Glad to hear you're okay. It looked like a gentle crash (if there ever is such a thing)
I love the cage, it looks great!
Why does your car look like its a monster truck? :-D
Justin's '85 UrQ'd 4000 20vt Project - Tuning Help?
It wasn't a hard hit at all. Maybe b/c every muscle in my body was locked in aggitation as I slid into the wall, but I barely even noticed my body moving on impact.
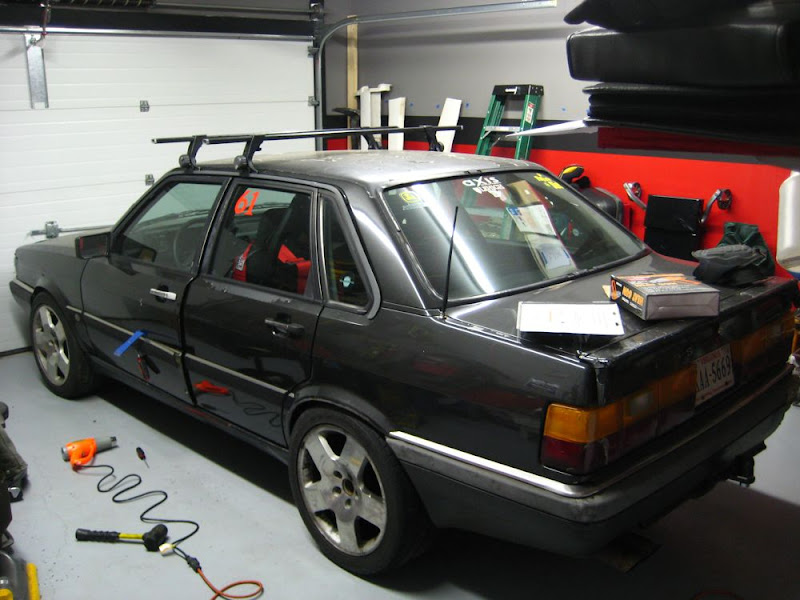
monster truck: On the OZ SL rims I'm running 235/45/17 (B6 A4 sized tires), which are too tall for the car and make it ressemble a matchbox from certain angles. The others are 225/40/17, which fit the car much better. I've gotten so used to looking at it though that I don't notice it much anymore... until I see pix of it headon, then I realize I have the ground clearance of an SUV, and the car is as low as it can go
monster truck: On the OZ SL rims I'm running 235/45/17 (B6 A4 sized tires), which are too tall for the car and make it ressemble a matchbox from certain angles. The others are 225/40/17, which fit the car much better. I've gotten so used to looking at it though that I don't notice it much anymore... until I see pix of it headon, then I realize I have the ground clearance of an SUV, and the car is as low as it can go
-
3B'dB3
The actual r-comp tires I use are 225/40/17 vs the 235/45/17. I do get quicker accel with the smaller tires. I just couldn't argue with the price on the 235s (my friend gave them to me, and they were used for one track event). SO needless to say, I made them work
Power-wise, car is currently making 195whp at 14psi. Eventually will up the pressure to 20-22psi, but for now I don't need the extra power. Just need to make myself a better driver and then I'll up the boost again.
Power-wise, car is currently making 195whp at 14psi. Eventually will up the pressure to 20-22psi, but for now I don't need the extra power. Just need to make myself a better driver and then I'll up the boost again.
Re: Justin's '85 4000 20vt Project: Got sex'd by an UrQ? ;)
Back from the dead! So a lot has happened to the 'ol girl since I last posted, and a new (and hopefully final) phase has begun - Body Work! Since May and my little tangle with the wall at VIR, I essentially just drove the car. The 'ol girl made it through another 8-10 track days with only a few minor hiccups - likethe wastegate studs continually back out after every track event (despite having the ridiculously potent red loctite w/ 2100*F melt point), , throwing a couple P/S and Alternator belts (think there's an issue w/ the crank pulley), and the driver's rear axle nut continually backing out after tracking w/ R-comps (Even w/ new nut and the super hot red loctite). The latter I need to come up with a solution to keep it held in place... was thinking a lock wire or something along those lines. Will figure it out though.
After I tackled the issue above, I figured it was time to start straightening out the dents I put in it from sliding into the wall. After a little ebay shopping, I was able to score a stud welder for a decent deal and decided to start playing.
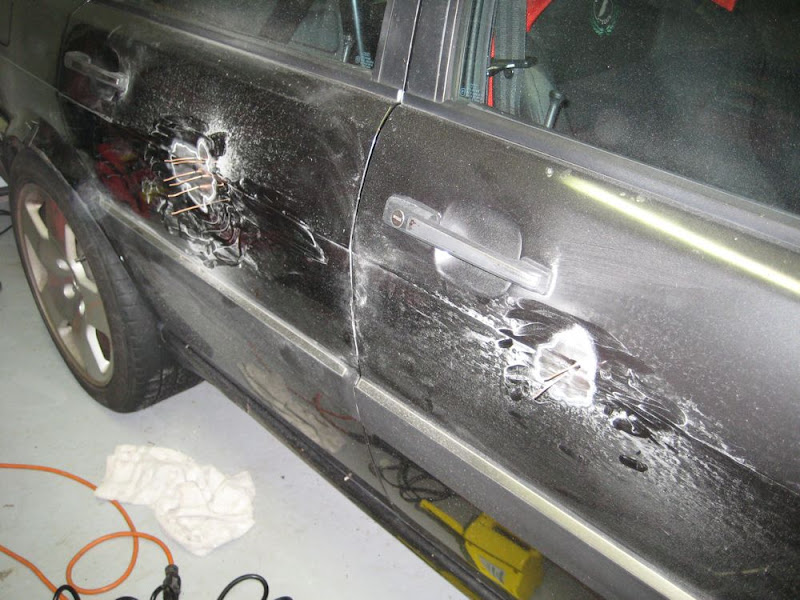
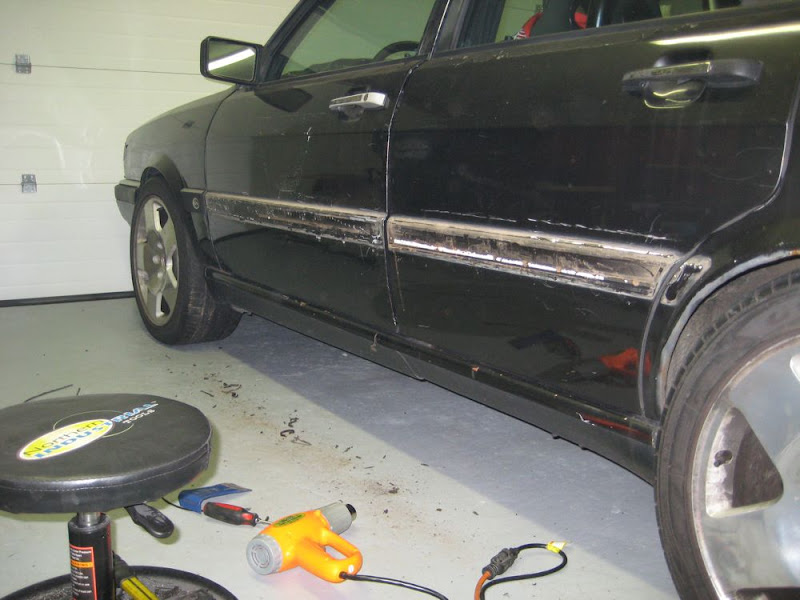
Both the front and rear pass side doors had small dents in them from hitting the tire wall, so this was the best place to start playing and learning how to actually use this thing:
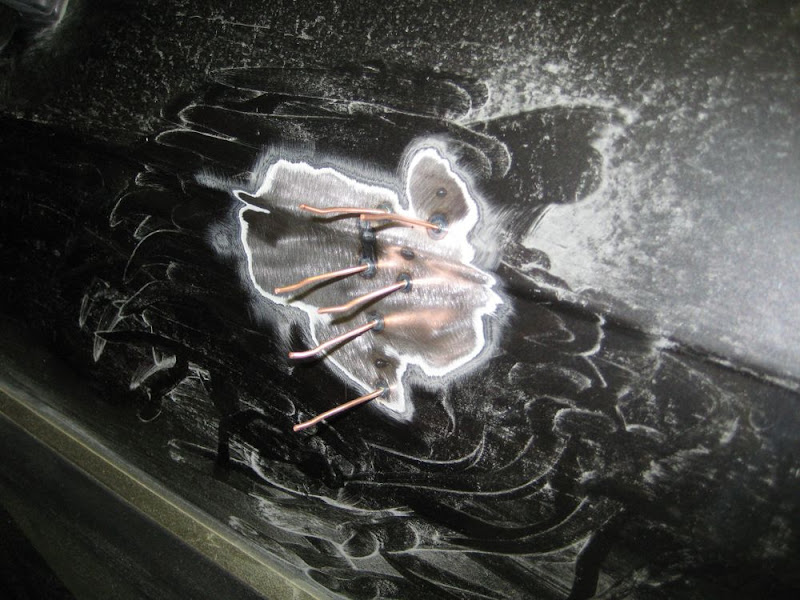
One thing I learned is that once you take the paint off the car, it's a real PITA to tell where exactly the dent was since none of them were really that bad... but I started to get the hang of it and learned where to put the studs so I could get the dent out the best I could:
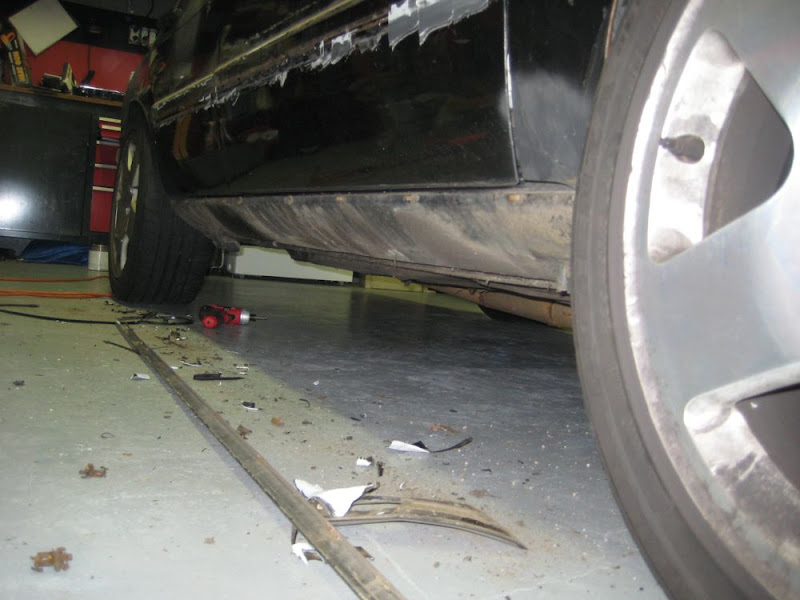
Once I got the doors settled, the next big thing to tackle was the rear quarter panel. This was obviously a LOT bigger of a job than the stud welder could handle! Esp the slide hammer that came WITH the welder, as it is a royal POS! It had a knurrled wheel to bite onto the studs, but after doing the doors all the knurls have essentially rounded off. Need to find a better solution before I can use that anymore.
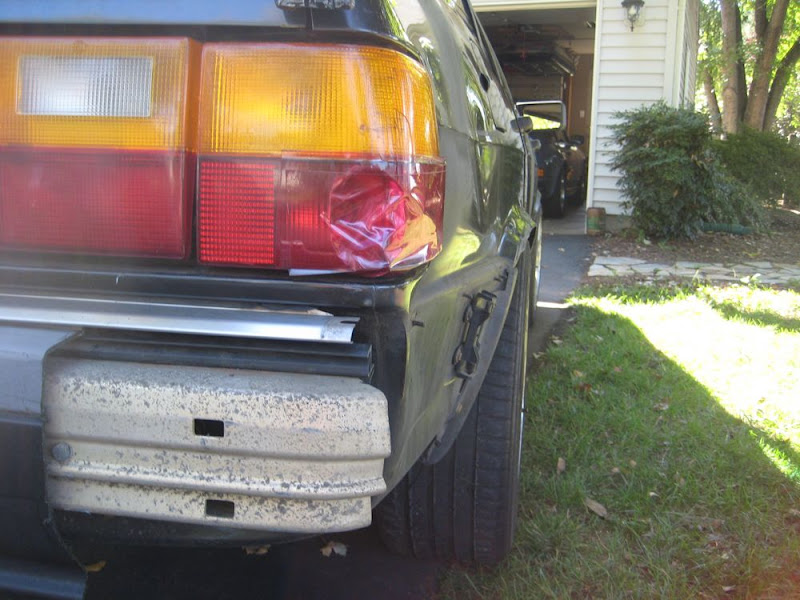
So onto the rear quarter panel. Since I didn't want to pay a body shop to do this, I did the next best thing... went to Home Depot and bought a slew of 1/4" bolts, a couple 1/4" turnbuckles, borrowed a buddy's come-a-long, and went to a friends house who had a well established tree
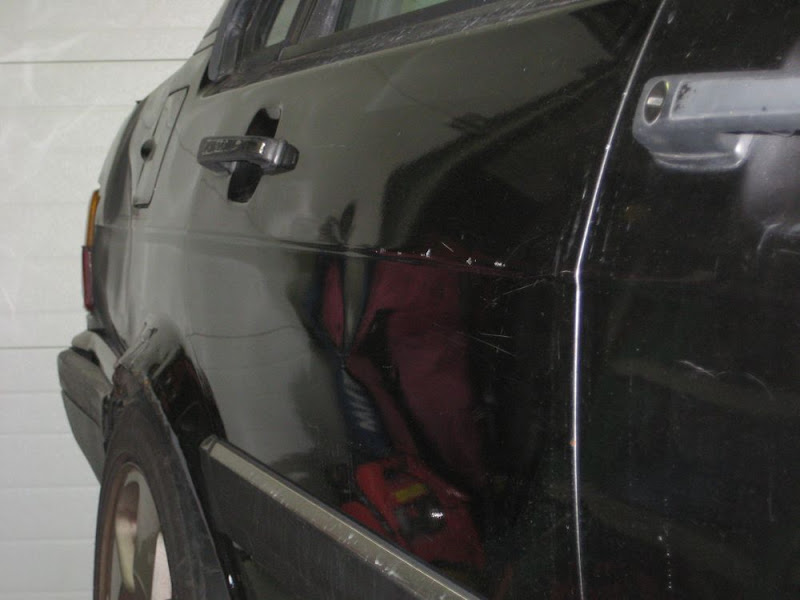
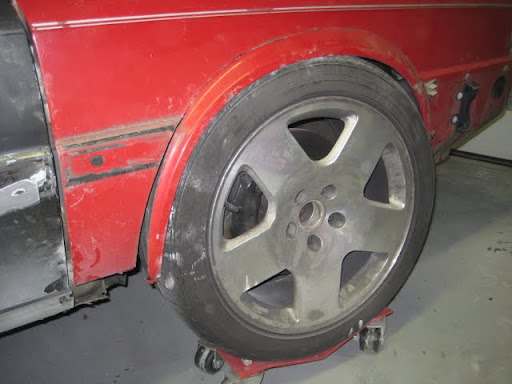
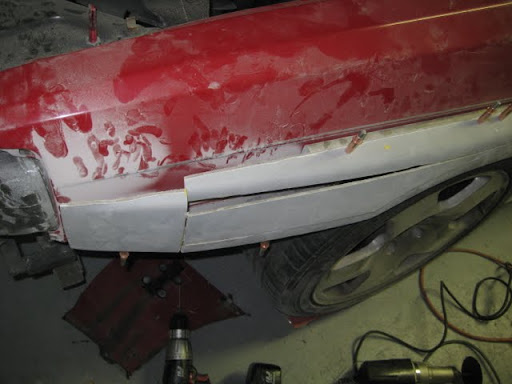
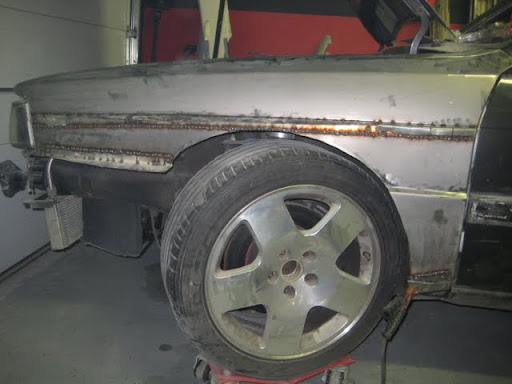
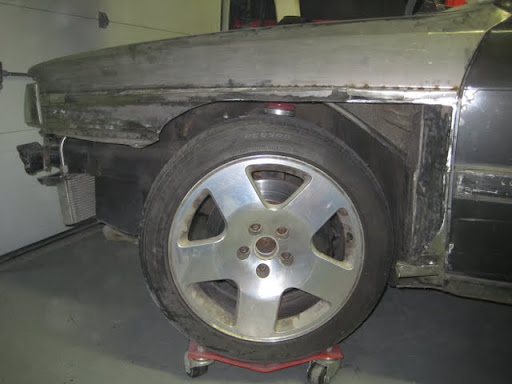
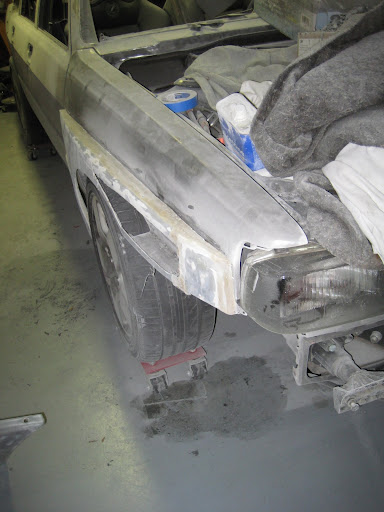
Here's a before so you get a better idea of how much the fender was pushed in:
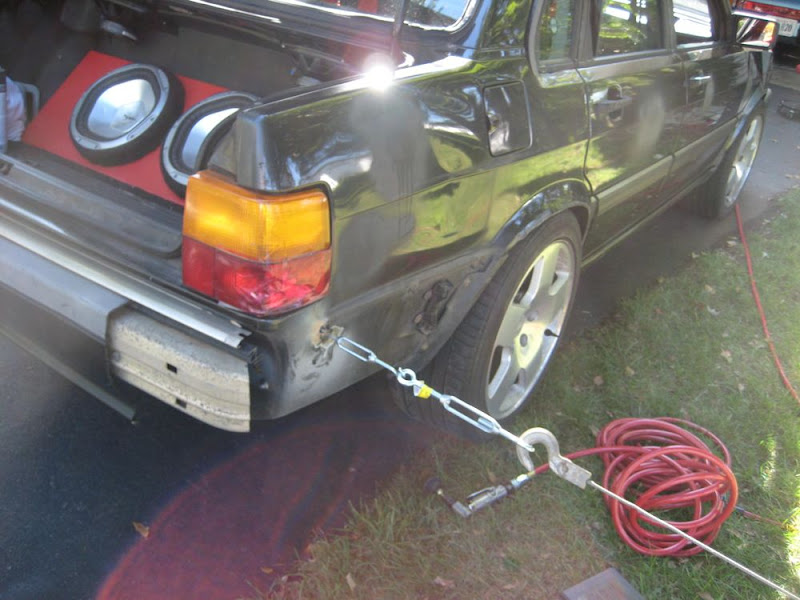
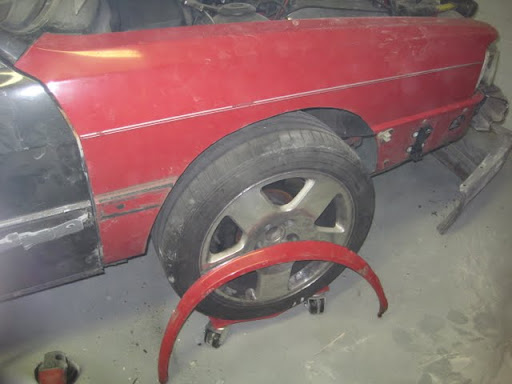
From there started the fun - Find the worst portion of the dent, weld on bolt to area and hook up to tree with jiggy rig puller:
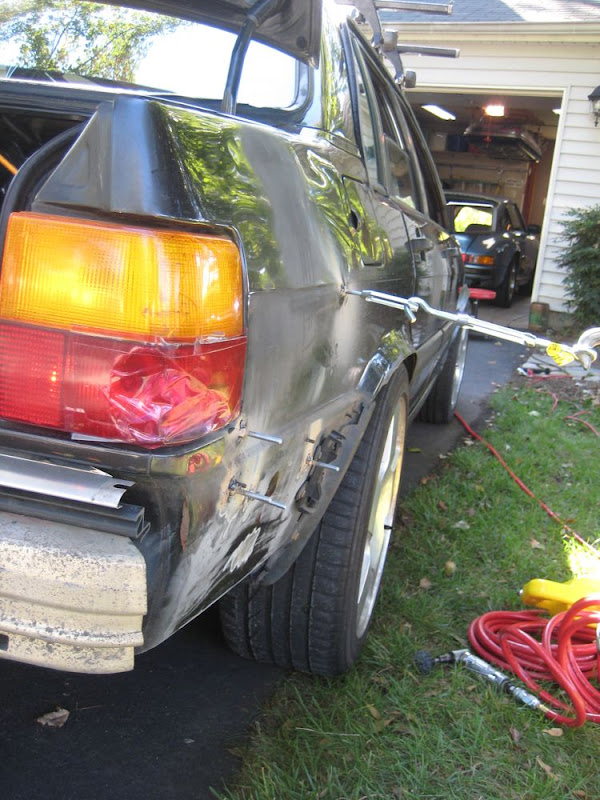
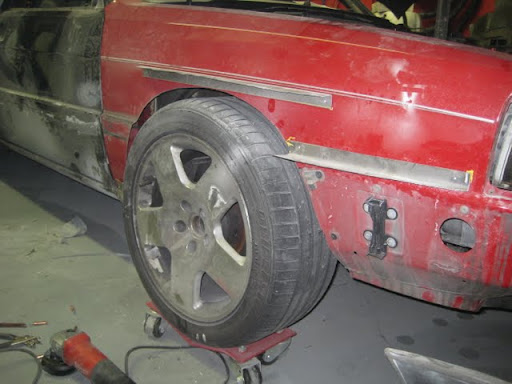
After a couple of hours of finagling w/ the pullers, briefly using the stud welder and doing some finessing (not even close to being done) with the body dollies, this is what I ended up with:
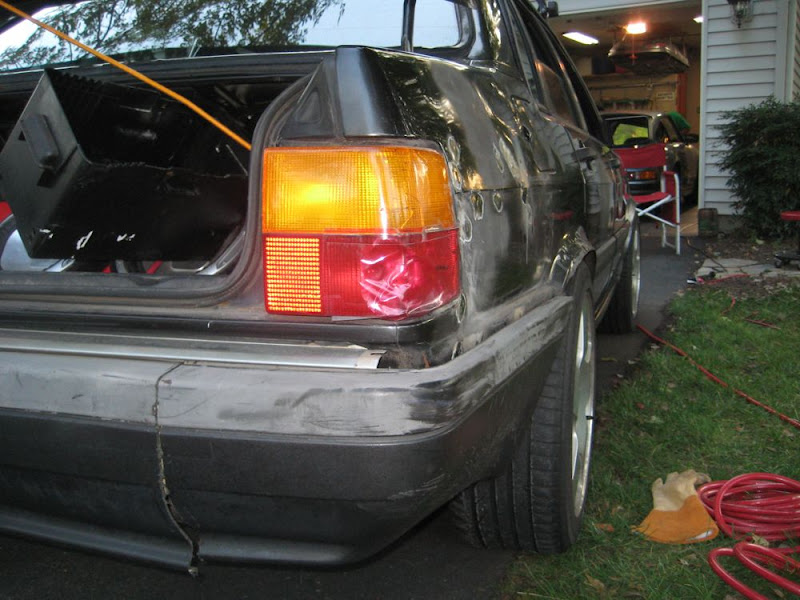
From this point I've been stripping down the car for paint and "such."
Started with the molding (lord this is a b!tch to get off if you're trying to save it):
going:
going:
gone:
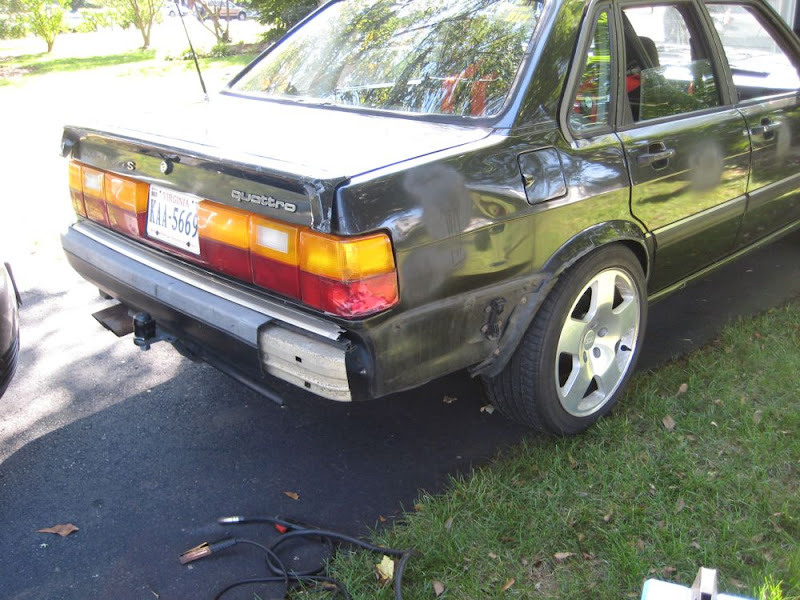
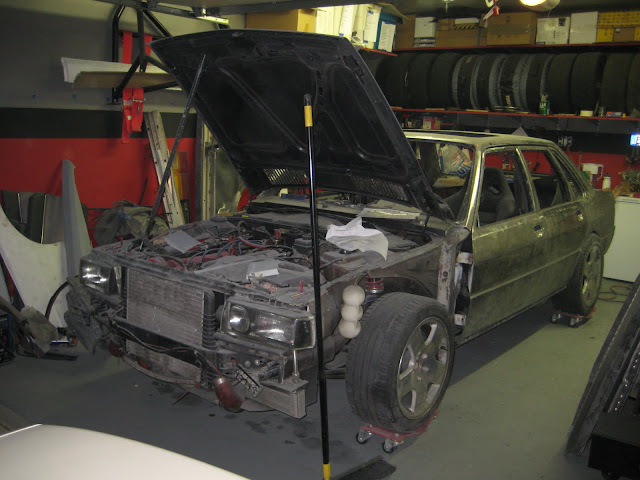
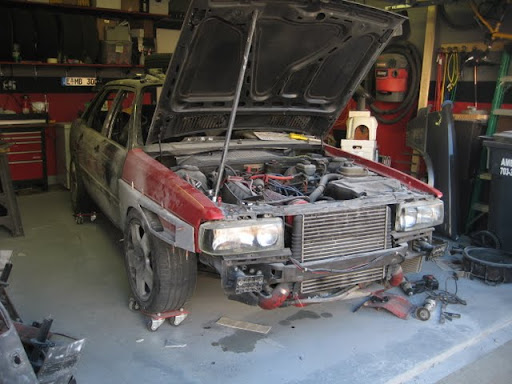
And here is the last pictures of the 'ol girl...... as she will never be the same after this point
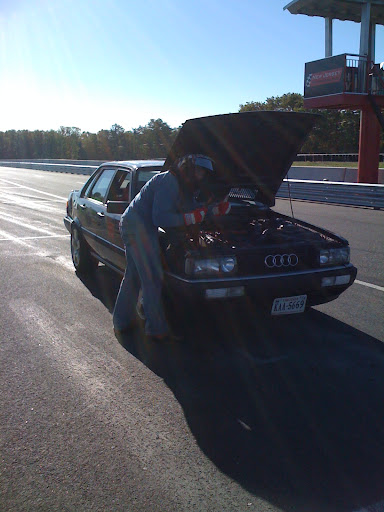
Story behind this one - Brake booster hose blew at NJMP, so I was doing a quick "hot pits" repair so I could hop back on track and continue playing/flogging the beast
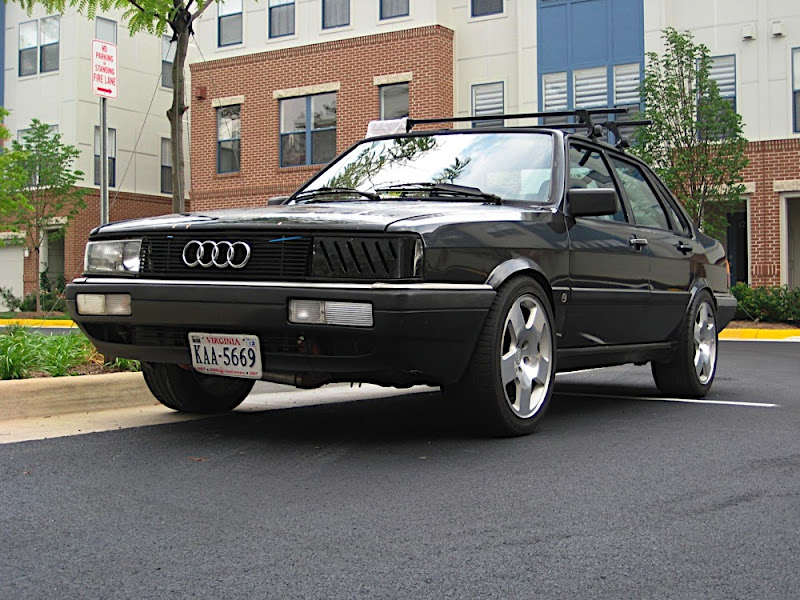
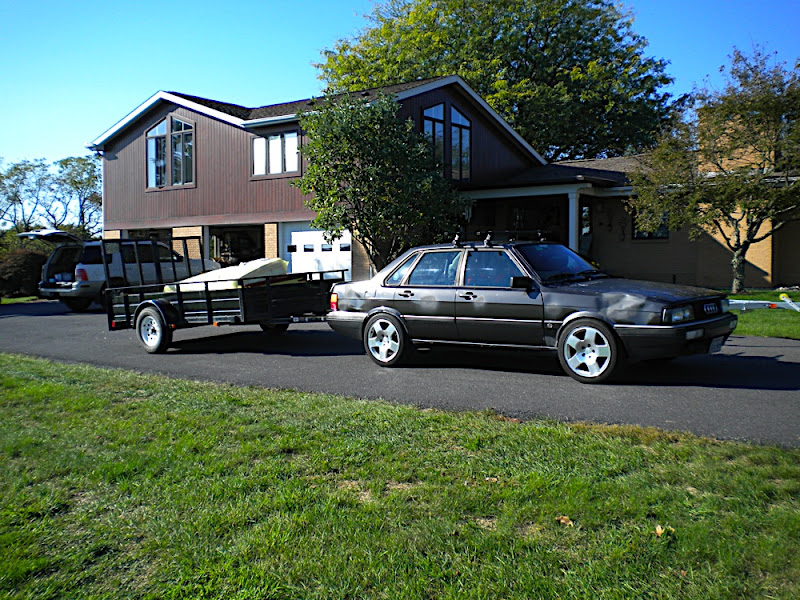
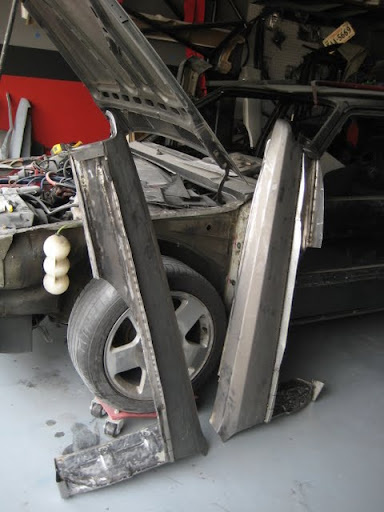
And who said 4000s can't haul
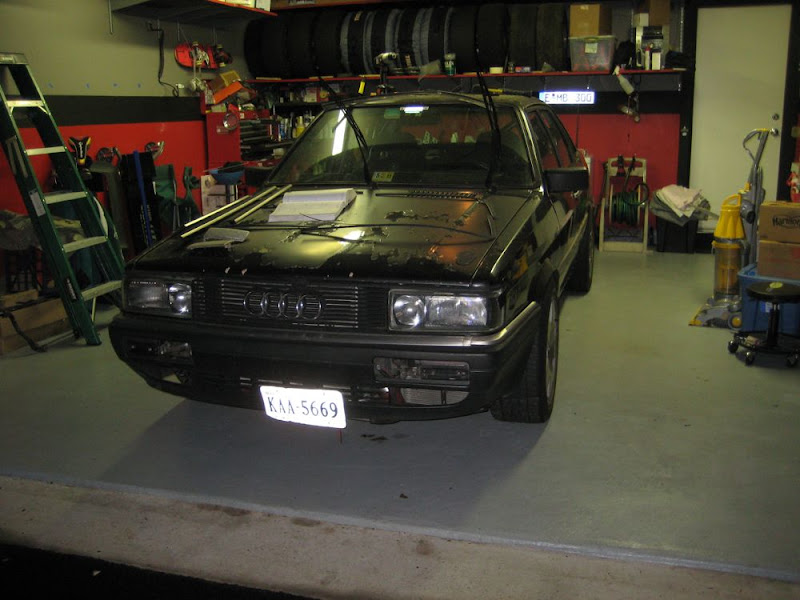
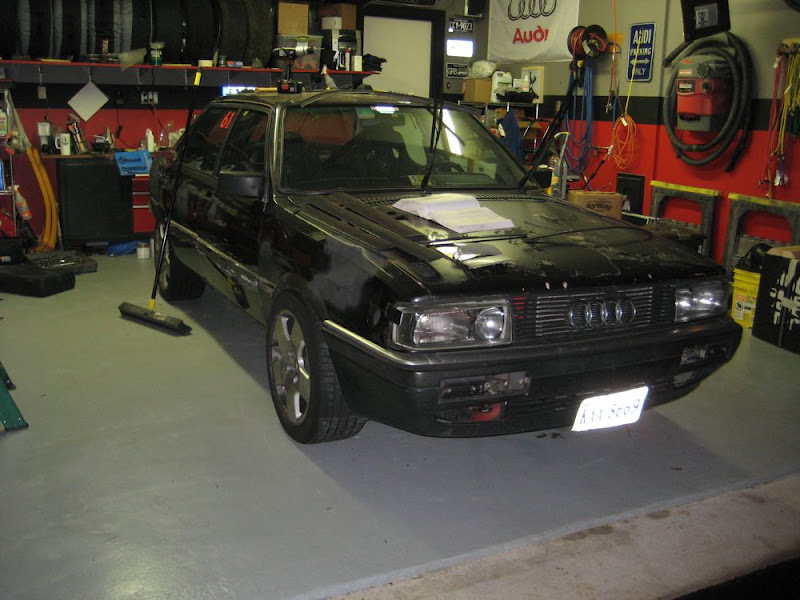
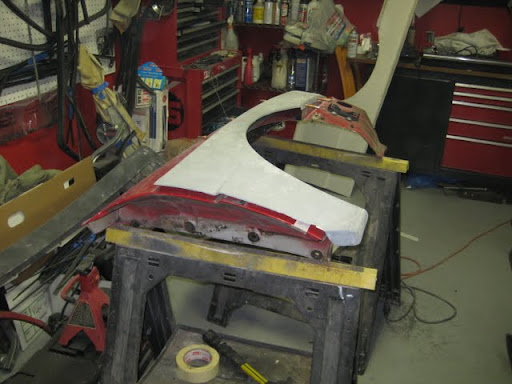
And this is why she will never be the same:
She's getting made sexier
More to follow...........
Since May and my little tangle with the wall at VIR, I essentially just drove the car. The 'ol girl made it through another 8-10 track days with only a few minor hiccups - likethe wastegate studs continually back out after every track event (despite having the ridiculously potent red loctite w/ 2100*F melt point), , throwing a couple P/S and Alternator belts (think there's an issue w/ the crank pulley), and the driver's rear axle nut continually backing out after tracking w/ R-comps (Even w/ new nut and the super hot red loctite). The latter I need to come up with a solution to keep it held in place... was thinking a lock wire or something along those lines. Will figure it out though.After I tackled the issue above, I figured it was time to start straightening out the dents I put in it from sliding into the wall. After a little ebay shopping, I was able to score a stud welder for a decent deal and decided to start playing.
Both the front and rear pass side doors had small dents in them from hitting the tire wall, so this was the best place to start playing and learning how to actually use this thing:
One thing I learned is that once you take the paint off the car, it's a real PITA to tell where exactly the dent was since none of them were really that bad... but I started to get the hang of it and learned where to put the studs so I could get the dent out the best I could:
Once I got the doors settled, the next big thing to tackle was the rear quarter panel. This was obviously a LOT bigger of a job than the stud welder could handle! Esp the slide hammer that came WITH the welder, as it is a royal POS! It had a knurrled wheel to bite onto the studs, but after doing the doors all the knurls have essentially rounded off. Need to find a better solution before I can use that anymore.
So onto the rear quarter panel. Since I didn't want to pay a body shop to do this, I did the next best thing... went to Home Depot and bought a slew of 1/4" bolts, a couple 1/4" turnbuckles, borrowed a buddy's come-a-long, and went to a friends house who had a well established tree
Here's a before so you get a better idea of how much the fender was pushed in:
From there started the fun - Find the worst portion of the dent, weld on bolt to area and hook up to tree with jiggy rig puller:
After a couple of hours of finagling w/ the pullers, briefly using the stud welder and doing some finessing (not even close to being done) with the body dollies, this is what I ended up with:
From this point I've been stripping down the car for paint and "such."
Started with the molding (lord this is a b!tch to get off if you're trying to save it):
going:
going:
gone:
And here is the last pictures of the 'ol girl...... as she will never be the same after this point
Story behind this one - Brake booster hose blew at NJMP, so I was doing a quick "hot pits" repair so I could hop back on track and continue playing/flogging the beast
And who said 4000s can't haul
And this is why she will never be the same:
She's getting made sexier
More to follow...........
Re: Justin's '85 4000 20vt Project: Got sex'd by an UrQ?
show us MOAR URQ GOODNESS!!!!!!!!
24v-VR6T-CQ BEAST http://www.theprojectpad.com/viewtopic.php?f=11&t=193#p37887
16v-ABA-T VEMS O1E ETC 4Kq http://www.theprojectpad.com/viewtopic.php?f=11&t=201#p38264
16v-ABA-T VEMS O1E ETC 4Kq http://www.theprojectpad.com/viewtopic.php?f=11&t=201#p38264

Re: Justin's '85 4000 20vt Project: Got sex'd by an UrQ?
WOOT! Going to look great man!
-Ben-

-1985 Audi 4kq: Xona 7164 AAN 488whp- -2009 Audi A4 -
-1985 Audi 4kq: Xona 7164 AAN 488whp- -2009 Audi A4 -
-
karthurtq
Re: Justin's '85 4000 20vt Project: Got sex'd by an UrQ?
Dude...I would say that a lot of red got rubbed off on your neck
while in VA....But I now that I think about it I've see parts of PA
that I couldn't distinguish from Southern VA, besides the hilliness.
Good work making the most with what you have. It will be even
specialier with URQ flares. Will you be able to lower it more once
they are on?
while in VA....But I now that I think about it I've see parts of PA
that I couldn't distinguish from Southern VA, besides the hilliness.
Good work making the most with what you have. It will be even
specialier with URQ flares. Will you be able to lower it more once
they are on?
Re: Justin's '85 4000 20vt Project: Got sex'd by an UrQ?
karthurtq wrote: Will you be able to lower it more once
they are on?
I say pooch em' before you finalize their mounting... so's you gots room for more later
Re: Justin's '85 4000 20vt Project: Got sex'd by an UrQ?
karthurtq wrote:But I now that I think about it I've see parts of PA
that I couldn't distinguish from Southern VA, besides the hilliness.
Having lived in both places, I would say VA has nothing on north central PA......

Re: Justin's '85 4000 20vt Project: Got sex'd by an UrQ?
I am anxious to see the final product of this.... looks good. Are you going to keep the car black?
-
Quattro Krant
Re: Justin's '85 4000 20vt Project: Got sex'd by an UrQ?
Just saw this project thread updated, haven't followed it since the issue on the dyno. Can't wait to see how it turns out with the Ur-Q flares.
-
red leather seats
Re: Justin's '85 4000 20vt Project: Got sex'd by an UrQ?
woah, urq fenders! And fat 5's! I thought those wouldn't fit on the 4kq.
-
NoQuattro
Re: Justin's '85 4000 20vt Project: Got sex'd by an UrQ?
I will be following the addition of these fenders closely. I've always been curious about how people add them.
Re: Justin's '85 4000 20vt Project: Got sex'd by an UrQ?
Keith: LOL! As I've said to many, my neighborhood wasn't ready for me when I moved into it in NoVA  . I'd say it was more PA (though I grew up in Eastern PA... like Sam said, Central PA is a whole 'nother cup 'o tea) than VA Beach that did this to me, but then again... ya never know!
I can lower the car as much as I want for the most part, but unfortunately can't make it any lower than it is already w/o f'ing up the geometry of the suspension. As it is right now, the control arms are parallel to the ground, so if I lower it anymore the camber is going to get f'd up under compression. That being said, I will make sure I can sit the car on its bump stops and not hit the fenders before I finish Rear flares are getting lifted ~2" or so to make room in the wheel well, and the fronts should be good w/ no modifications... time will tell, though. Oh, and the oversized tires don't exactly help with the overall ride-height look either, but might play with that as well since the tires are shot on the wheels.
red leather seats: Fat5s won't fit on a 4000 w/o modifications (hubs aside). I have massaged the fender flares (front and rear)already to make room (look back on the thread a few pages)... otherwise you'd be rubbing like no other, esp w/ 235 series r-comps on the car
. I'd say it was more PA (though I grew up in Eastern PA... like Sam said, Central PA is a whole 'nother cup 'o tea) than VA Beach that did this to me, but then again... ya never know!I can lower the car as much as I want for the most part, but unfortunately can't make it any lower than it is already w/o f'ing up the geometry of the suspension. As it is right now, the control arms are parallel to the ground, so if I lower it anymore the camber is going to get f'd up under compression. That being said, I will make sure I can sit the car on its bump stops and not hit the fenders before I finish
Rear flares are getting lifted ~2" or so to make room in the wheel well, and the fronts should be good w/ no modifications... time will tell, though. Oh, and the oversized tires don't exactly help with the overall ride-height look either, but might play with that as well since the tires are shot on the wheels.red leather seats: Fat5s won't fit on a 4000 w/o modifications (hubs aside). I have massaged the fender flares (front and rear)already to make room (look back on the thread a few pages)... otherwise you'd be rubbing like no other, esp w/ 235 series r-comps on the car
-
WAUG0806
Re: Justin's '85 4000 20vt Project: Got sex'd by an UrQ?
I really need to chase you around a track some day!
Nice update!
Nice update!
Re: Justin's '85 4000 20vt Project: Got sex'd by an UrQ?
WAUG0806 wrote:I really need to chase you around a track some day!
Nice update!
yeah get a 4kq track day going and ill come play tooo
24v-VR6T-CQ BEAST http://www.theprojectpad.com/viewtopic.php?f=11&t=193#p37887
16v-ABA-T VEMS O1E ETC 4Kq http://www.theprojectpad.com/viewtopic.php?f=11&t=201#p38264
16v-ABA-T VEMS O1E ETC 4Kq http://www.theprojectpad.com/viewtopic.php?f=11&t=201#p38264
Re: Justin's '85 4000 20vt Project: Got sex'd by an UrQ?
Come to any PCC ACNA event (Summit Point and VIR) and you will see me there as I'm the Chief Tech guy. I help out with the NJ ACNA group as well (NJMP), and go to the WG2 event in August with the NEQ. So come out and play... though I think your 20vt has a bit more spunk than my 20vt
I don't think this will be done by the April VIR unfortunately, as I'm having to do a lot more work than anticipated to get things to fit correctly (ain't that always the way?)... trying to find time to go into the garage every night and spend an hr or two, so hopefully things will progress.
I don't think this will be done by the April VIR unfortunately, as I'm having to do a lot more work than anticipated to get things to fit correctly (ain't that always the way?)... trying to find time to go into the garage every night and spend an hr or two, so hopefully things will progress.
Re: Justin's '85 4000 20vt Project: Got sex'd by an UrQ?
Well ladies and gents, it’s about time that I post an update since it’s been a few months since my last one. Rest assured that a LOT has been going on with the car, but at the same time I feel like I’ve done next to nothing. I’ll try to do this in pieces so it flows a little better and not jump around like I did when I actually did all the work
Farewell Team Doorhandle!!!
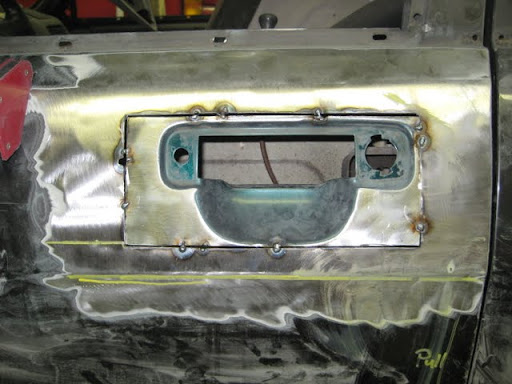
Yup, that’s right! I couldn’t take it anymore! I’ve replaced almost every handle on the car at this point, and it’s time that I just bite the bullet and upgrade to something a little sleeker/custom. The donor handles came from the ’92 UrS4 we had parted out a year ago:
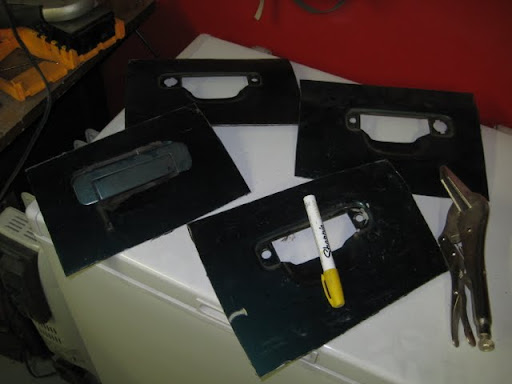
Next up was figuring out exactly HOW to position these things. At this point, I’ve just managed to do the positioning of the handles. I will still need to do the fab to get them to work with the 4000 latches, but will handle that once I take the doors off the car.
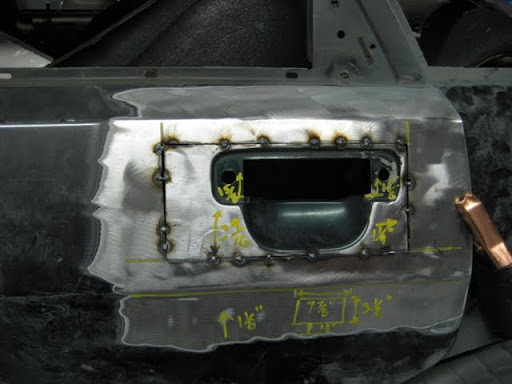
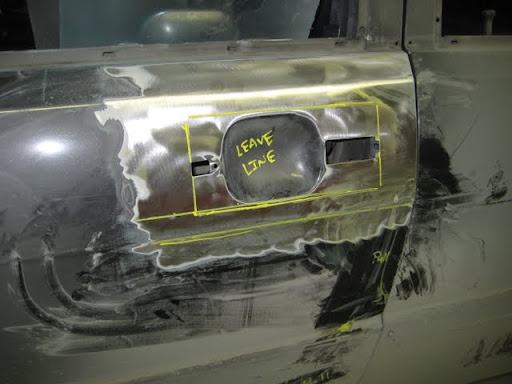
So measure 100 times:
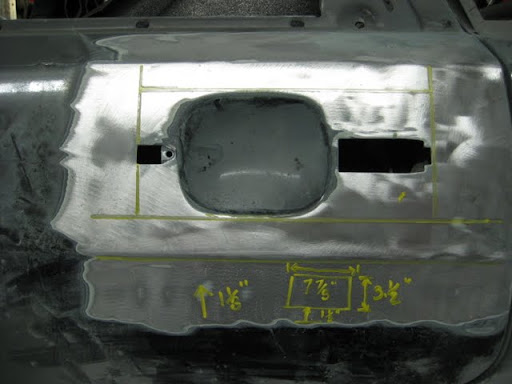
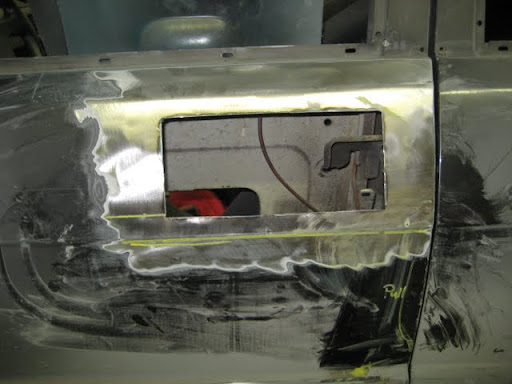
Then cut… REALLY carefully!

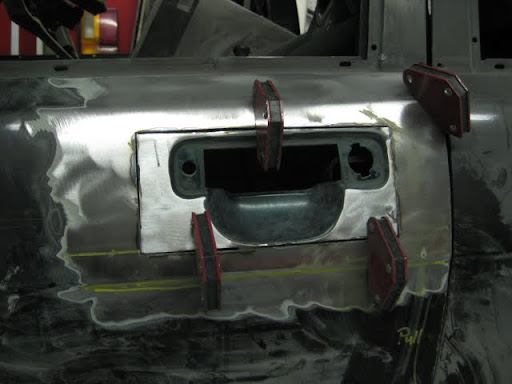
Next, time to position the handle after trimming the necessary fat off:
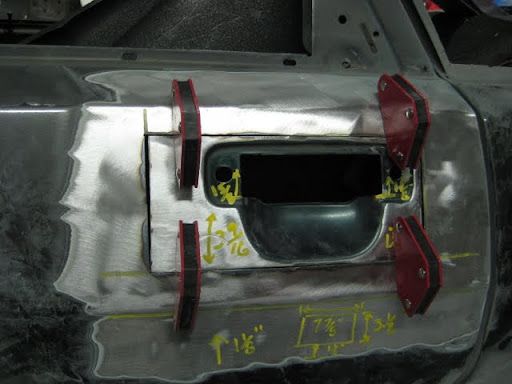
And tacked in place:
Same for the fronts:
And then spend countless hours welding around the perimeters in a feeble attempted to keep the doors from warping (I did NOT succeed regardless of how long I waited, etc), then follow up with grinding and smoothing and you get:
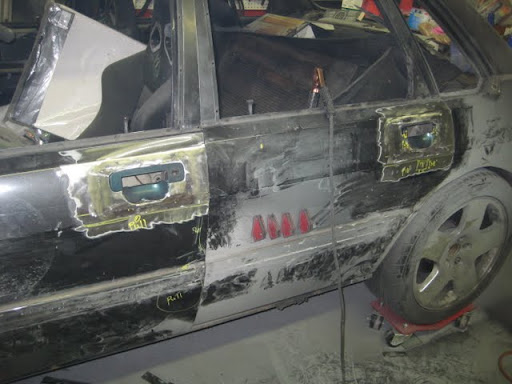
I was thankfully able to get the warpage back in line for the most part w/ the help of the slide hammer and stud welder. Needed a little persuation, but for the most part she’s flat again. I will need a light skimming of bondo to hide ALL the lines, but I can say it’s not too bad all said and done:
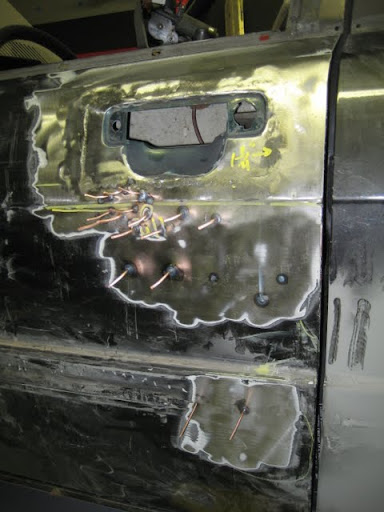
And then to the pass side… rinse and repeat!
I went about welding the pass side pieces in a little differently than the driver’s side to see if I can minimize the warping. Unfortunately, I failed again… but this time, I think I know why. I believe that b/c of how the metal is shaped in the “cupped” portion of the handle, when you weld it to the door skin, the heat doesn’t dissipate evenly and it causes the door skin to pull in. I had the door 100% flat up until I welded the bottom of the handle. Once I did that, within 4-5 tack welds, the door started to pull in. UBER frustrating, but what have you.
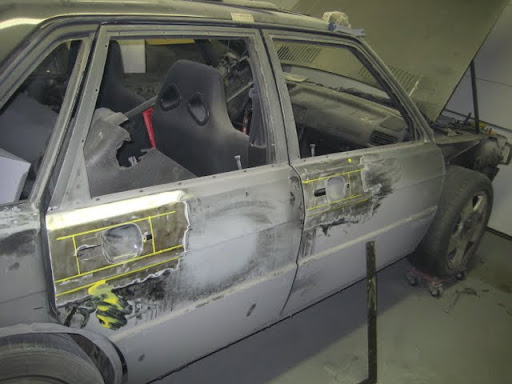
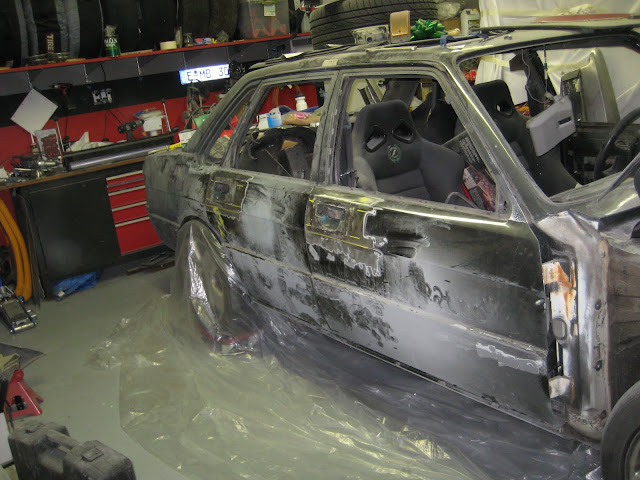
Next! Farewell old paint, hello Delorean look-alike!
Since this car has been repainted once (crappy maaco job), I decided that I wanted to do this from scratch… which means she’s going to bare metal!
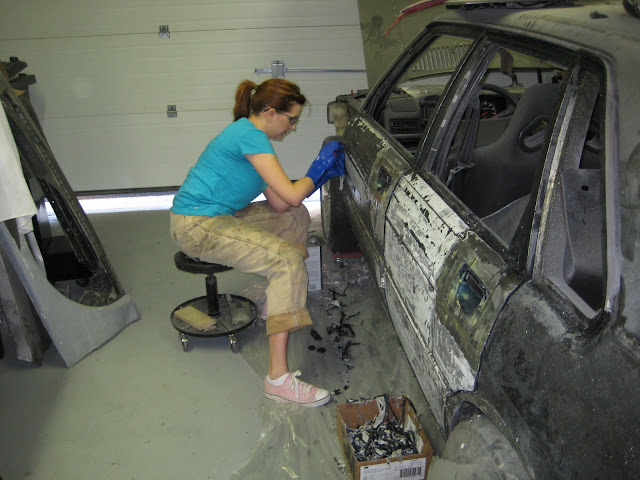
I have to say, big thanks to Hank and his crazy painting expedition for tipping me off to using paint stripper to get the paint off. My lord did it make this a LOT easier and a TON cleaner than if I went at it w/ a sander like I was planning on doing. It took me a while to do the stripping, but I had a helper this time (my gf is a trooper!!!), so it went quicker than if I did it alone.
Going:
Gone:
She’ll kill me for this one
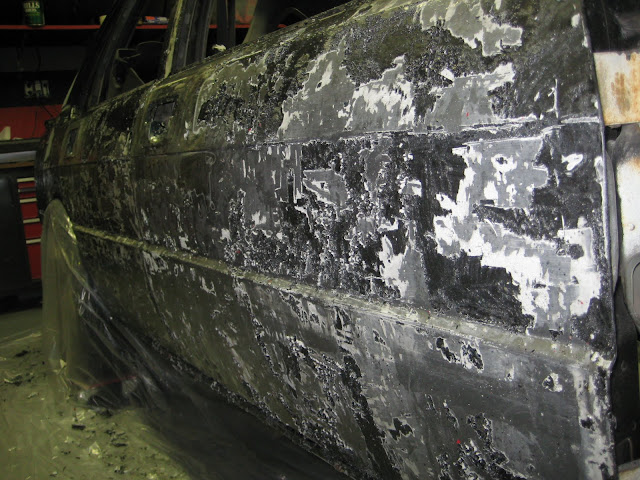
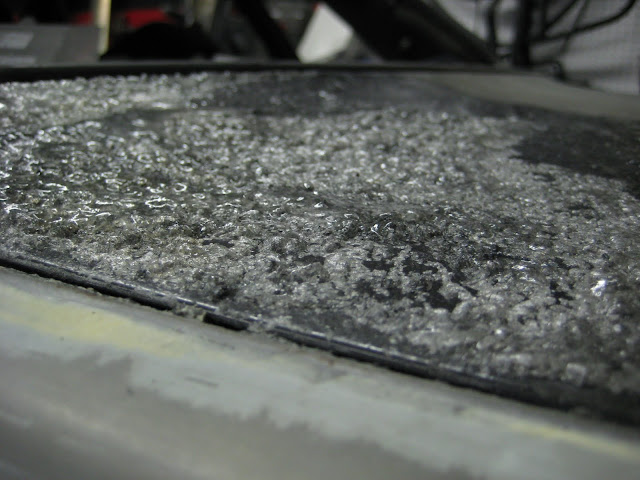
As if the already peeling clearcoat needed any more help… It was funny to listen to this stuff work, as the garage started to sound like a bowl of rice crispies (snap, crackle and popping) as the painted peeled and bubbled up:
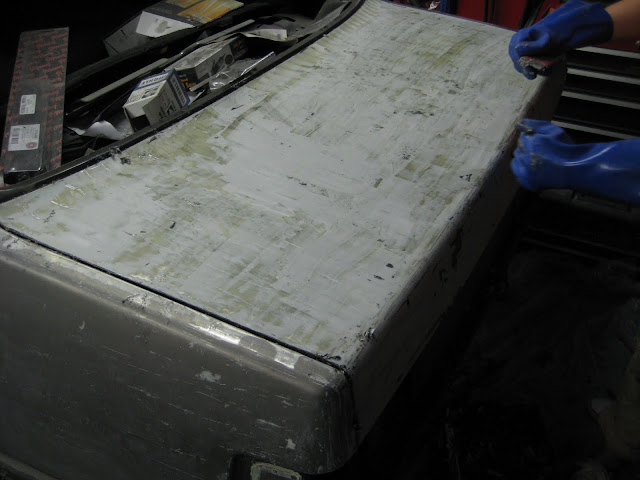
And the trunk and driver’s side done:
And now the roof:
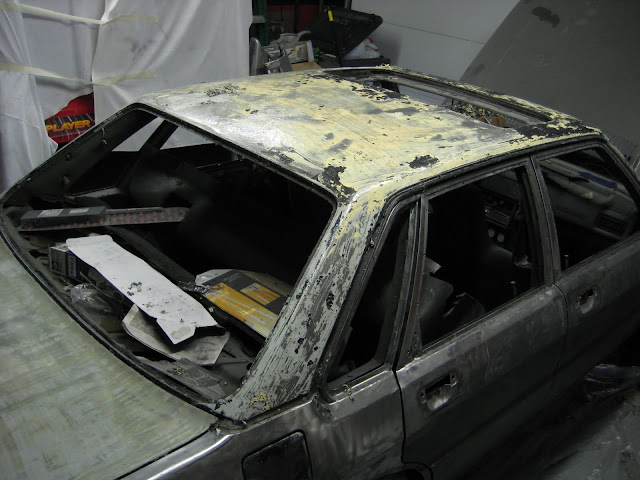
And a funky find… brass brazing at the seams of the roof and A and C pillars:

I believe when they repainted the car, they might have sanded the roof down then reprimed and painted, vs the rest of the car… reason I say this is b/c it had a funky yellowish primer vs the standard Audi white. That, and it was only on the c-pillars and roof, no where else on the car! What I also found out was that the peeling clearcoat had allowed water to actually penetrate the paint, and I was starting to see surface rust on the roof in spots.
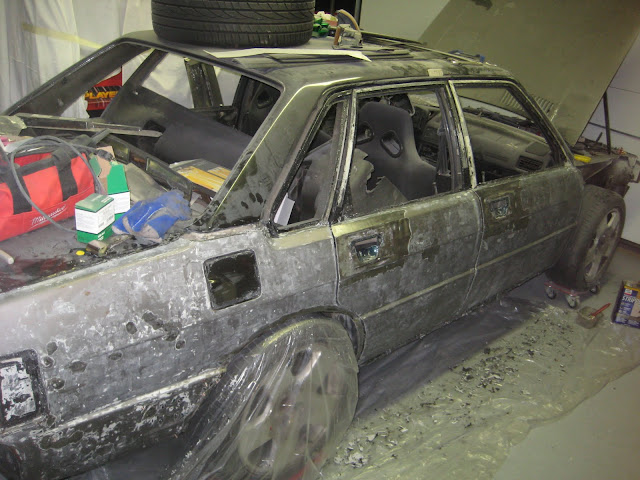
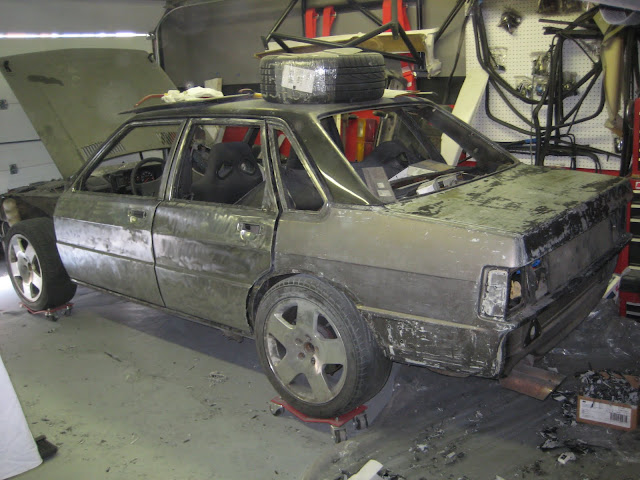
But after hours of scraping and almost 2 gallons of stripper… this is about 95% of the paint on the car:
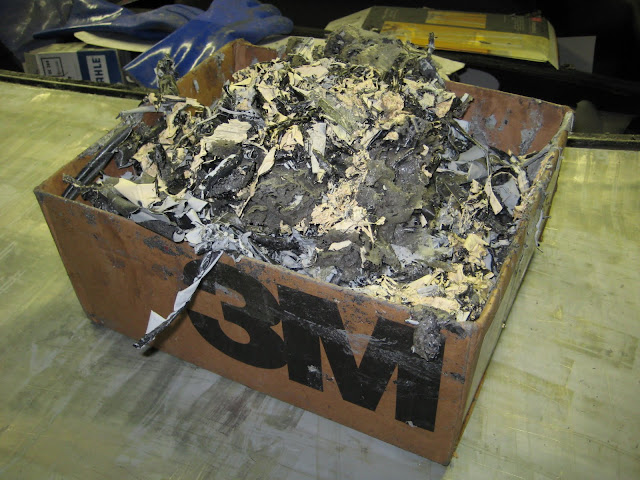
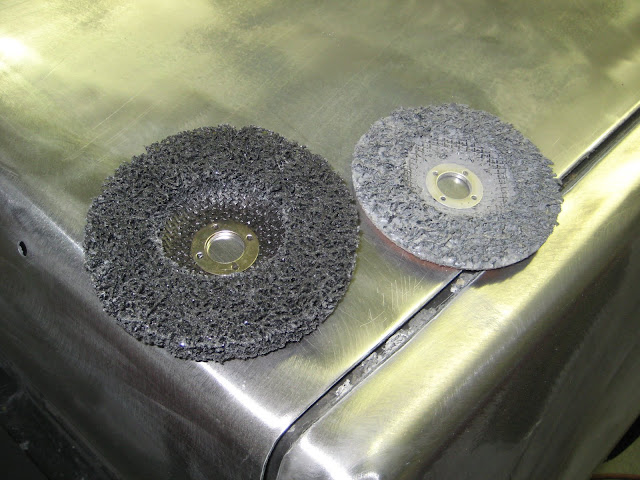
From this point, it was time to start cleaning up the metal totally… so I busted out the abrasive disks for the angle grinder and went to town:
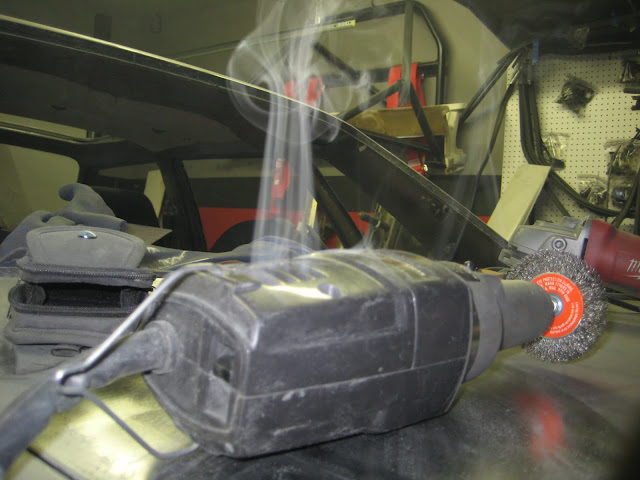
And for the places I couldn’t get w/ the grinder, I used a wire wheel and my die grinder (RIP). This project has def allowed me to upgrade in tools, but this lil guy just wasn’t up for the abuse I guess:
But the wire wheel did continually get even with me as I worked… man these kinda hurt after a while:

Also, while on the body… it was time to start filling up holes I wasn’t going to use. Namely the antenna (going to install a roof mounted one a la CQ):

And farewell rear spoiler (I have plans for designing one for the rear that will actually provide a lil downforce at the track):

As she sits:
And then it was time for the front. When I initially did the motor swap, I cut the entire front core support. Ever since then, I’ve regretted doing that as the way I installed the top piece, it just looked like junk to me… so now is my time to fix this
I removed my mounting hardware:


And welded her back in and smoothed it out:

I’m also going to go back and fill in all the holes on the front clip too that aren’t going to be used… no real point in doing this, but I figured why not smooth everything out. It’s totally for looks and I’d probably be the only one to notice it, but it makes me smile so that’s all that matters
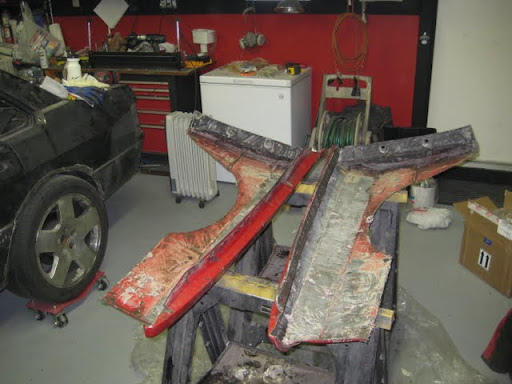
And now, the saga of the front fenders
To say it nicely… this has been a royal PITA! What started off as a bolt on “easy” part of the project turned into a 2 month ordeal. I knew that these fenders weren’t going to be perfect as the guy I bought them from warned me that the gaps, etc weren’t great and they needed some work. Unfortunately, that didn’t even touch on how bad they really were. Whomever was responsible for molding these things (not the guy I bought them from) should be drug into an alley and beaten with a rubber hose. I’d be embarrassed if I were to sell these as good… and pix will show why!
But I digress… in order to get these fenders to fit, you had to do some trimming on the 4000 rocker panels… which brought me to buy new tools (yay):
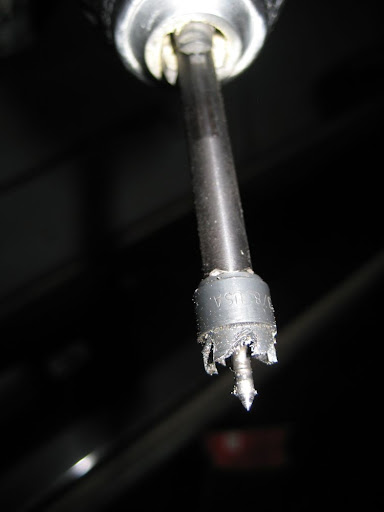
This little thing was great at cutting out the spot welds… only downside is that it has zero strength, so the teeth break off REALLY easily. Not bad for $16, but at the same time the stupid cutters cost more than the tool itself practically.
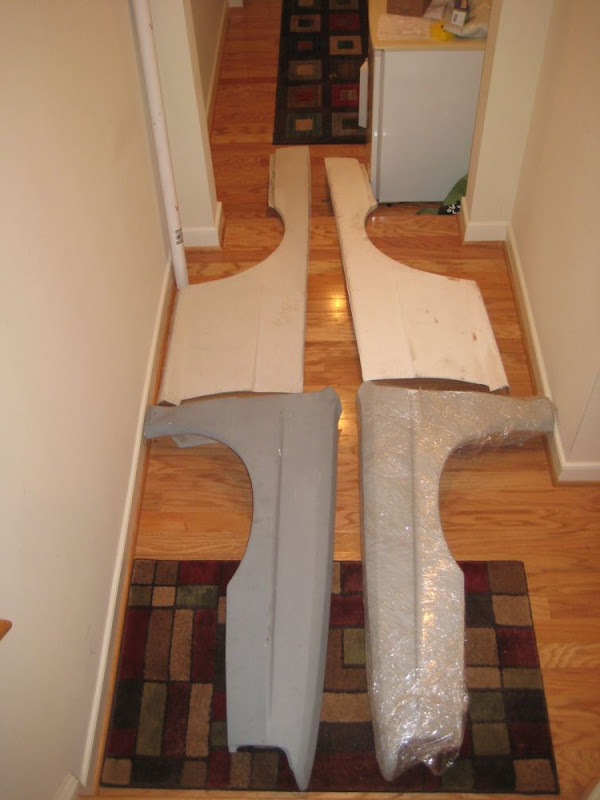
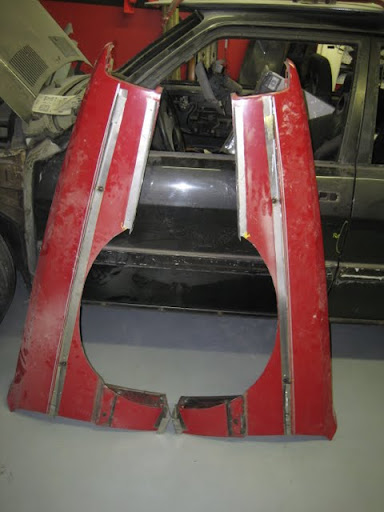
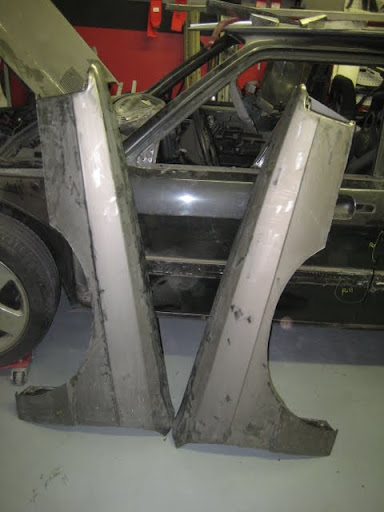
Here’s what had to get cut off the rocker panels… Driver’s side:
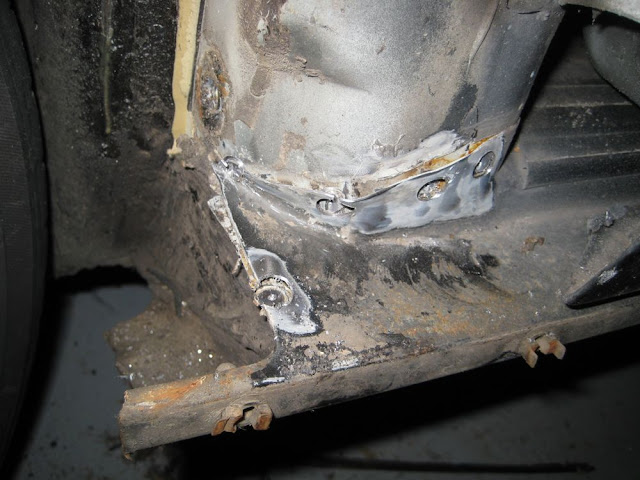
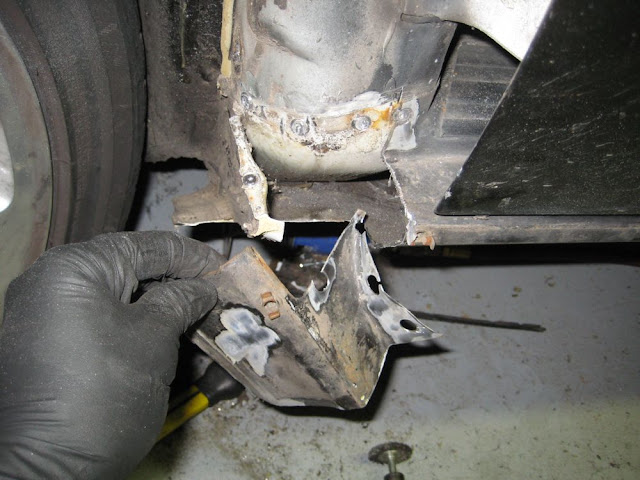
And passenger’s side:
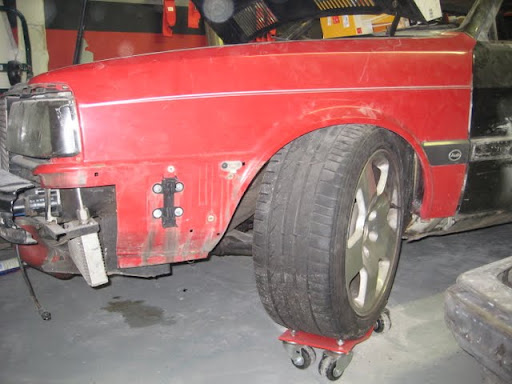
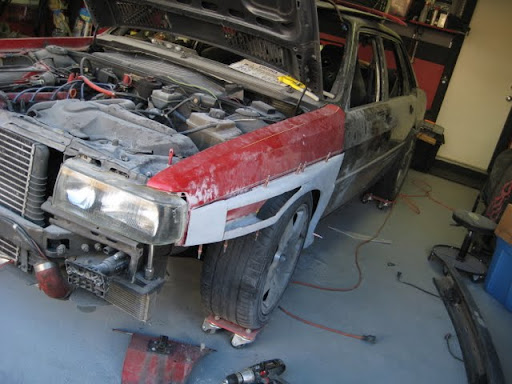
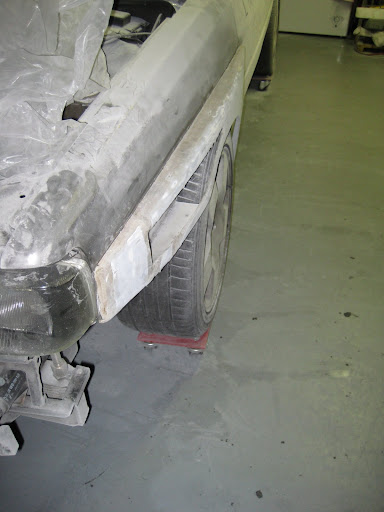
With that out of the way, I can now fit the fenders… and as you can see, they fit great on the driver’s side:
And even better on the pass side:

That curve that you see on the front tip as it meets the headlight… that’s how it sat naturally. If I were to pull it out to sit where it was suppose to fit, you could literally hear the fiberglass cracking and breaking. This must have been grafted off a bent fender or something, b/c I have no clue how else it could suck in this badly. The bottom edge was in almost 1+ inches from where it was suppose to be!!! This wasn’t the case on the drivers side, but then again the gap was so bad that it needed its own help, plus it didn’t meet properly at the top, etc etc etc etc. I could go on, but I’ll stop here
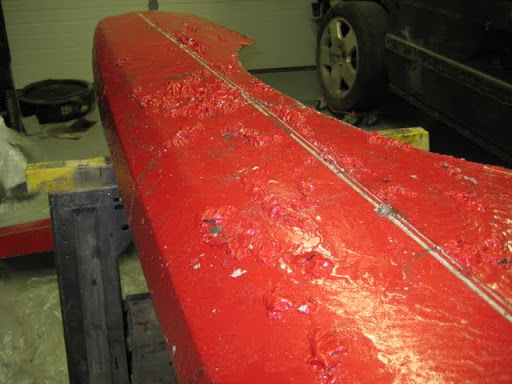
Lemonade out of Lemons:
At this point, I started to cut slots in the pass front fender to see if I could somehow salvage it. No matter what I did, there was no way these things were going to work. Not only were they torqued, but there was no way they were even going to clear my wheel/tire setup!
So at this point, I completely switched gears and decided it was time to build my own fenders. Not exactly the path I had envisioned, but one more thing that will make this puppy truly unique and mine
Since both fenders on my car were bent (driver’s b/c of PO and pass b/c of me), I snagged the front fenders from the CGT we had parted out a few years ago.
I started off by dropping the car as low as my suspension would allow to make sure I gave myself adequate clearance b/n the fenders and the wheels/tires. This also will give me an idea of how much extra rubber I could sneak under the fenders if I find the need down the road
With the stock fenders and my setup, there is no room for one to actually turn the wheel. So I started off the fabrication by removing the lip around the entire fender:
To show the clearance gained by doing so:
From this point, I started to bend some sheet metal to make mounts that would allow me to bond the fiberglass flares to the metal ones, while also removing the awful twist in the fender AND make plenty of room for the wheels to live within the flares.
It was also at this point that I decided it was time to twist this a little more (and I can thank Hadyn for planting the seed in my head)…

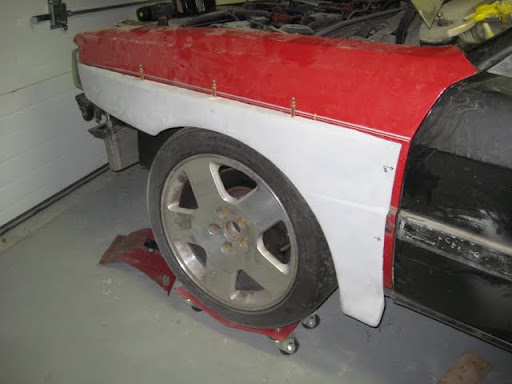
And the initial positioning of the flare:
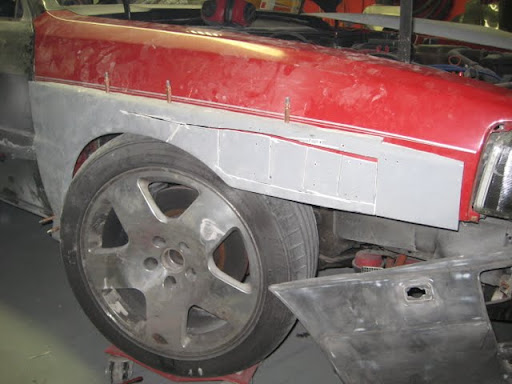
As you can see, I had to do a TON of chopping of the flare to get it to lay flat. This was the initial idea, but those flaps are later cut out/removed. I will go into it later on in the post.
Next the driver’s side:
This part went a LOT faster b/c I could measure directly off the pass side once I got it all fit. So it took about 8-10 hrs to do the pass side, and about 4-5 to do the driver’s side.
And more cutting b/c even the driver’s side was torqued! Just not nearly as bad as the pass side:
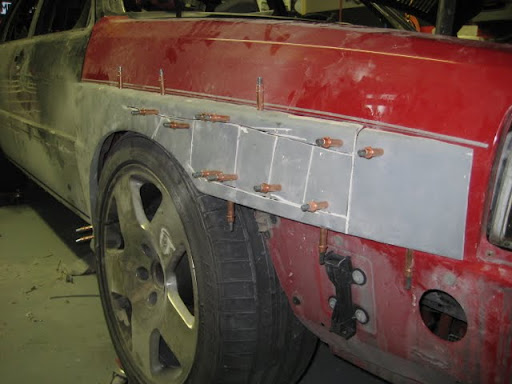
And here she is w/ the fenders pretty much “ready” for the next step. As you can see, I ended up cutting a hole in the center of the flare. I had to do this b/c the difference in angles of the areas where I cut was so extreme there was no way I was going to get the fender to lie flat using the existing material. So OUT it came to be filled in later.
At this point, it was time for me to make the attachments to the fenders permanent. Here’s how the fenders looked:
And out came the stripper again, and I cleaned these puppies off inside AND outside!
Clean and ready to go!
And supports tack welded into place:
And then some more cutting to make the rear vent functional plus grinding down the spot welds:
Rinse and repeat on pass side, and you get the final products:
Next came the Fun with Fiberglass!!! If I didn’t say it already, I will say it now… I HATE fiberglass! Not necessarily a pain to work with, but lord does it make a mess!
As you might remember, there was a huge gap on the driver’s fender. Well, unfortunately even w/ repositioning the flare on the new fender, the gap continued. So the time came for me to learn to fiberglass… lol. My only experience using fiberglass was watching guys on TV use it… but hey, if they can do it on TV, how hard can it really be… right? Yeah…. Fun.
Here’s the misalignment on the driver’s side of the car:

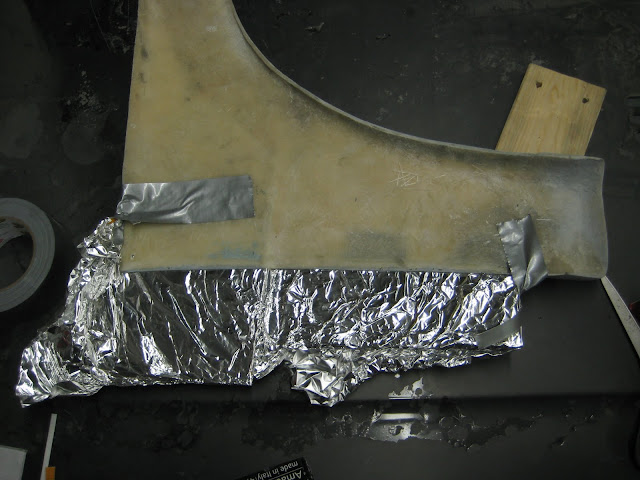
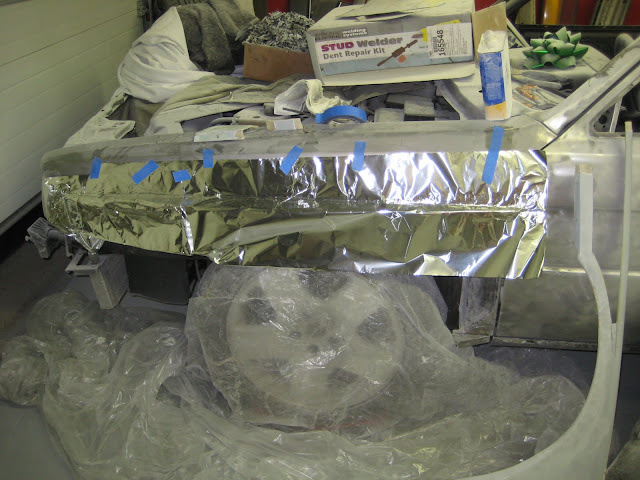
In order to make up this gap, I had to make some sort of mold. I initially was going to try to graft on a piece of fiberglass panel that I had, but after playing with it, this really wasn’t a good option. Instead, I decided to do some grinding on the panel to thin it out a bit and built a “mold” of sorts to hold the resin reasonably where I wanted it and sort of shape it how I needed it. I made the mold from cardboard and aluminum foil. The foil is a huge help b/c the resin doesn’t really stick to it (as seen on TV of course ), which was a huge help.
Beginnings of mold:
Setup for both fenders (unfortunately, there was a slight misalignment on the pass side too, so “while I was at it…”):
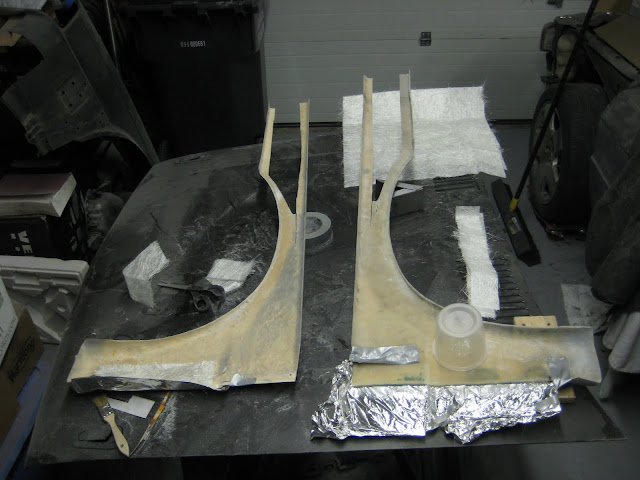
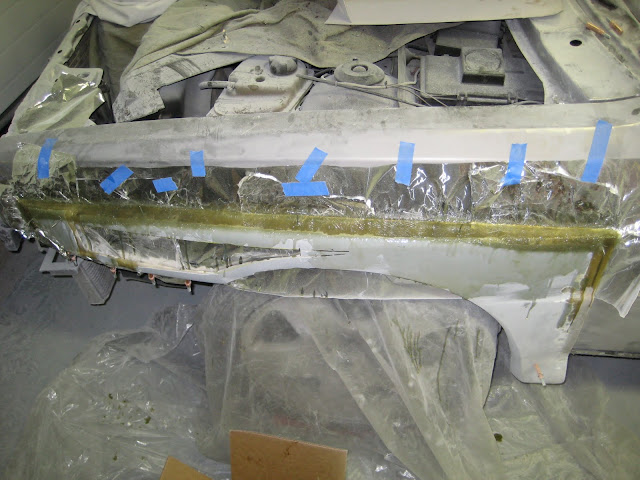
And laying everything up:

And the aftermath of driver’s side:

And pass side:

And after a TON of grinding/sanding (I can’t even describe to you how much I hate fiberglass at this point… I itched for about a week straight even thinking about it after this!)


Next up was making up the gap along the top of the fender. Again, I was originally going to glue in a piece of fiberglass panel and then rivet it down and bondo over it, but honestly I didn’t like that idea one bit. After fixing the gap, I decided that working with fiberglass isn’t so bad and that I’d tackle this part as well.
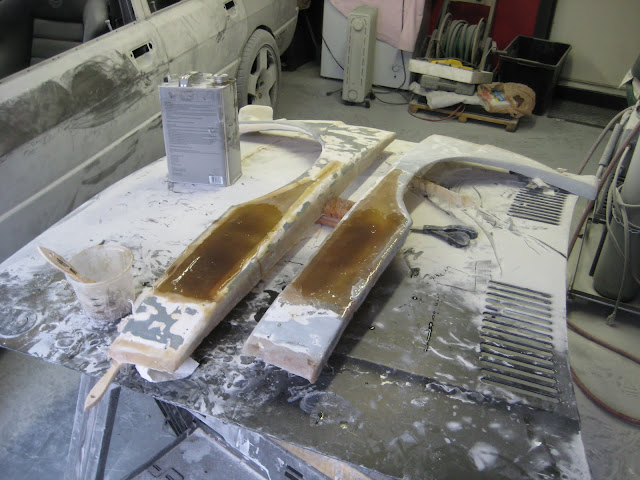
So I started out laying out my release paper for the mold:
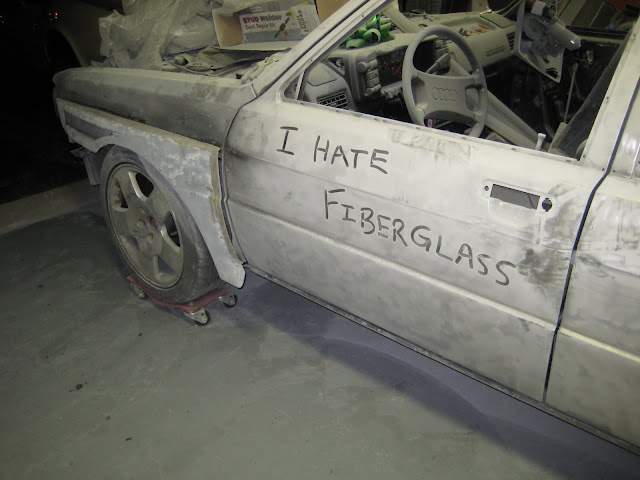
Positioned the panel and layed some glass:


And the finished pieces (and my final statement):
Then came the next step of filling and smoothing the holes in the center. In order to keep everything aligned properly, I decided to lay the first layer of fiberglass with the flares mounted ON the car to make sure everything lined up correctly. Last thing I felt like doing was redoing this AGAIN!
Action shots… mind you, I had not washed the shop cloths since I started doing the fiberglass work as there was no real point considering even looking at the garage at this point got that lovely white powder all over you!


And the final pieces:
I don’t have any pictures of them mounted on the car, but they look pretty sweet if I do say so myself. While this has been a ridiculously frustrating process considering that I paid good $$ for fenders that I had to literally rebuild myself, this has def allowed me to make the car uniquely my own. Also, this has properly educated me in how to tackle the rear flares! Given the amount of time playing around with the fronts, I’m pretty sure the rear will go a LOT quicker.
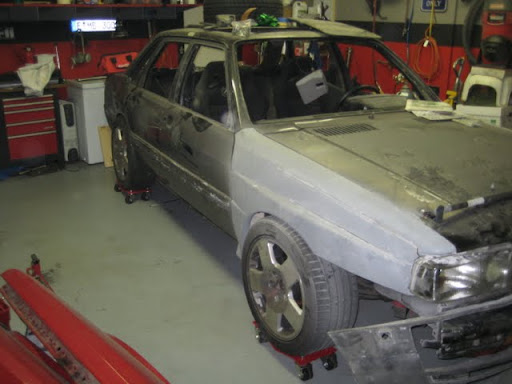
Next on the list is bending up the rocker panels. Since I haunched out the front fenders a bit compared to “stock,” the rocker panels are going to need to sit out a bit more than they would have initially. So at this point I need to make and install the rocker panels first before tackling the rear to make sure everything lines up the way it’s supposed to!
So that’s how she sits right now… Hopefully life will play a little nicer in the next few months so I can actually get this thing finished before my next track event, as I missed it at VIR earlier this week :(.
Hope you enjoyed the show… more to come w/o a doubt!
Farewell Team Doorhandle!!!
Yup, that’s right! I couldn’t take it anymore! I’ve replaced almost every handle on the car at this point, and it’s time that I just bite the bullet and upgrade to something a little sleeker/custom. The donor handles came from the ’92 UrS4 we had parted out a year ago:
Next up was figuring out exactly HOW to position these things. At this point, I’ve just managed to do the positioning of the handles. I will still need to do the fab to get them to work with the 4000 latches, but will handle that once I take the doors off the car.
So measure 100 times:
Then cut… REALLY carefully!
Next, time to position the handle after trimming the necessary fat off:
And tacked in place:
Same for the fronts:
And then spend countless hours welding around the perimeters in a feeble attempted to keep the doors from warping (I did NOT succeed regardless of how long I waited, etc), then follow up with grinding and smoothing and you get:
I was thankfully able to get the warpage back in line for the most part w/ the help of the slide hammer and stud welder. Needed a little persuation, but for the most part she’s flat again. I will need a light skimming of bondo to hide ALL the lines, but I can say it’s not too bad all said and done:
And then to the pass side… rinse and repeat!
I went about welding the pass side pieces in a little differently than the driver’s side to see if I can minimize the warping. Unfortunately, I failed again… but this time, I think I know why. I believe that b/c of how the metal is shaped in the “cupped” portion of the handle, when you weld it to the door skin, the heat doesn’t dissipate evenly and it causes the door skin to pull in. I had the door 100% flat up until I welded the bottom of the handle. Once I did that, within 4-5 tack welds, the door started to pull in. UBER frustrating, but what have you.
Next! Farewell old paint, hello Delorean look-alike!
Since this car has been repainted once (crappy maaco job), I decided that I wanted to do this from scratch… which means she’s going to bare metal!
I have to say, big thanks to Hank and his crazy painting expedition for tipping me off to using paint stripper to get the paint off. My lord did it make this a LOT easier and a TON cleaner than if I went at it w/ a sander like I was planning on doing. It took me a while to do the stripping, but I had a helper this time (my gf is a trooper!!!), so it went quicker than if I did it alone.
Going:
Gone:
She’ll kill me for this one
As if the already peeling clearcoat needed any more help… It was funny to listen to this stuff work, as the garage started to sound like a bowl of rice crispies (snap, crackle and popping) as the painted peeled and bubbled up:
And the trunk and driver’s side done:
And now the roof:
And a funky find… brass brazing at the seams of the roof and A and C pillars:
I believe when they repainted the car, they might have sanded the roof down then reprimed and painted, vs the rest of the car… reason I say this is b/c it had a funky yellowish primer vs the standard Audi white. That, and it was only on the c-pillars and roof, no where else on the car! What I also found out was that the peeling clearcoat had allowed water to actually penetrate the paint, and I was starting to see surface rust on the roof in spots.
But after hours of scraping and almost 2 gallons of stripper… this is about 95% of the paint on the car:
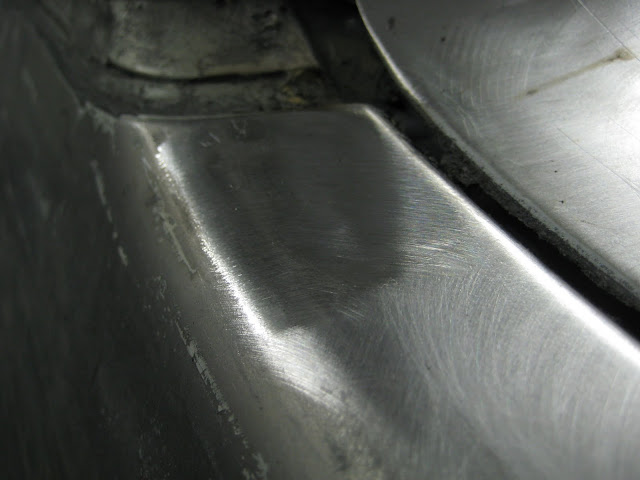
From this point, it was time to start cleaning up the metal totally… so I busted out the abrasive disks for the angle grinder and went to town:
And for the places I couldn’t get w/ the grinder, I used a wire wheel and my die grinder (RIP). This project has def allowed me to upgrade in tools, but this lil guy just wasn’t up for the abuse I guess:
But the wire wheel did continually get even with me as I worked… man these kinda hurt after a while:
Also, while on the body… it was time to start filling up holes I wasn’t going to use. Namely the antenna (going to install a roof mounted one a la CQ):
And farewell rear spoiler (I have plans for designing one for the rear that will actually provide a lil downforce at the track):
As she sits:
And then it was time for the front. When I initially did the motor swap, I cut the entire front core support. Ever since then, I’ve regretted doing that as the way I installed the top piece, it just looked like junk to me… so now is my time to fix this
I removed my mounting hardware:
And welded her back in and smoothed it out:
I’m also going to go back and fill in all the holes on the front clip too that aren’t going to be used… no real point in doing this, but I figured why not smooth everything out. It’s totally for looks and I’d probably be the only one to notice it, but it makes me smile so that’s all that matters
And now, the saga of the front fenders
To say it nicely… this has been a royal PITA! What started off as a bolt on “easy” part of the project turned into a 2 month ordeal. I knew that these fenders weren’t going to be perfect as the guy I bought them from warned me that the gaps, etc weren’t great and they needed some work. Unfortunately, that didn’t even touch on how bad they really were. Whomever was responsible for molding these things (not the guy I bought them from) should be drug into an alley and beaten with a rubber hose. I’d be embarrassed if I were to sell these as good… and pix will show why!
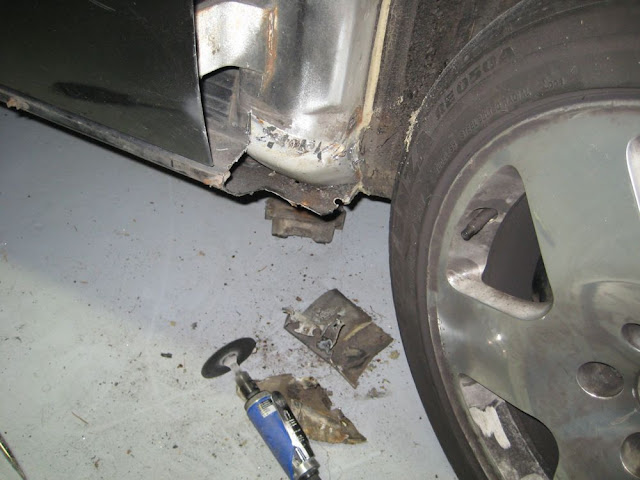
But I digress… in order to get these fenders to fit, you had to do some trimming on the 4000 rocker panels… which brought me to buy new tools (yay):
This little thing was great at cutting out the spot welds… only downside is that it has zero strength, so the teeth break off REALLY easily. Not bad for $16, but at the same time the stupid cutters cost more than the tool itself practically.
Here’s what had to get cut off the rocker panels… Driver’s side:
And passenger’s side:
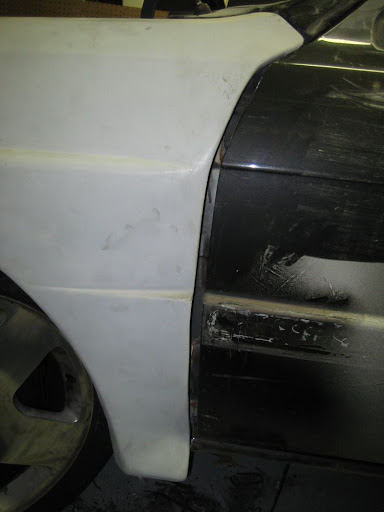
With that out of the way, I can now fit the fenders… and as you can see, they fit great on the driver’s side:
And even better on the pass side:
That curve that you see on the front tip as it meets the headlight… that’s how it sat naturally. If I were to pull it out to sit where it was suppose to fit, you could literally hear the fiberglass cracking and breaking. This must have been grafted off a bent fender or something, b/c I have no clue how else it could suck in this badly. The bottom edge was in almost 1+ inches from where it was suppose to be!!! This wasn’t the case on the drivers side, but then again the gap was so bad that it needed its own help, plus it didn’t meet properly at the top, etc etc etc etc. I could go on, but I’ll stop here
Lemonade out of Lemons:
At this point, I started to cut slots in the pass front fender to see if I could somehow salvage it. No matter what I did, there was no way these things were going to work. Not only were they torqued, but there was no way they were even going to clear my wheel/tire setup!
So at this point, I completely switched gears and decided it was time to build my own fenders. Not exactly the path I had envisioned, but one more thing that will make this puppy truly unique and mine
Since both fenders on my car were bent (driver’s b/c of PO and pass b/c of me), I snagged the front fenders from the CGT we had parted out a few years ago.
I started off by dropping the car as low as my suspension would allow to make sure I gave myself adequate clearance b/n the fenders and the wheels/tires. This also will give me an idea of how much extra rubber I could sneak under the fenders if I find the need down the road
With the stock fenders and my setup, there is no room for one to actually turn the wheel. So I started off the fabrication by removing the lip around the entire fender:
To show the clearance gained by doing so:
From this point, I started to bend some sheet metal to make mounts that would allow me to bond the fiberglass flares to the metal ones, while also removing the awful twist in the fender AND make plenty of room for the wheels to live within the flares.
It was also at this point that I decided it was time to twist this a little more (and I can thank Hadyn for planting the seed in my head)…
And the initial positioning of the flare:
As you can see, I had to do a TON of chopping of the flare to get it to lay flat. This was the initial idea, but those flaps are later cut out/removed. I will go into it later on in the post.
Next the driver’s side:
This part went a LOT faster b/c I could measure directly off the pass side once I got it all fit. So it took about 8-10 hrs to do the pass side, and about 4-5 to do the driver’s side.
And more cutting b/c even the driver’s side was torqued! Just not nearly as bad as the pass side:
And here she is w/ the fenders pretty much “ready” for the next step. As you can see, I ended up cutting a hole in the center of the flare. I had to do this b/c the difference in angles of the areas where I cut was so extreme there was no way I was going to get the fender to lie flat using the existing material. So OUT it came to be filled in later.
At this point, it was time for me to make the attachments to the fenders permanent. Here’s how the fenders looked:
And out came the stripper again, and I cleaned these puppies off inside AND outside!
Clean and ready to go!
And supports tack welded into place:
And then some more cutting to make the rear vent functional plus grinding down the spot welds:
Rinse and repeat on pass side, and you get the final products:
Next came the Fun with Fiberglass!!! If I didn’t say it already, I will say it now… I HATE fiberglass! Not necessarily a pain to work with, but lord does it make a mess!
As you might remember, there was a huge gap on the driver’s fender. Well, unfortunately even w/ repositioning the flare on the new fender, the gap continued. So the time came for me to learn to fiberglass… lol. My only experience using fiberglass was watching guys on TV use it… but hey, if they can do it on TV, how hard can it really be… right? Yeah…. Fun.
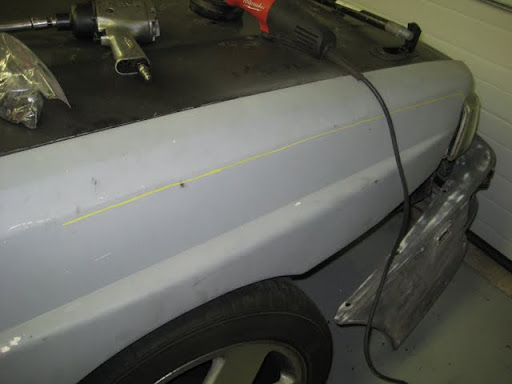
Here’s the misalignment on the driver’s side of the car:
In order to make up this gap, I had to make some sort of mold. I initially was going to try to graft on a piece of fiberglass panel that I had, but after playing with it, this really wasn’t a good option. Instead, I decided to do some grinding on the panel to thin it out a bit and built a “mold” of sorts to hold the resin reasonably where I wanted it and sort of shape it how I needed it. I made the mold from cardboard and aluminum foil. The foil is a huge help b/c the resin doesn’t really stick to it (as seen on TV of course
), which was a huge help.Beginnings of mold:
Setup for both fenders (unfortunately, there was a slight misalignment on the pass side too, so “while I was at it…”):
And laying everything up:
And the aftermath of driver’s side:
And pass side:
And after a TON of grinding/sanding (I can’t even describe to you how much I hate fiberglass at this point… I itched for about a week straight even thinking about it after this!)
Next up was making up the gap along the top of the fender. Again, I was originally going to glue in a piece of fiberglass panel and then rivet it down and bondo over it, but honestly I didn’t like that idea one bit. After fixing the gap, I decided that working with fiberglass isn’t so bad and that I’d tackle this part as well.
So I started out laying out my release paper for the mold:
Positioned the panel and layed some glass:
And the finished pieces (and my final statement
):Then came the next step of filling and smoothing the holes in the center. In order to keep everything aligned properly, I decided to lay the first layer of fiberglass with the flares mounted ON the car to make sure everything lined up correctly. Last thing I felt like doing was redoing this AGAIN!
Action shots… mind you, I had not washed the shop cloths since I started doing the fiberglass work as there was no real point considering even looking at the garage at this point got that lovely white powder all over you!
And the final pieces:
I don’t have any pictures of them mounted on the car, but they look pretty sweet if I do say so myself. While this has been a ridiculously frustrating process considering that I paid good $$ for fenders that I had to literally rebuild myself, this has def allowed me to make the car uniquely my own. Also, this has properly educated me in how to tackle the rear flares! Given the amount of time playing around with the fronts, I’m pretty sure the rear will go a LOT quicker.
Next on the list is bending up the rocker panels. Since I haunched out the front fenders a bit compared to “stock,” the rocker panels are going to need to sit out a bit more than they would have initially. So at this point I need to make and install the rocker panels first before tackling the rear to make sure everything lines up the way it’s supposed to!
So that’s how she sits right now… Hopefully life will play a little nicer in the next few months so I can actually get this thing finished before my next track event, as I missed it at VIR earlier this week :(.
Hope you enjoyed the show… more to come w/o a doubt!

Re: Justin's '85 4000 20vt Project: Got sex'd by an UrQ?
May I be the first to say holy shit?
Wow.
Wow.
Matt
18 Silverado 1500 work pig, roof rack and tonneau cover
11 Jetta sedan TDI DSG, rear muffler delete
GONE :( 87 4ktq - 4 FOX SNAKES

18 Silverado 1500 work pig, roof rack and tonneau cover
11 Jetta sedan TDI DSG, rear muffler delete
GONE :( 87 4ktq - 4 FOX SNAKES
-
Quattro v1.0
- Posts: 405
- Joined: Wed Feb 27, 2013 11:08 am
Re: Justin's '85 4000 20vt Project: Got sex'd by an UrQ?
WoW I'll be the second! Now I see why that UrQ doesn't have a project page here yet - but when it does, Im tuned in.
I can't wait for the next series of pics.
I bet there would be buyers if you were to pull a set of moulds from your completed fenders :cheers:
What's even more amazing is the fact that you are able to pull off a project like this in what looks to be a very urban area lol
I can't wait for the next series of pics.
I bet there would be buyers if you were to pull a set of moulds from your completed fenders :cheers:
What's even more amazing is the fact that you are able to pull off a project like this in what looks to be a very urban area lol
Re: Justin's '85 4000 20vt Project: Got sex'd by an UrQ?
lol, thanks guys! THe thought has crossed my mind about molds, but moreso incase something happened to the car vs selling... lol.
And yeah, I live in suburbia hell. Fairfax, VA, where the yuppies go to roost... or at least, my next door neighbor. Thankfully, it's my cousin's house and not mine... I'm just overtaking the garage The one neighbor def doesn't care for me and my car habit, but then again it seems she (and her husband... talk about peas in a pod!) hates everyone, so I'm not too special
And yeah, I live in suburbia hell. Fairfax, VA, where the yuppies go to roost... or at least, my next door neighbor. Thankfully, it's my cousin's house and not mine... I'm just overtaking the garage
The one neighbor def doesn't care for me and my car habit, but then again it seems she (and her husband... talk about peas in a pod!) hates everyone, so I'm not too special -
HT Motorsport
- Posts: 350
- Joined: Wed Feb 27, 2013 11:56 am
Re: Justin's '85 4000 20vt Project: Got sex'd by an UrQ?
Wow Justin!
Those fenders totally hosed you, I sooo wish I had been doing mine earlier as that was a ton of work you did. Looks like they came out nice in the end though, bravo for sticking with it. I would have taken them outside and driven over them!
Love the door handles, they are awesome!
On the rears, if you aint into it already and if your rears are as bad as the fronts, I should be doing mine in a few (3 or 4) weeks and pulling molds soon after that.
Good work, and lots of it. Thanks for the detailed update.
H
Re: Justin's '85 4000 20vt Project: Got sex'd by an UrQ?
Hey Hadyn, thanks! I'm too stubborn to destroy them... esp considering the $$ I spent to buy the damn things... lol. But don't think that the thought didn't cross my mind!
The rears should be in better shape, as I bought them from someone else who did better molds (I'm hoping... lol).
At this rate though, It doesn't scare me anymore to have to put in the work as long as it looks good in the end. This has truely become one of those projects that I will never forget in my life. Def learned a TON doing this, and look forward (and am slightly scared) to see what the future holds for me with it... haha.
I might be picking your brain down the road about making the molds though, as I have a feeling it'd be wise of me to make something that I could easily duplicate this stuff if necessary..... just in case.
Re: Justin's '85 4000 20vt Project: Got sex'd by an UrQ?
awesome, this is sooo badass
24v-VR6T-CQ BEAST http://www.theprojectpad.com/viewtopic.php?f=11&t=193#p37887
16v-ABA-T VEMS O1E ETC 4Kq http://www.theprojectpad.com/viewtopic.php?f=11&t=201#p38264
16v-ABA-T VEMS O1E ETC 4Kq http://www.theprojectpad.com/viewtopic.php?f=11&t=201#p38264