I hope when I get to this kind of project I'm as patient as you seem to be.
Damn, Derek lookin' good! Keep it up. :-D
Derracudas zermatt 20vt,6spd, 351awhp - July 4th drive vid
-
derracuda
-
AudiSport4000
- Posts: 795
- Joined: Wed Feb 27, 2013 12:53 pm
- Location: Fort Wayne, IN
KKquattro wrote:the gauge panel is from a fwd 4k, right?
greets
Yup, bolts right up where the differential lock panel is.
1986 4kq Commemorative Design
2012 Jetta TDI
Follow me on YouTube at Mike's Virtual Garage!
https://www.youtube.com/channel/UCaMvwkjuW7Ziy5pmfVh_PJQ/
2012 Jetta TDI
Follow me on YouTube at Mike's Virtual Garage!
https://www.youtube.com/channel/UCaMvwkjuW7Ziy5pmfVh_PJQ/
-
Dye-Lohn NJ


-
quattrostyle
-
derracuda
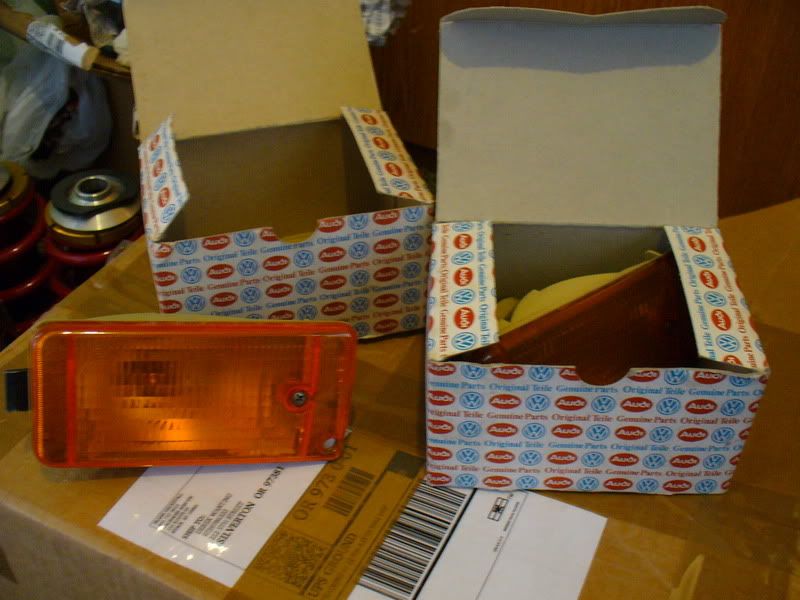
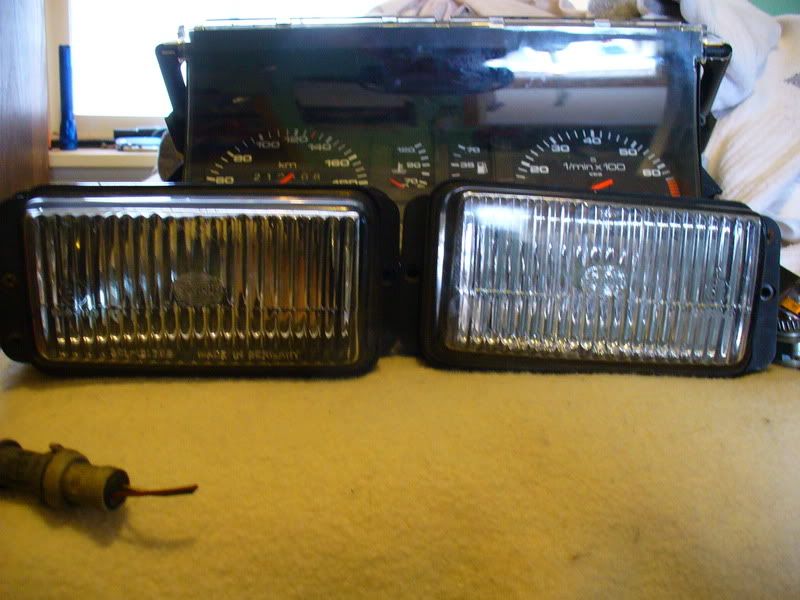
ok, some part updates... i got some euro goodies from my buddy maarten M in the NL. he hooked me up with euro headlights, foglights, indicators, foglight switches, the works. so i have me some good euro parts to help this car really start coming together.
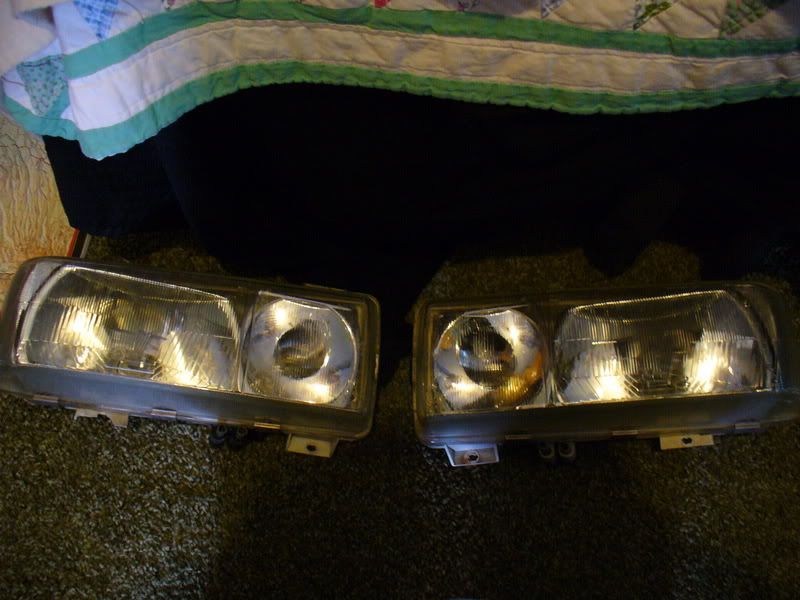
euro indicators
fogs 8)
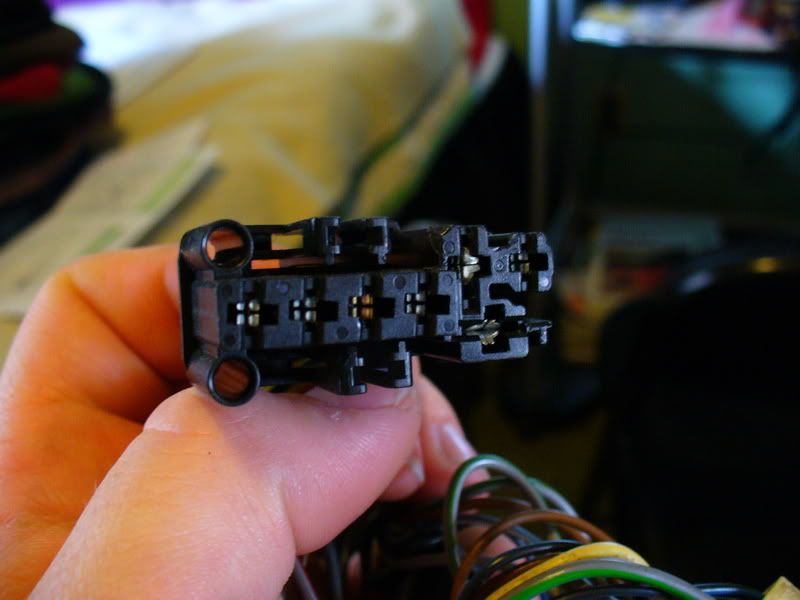
an unmelted headlight plug
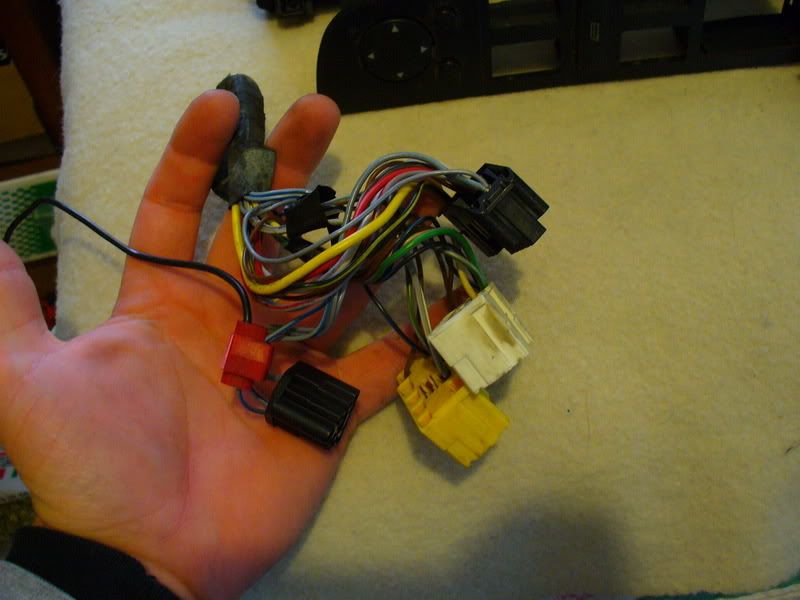
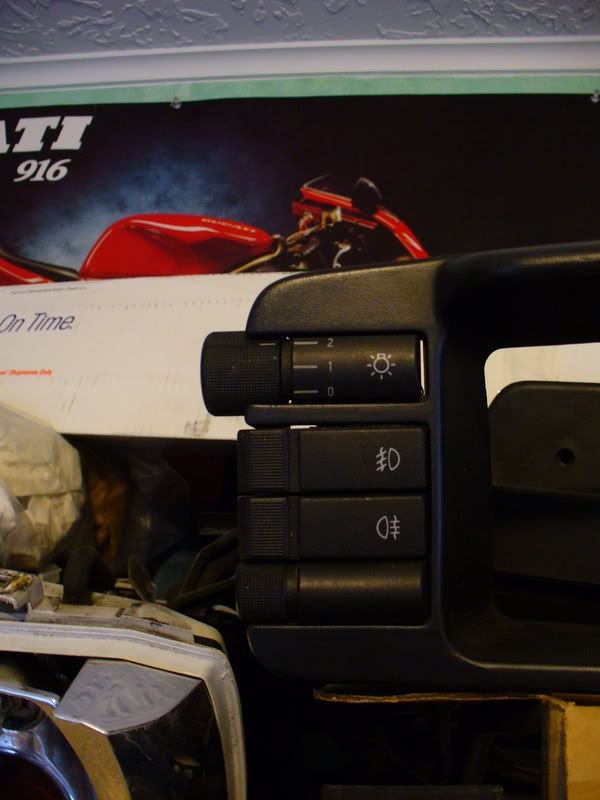
foglight switch plugs..
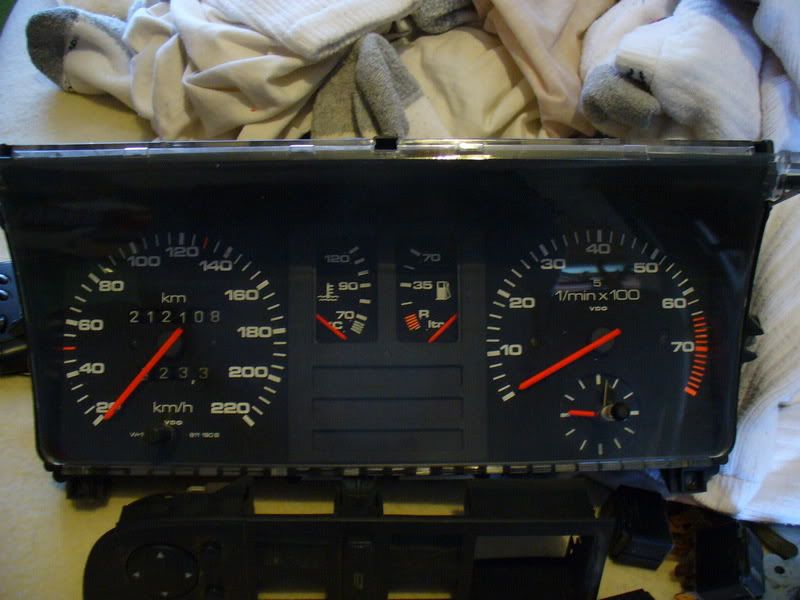
euro cluster (i'm gonna try and see about a higher mph speedo for it and use the rest of it as is. it's nice to have actual #'s on the coolant temp)
mmm, bixenon's a comin'....
euro indicators
fogs 8)
an unmelted headlight plug
foglight switch plugs..
euro cluster (i'm gonna try and see about a higher mph speedo for it and use the rest of it as is. it's nice to have actual #'s on the coolant temp)
mmm, bixenon's a comin'....
-
maarten
i'm missing the foglight switches in this post 
no problem getting these parts for you, i'm glad they go in a nice car, can't wait to see it finished, also thanks to you, for all the electrical goodies we don't have...
guys. derek is the best i think the things he did sent me are cleaner than the parts i sent him, i see now in the pics, that one of the mounting tabs of one of the headlights is broken :(
no problem getting these parts for you, i'm glad they go in a nice car, can't wait to see it finished, also thanks to you, for all the electrical goodies we don't have...
guys. derek is the best
i think the things he did sent me are cleaner than the parts i sent him, i see now in the pics, that one of the mounting tabs of one of the headlights is broken :(-
derracuda
-
AudiSport4000
- Posts: 795
- Joined: Wed Feb 27, 2013 12:53 pm
- Location: Fort Wayne, IN
Looks good. I had a Canadian cluster in my old 4000 years and years ago. I loved having the numbers there for the coolant and fuel, it was nice.
Good score on the fog light switches! I only have some of the front ones. Let us know how it goes installing the fog lights and turn indicators. Thats something Ive been looking to do for a while.
Good score on the fog light switches! I only have some of the front ones. Let us know how it goes installing the fog lights and turn indicators. Thats something Ive been looking to do for a while.
1986 4kq Commemorative Design
2012 Jetta TDI
Follow me on YouTube at Mike's Virtual Garage!
https://www.youtube.com/channel/UCaMvwkjuW7Ziy5pmfVh_PJQ/
2012 Jetta TDI
Follow me on YouTube at Mike's Virtual Garage!
https://www.youtube.com/channel/UCaMvwkjuW7Ziy5pmfVh_PJQ/
-
derracuda
-
Wizard-of-OD
-
derracuda
-
ralleyquattro

- Posts: 858
- Joined: Wed Feb 27, 2013 1:46 pm
derracuda wrote:euro indicators
fogs 8)
You will need the Euro bumper frame (FG) in order to fit these. Unless you do some innovative surgery to existing bumper/shocks.
I got a complete bumper from Europe along with complete harness for headlights/fogs/indicators. Other than swapping the bumper cover from US to Euro frame the job is a piece of cake. Looks great and is 1/4 of the weight of the NA bumper assembly!
Martin Pajak
http://www.quattro.ca
82 Audi Ur-q, SQ project
83 Audi 80 q, Euro 2-Door
85 Audi Ur-q, Euro mit 3B
91 Coupe Quattro
93 Audi 80 q Avant, 2.5 TDI with 6-speed
04 Audi A4 1.8Tq Avant USP 6-speed
04 Audi A4 3.0q Avant USP 6-speed
http://www.quattro.ca
82 Audi Ur-q, SQ project
83 Audi 80 q, Euro 2-Door
85 Audi Ur-q, Euro mit 3B
91 Coupe Quattro
93 Audi 80 q Avant, 2.5 TDI with 6-speed
04 Audi A4 1.8Tq Avant USP 6-speed
04 Audi A4 3.0q Avant USP 6-speed
-
derracuda
-
derracuda
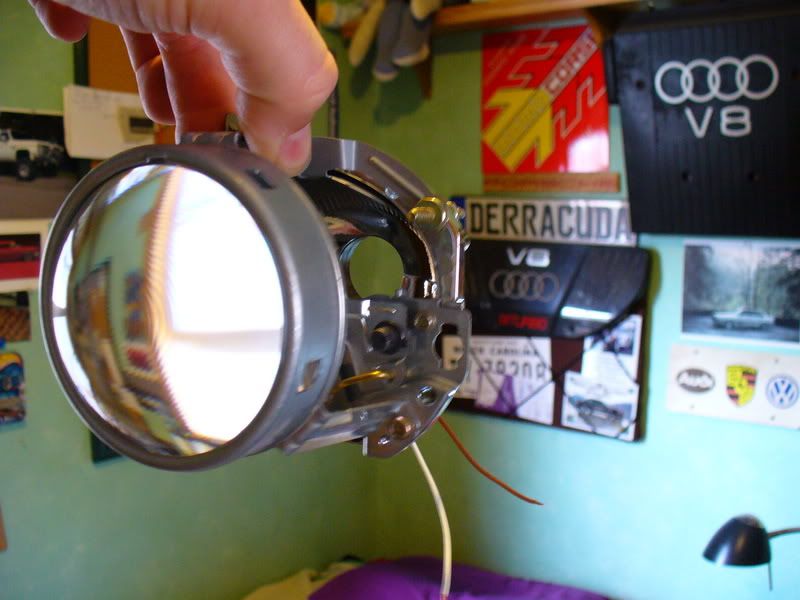
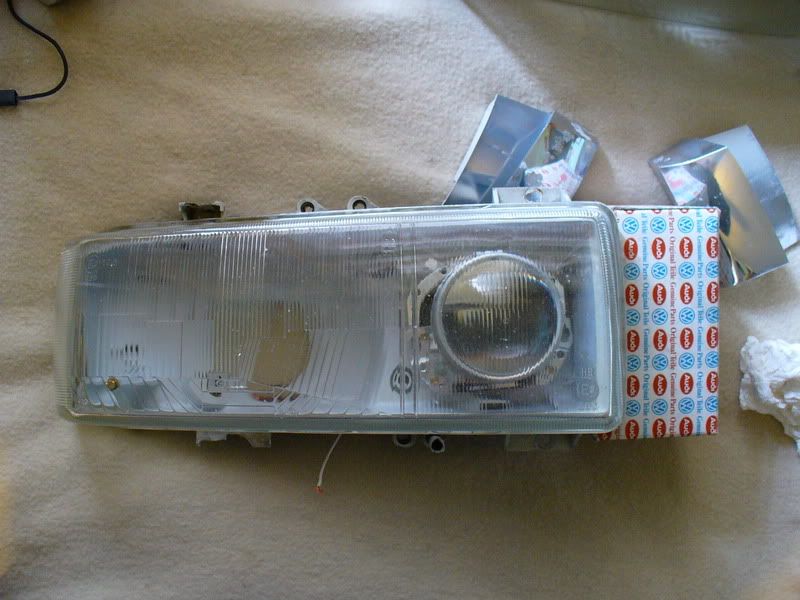
headlight update i've been working on retrofitting yet another pair of eurolights with HID projector lamps, but this time it's with bixenon projectors so that i have not only low beam, but high beam 8)
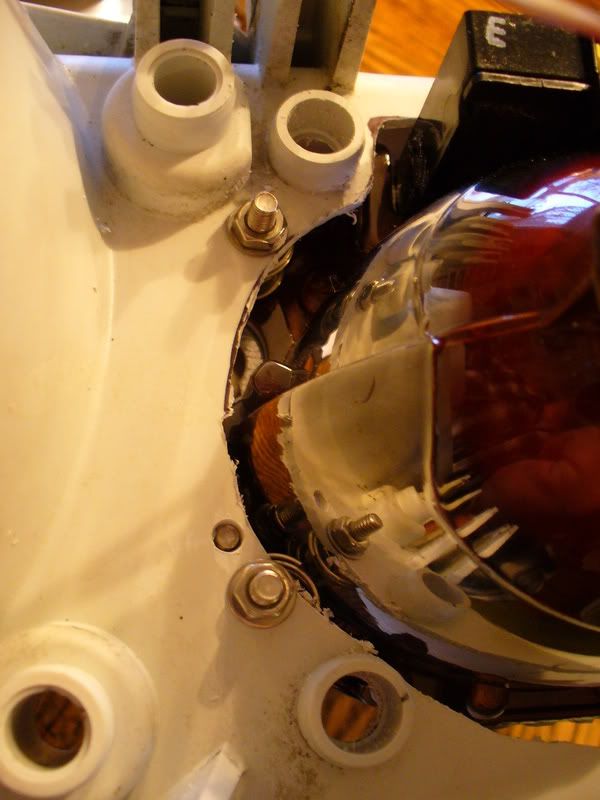
i started off by totally dismantling the headlights as they were really dirty and needed a good cleaning....
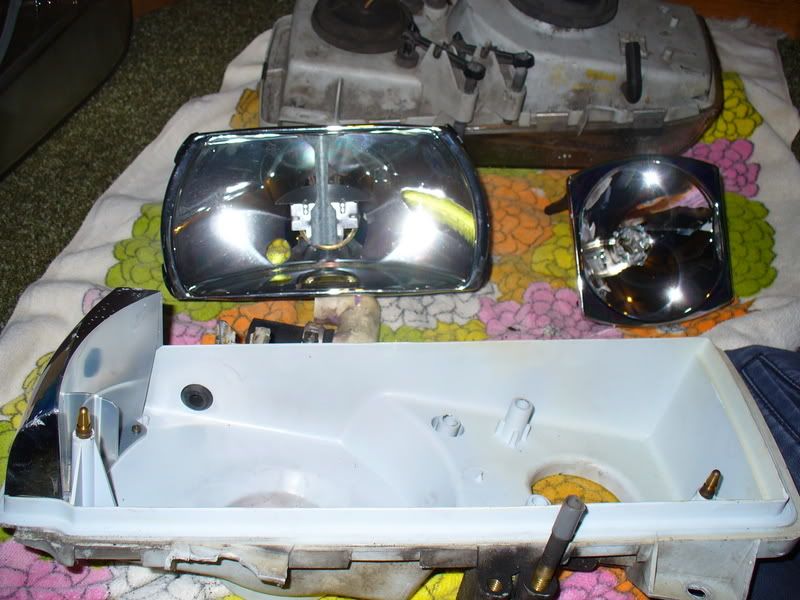
the light buckets were in fantastic shape..
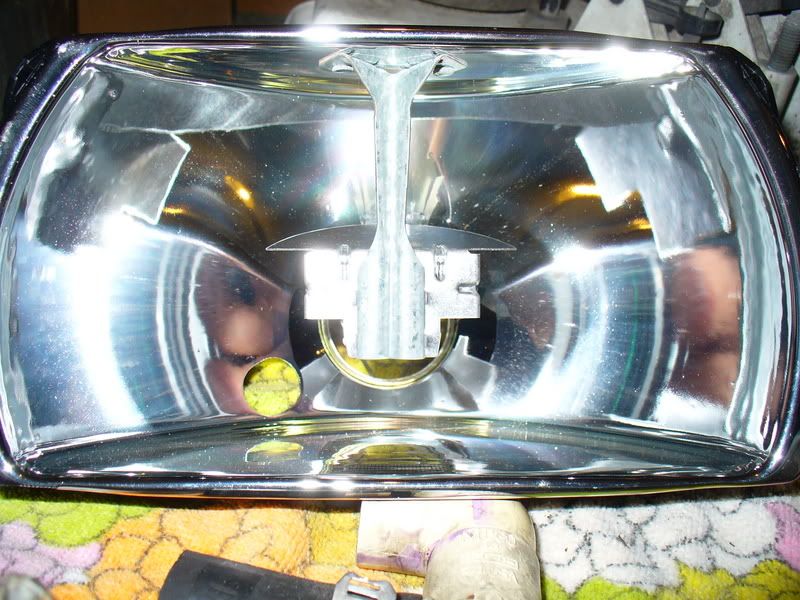
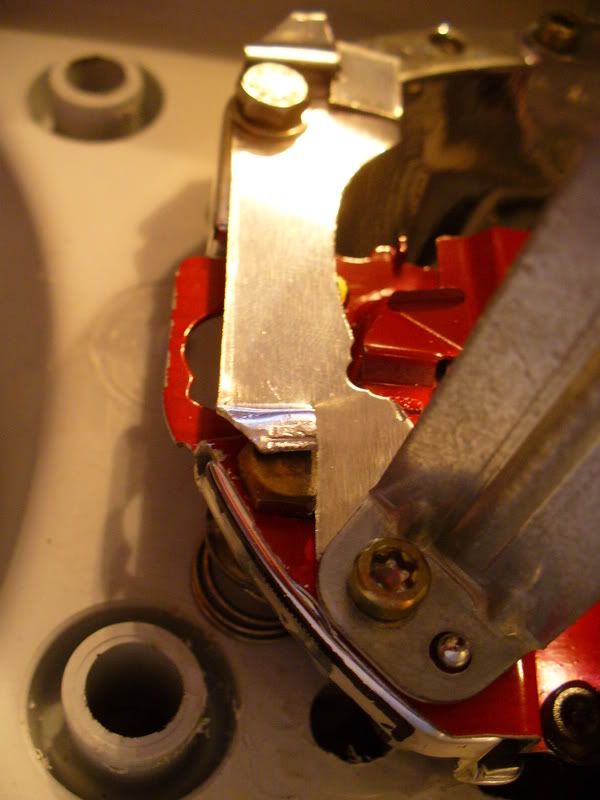
then i used a dremel to cut the back side of the housing out for the deeper projector unit..
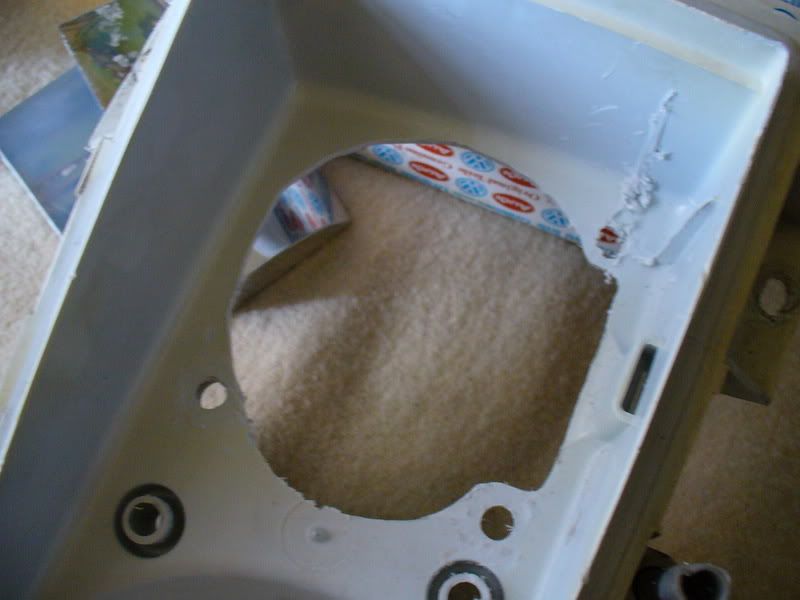
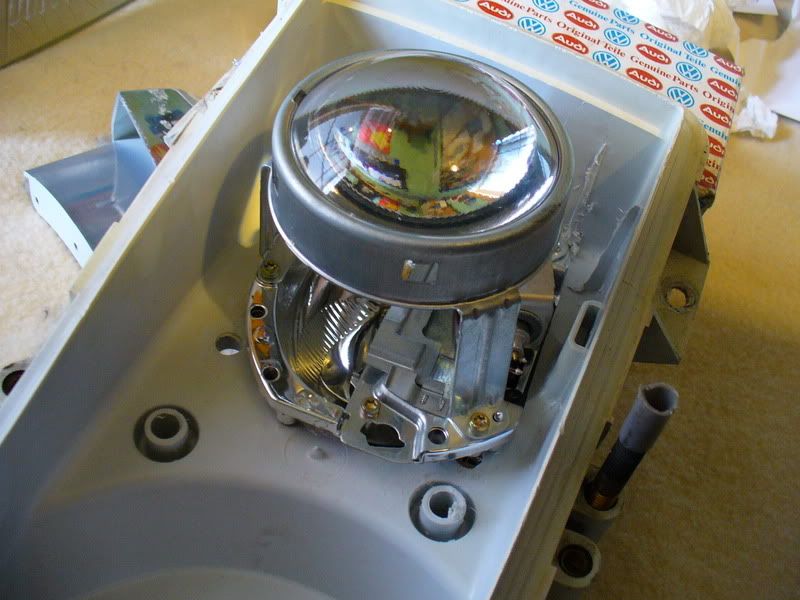
in order to mount the projector in a fashion so that i could adjust the light properly ad not completely dissassemble the housing everytime, i went the route of the factory.... sorta.... i had to make it with a pivot on one corner, and two adjusters on the other side. i had to make a plate to hold the bolt heads in place so that the only thing i have to do is turn the nuts outside the back and the springs keep tension between the projector and the light housing. the most difficult part now will be finding a way to seal the whole stinkin thing up
these are RC car tie rod ends 8)
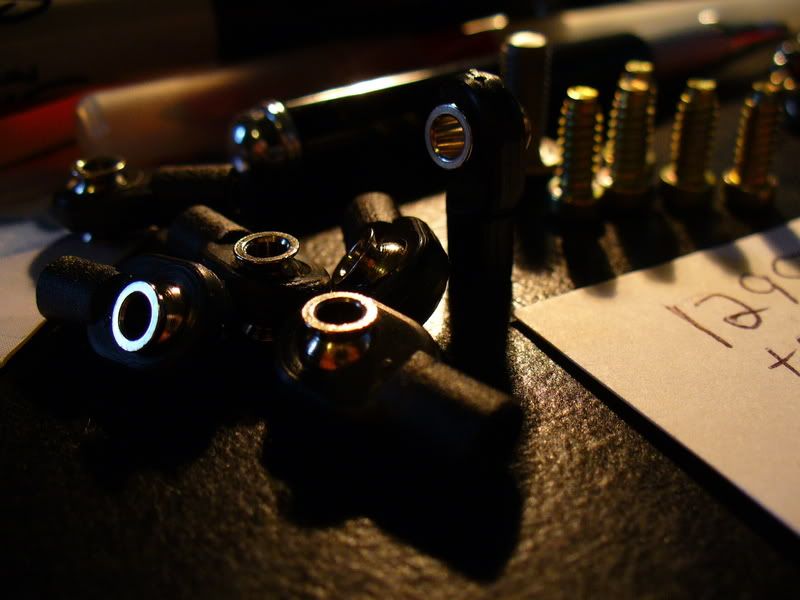
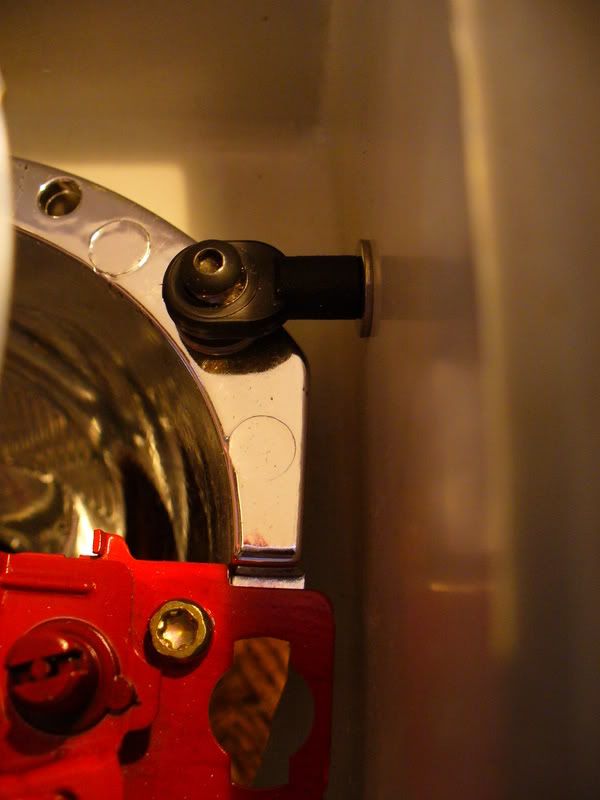
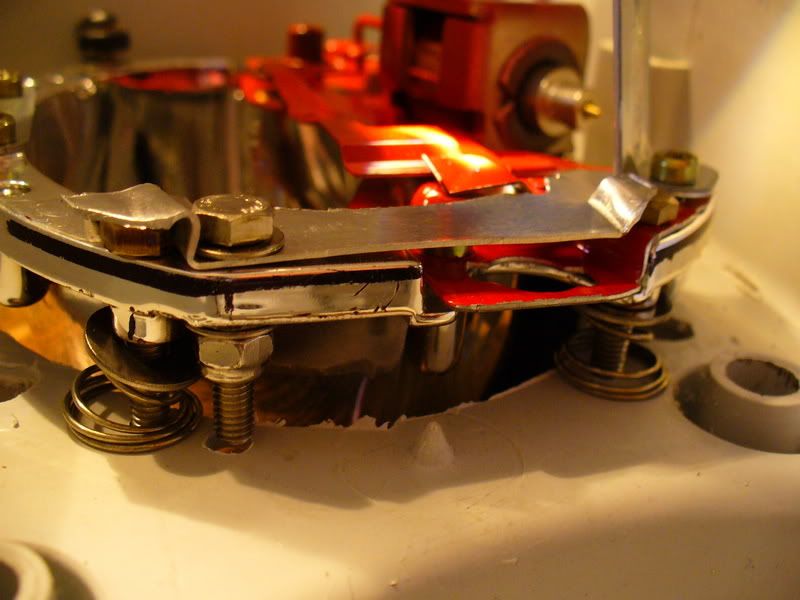
adjuster nuts

test fit cardboard cover plate. i'll make one from aluminum for the final product
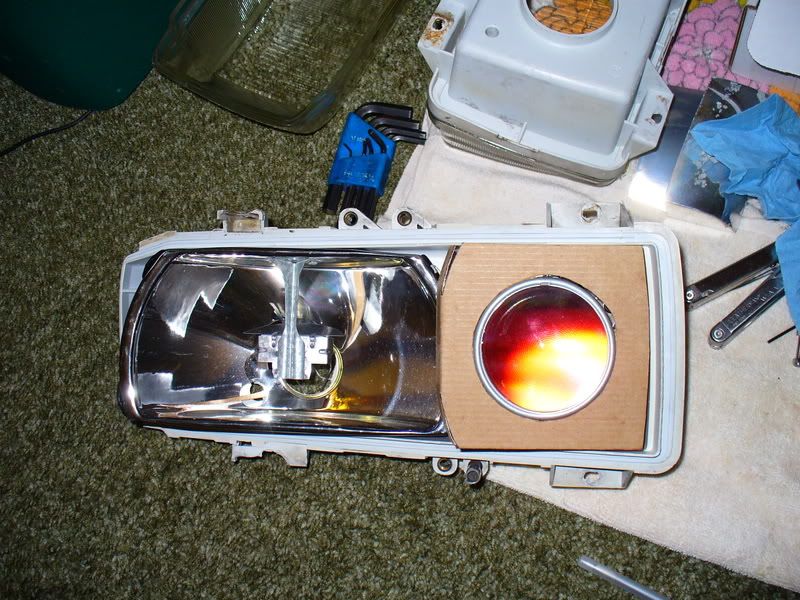
that's it for now!
i've been working on retrofitting yet another pair of eurolights with HID projector lamps, but this time it's with bixenon projectors so that i have not only low beam, but high beam 8)i started off by totally dismantling the headlights as they were really dirty and needed a good cleaning....
the light buckets were in fantastic shape..
then i used a dremel to cut the back side of the housing out for the deeper projector unit..
in order to mount the projector in a fashion so that i could adjust the light properly ad not completely dissassemble the housing everytime, i went the route of the factory.... sorta.... i had to make it with a pivot on one corner, and two adjusters on the other side. i had to make a plate to hold the bolt heads in place so that the only thing i have to do is turn the nuts outside the back and the springs keep tension between the projector and the light housing. the most difficult part now will be finding a way to seal the whole stinkin thing up
these are RC car tie rod ends 8)
adjuster nuts
test fit cardboard cover plate. i'll make one from aluminum for the final product
that's it for now!