Page 15 of 17
Re: 24vVR6T CQ Project: EATSGTR, chassis FAB
Posted: Tue May 06, 2014 3:04 am
by my2000apb
MORE!!!
I also got started on the hanger braces for the turbo/ex mani and the downpipe as well.
Just a few sneak peeks of the mounts for the braces, those will likely get finished this week as well.

- start of dp and turbo hangers.jpg (1.25 MiB) Viewed 61926 times
- turbo hanger brace detail.jpg (1.63 MiB) Viewed 61926 times
- dp hanger brace detail.jpg (1.55 MiB) Viewed 61926 times
I also made up a heatshield for the front passenger CV boot/joint, its ultra thin alu for now and ease of mockup, I’ll be making it out of 0.125” aluminum sheet for the final version.
- front pass cv boot heatshield.jpg (1.05 MiB) Viewed 61926 times
I also started making a heatshield for the upper radiator hose. I will anodize and then wrap it in gold foil. the upper radiator hose is 20AN earl's with FlameGuard sleeving as well. I'm more concerned with keeping the hose itself from extreme heat vs. coolant heating up just a tad. between the heatshield and the sleeving, I'm sure it'll be fine.
- upper rad hose heatshield2.jpg (1.4 MiB) Viewed 61926 times
Re: 24vVR6T CQ Project: EATSGTR, chassis FAB
Posted: Tue May 06, 2014 9:30 pm
by speeding-g60
very much coolness goes on here.
Re: 24vVR6T CQ Project: EATSGTR, chassis FAB
Posted: Wed May 07, 2014 9:35 am
by DE80q
Keep it up Tim, and you might just have this running in time for carlisle next year!
Re: 24vVR6T CQ Project: EATSGTR, chassis FAB
Posted: Wed May 07, 2014 11:01 am
by my2000apb
speeding-g60 wrote:very much coolness goes on here.
thank you sir, you've made some pretty epic stuff too.
this shall be the summer of badass vrt cq, minimal work until mid august, so its gametime!!!!
DE80q wrote:Keep it up Tim, and you might just have this running in time for carlisle next year!
yeah itll be damn close mechanically, but its paint,cage, eng mgt that's my big huddles financially
getting more done every day. if all goes well by the end of this month, intake manifold will be done, downpipe and w/g dumps, all boost/inlet plumbing complete, custom axles and spacers, custom subframes and rear tie rods.
I also have a batch im prepping to go and get clear and black anodized, so a lot of the aluminum work will wrap up this month.
back to the garage, more updates to come!
Re: 24vVR6T CQ Project: EATSGTR, chassis FAB
Posted: Tue May 27, 2014 5:53 am
by glibobbo21
wheres the pic dump? i know youve been doing stuff!
Re: 24vVR6T CQ Project: EATSGTR, chassis FAB
Posted: Wed May 28, 2014 10:01 am
by my2000apb
glibobbo21 wrote:wheres the pic dump? i know youve been doing stuff!
well I had been making epic progress, down pipe done, WG reroute all done except the hole in DP and the v-band flanges welded on, and , I guess, in my progress I totally spaced putting my tube SF back. so I located the lower v-band for the downpipe properly for an OEM SF vs. my custom SF. so I'm back out to cut a chunk of DP off, relocate the v-band connection and finish up the WG re-route.
ill get an update done here shortly, but no more exhaust pics until the WG and DP are DONE!!!
but I've finished up plenty of other stuff to still have a meaty update. check back late tonight
and a single teaser pic!!!
- exh teaserr.jpg (1.41 MiB) Viewed 61778 times
Re: 24vVR6T CQ Project: EATSGTR, chassis FAB
Posted: Fri Jun 06, 2014 2:46 pm
by All_Euro
With all the GTR talk lately I can't help wondering where this is at...?
Re: 24vVR6T CQ Project: EATSGTR, chassis FAB
Posted: Sat Jun 07, 2014 12:08 pm
by my2000apb
All_Euro wrote:With all the GTR talk lately I can't help wondering where this is at...?
Exhaust is done from head to tailpipes except for some EGT and 02 bungs.
wastegate merge and dump back into DP is done
Turbo hanger brace is nearly done
BIG thanks to Shawn, vt10vt, for coming down and giving me a hand for the day!!!
we got the oil cooler mounting nearly finished, cv boot heatshield final ed. made. also worked on my upper radiator hose heatshield,
epic progress, ill get an update loaded tonight
Re: 24vVR6T CQ Project: EATSGTR, chassis FAB
Posted: Tue Jul 08, 2014 10:49 pm
by my2000apb
UPDATE TIME!!!!!
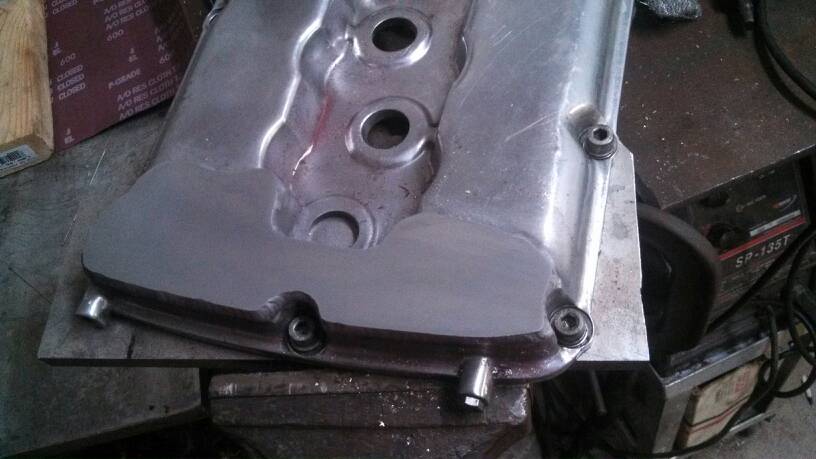
Ok let’s get caught up. I got 3X 10AN male bungs welded on my valve cover for the catch can lines.
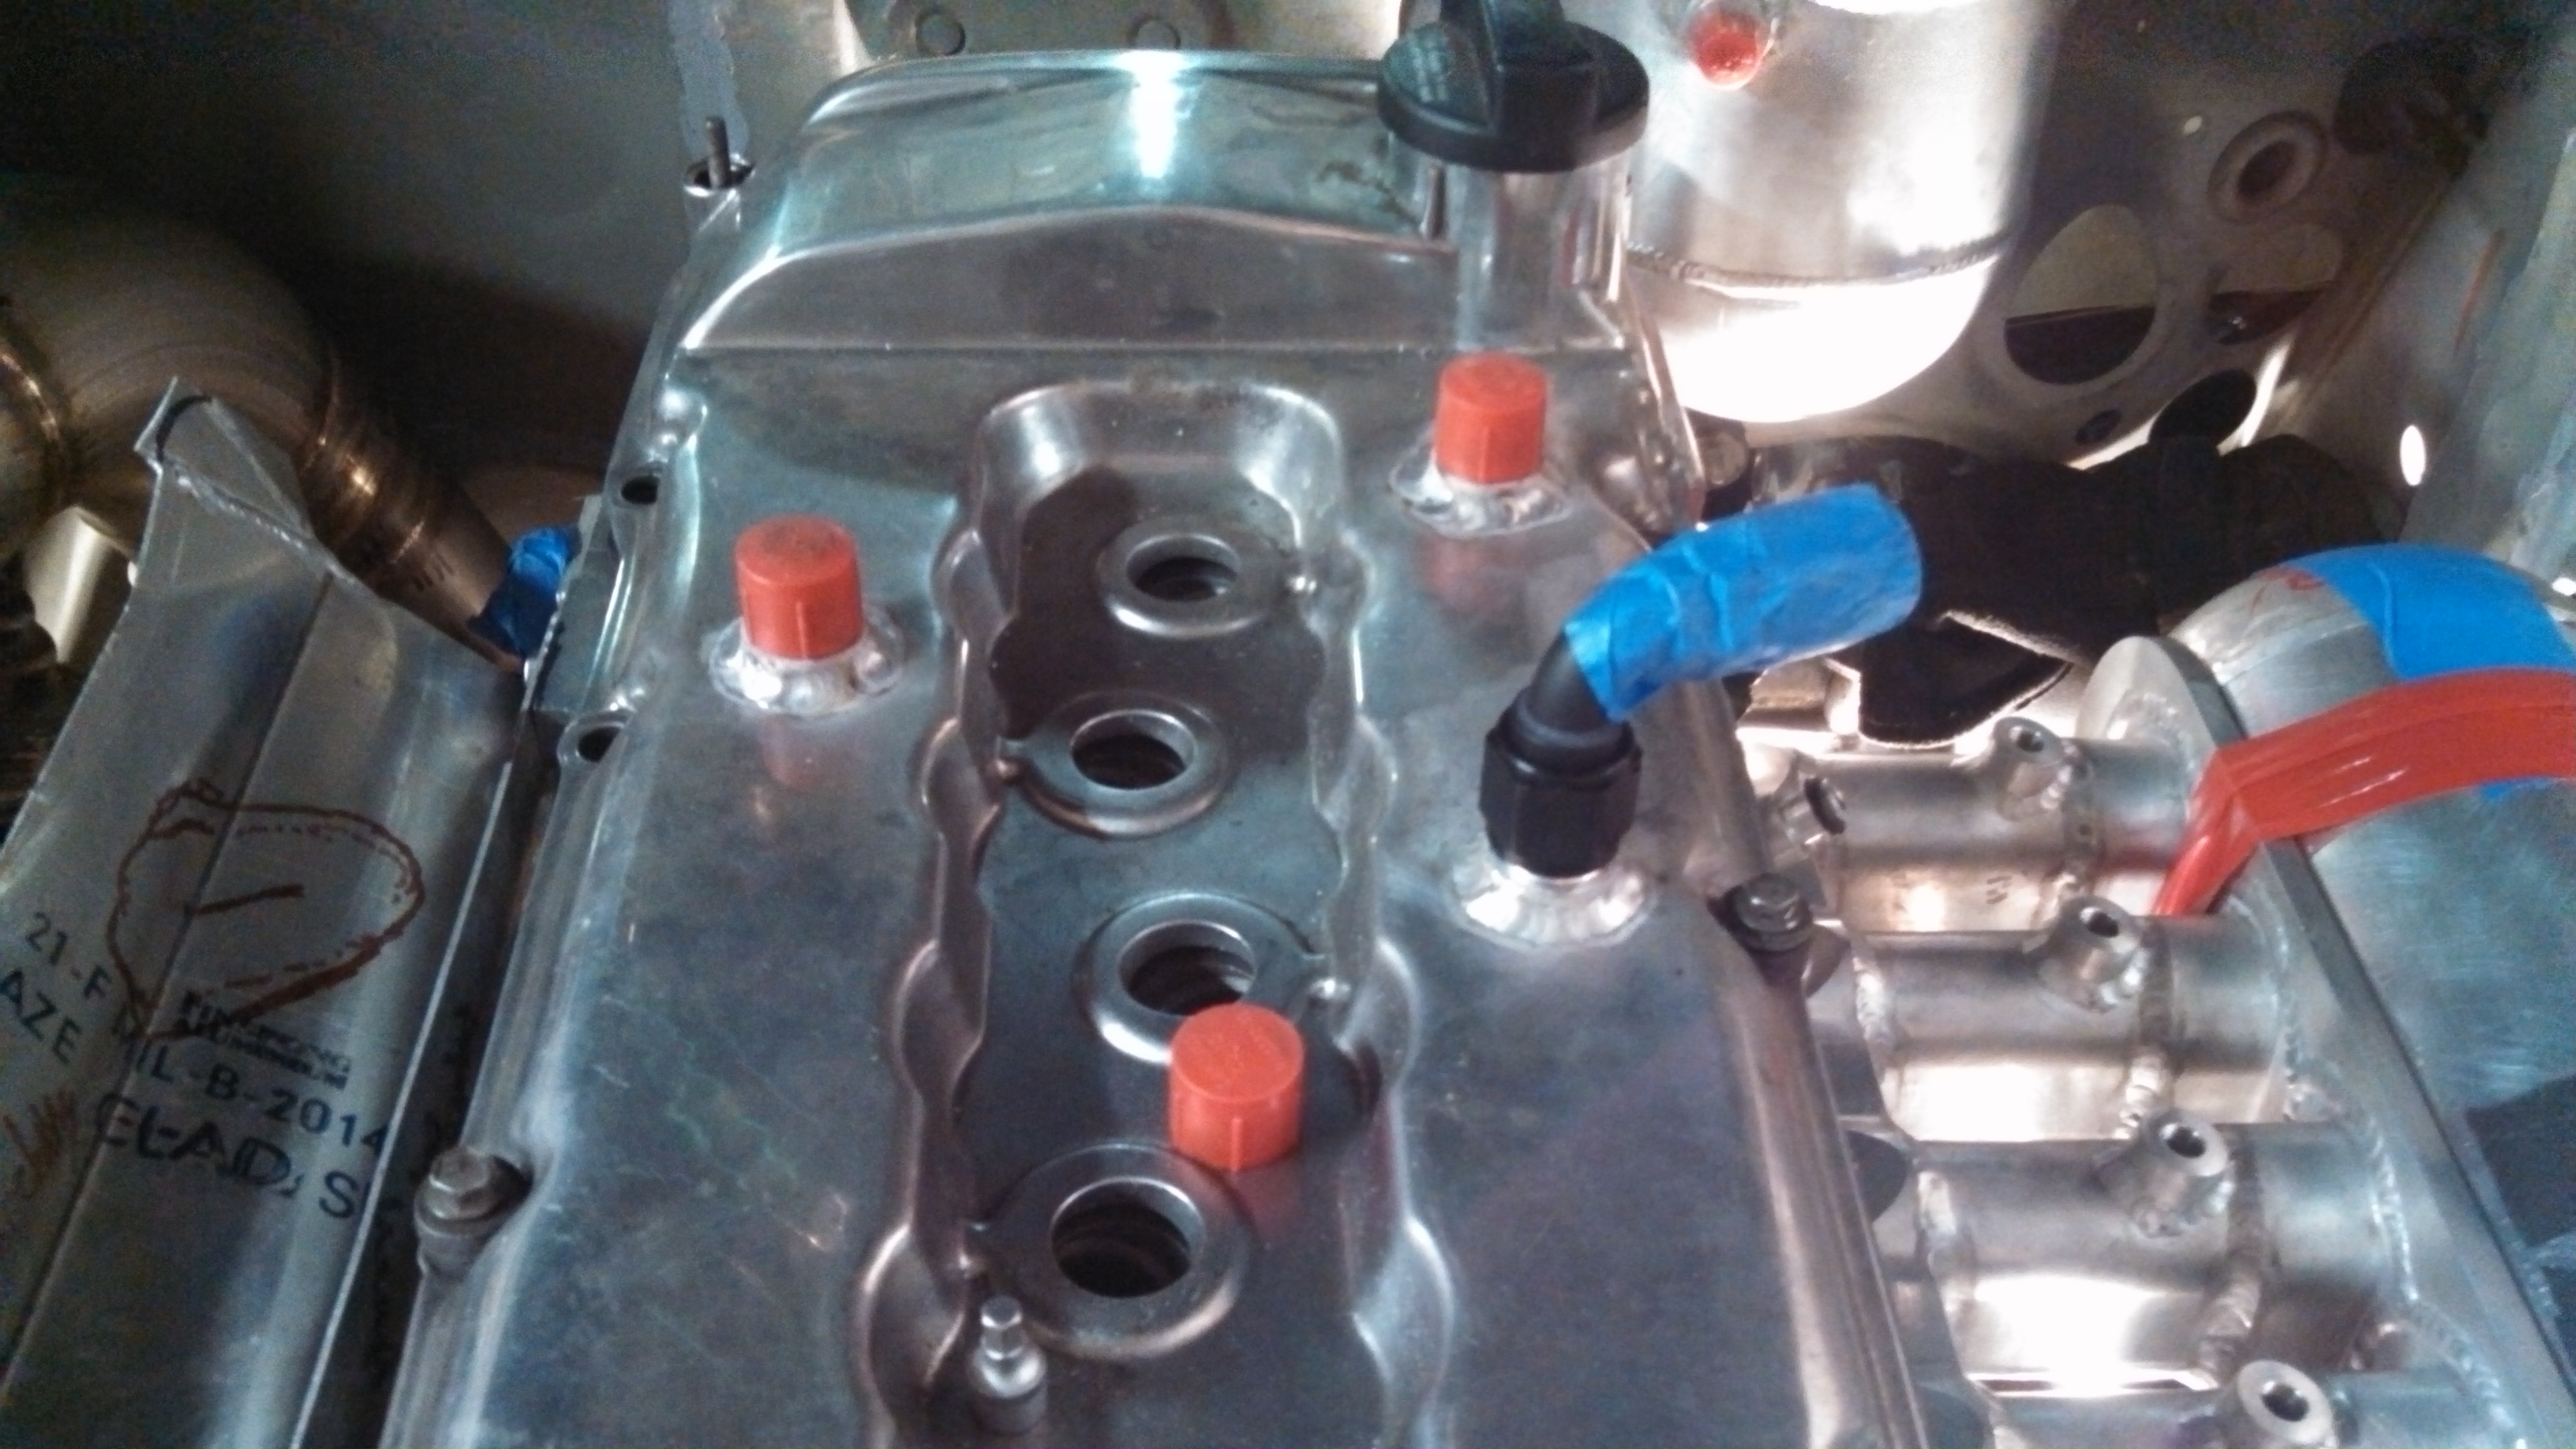
- valve cover breather bungs.jpg (1.35 MiB) Viewed 61462 times
I got a TON of AN plumbing supplies for the oil system, trans and dif coolers and pumps, catch can lines, vacuum and boost reference lines, blah blah.
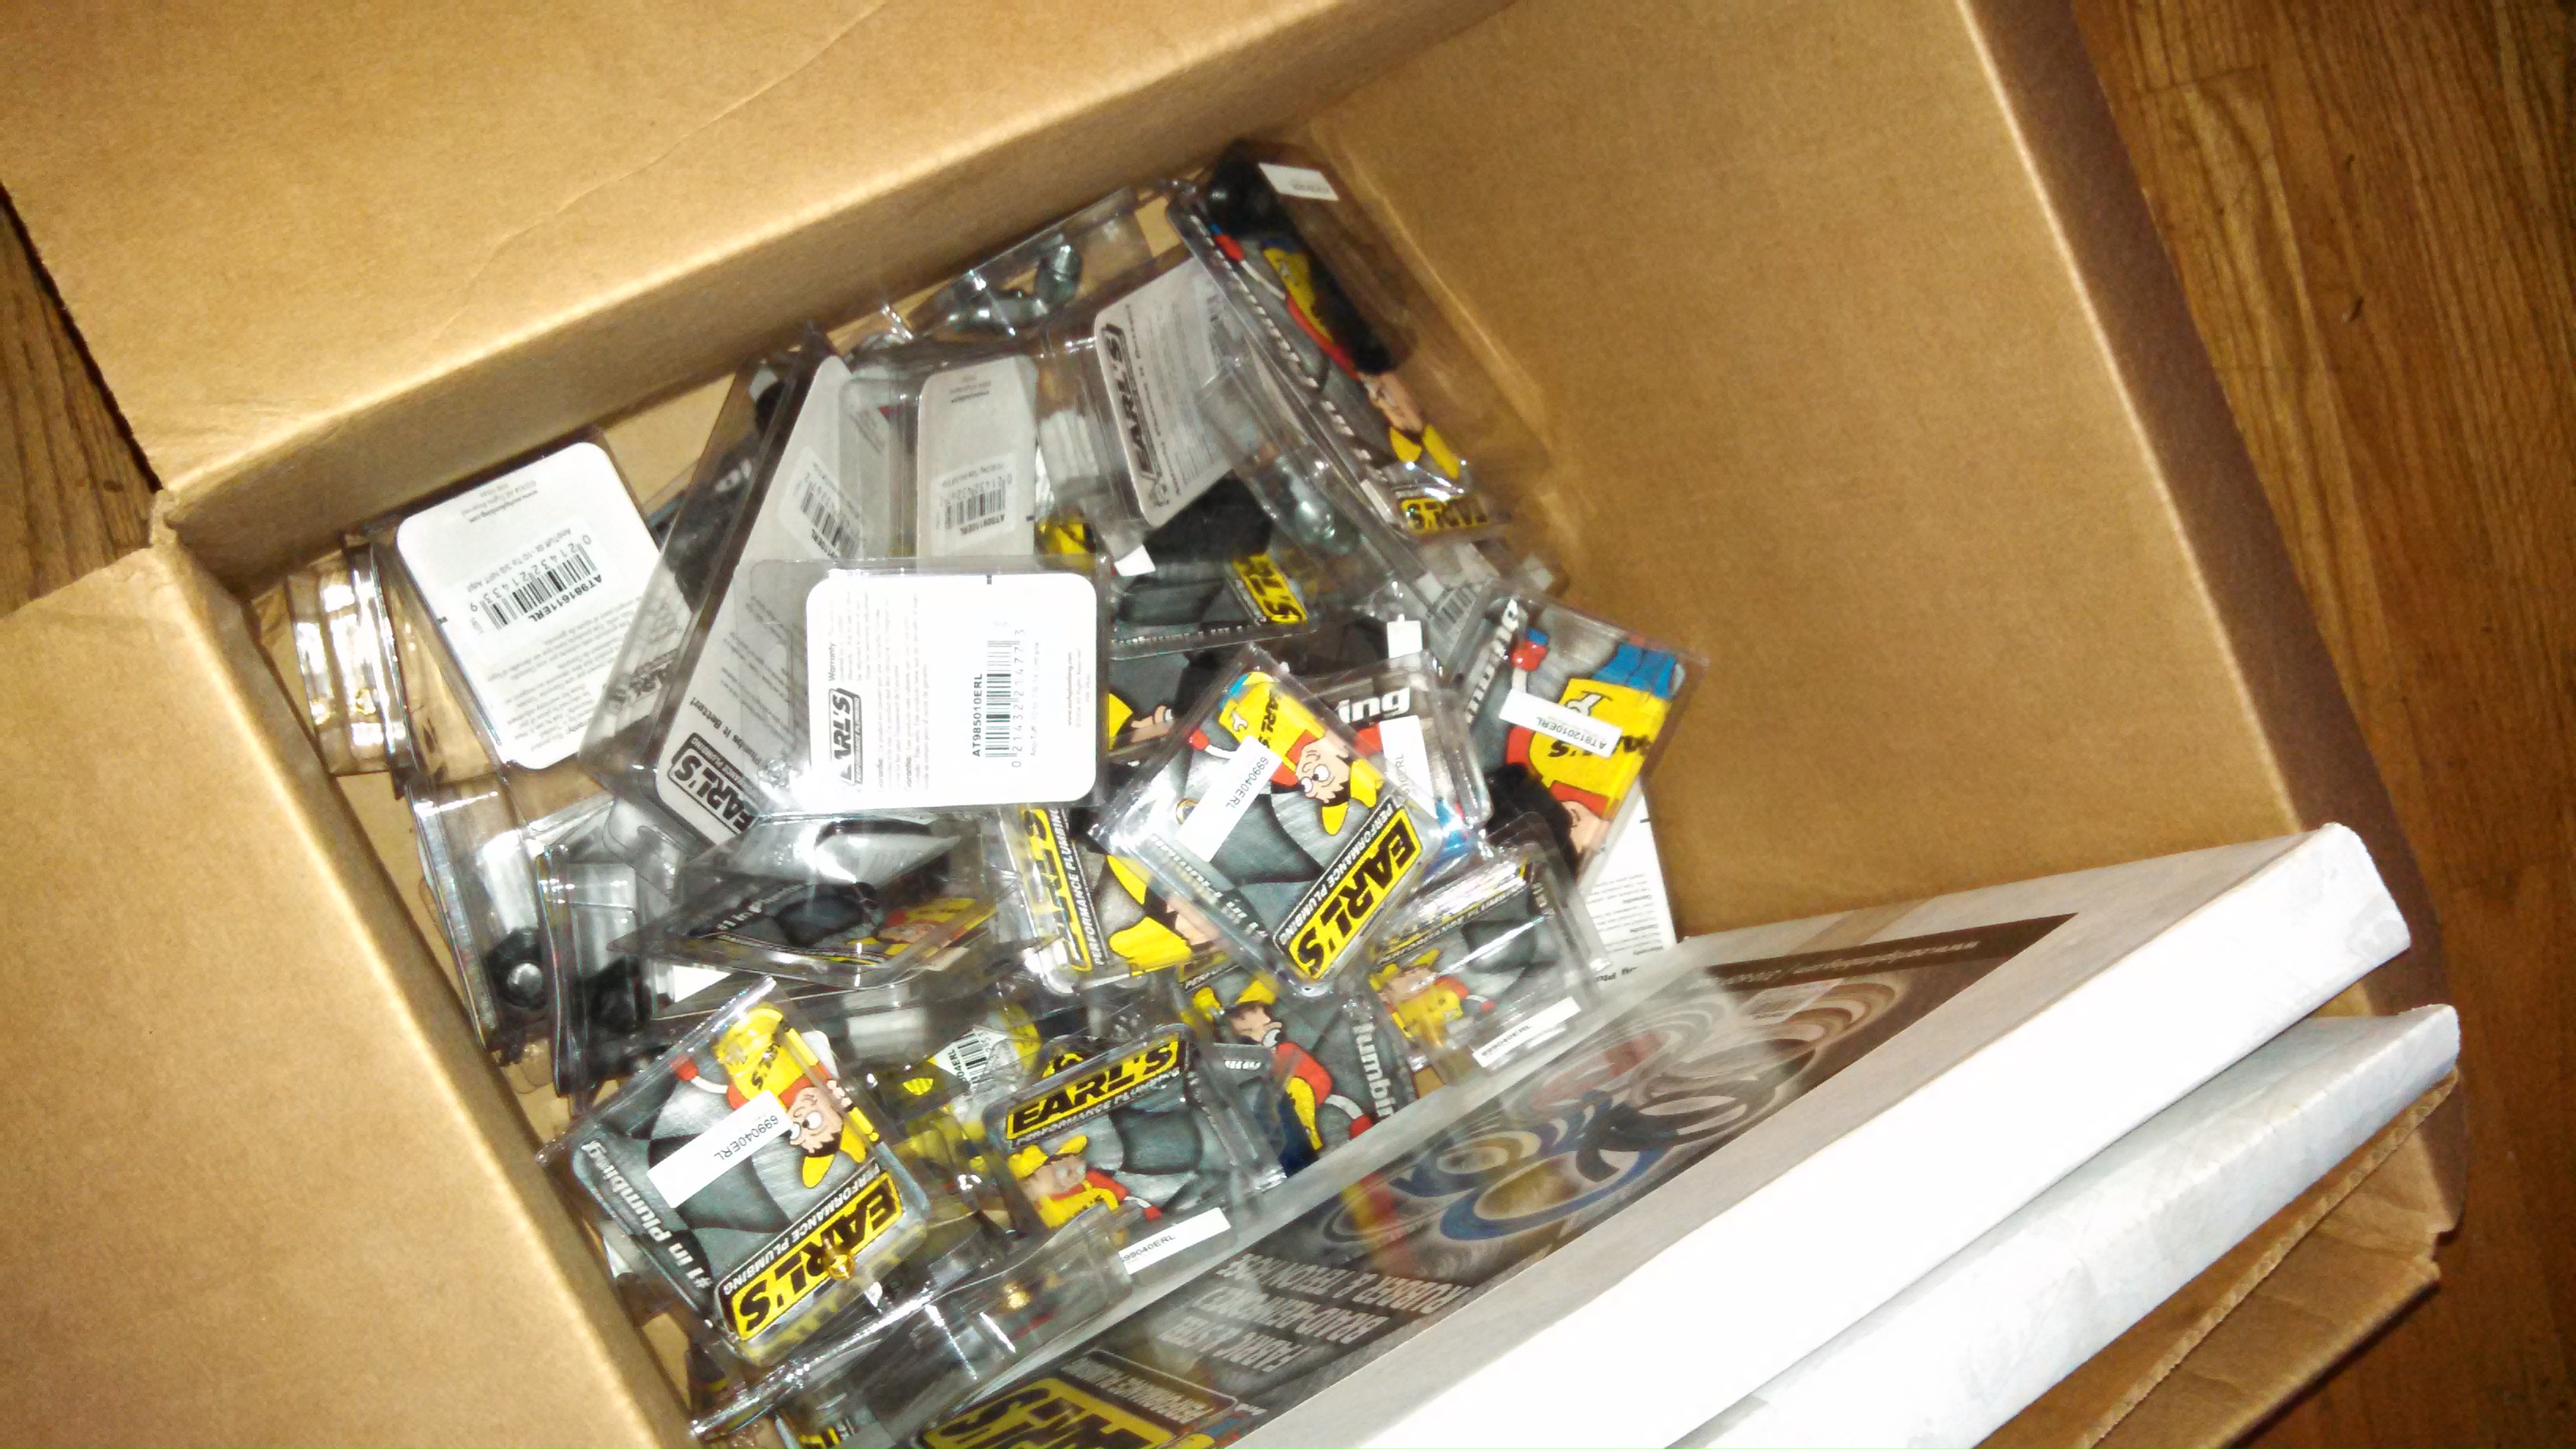
- got soem plumbing to do now.jpg (1.59 MiB) Viewed 61462 times
Last fall Jim and myself stopped by a scrap yard a few towns over and I found a few of these!!! They are from electric pole turnbuckles. They shoduld make for some good, strong, removable tow hooks. The longer one goes in the front, so it can stick out through the bumper and the rear is a bit shorter and even thicker ahahah.
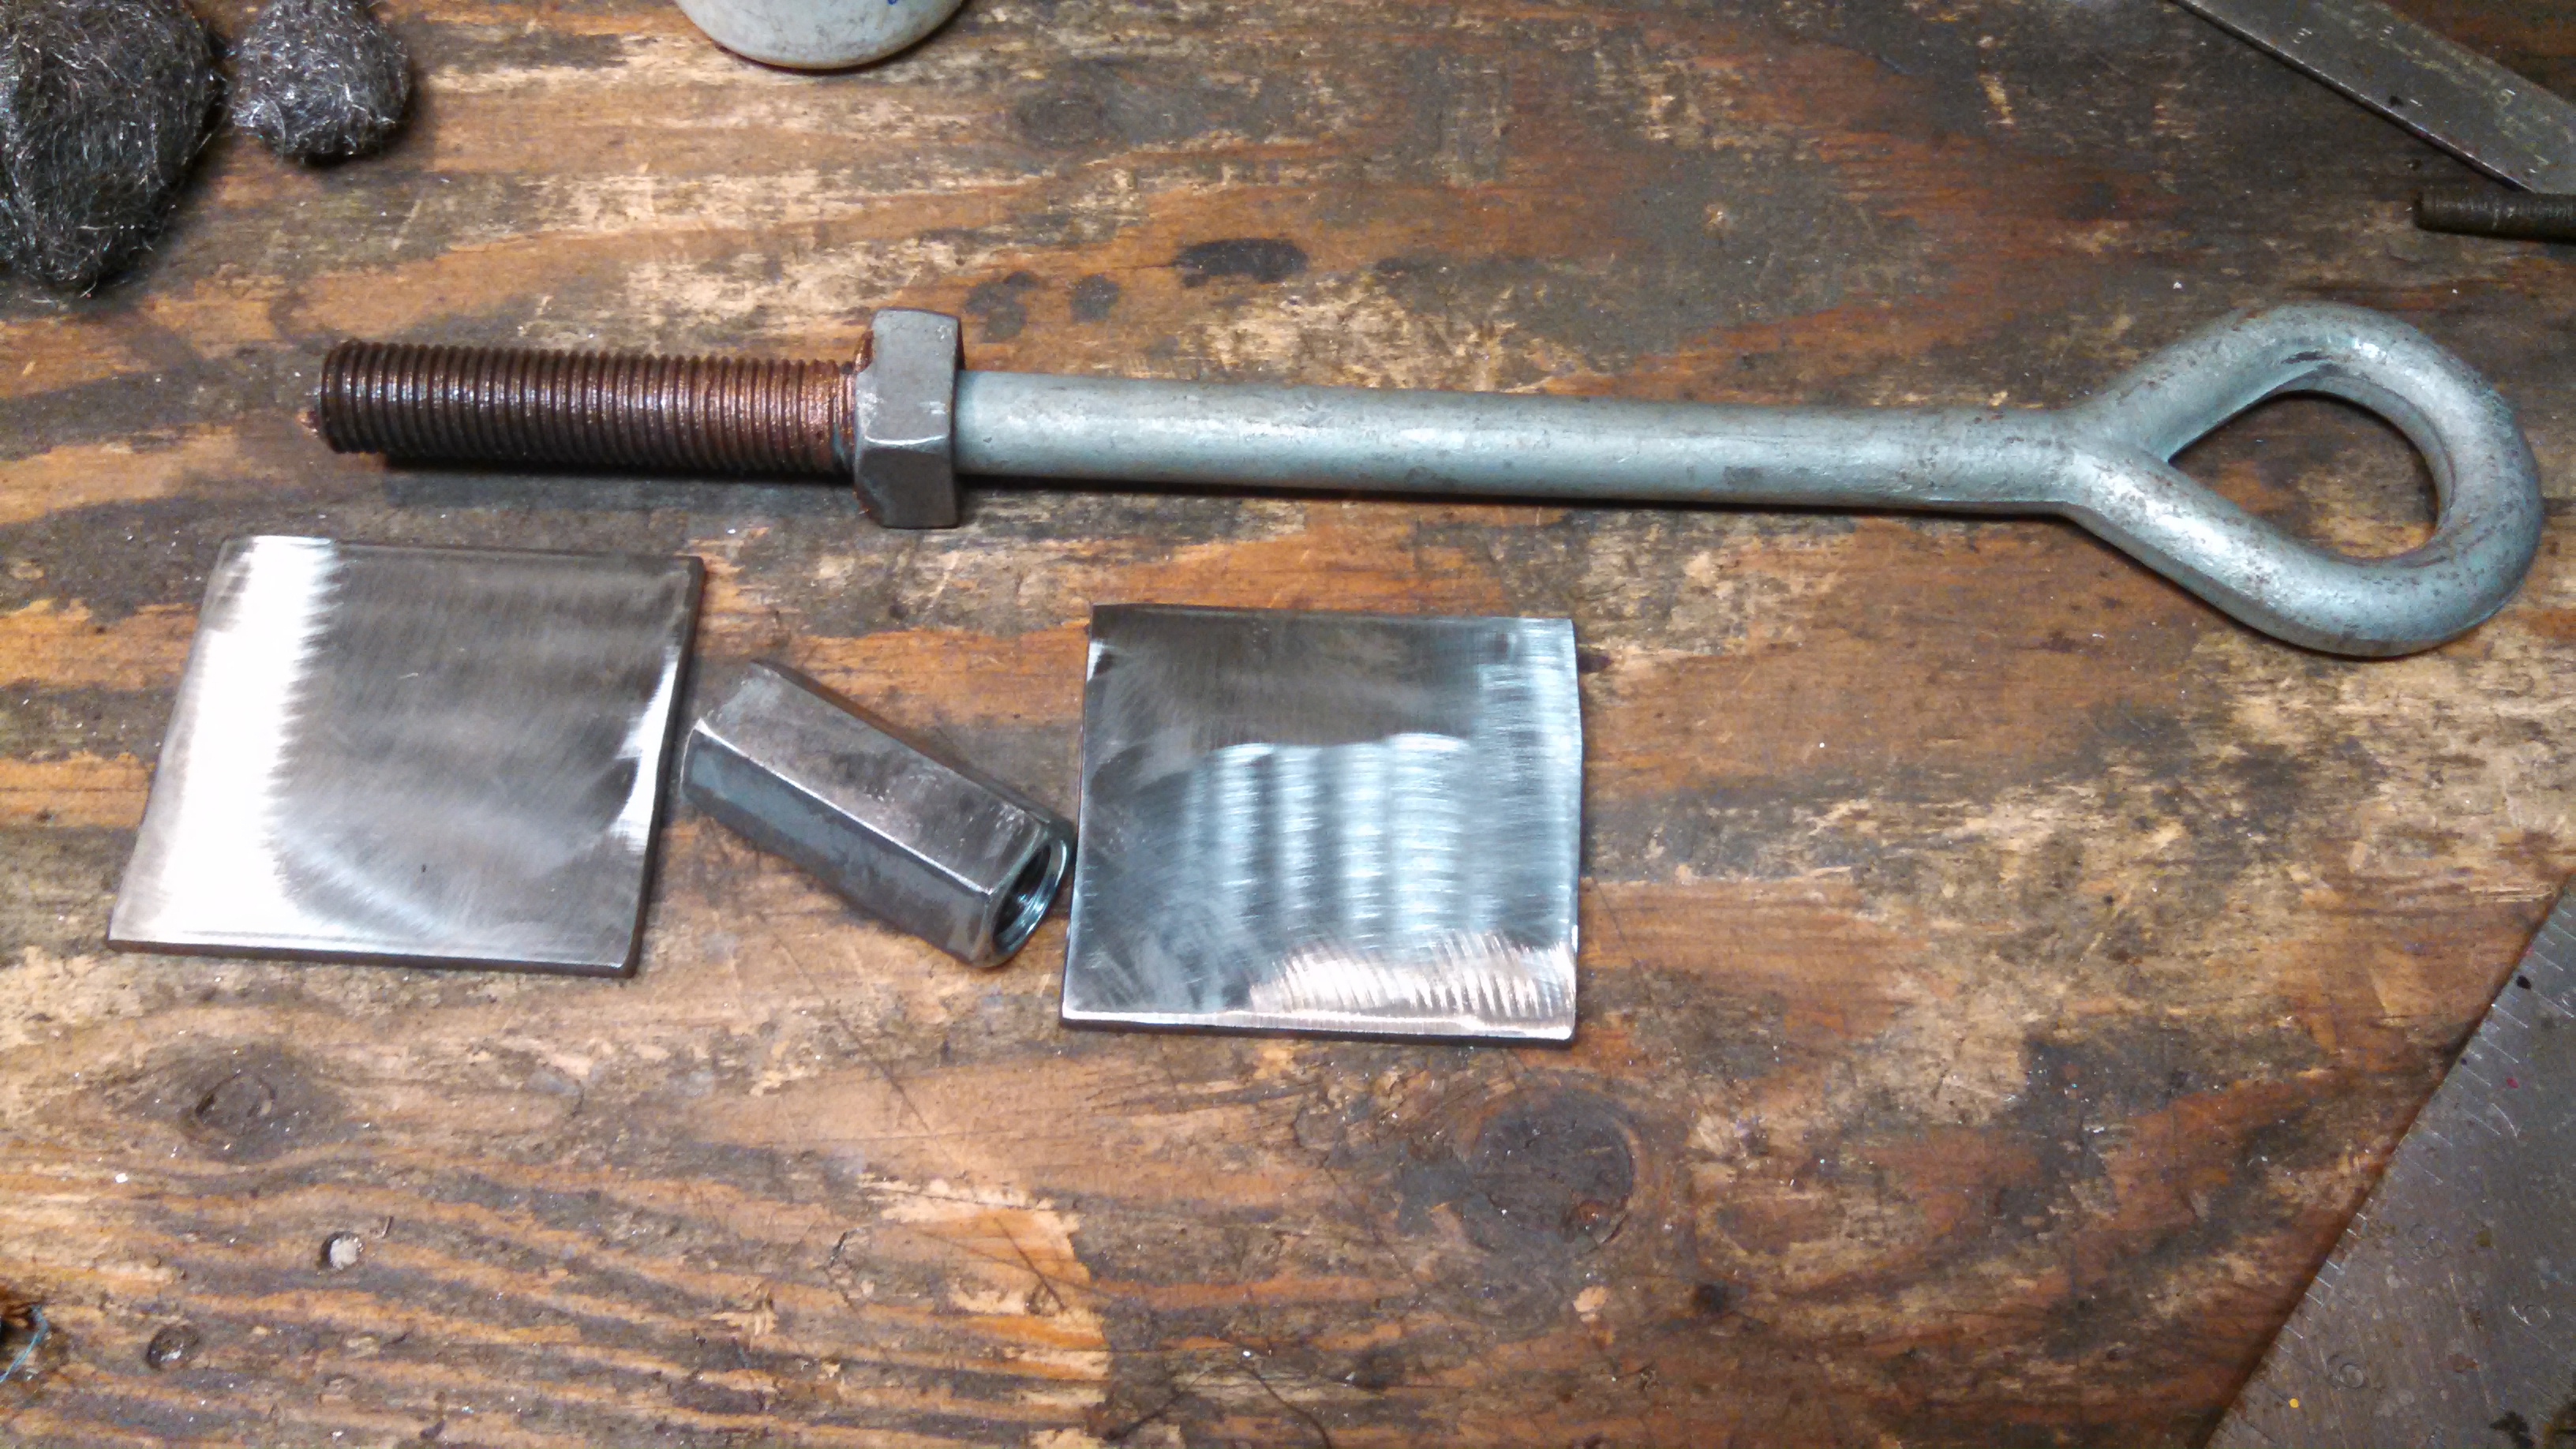
- extra rugged tow hook.jpg (1.9 MiB) Viewed 61462 times
I welded a plate on either side of the reciever threaded part. The plates are slide up through a hole in the bottom of the frame rail, up into slots cut for the upper edges of the plates and seam welded on either side.
- front tow hook reciever plated into framerail.jpg (1.13 MiB) Viewed 61462 times
They are a tad recessed and only need a little bit of flapper disc to make them smooth. I then welded a 2x3” plate around the entire area. It had qty. 8, 3/8” holes in it along the weld seams of the reciever’s plates. And again plated and seamed below the framerail. I just need to drill a hold in the front aluminum cross member for the tow hook. I knew I was going to do this when I built the front cross member and there is a ¼” wall thickness 1.75” tube going through the mounting plates for just this purpose.
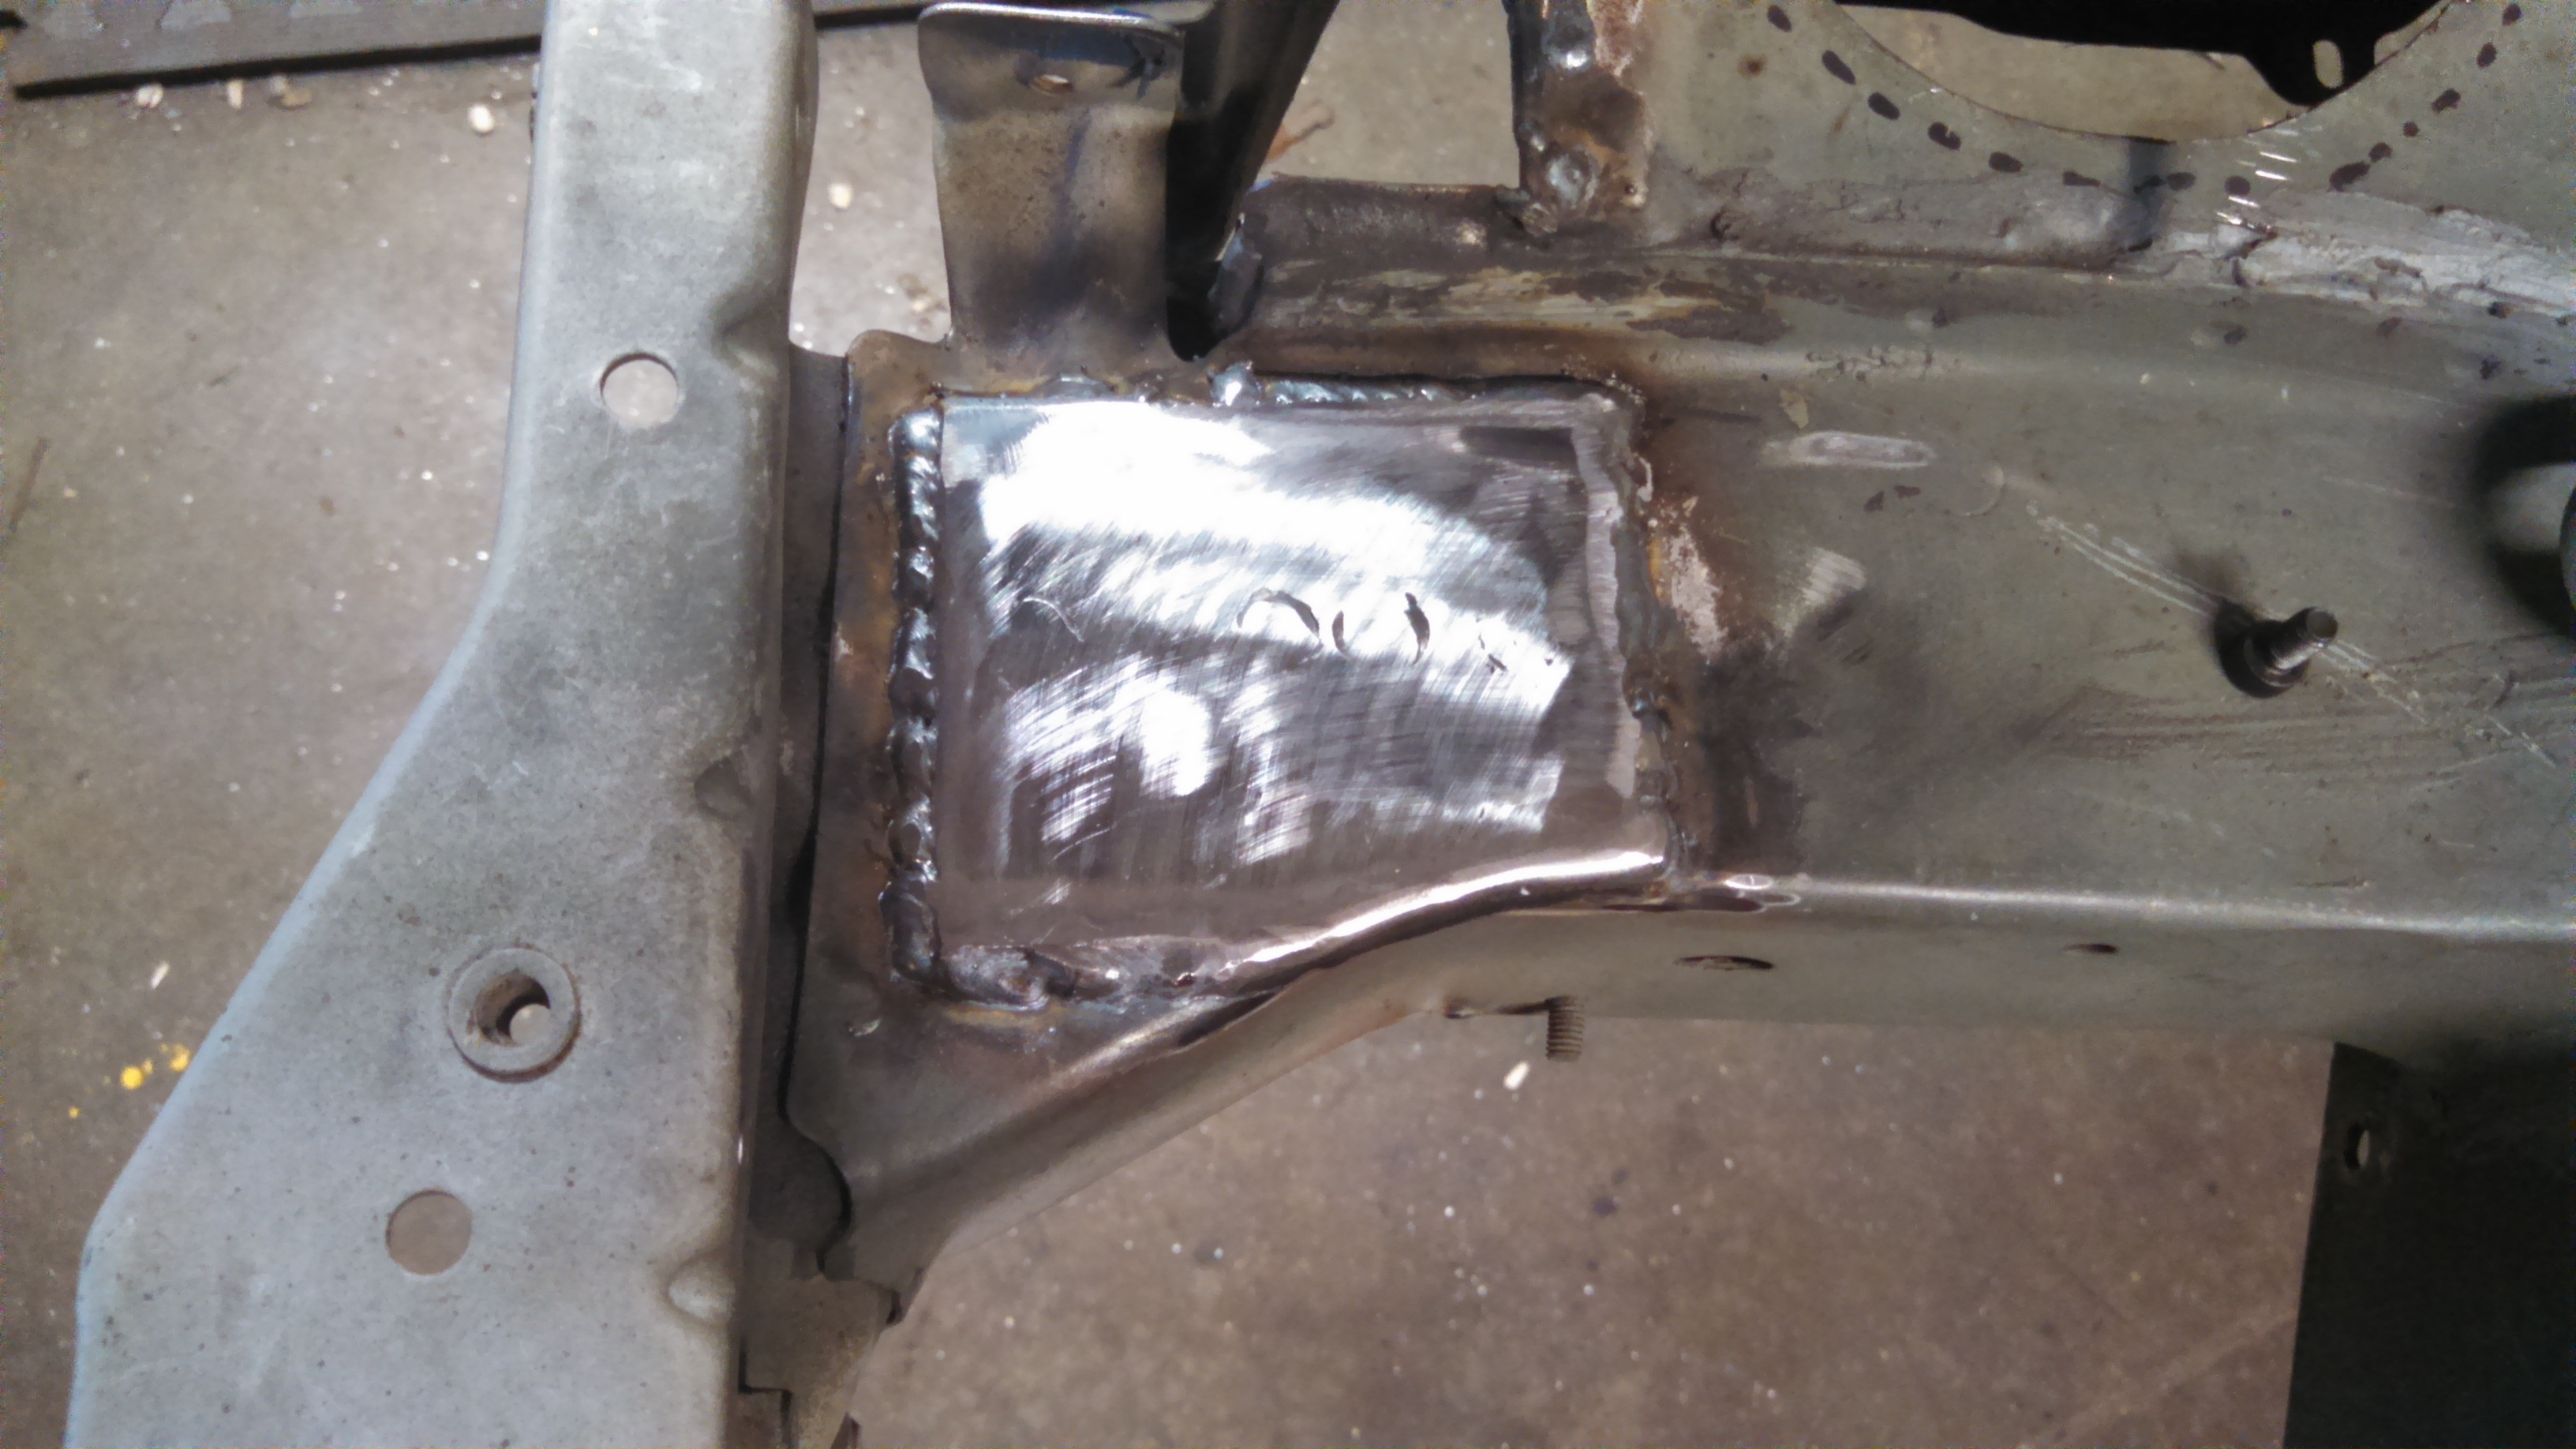
- tow hook welded upper plate.jpg (1.26 MiB) Viewed 61462 times
Re: 24vVR6T CQ Project: EATSGTR, chassis FAB
Posted: Tue Jul 08, 2014 11:01 pm
by my2000apb
UPDATE!!!
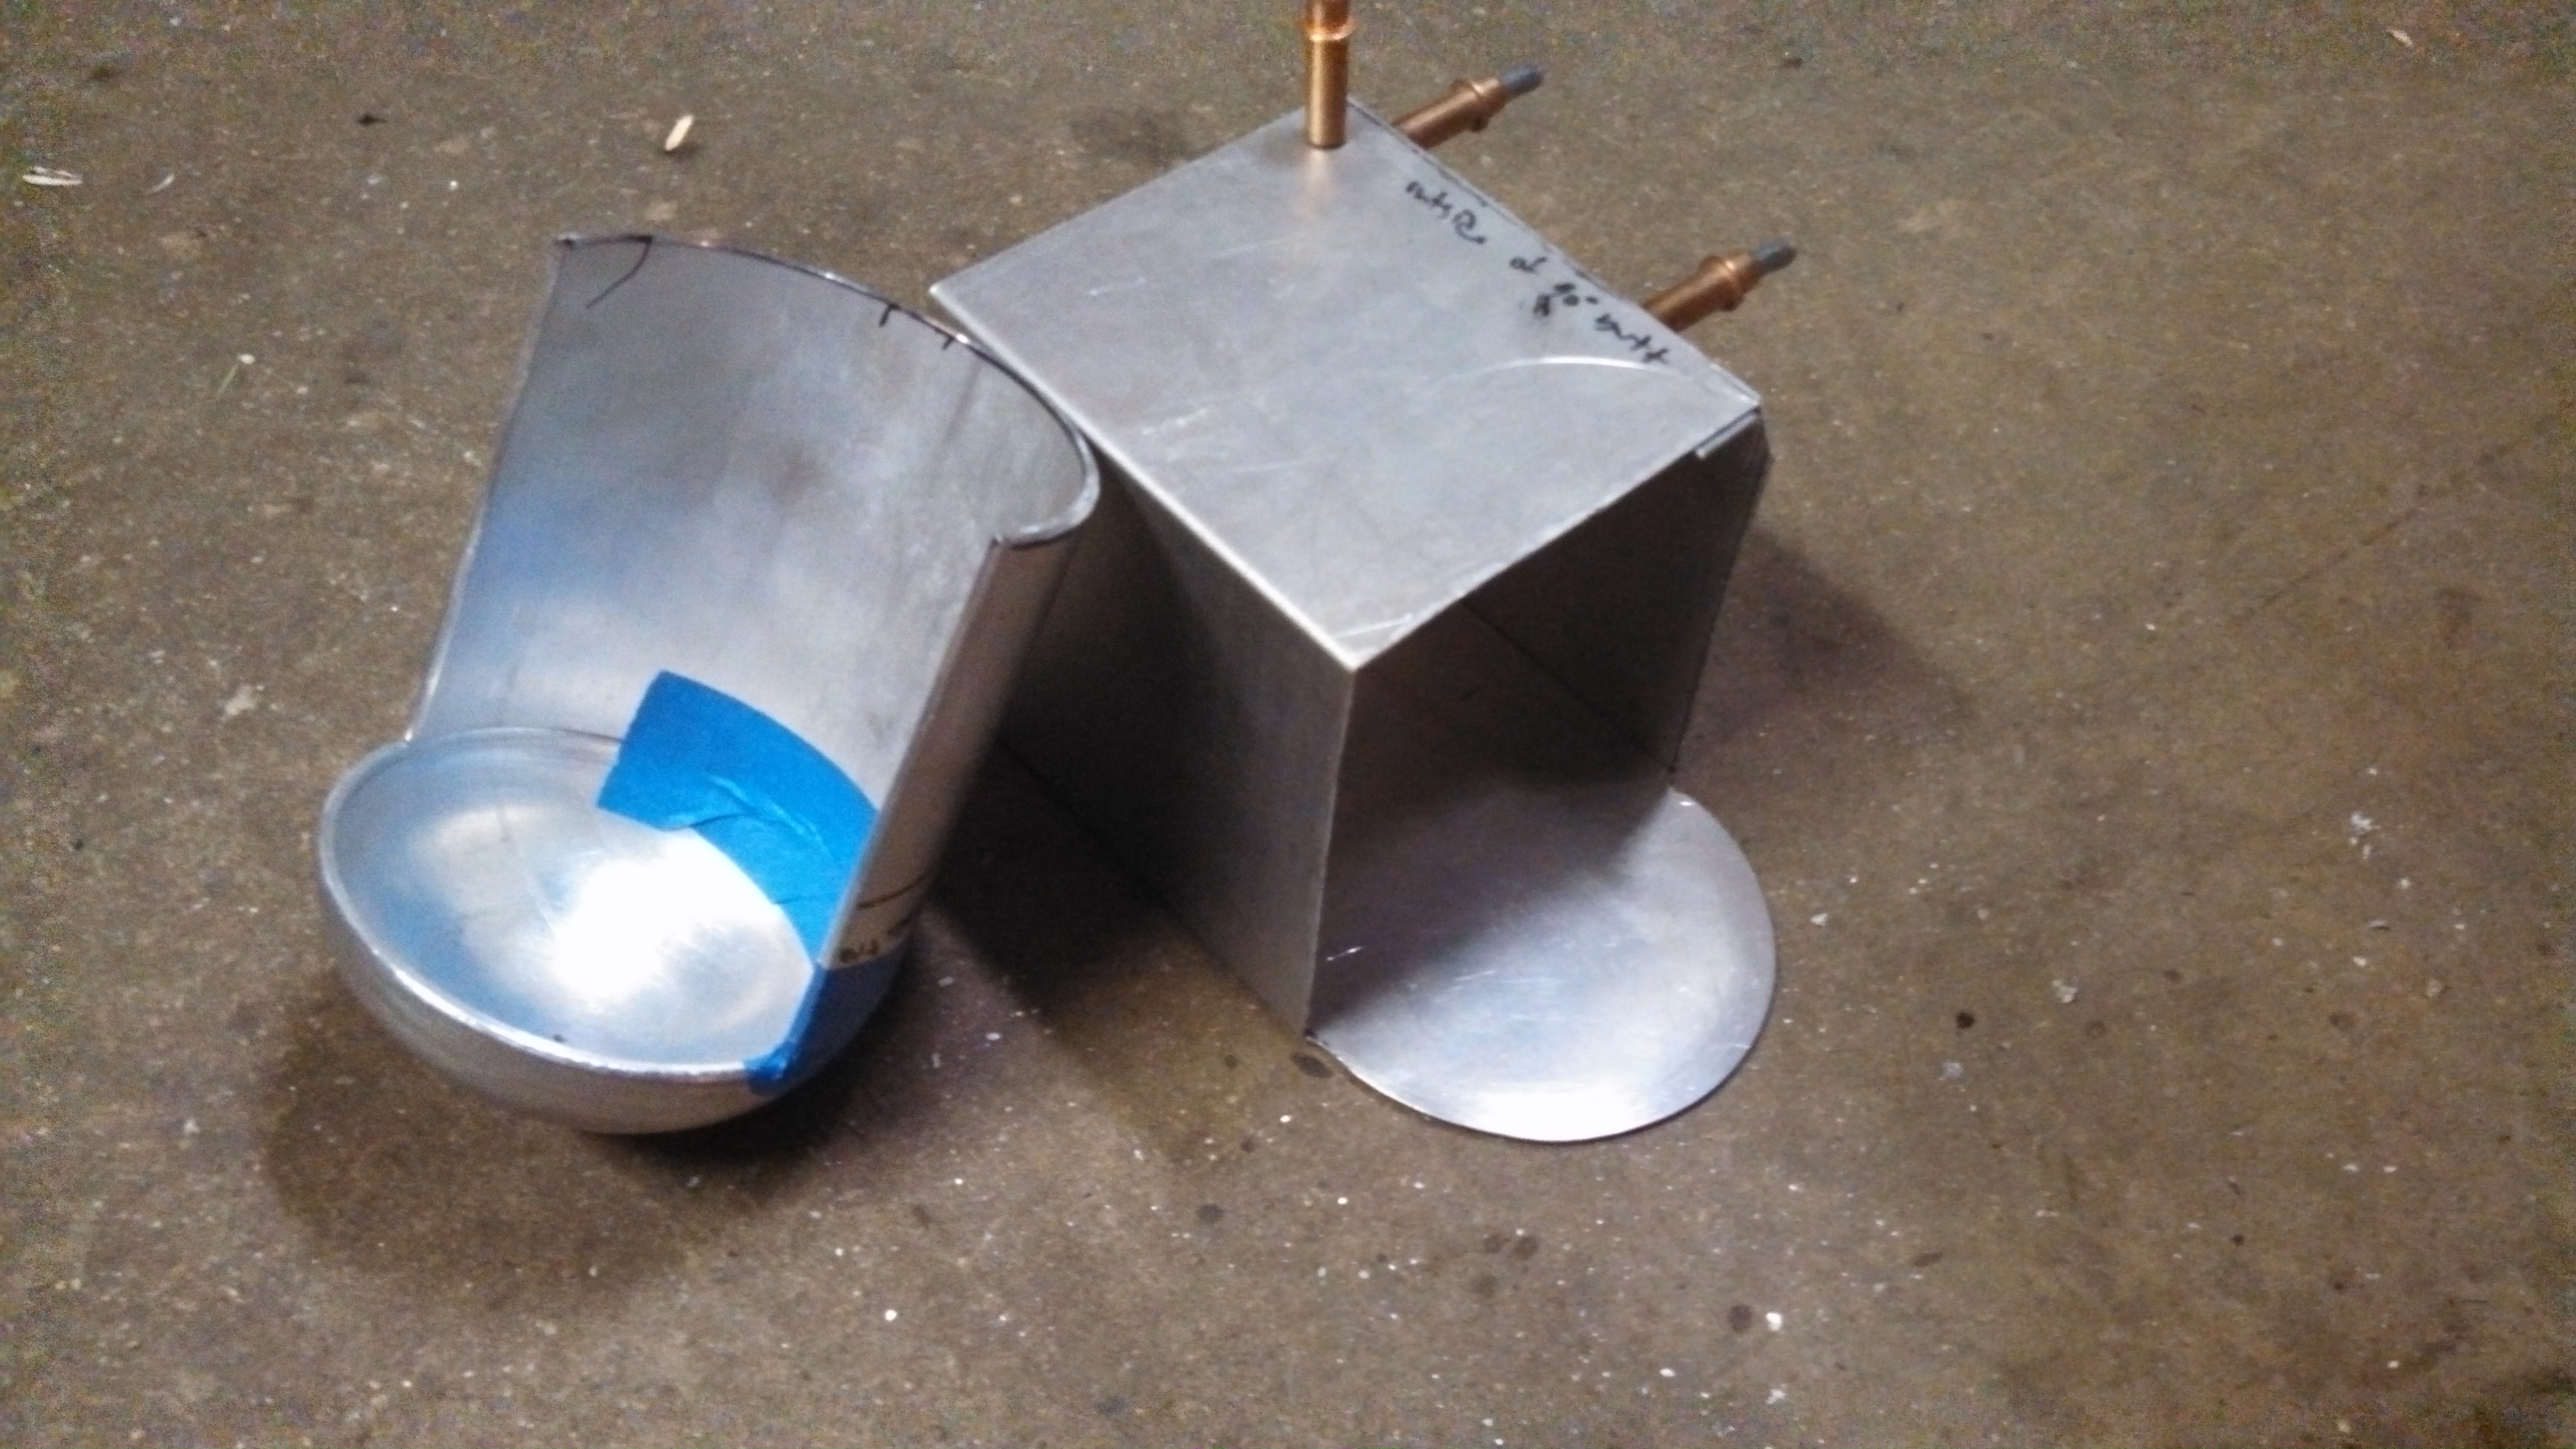
The catch can will be mounted under the strut tower bar just like the coolant tank. I will make it out of some round stock and a cap, as well as a box for the upper.
Here it is as a template
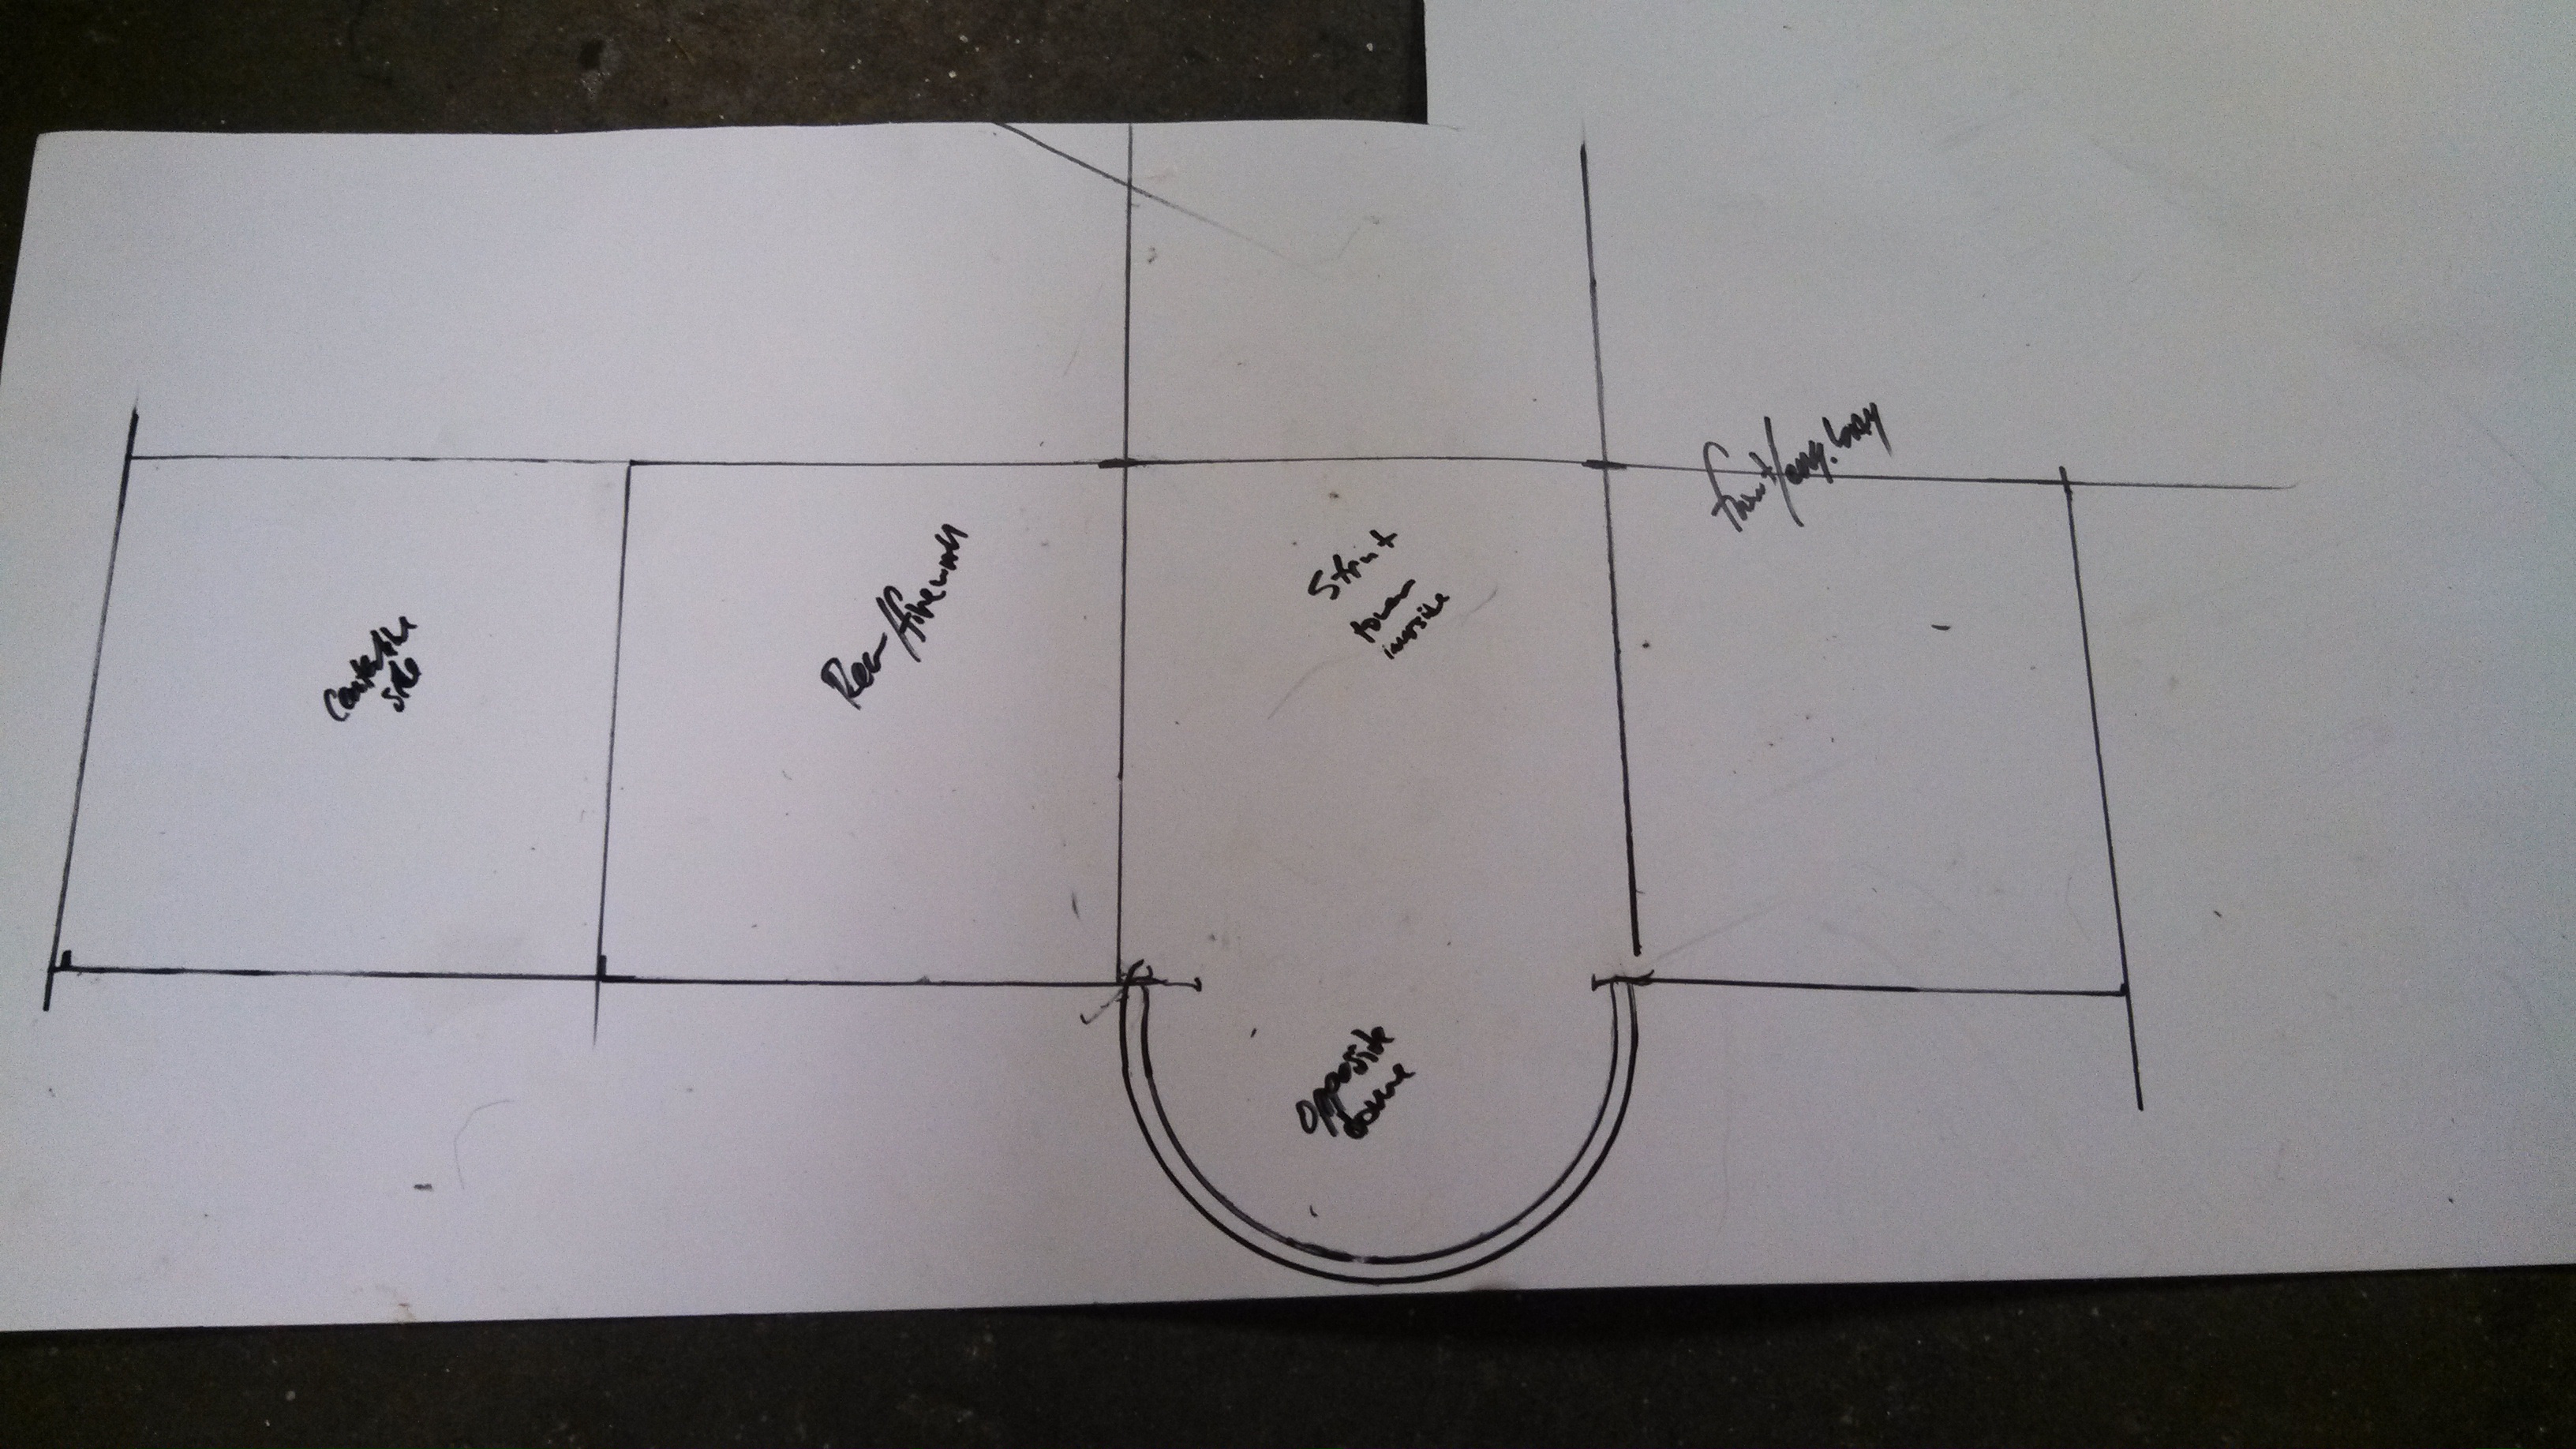
- catch can lower template.jpg (1.71 MiB) Viewed 61460 times
I am using dual K&N 1” breather filters on the catch can outlet. I went a tad over the top and beadrolled the ends of tubing where the filters attach. If there is any real pressure buildup to the point of needing the beadroll, I’d be screwed. So its more of a fit and finish thing.
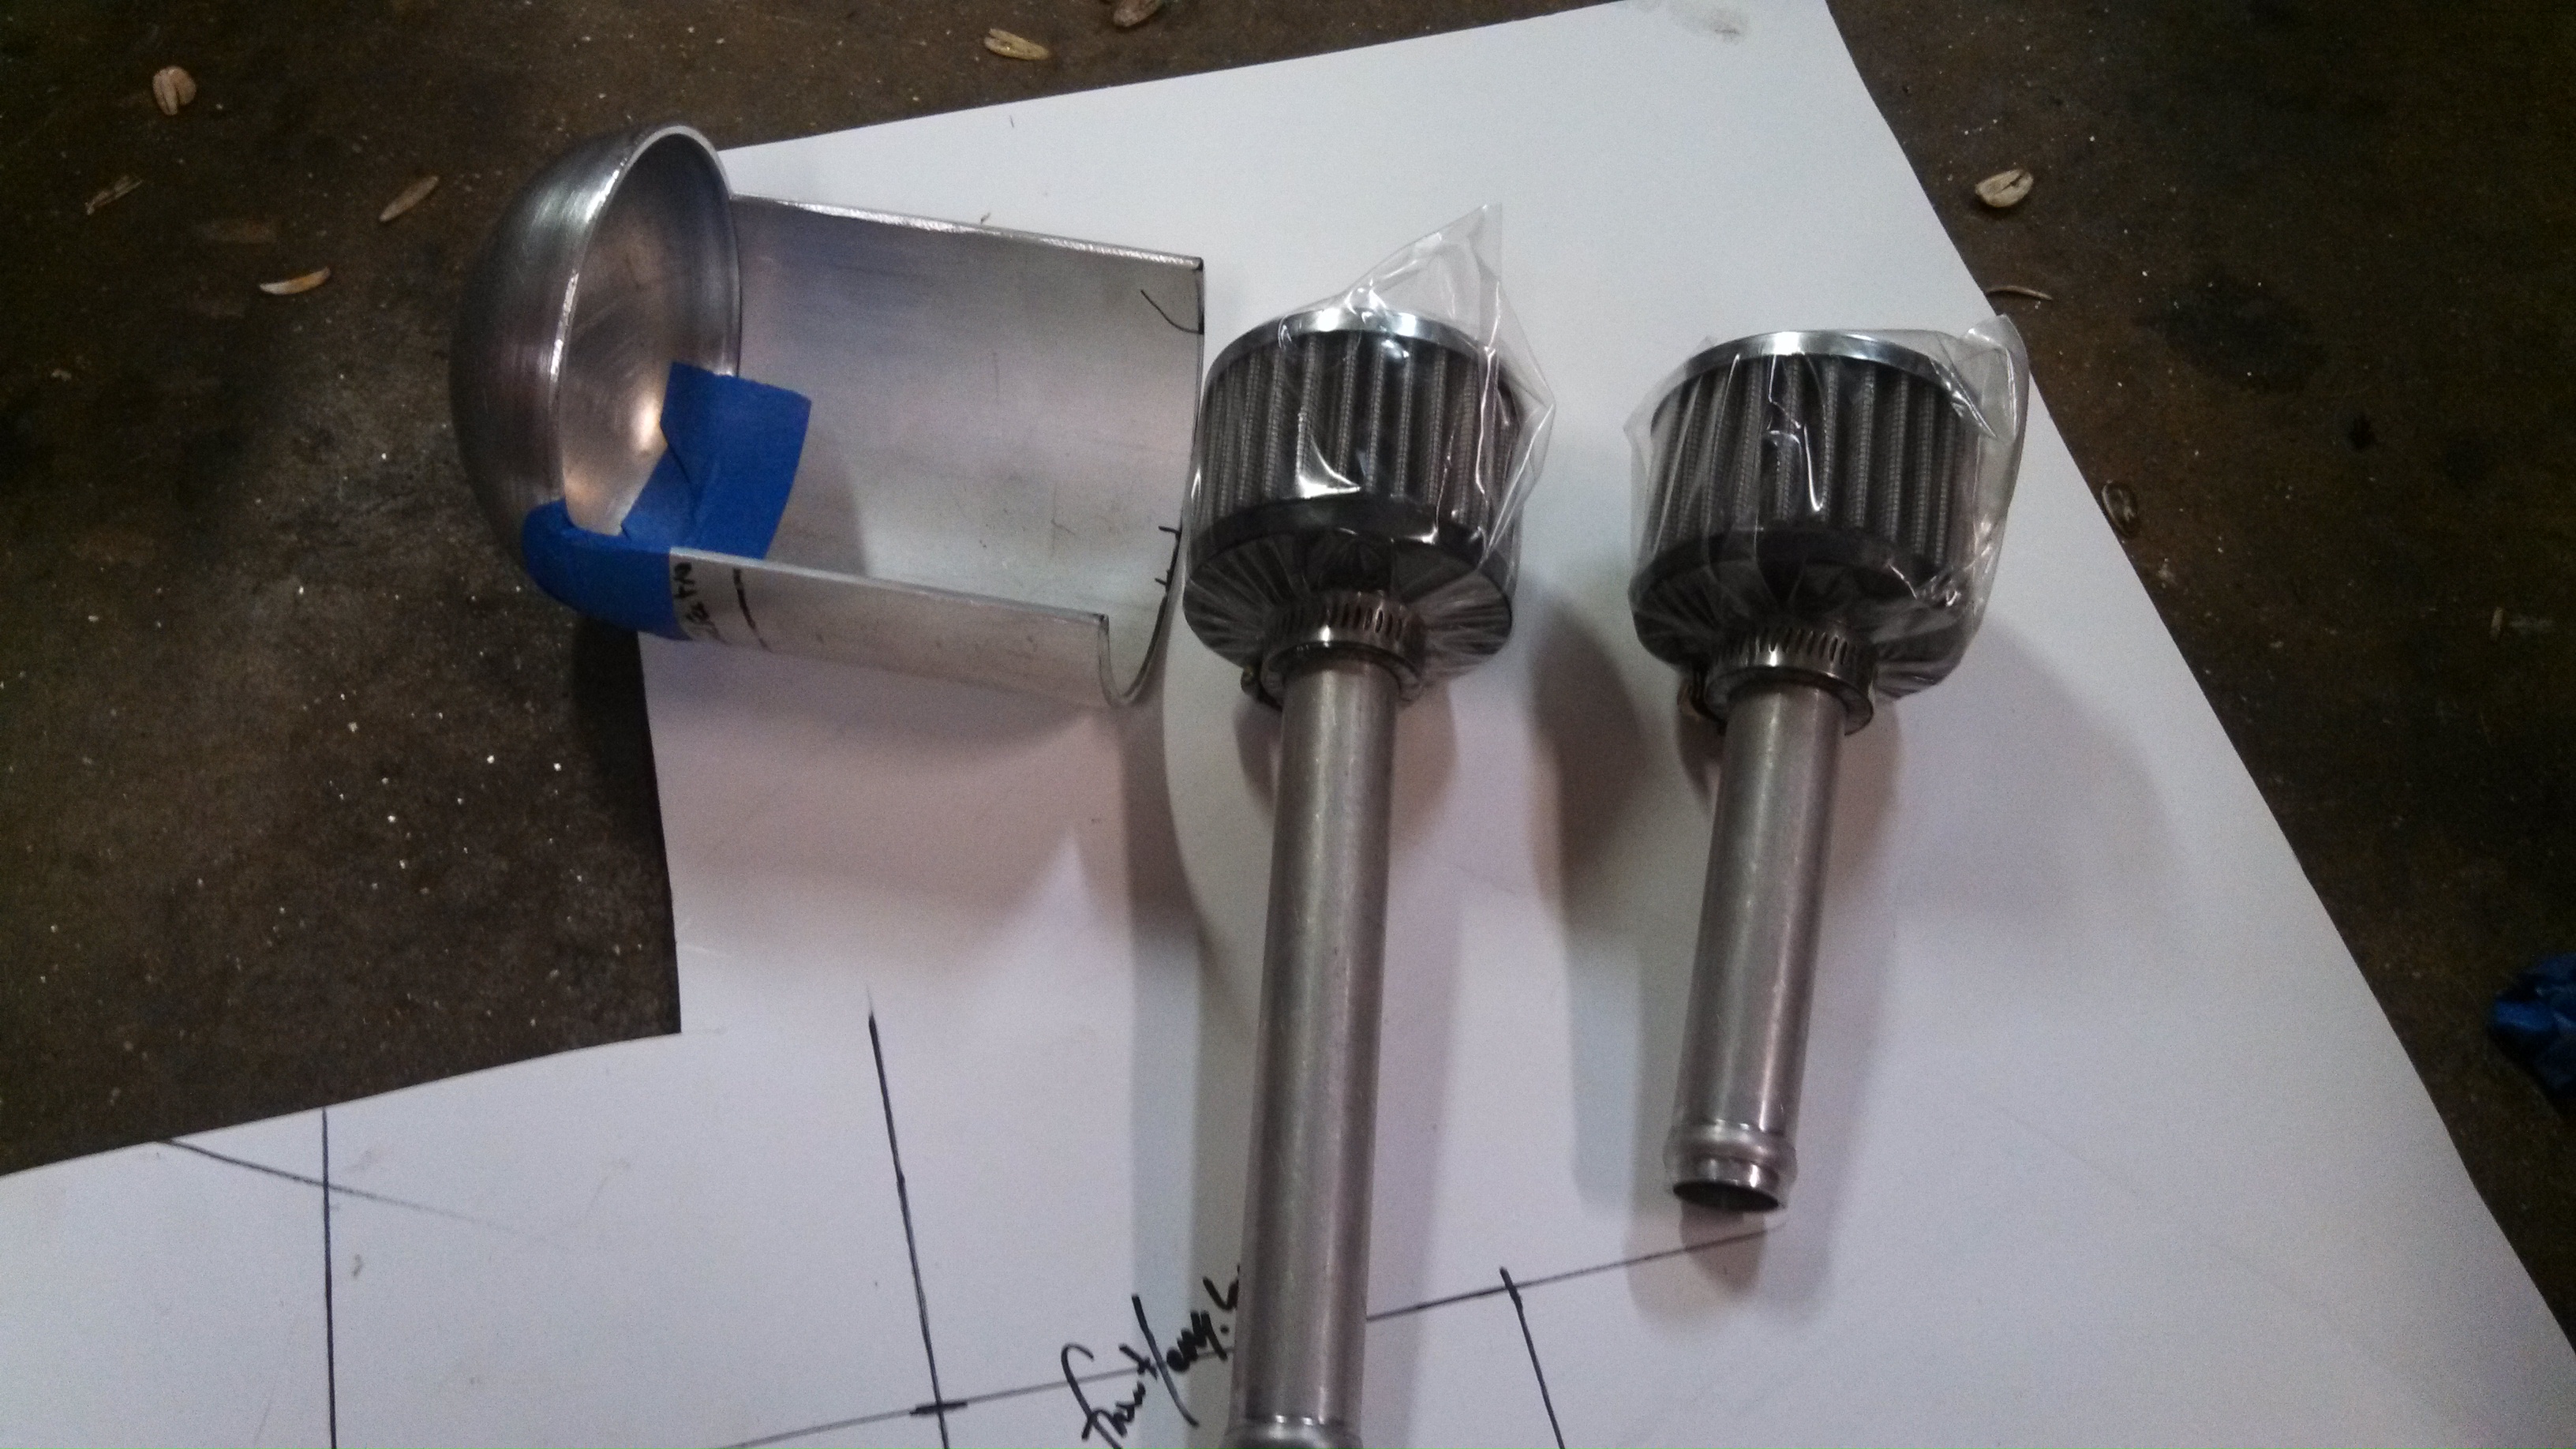
- catch can breather tubes.jpg (1.71 MiB) Viewed 61460 times
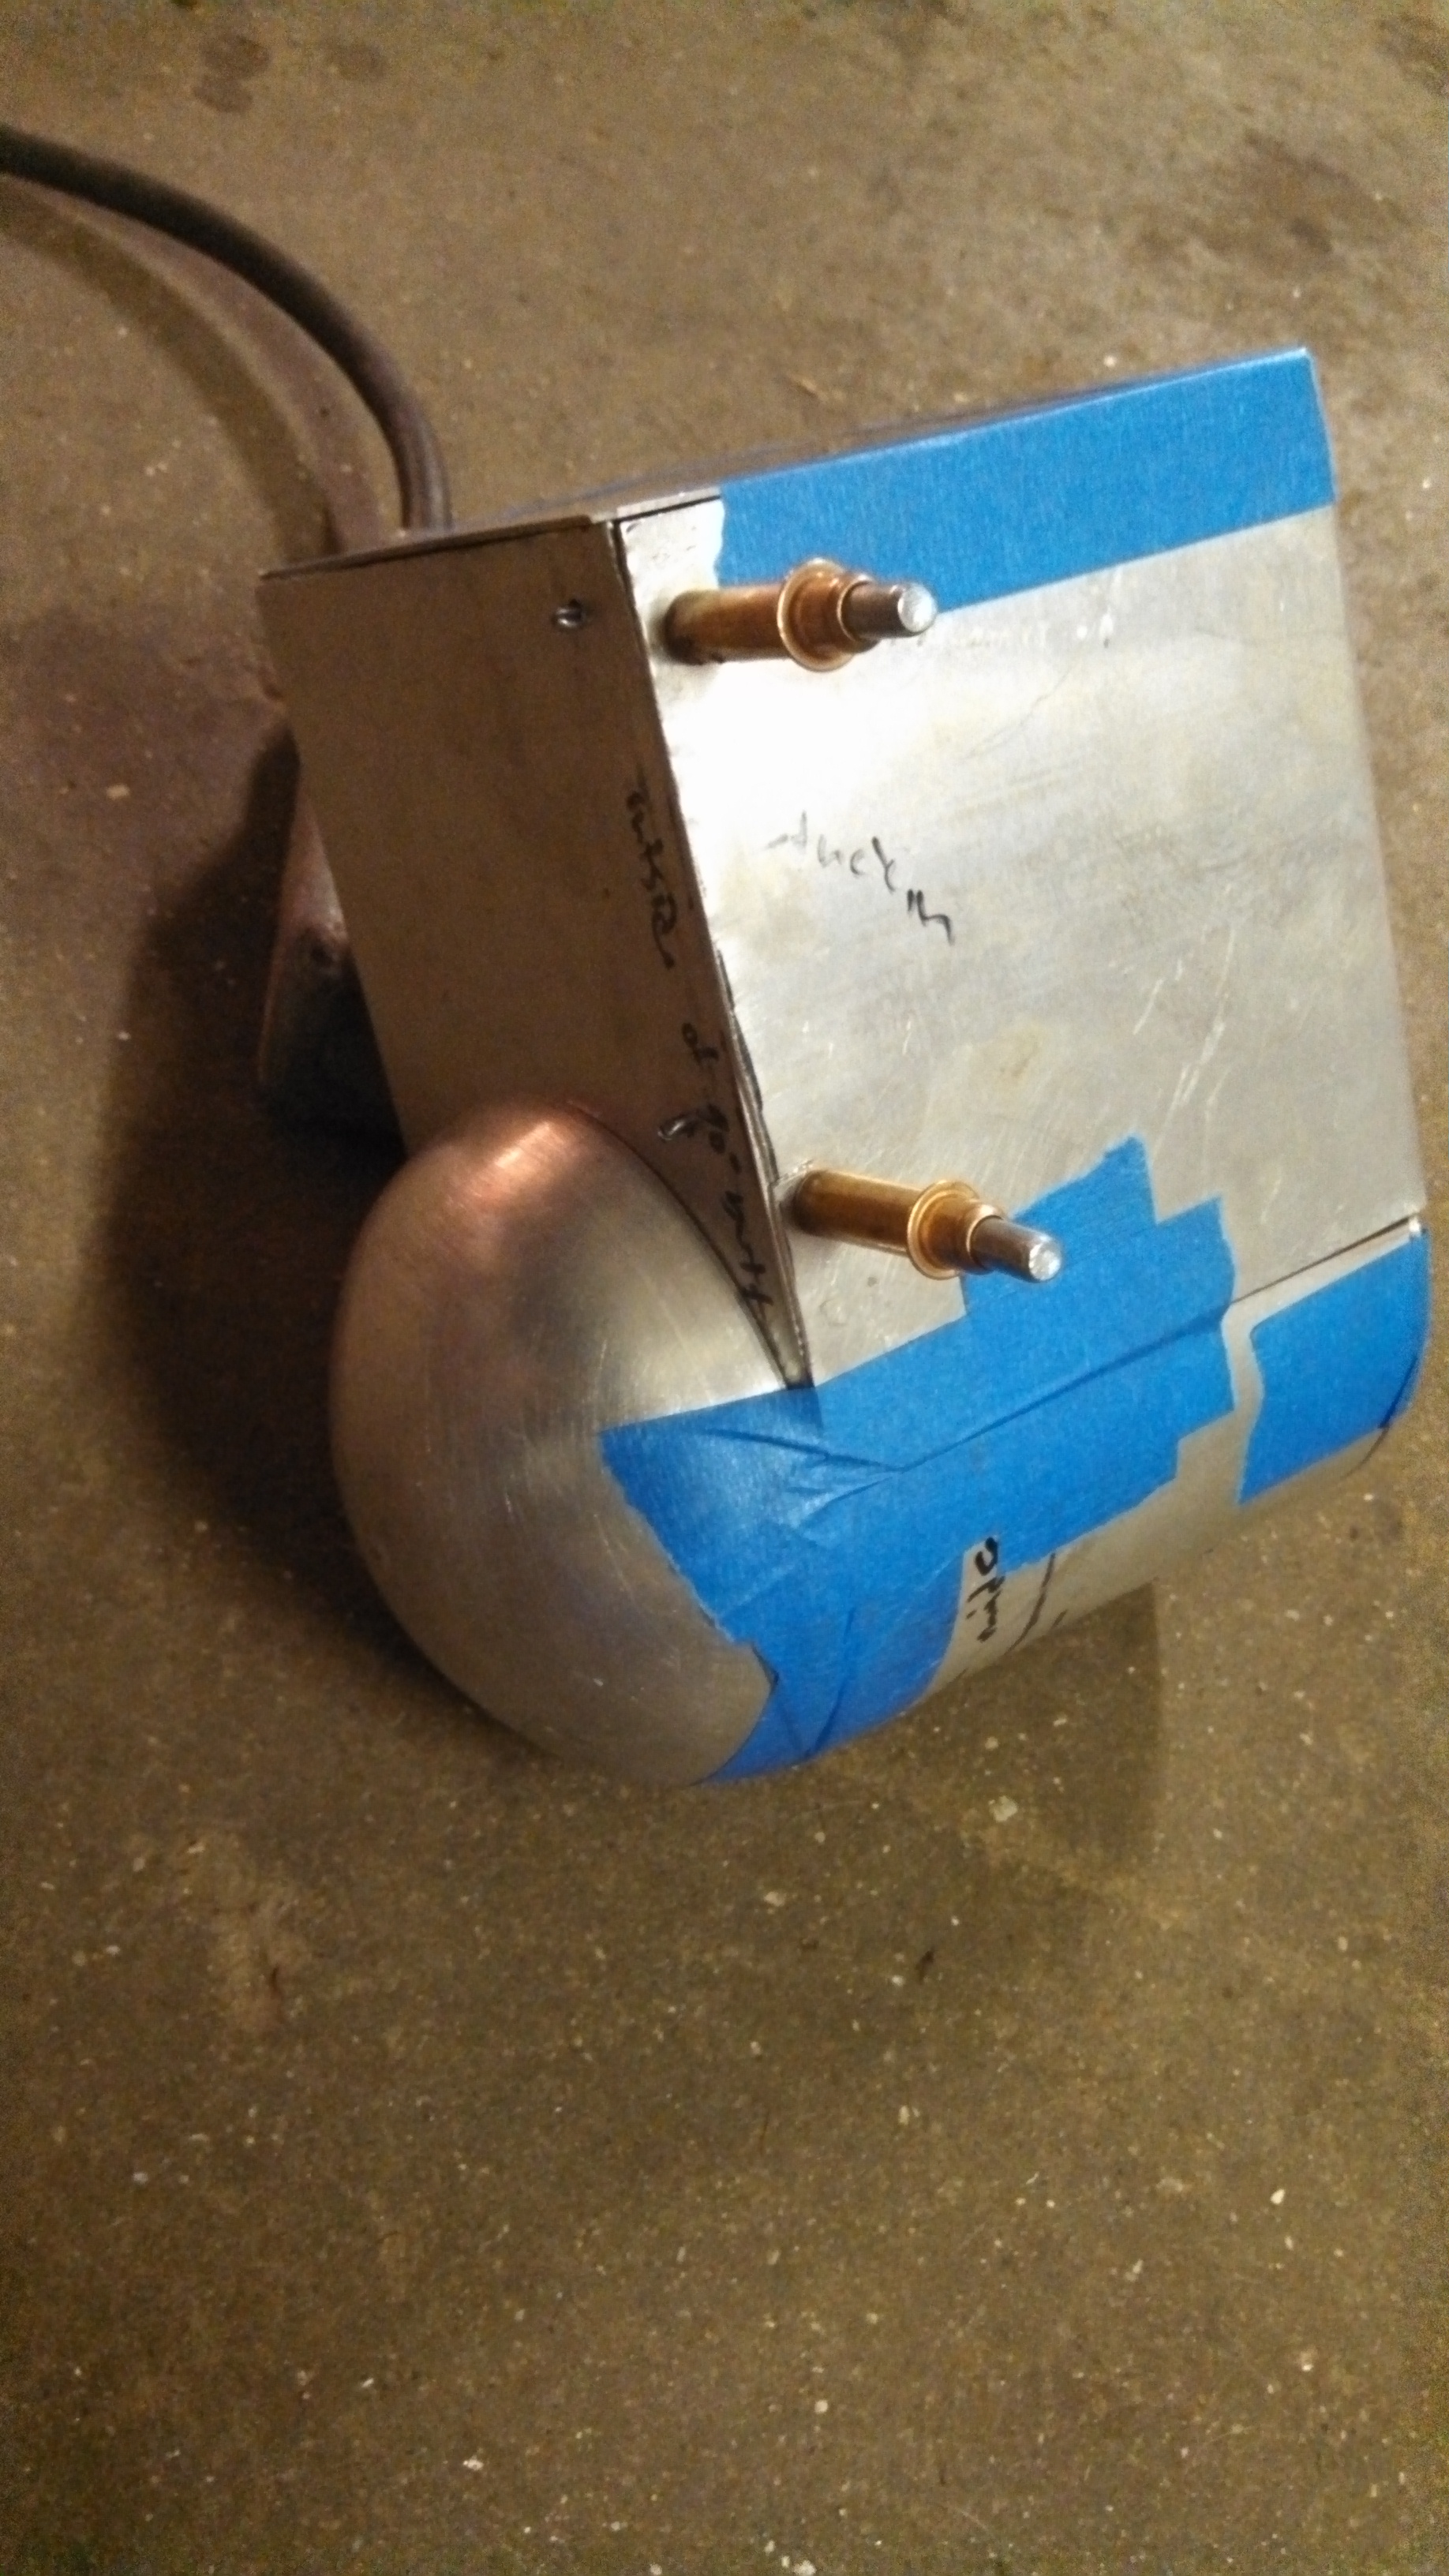
And taped together.
- catch can body mocked up.jpg (1.62 MiB) Viewed 61460 times
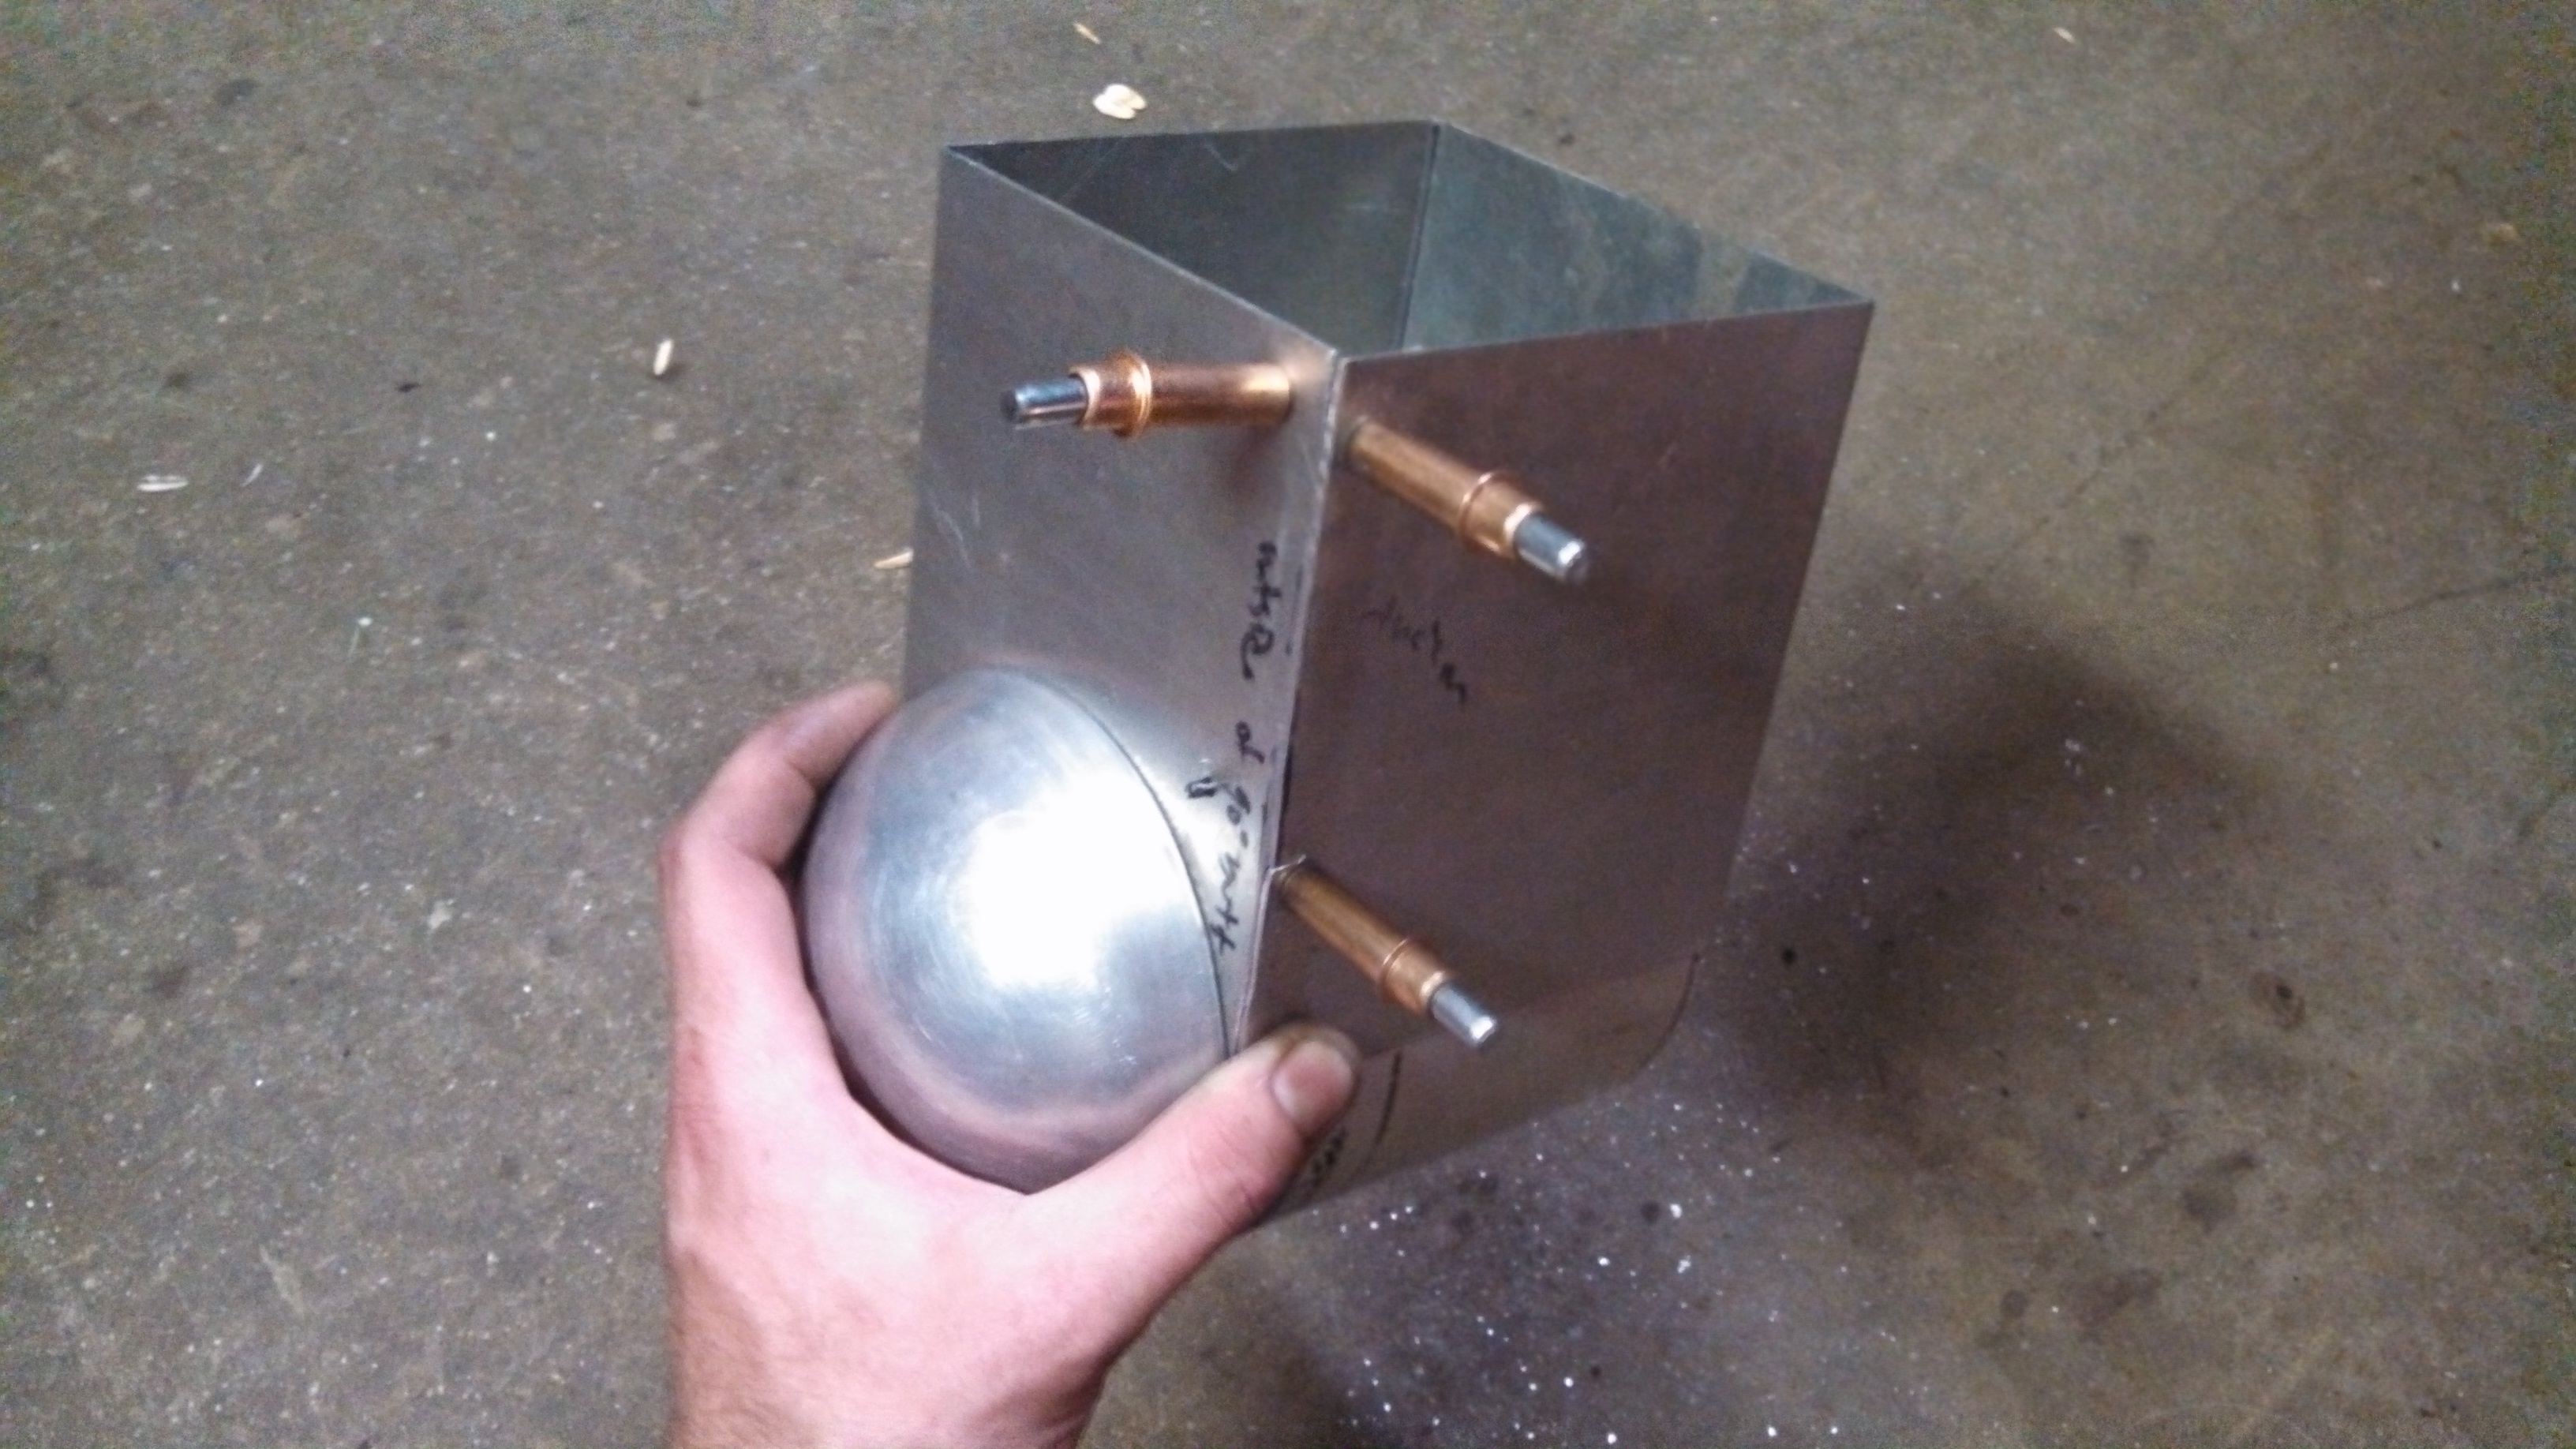
- catch can body mocked up2.jpg (1.44 MiB) Viewed 61460 times
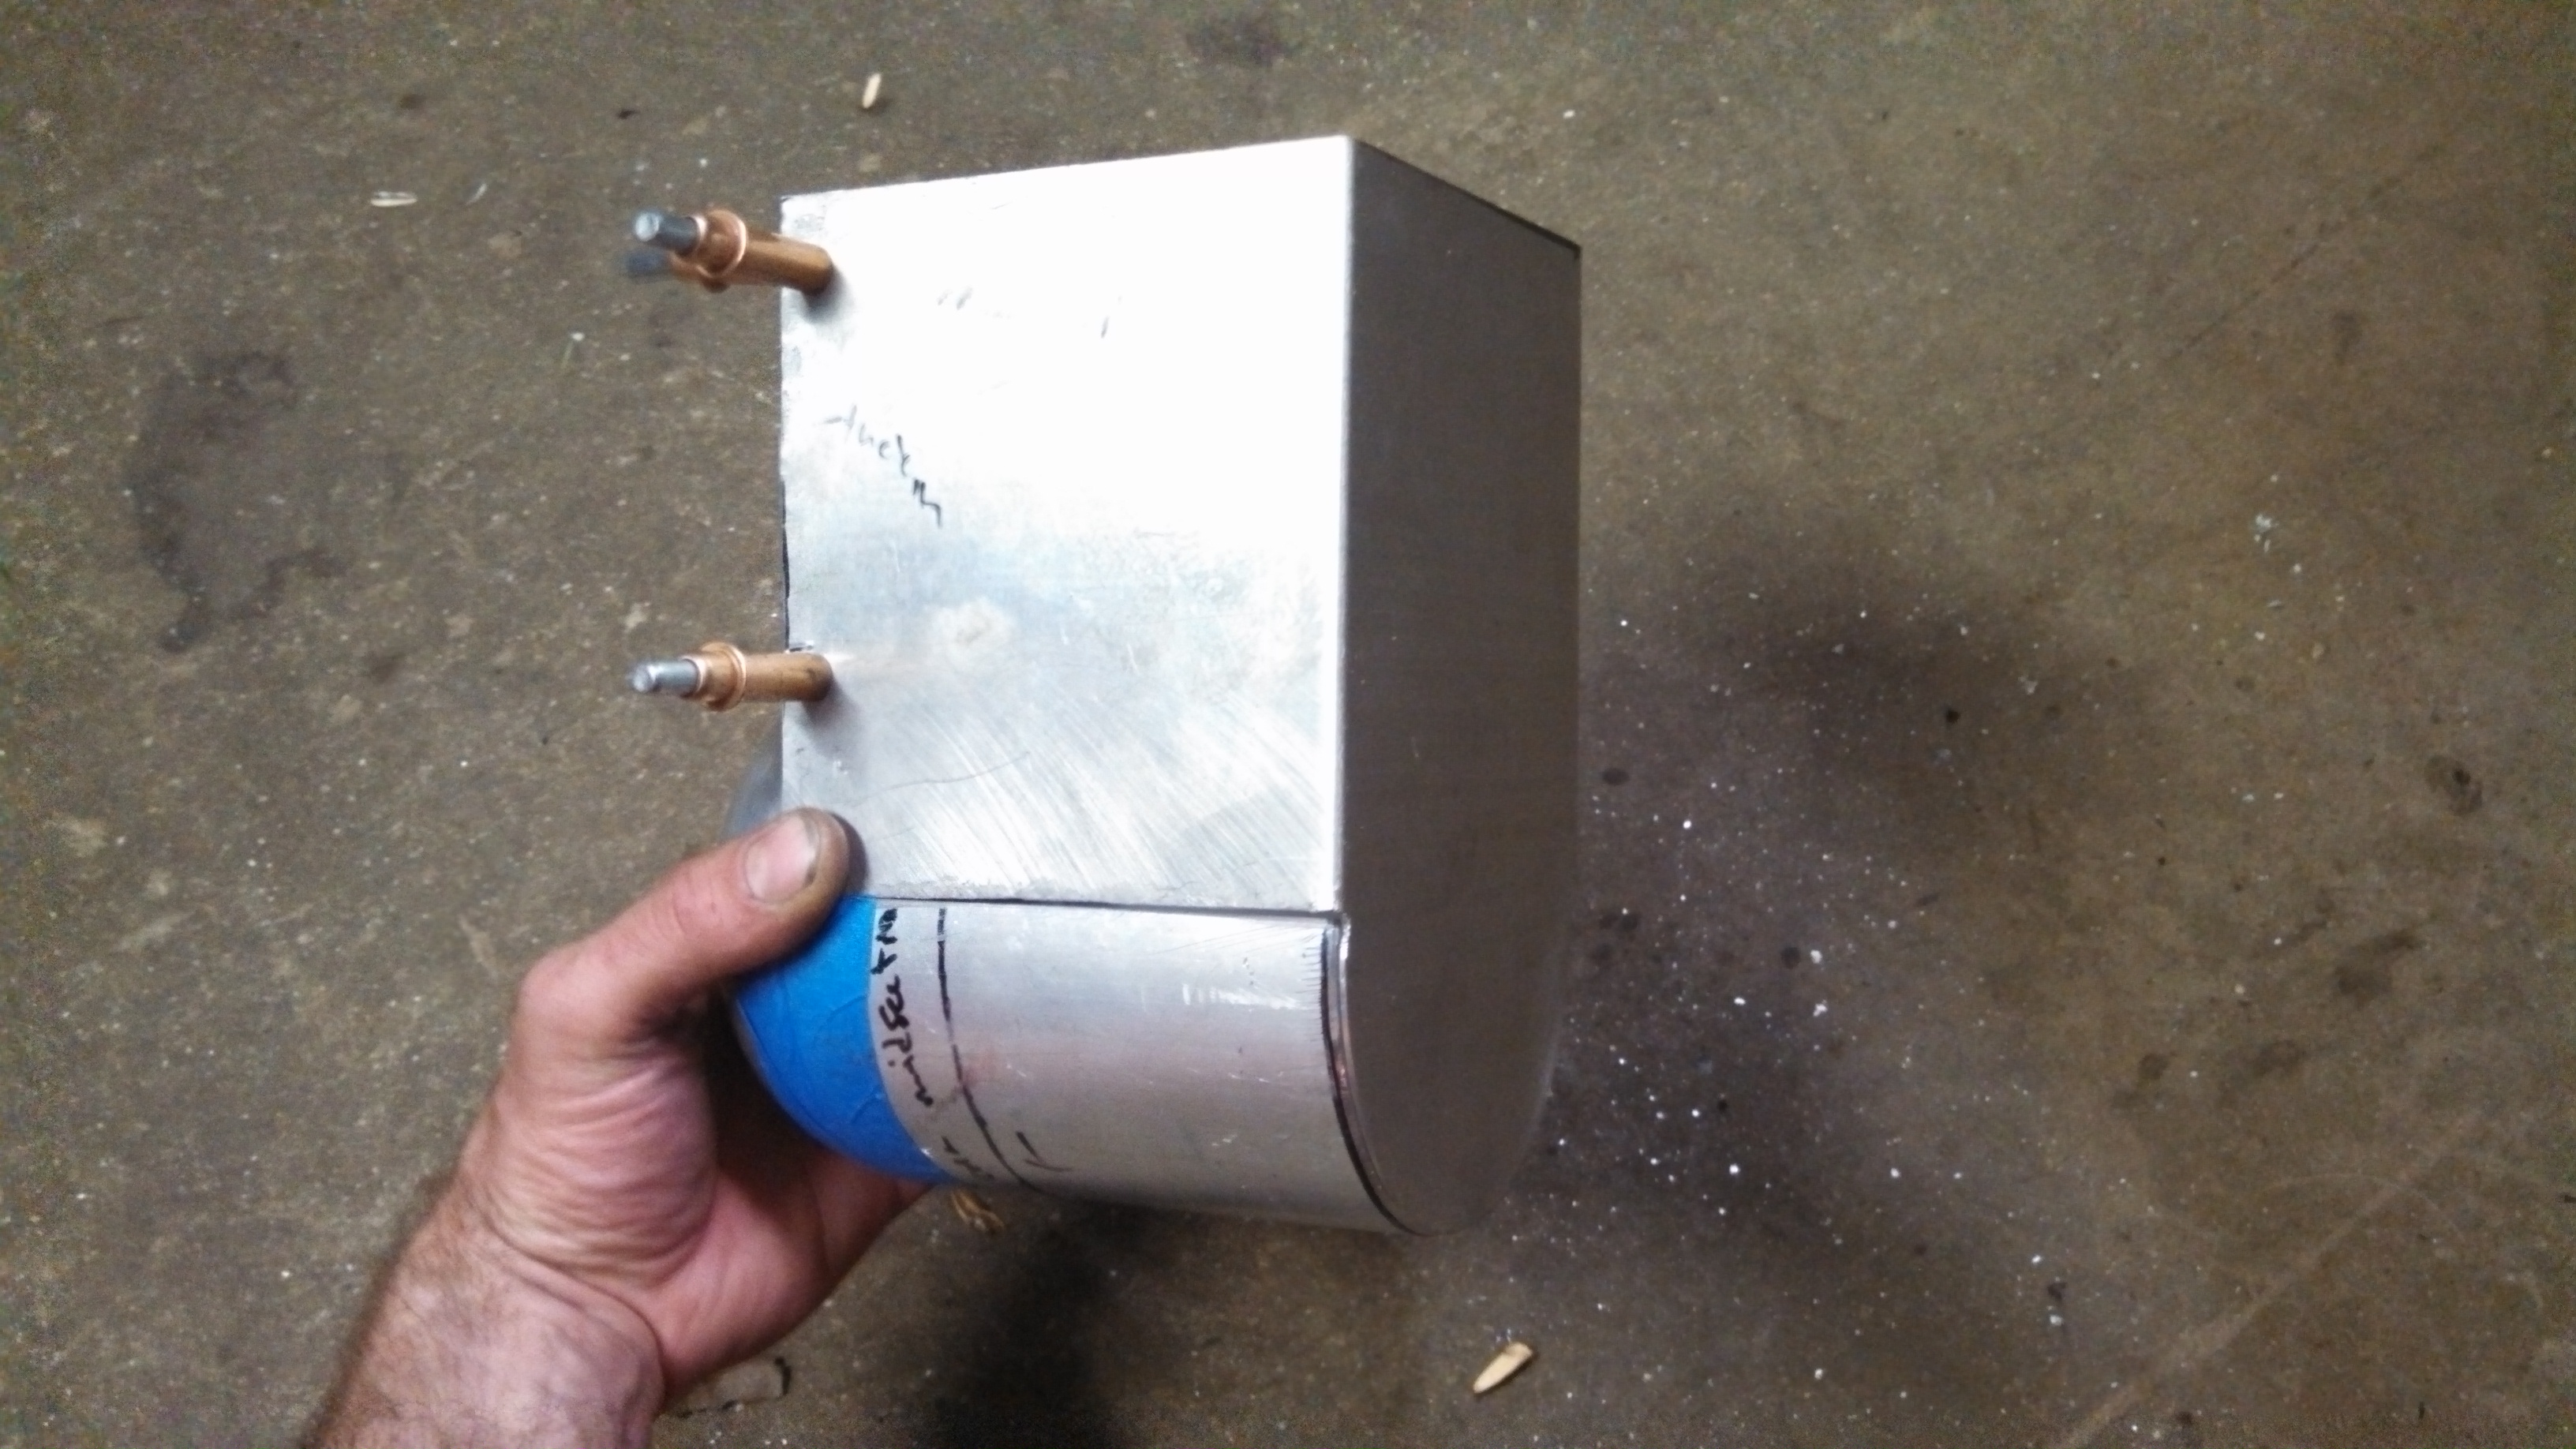
- catch can body mocked up3.jpg (1.39 MiB) Viewed 61460 times
Re: 24vVR6T CQ Project: EATSGTR, chassis FAB
Posted: Tue Jul 08, 2014 11:06 pm
by my2000apb
MORE!!!
Catch can ready to weld.
- catch can body ready for welding.jpg (1.47 MiB) Viewed 61477 times
I drilled a ton of holes in a thin plate and will be using that as a separator layer for the media.

- catch can media sep layer in can.jpg (1.45 MiB) Viewed 61477 times
And here is the catch can all finish welded and mounted up. I still need to clean it up a bit near some welds,( thin thin material) caused a few blisters. Give it a good sandblast and some clear powdercoat.
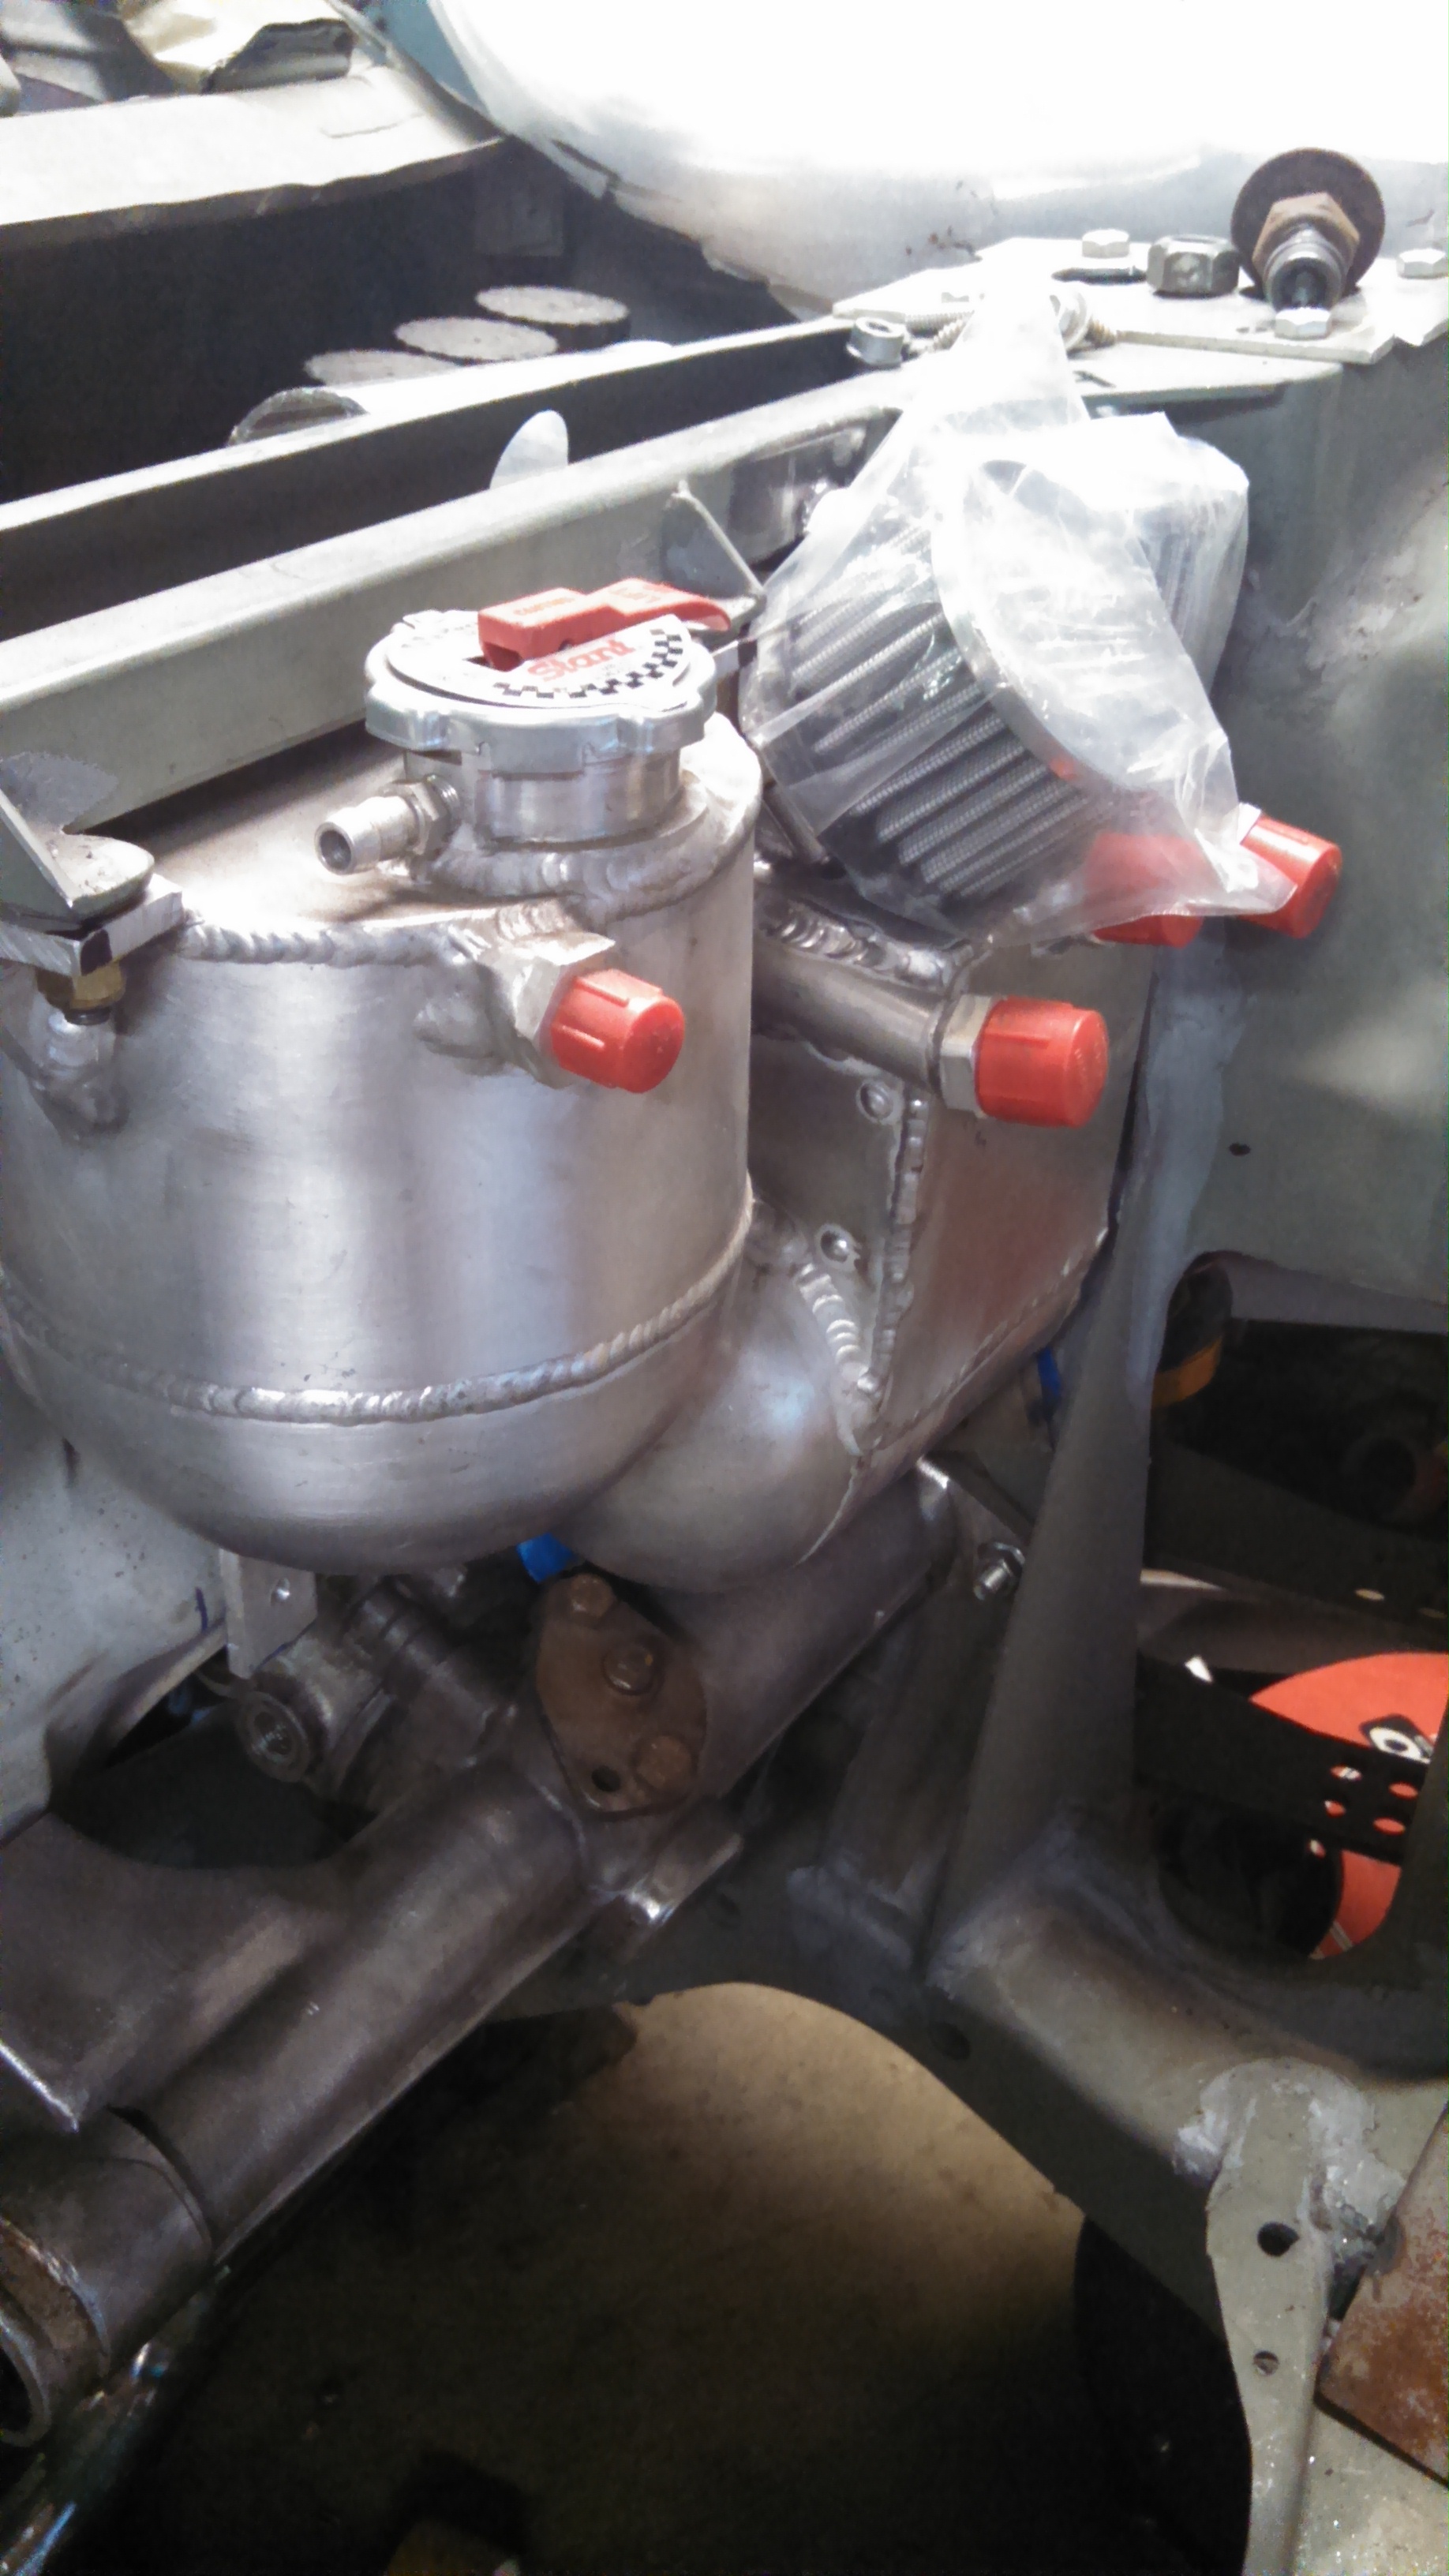
- catch can finished and mounted.jpg (1.1 MiB) Viewed 61477 times
I then made up the valve cover to catch can lines in Earl’s black Pro-Lite 350 Hose, 3X 10AN 90’s to straight’s, into the can.
they are just threaded on and not correctly aligned.
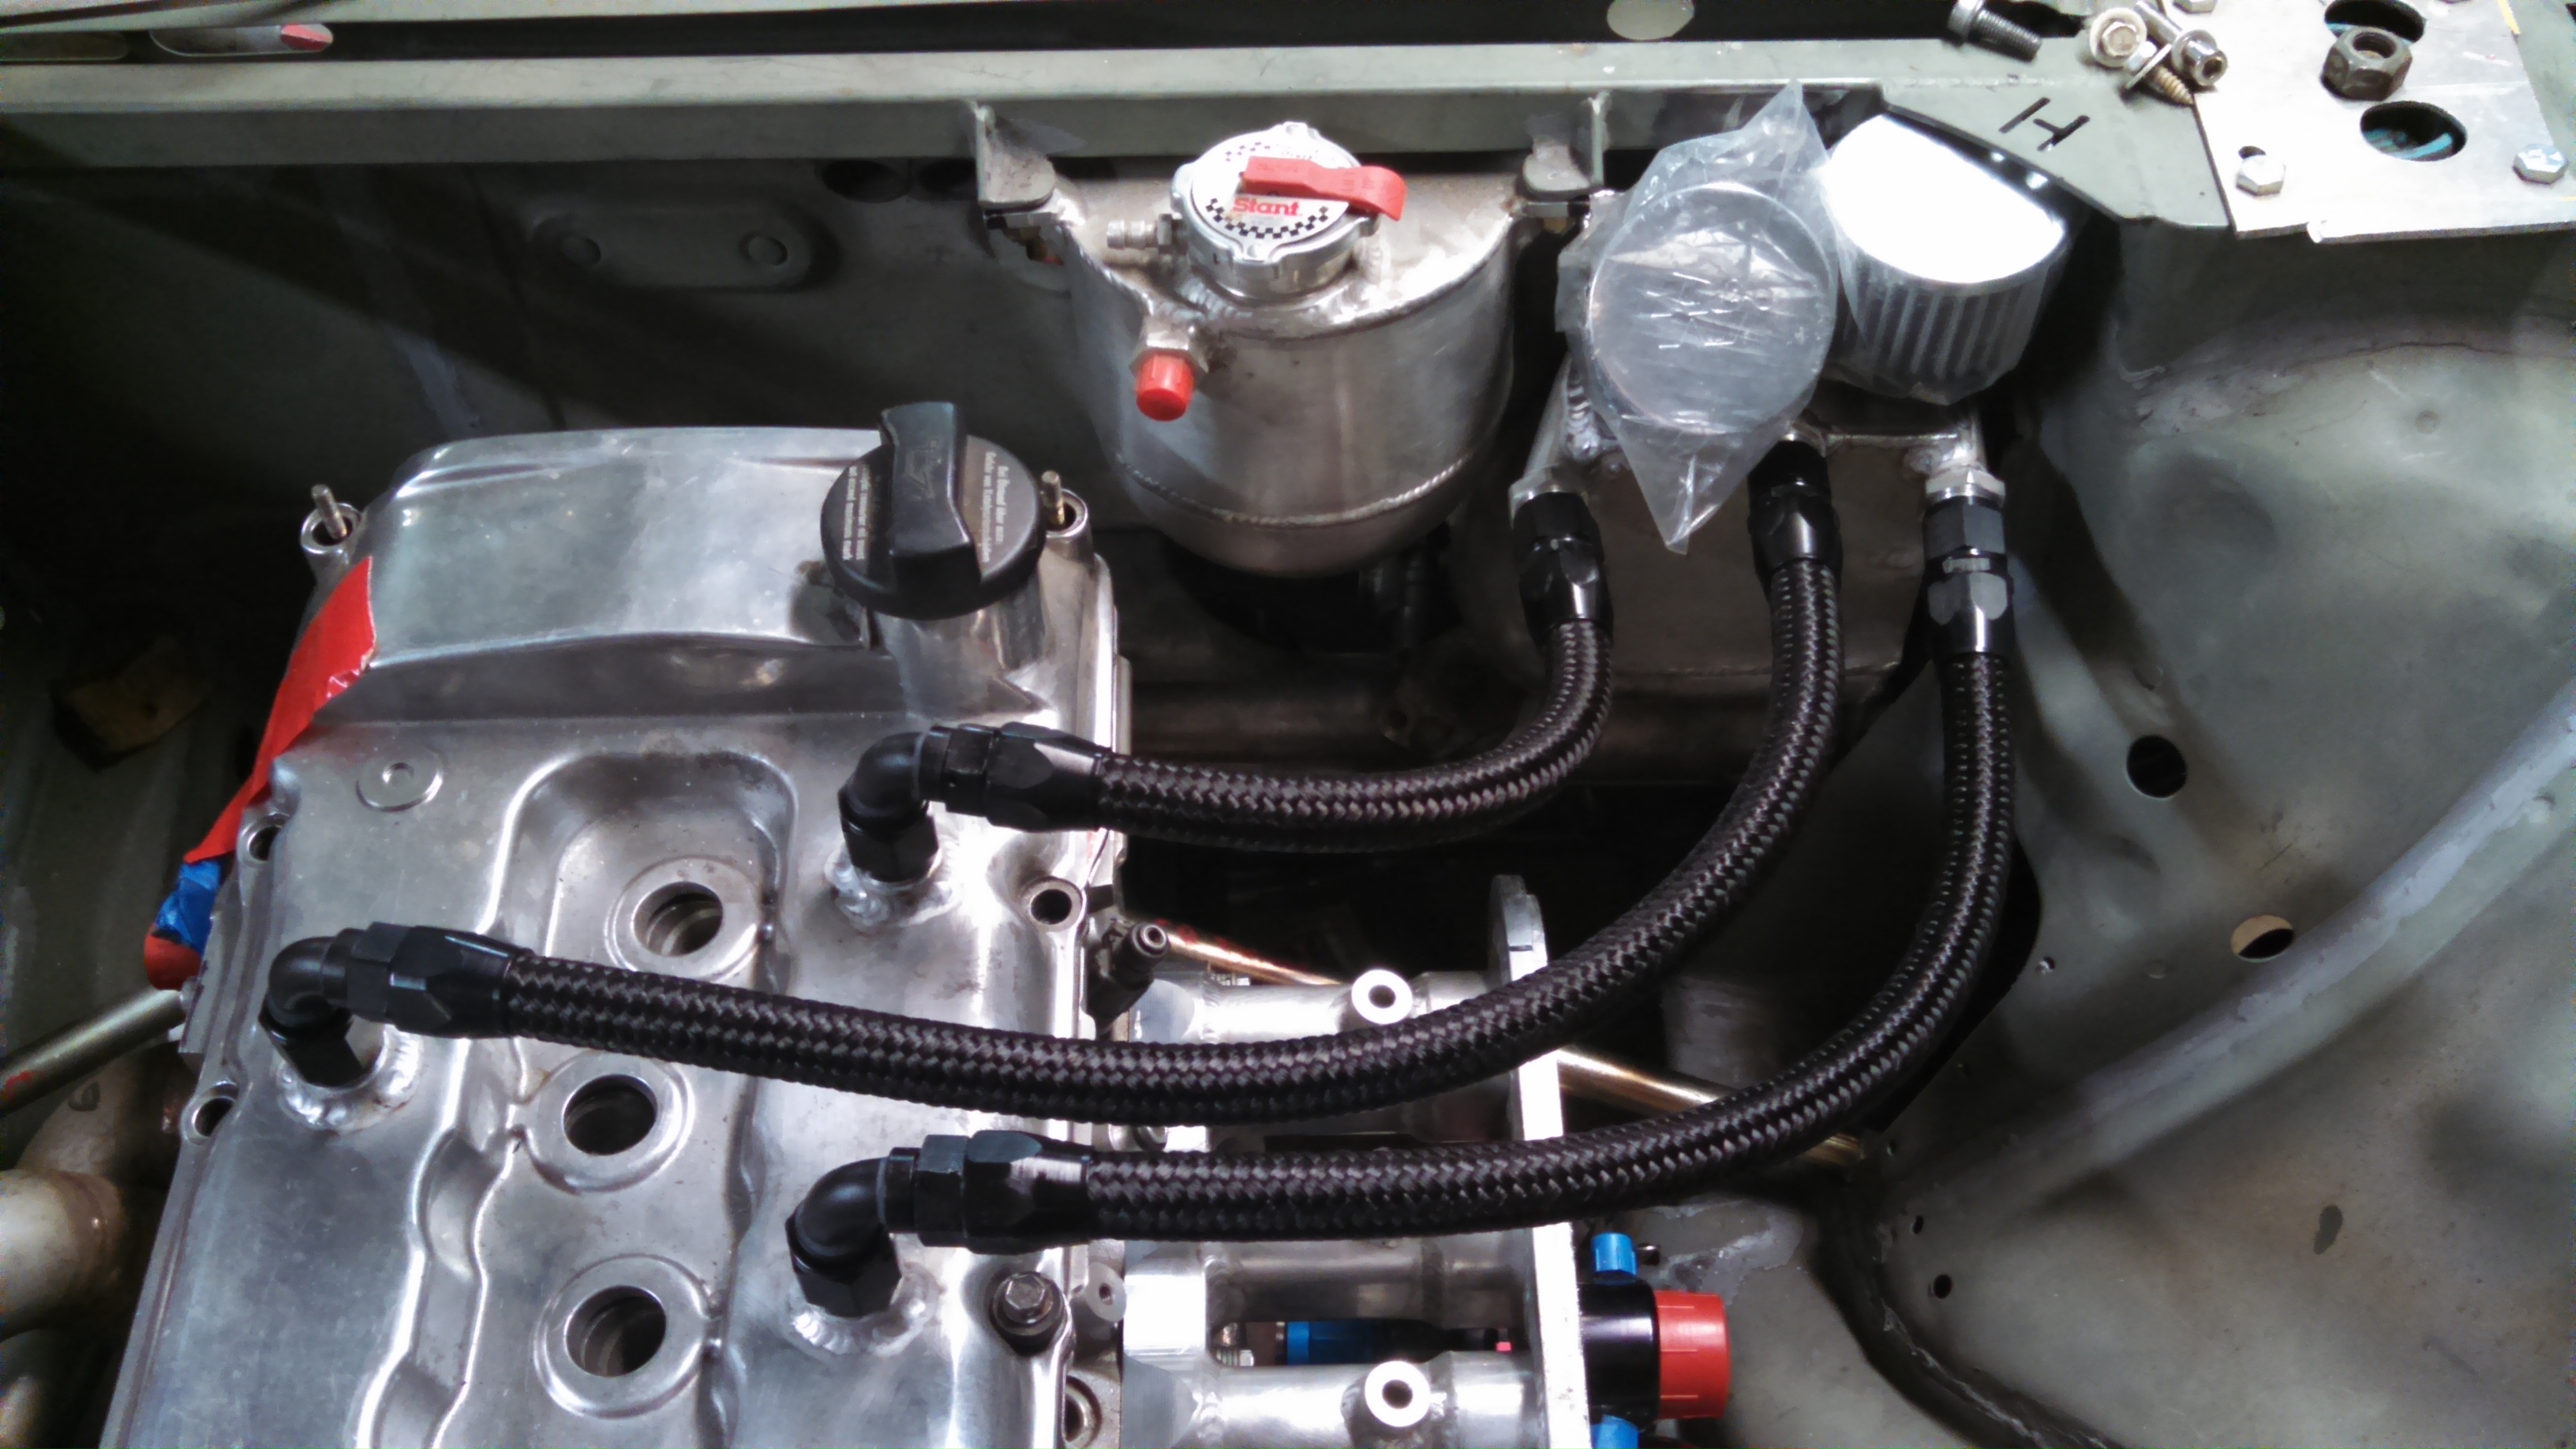
- catch can lines.jpg (1.24 MiB) Viewed 61477 times
Re: 24vVR6T CQ Project: EATSGTR, chassis FAB
Posted: Tue Jul 08, 2014 11:16 pm
by my2000apb
UPDATE!!!
I finally got back into exhaust work after taking a short break from stainless. Here is the downpipe, nearly ready except for adding a small wedge.
- DP jsut needs a wedge.jpg (1.13 MiB) Viewed 61474 times
Lower portion of the downpipe tacked together.
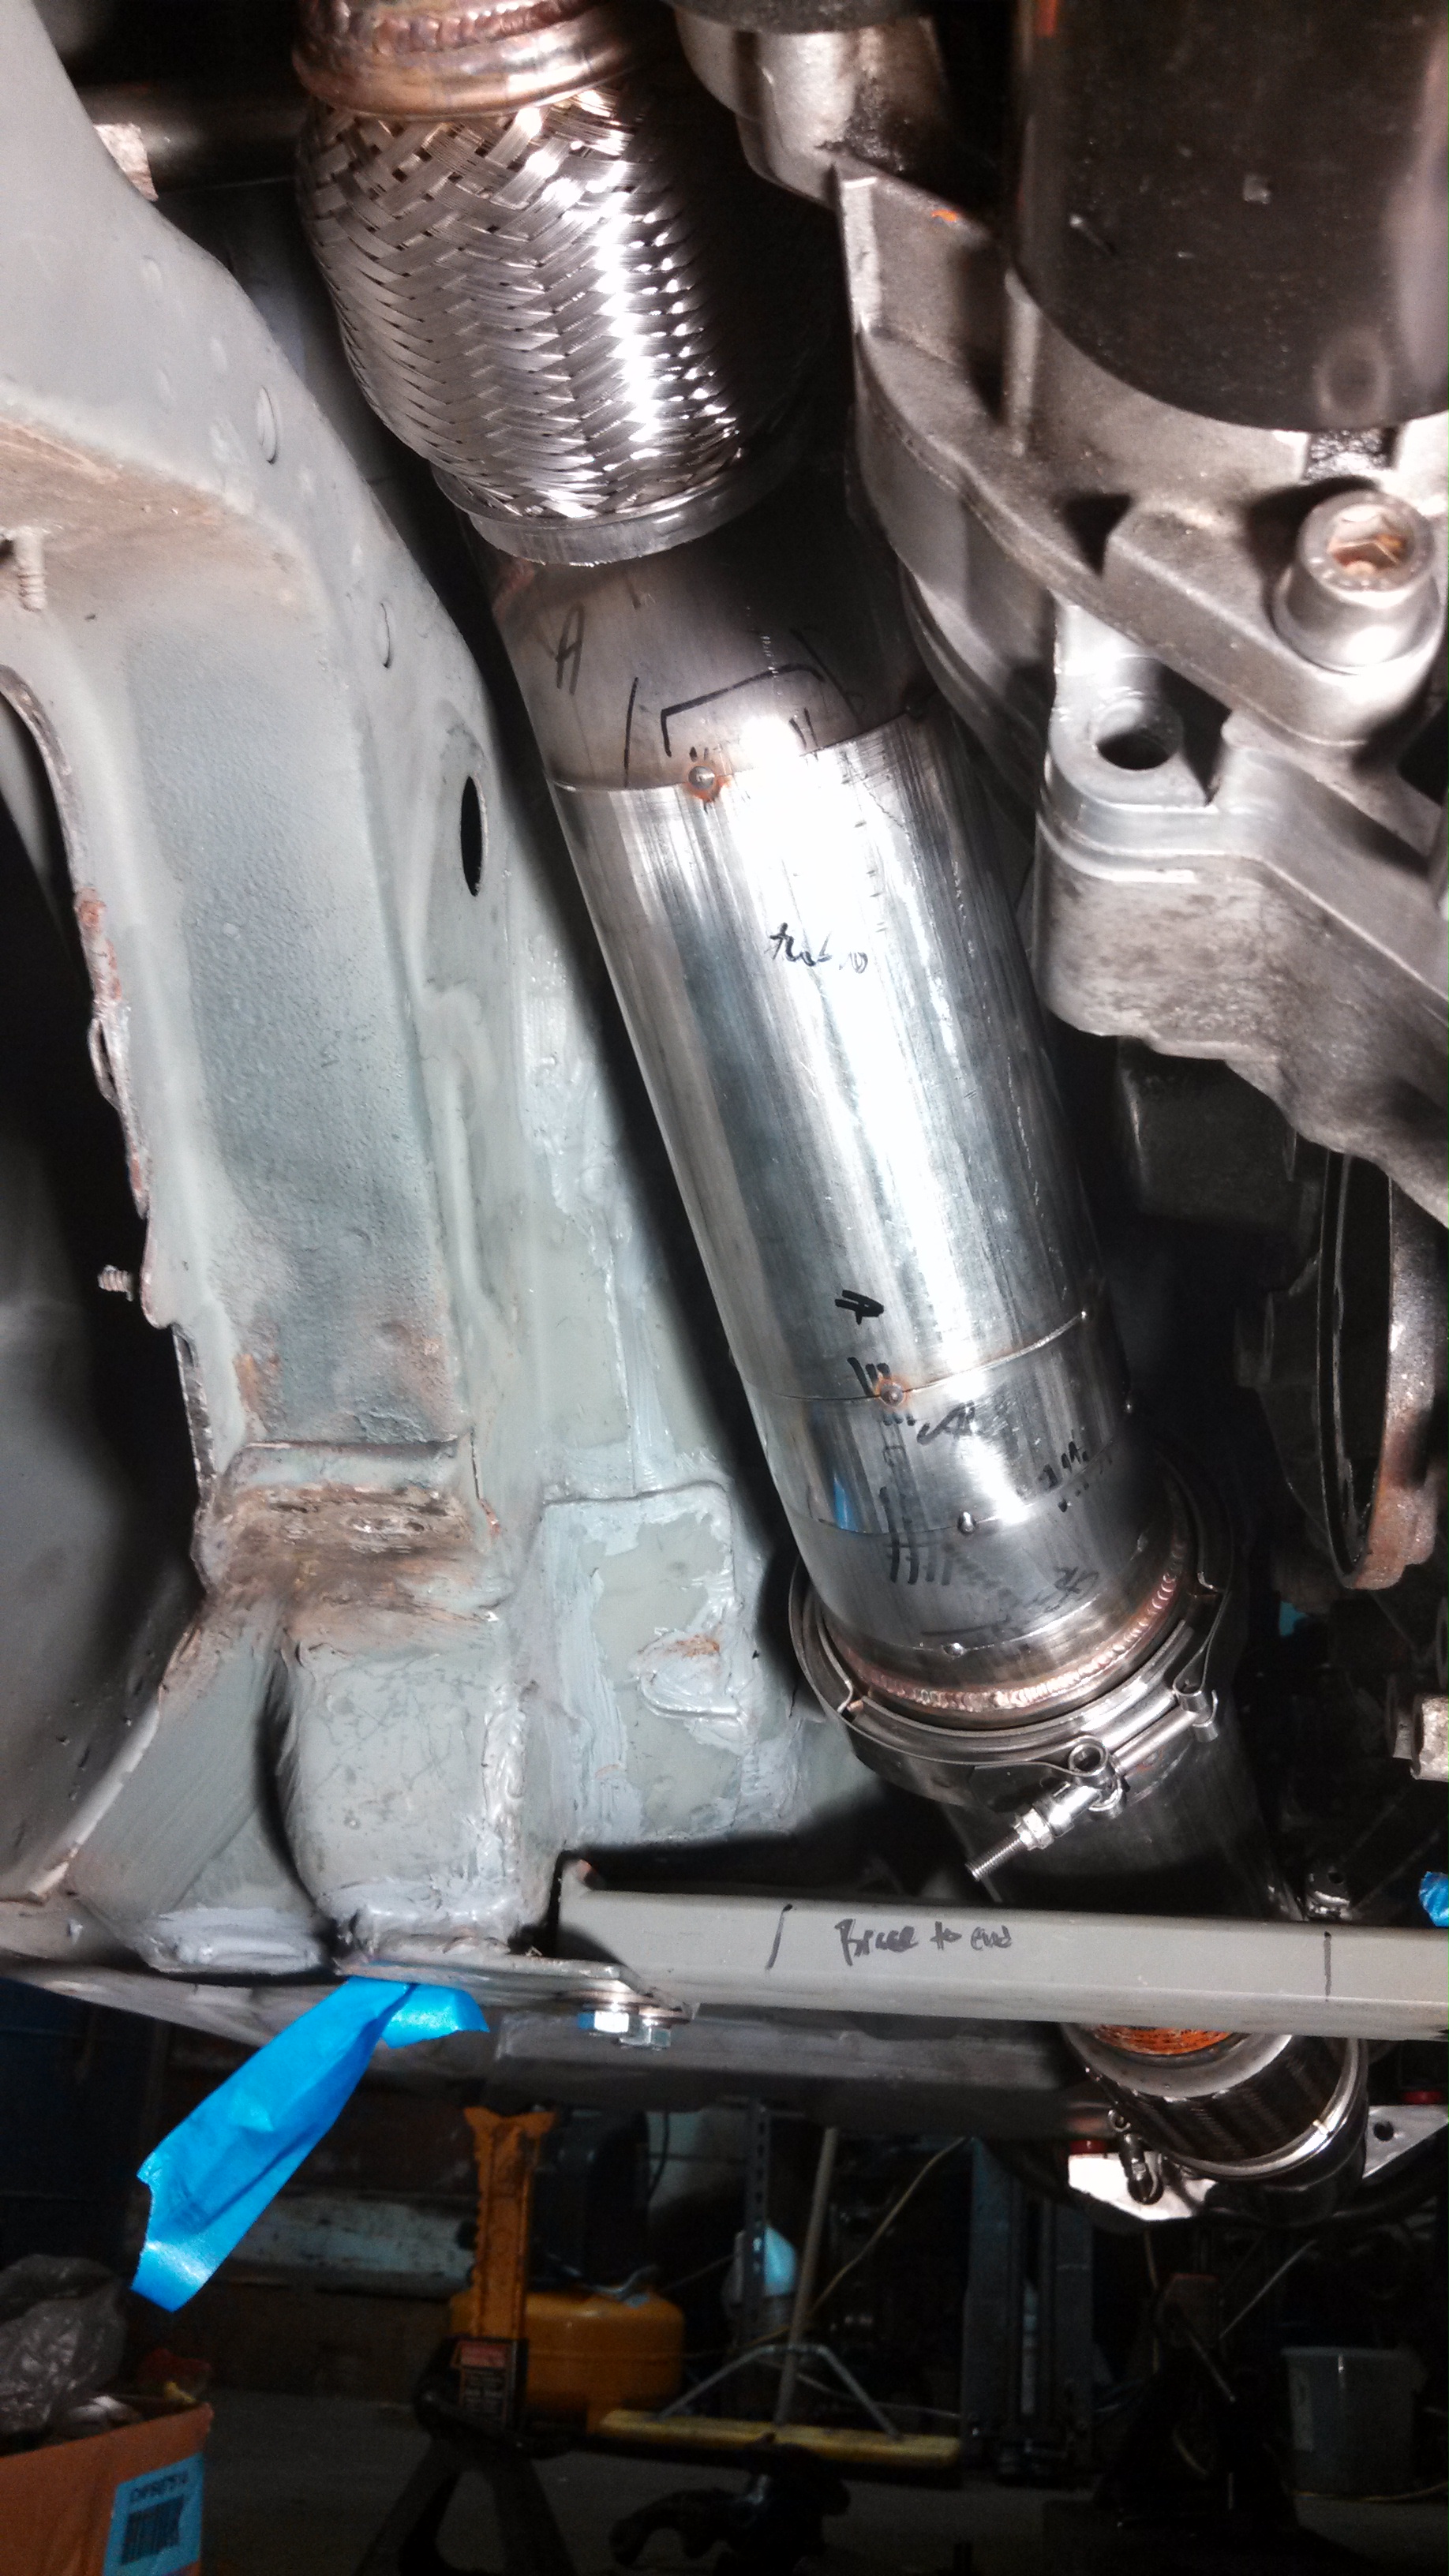
- downpipe from under, tacked.jpg (1.61 MiB) Viewed 61474 times
Here is the front Wastegate outlet that needs to be finished. It’s a bit tight up front with the Wastegate outlet, airbox intlet, headlight, radiator and shroud, but it fits!
- need to finish Front WG.jpg (930.89 KiB) Viewed 61474 times
- front WG dump connection.jpg (1.43 MiB) Viewed 61474 times
Start of the tight radius outlet for the front Wastegate.
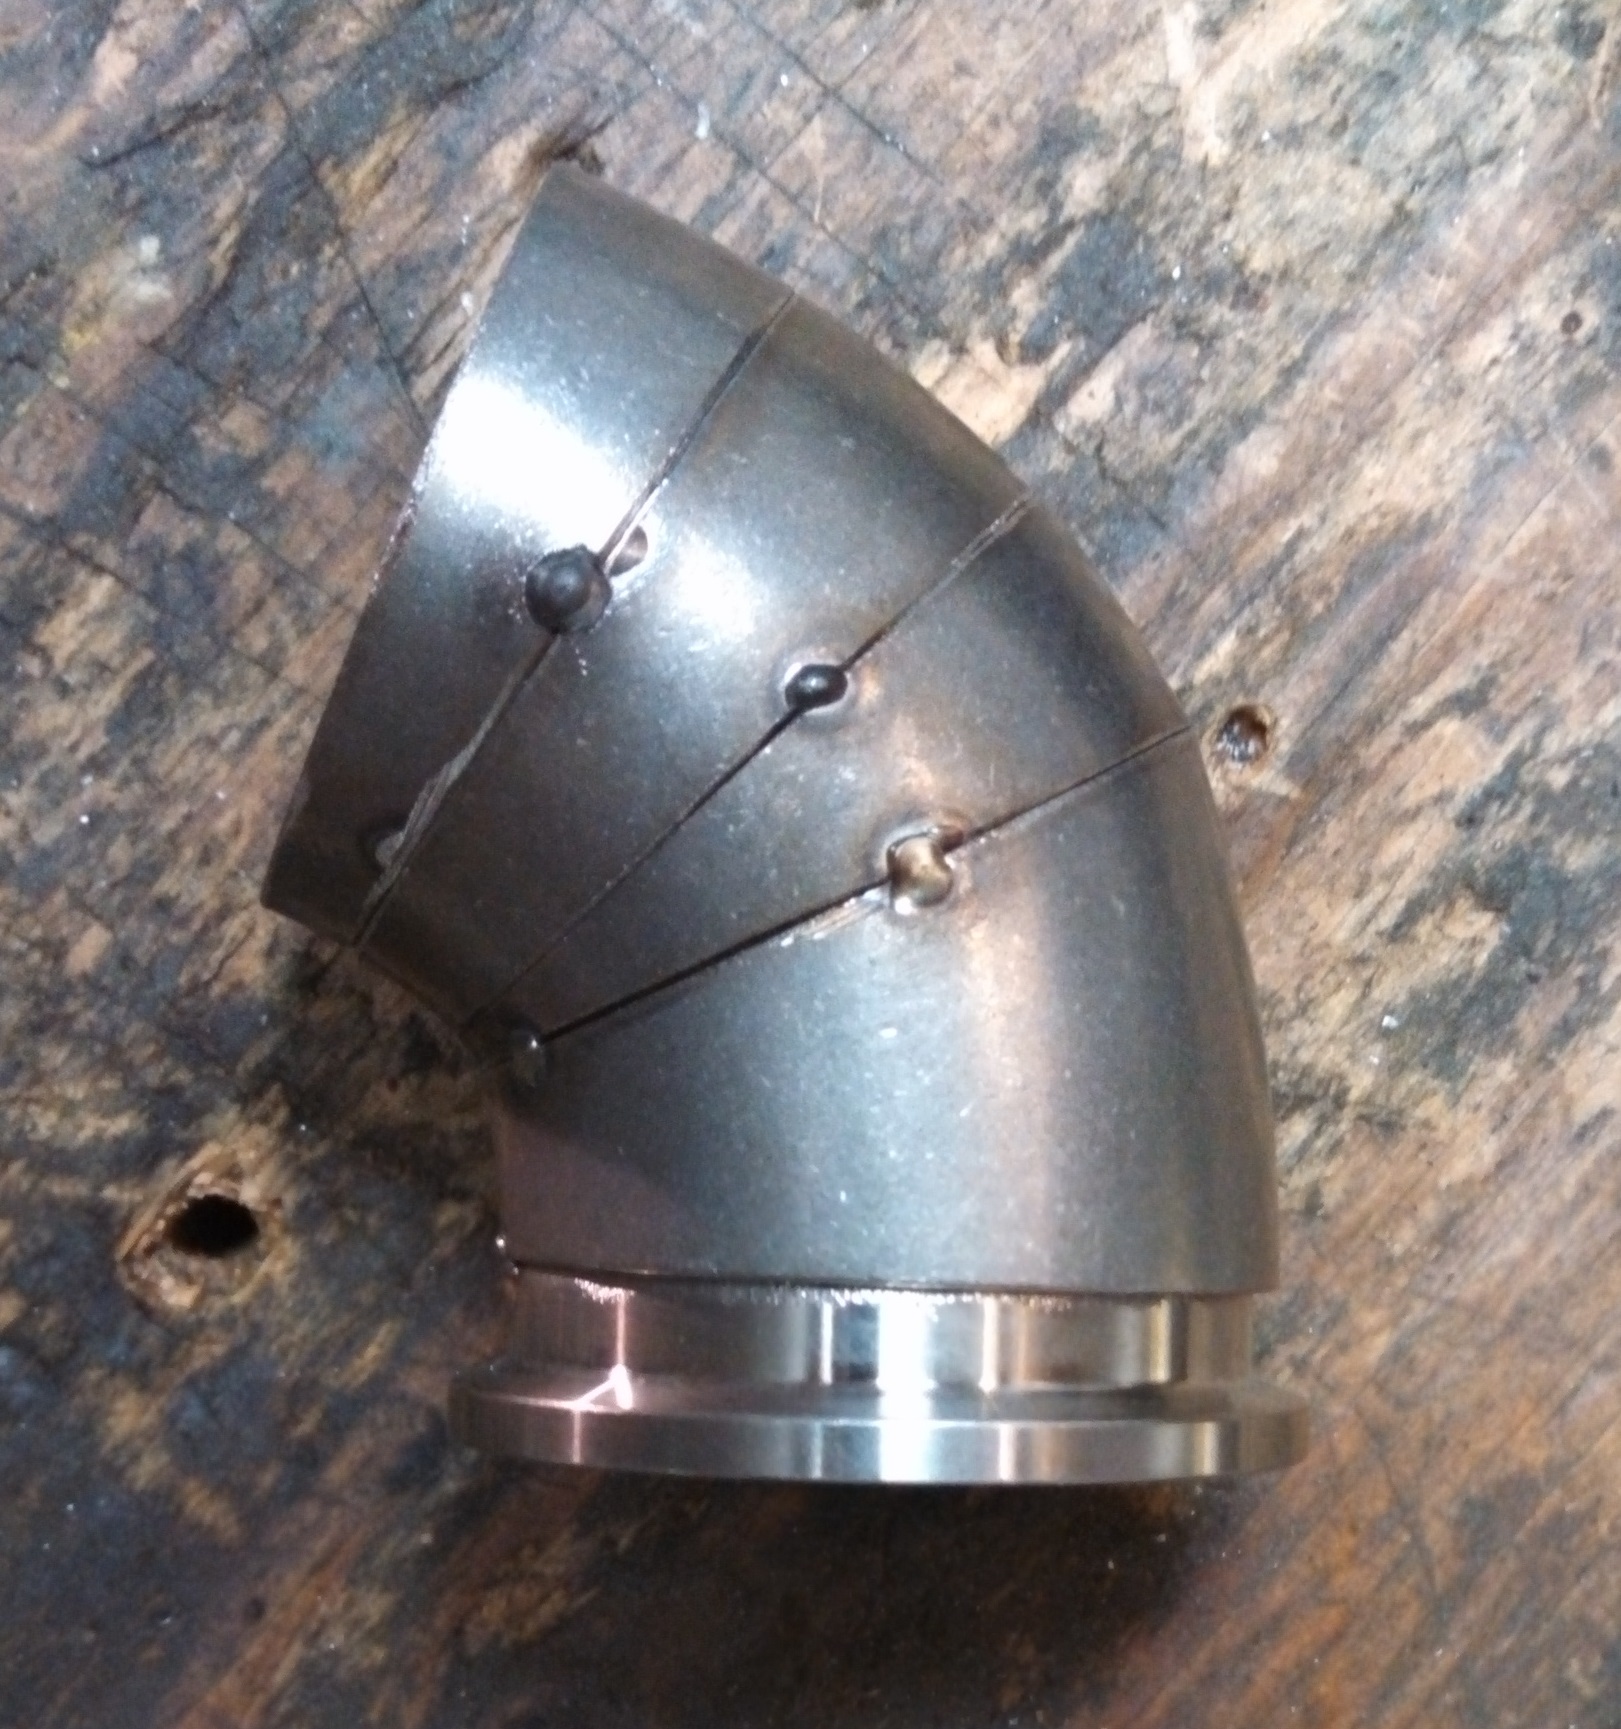
- tight radius WG outlet.jpg (678.33 KiB) Viewed 61474 times
Re: 24vVR6T CQ Project: EATSGTR, chassis FAB
Posted: Tue Jul 08, 2014 11:25 pm
by my2000apb
Re: 24vVR6T CQ Project: EATSGTR, chassis FAB
Posted: Tue Jul 08, 2014 11:34 pm
by my2000apb
MORE!!!
In order to make the Wastegate outlet “Y” removable without taking everything apart, I will be adding an additional Tial v-band connection for the front gate, just before the “Y” junction.
I purchased two additional MVR 44mm Wastegate inlet flanges that would normally belong on an exhaust manifold. I put these on the lathe at Ryan’s and cut them down to fit and recess perfectly with my 2.0”, 304SS 16ga. Tubing that is used on the Wastegate outlets.
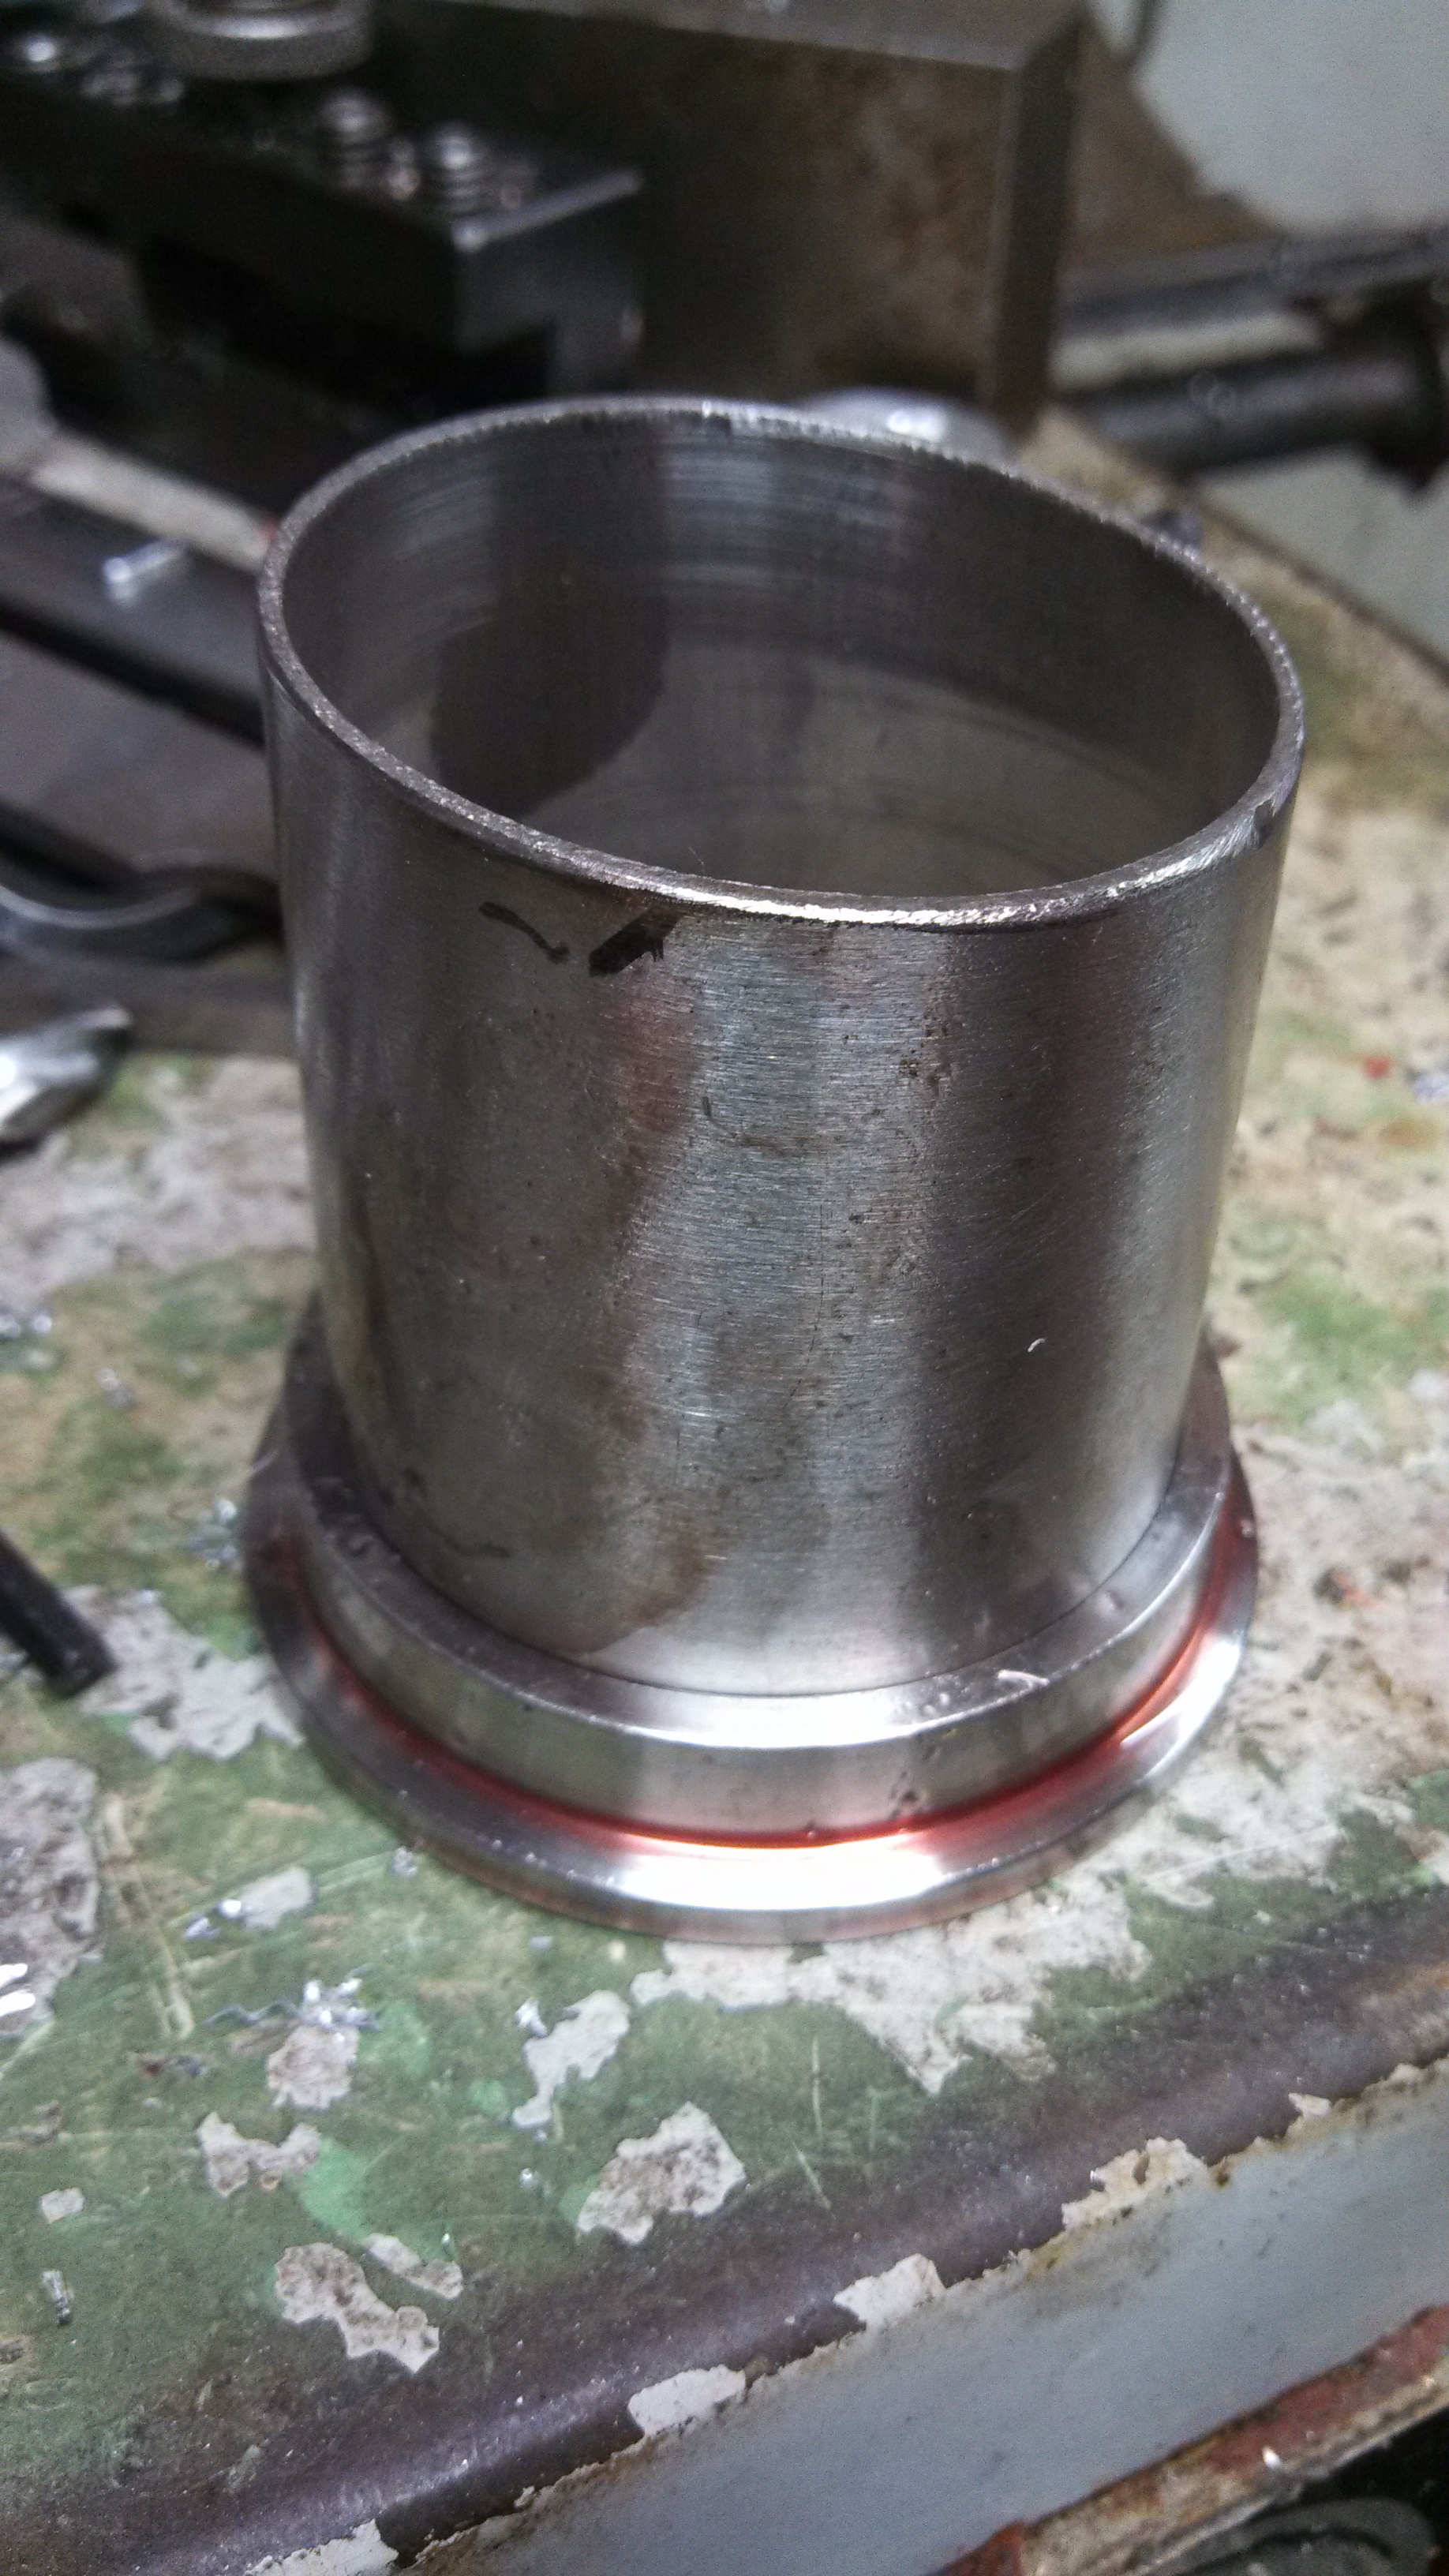
- tial flange lathed for tubing.jpg (1.84 MiB) Viewed 61471 times
And another shot of the rear WG outlet.
- rear wg dump.jpg (1.37 MiB) Viewed 61471 times
And a few pics of the Wastegate outlets merging
- finished WG merger.jpg (1.48 MiB) Viewed 61471 times
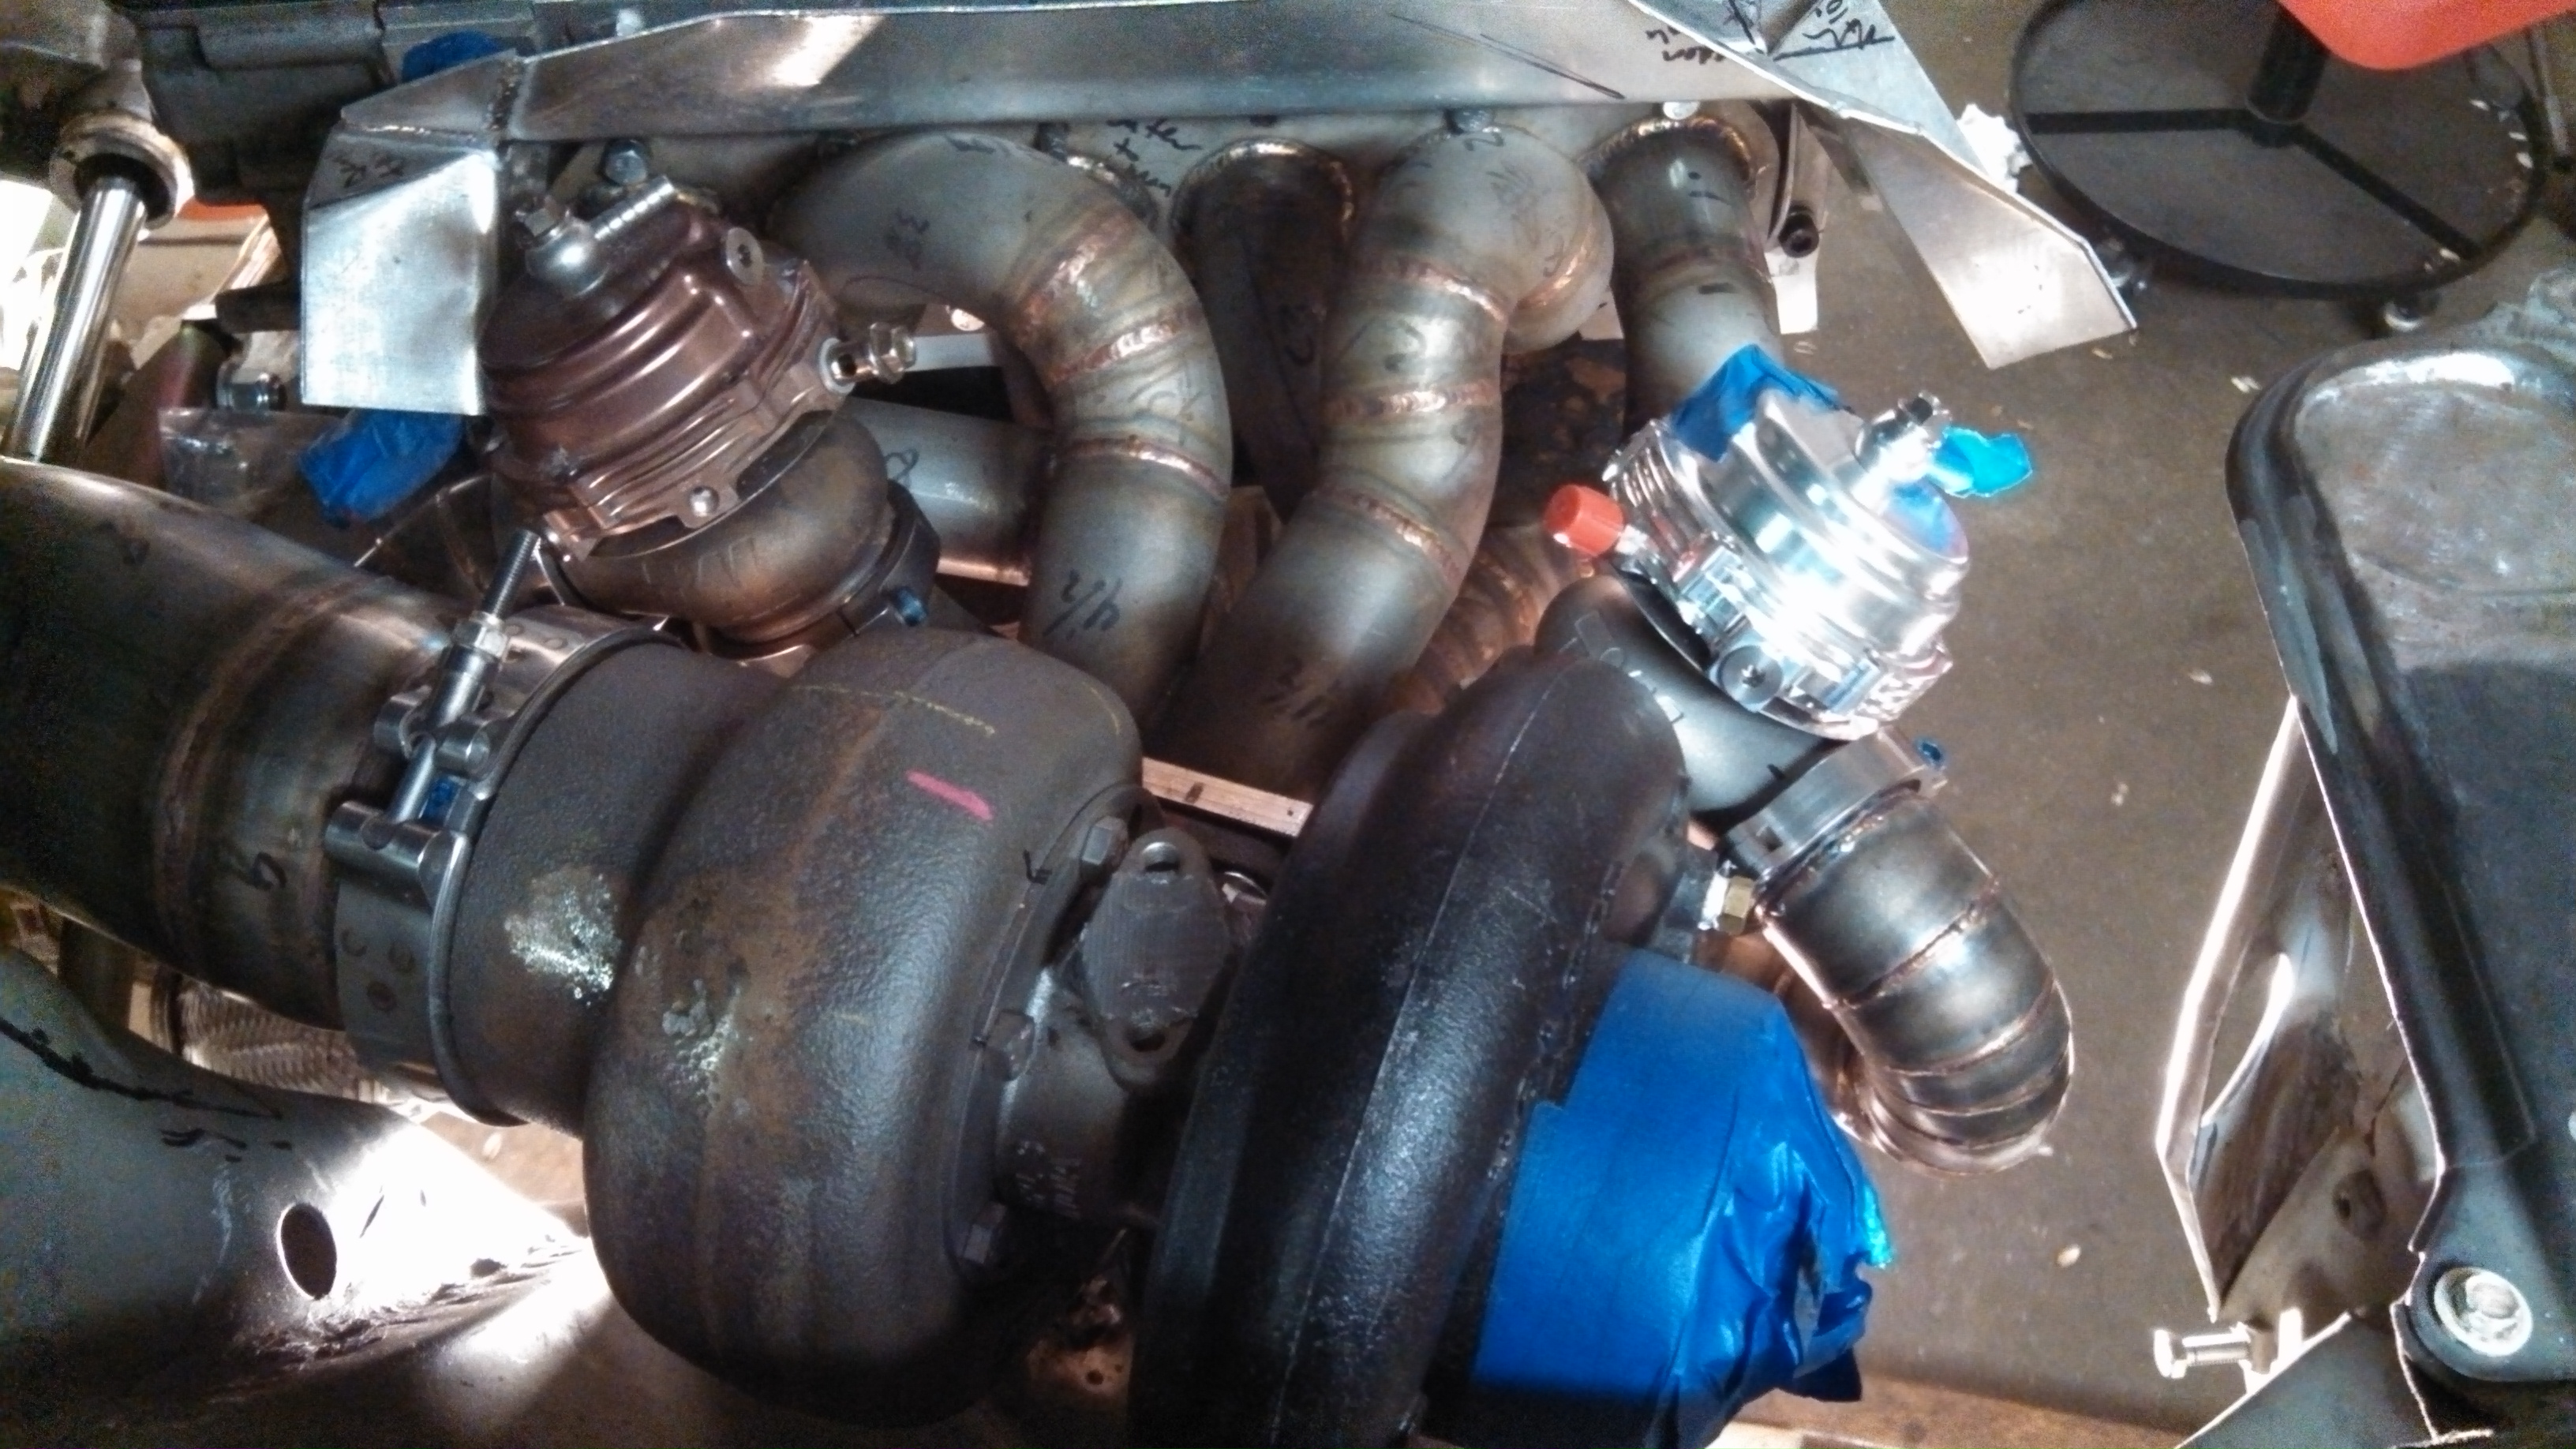
- both WG tubes finished.jpg (1.6 MiB) Viewed 61471 times
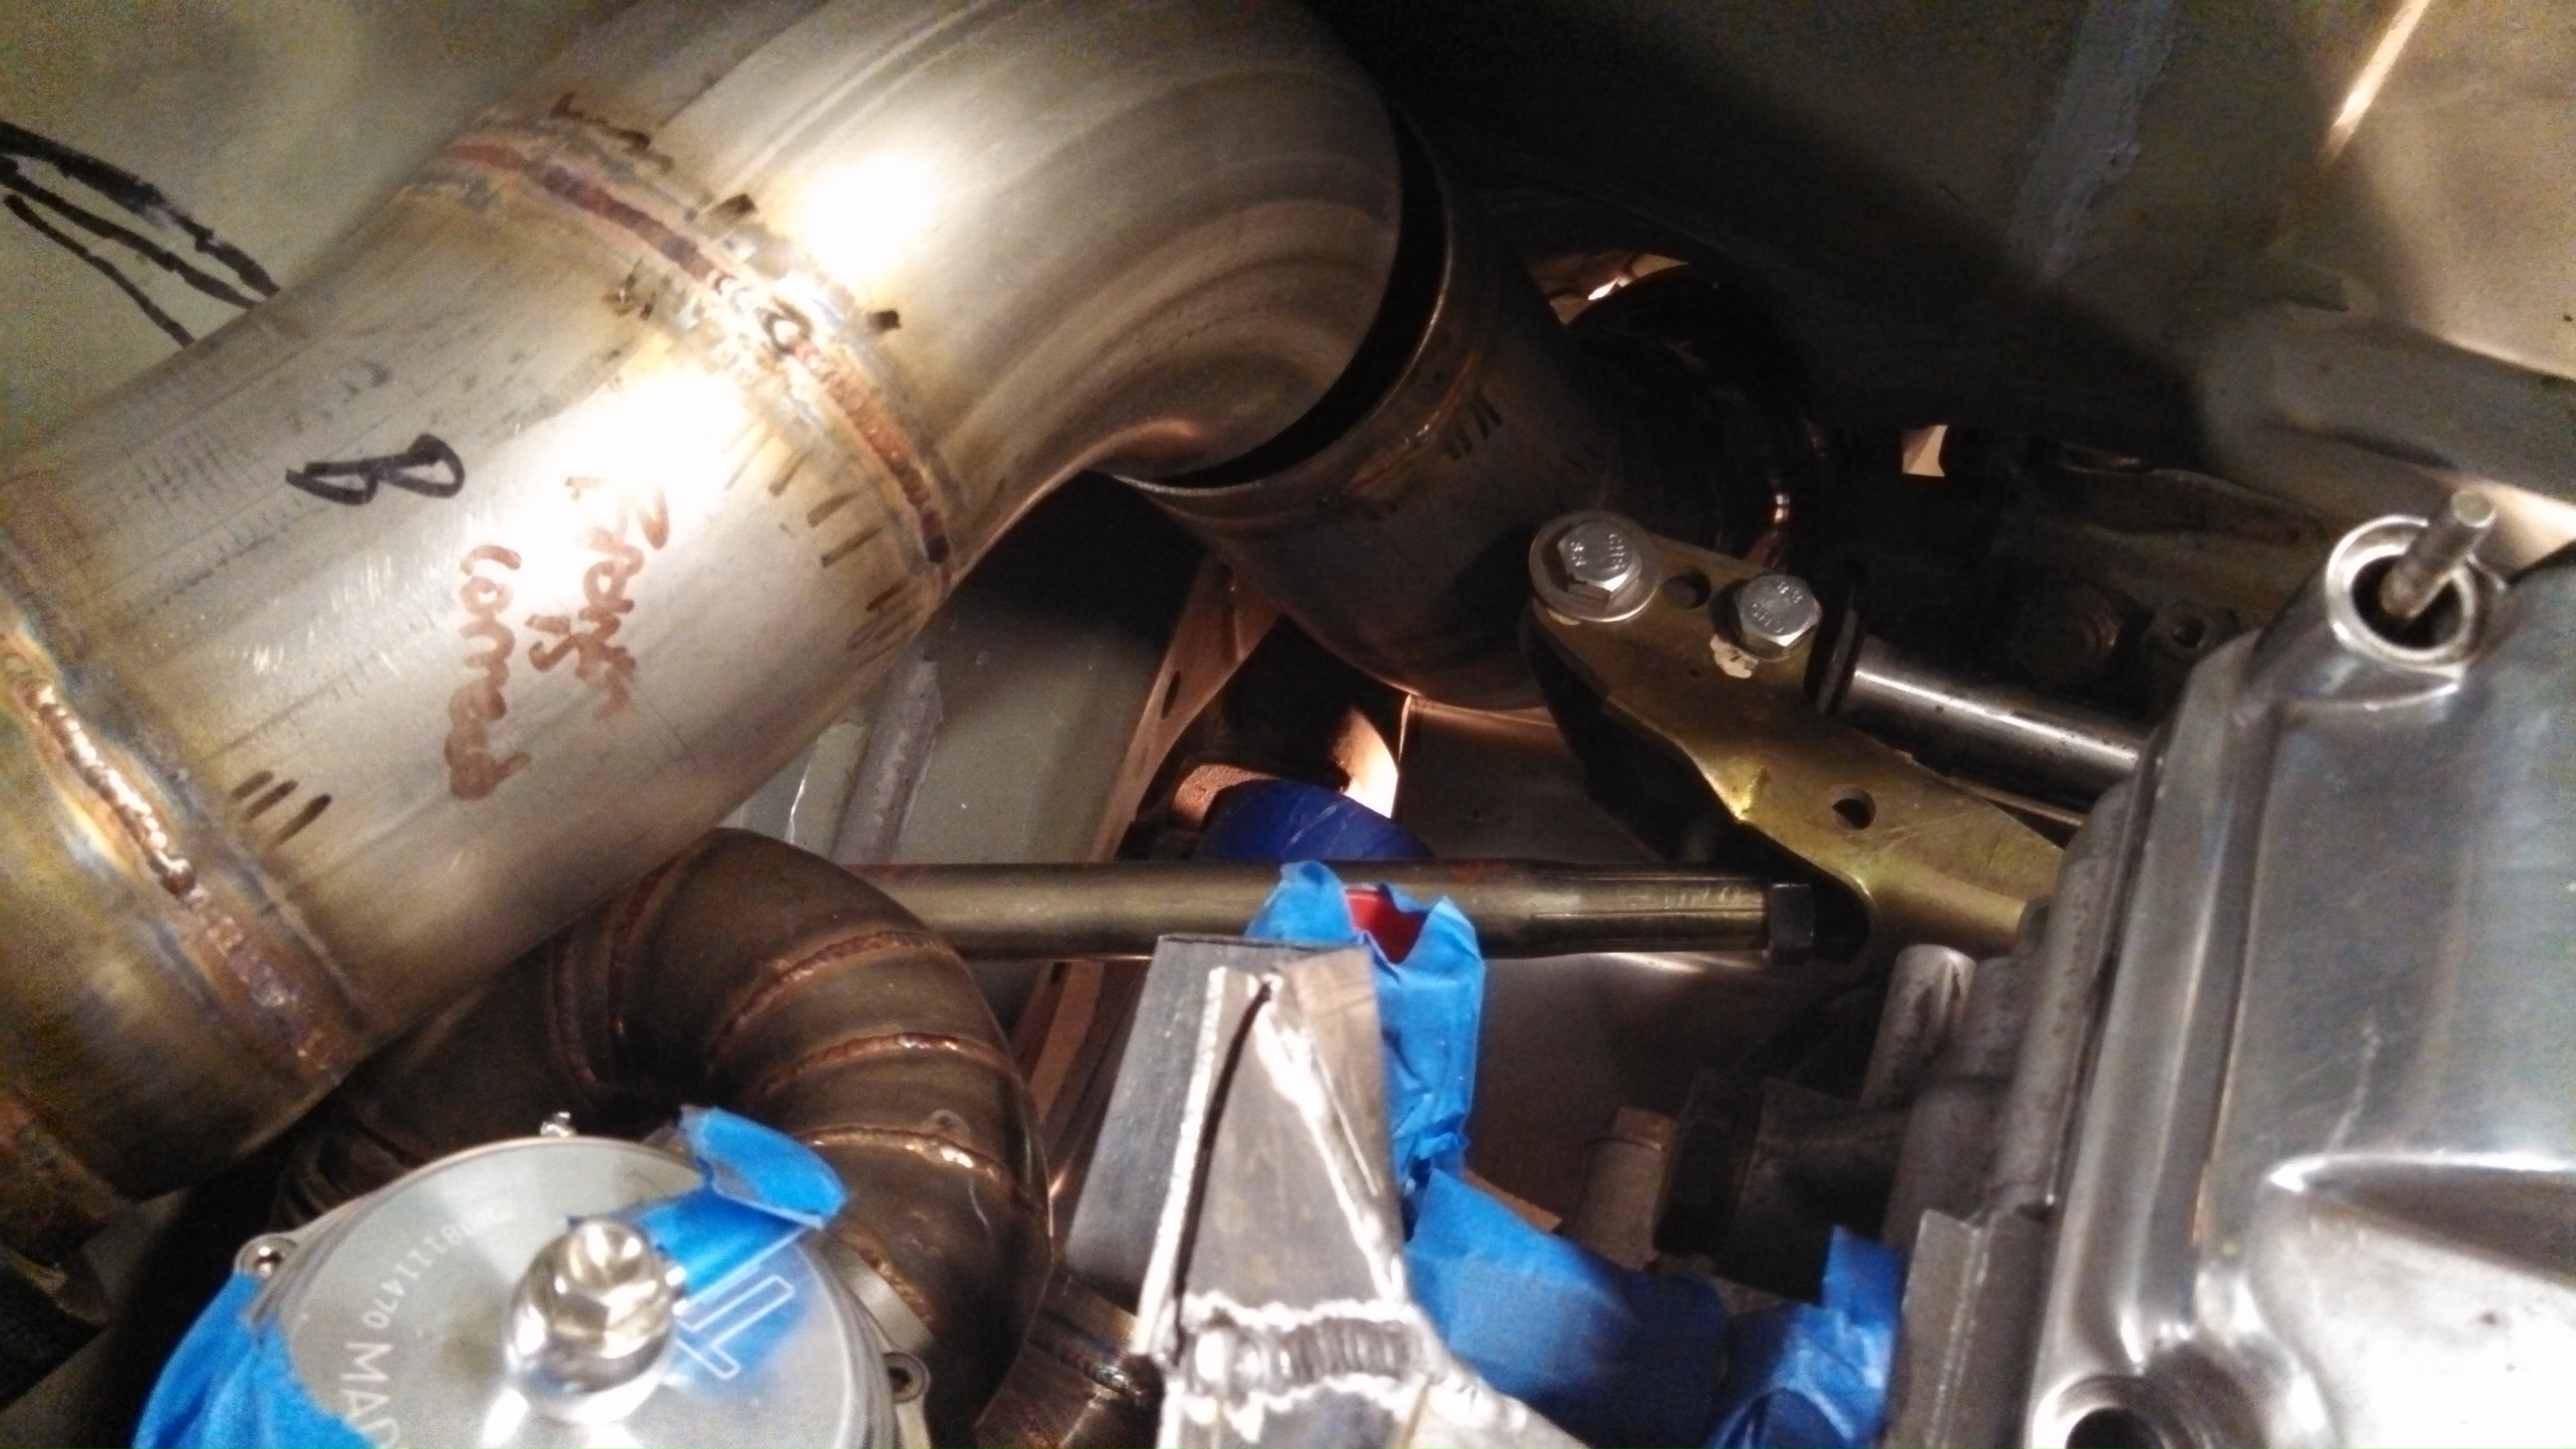
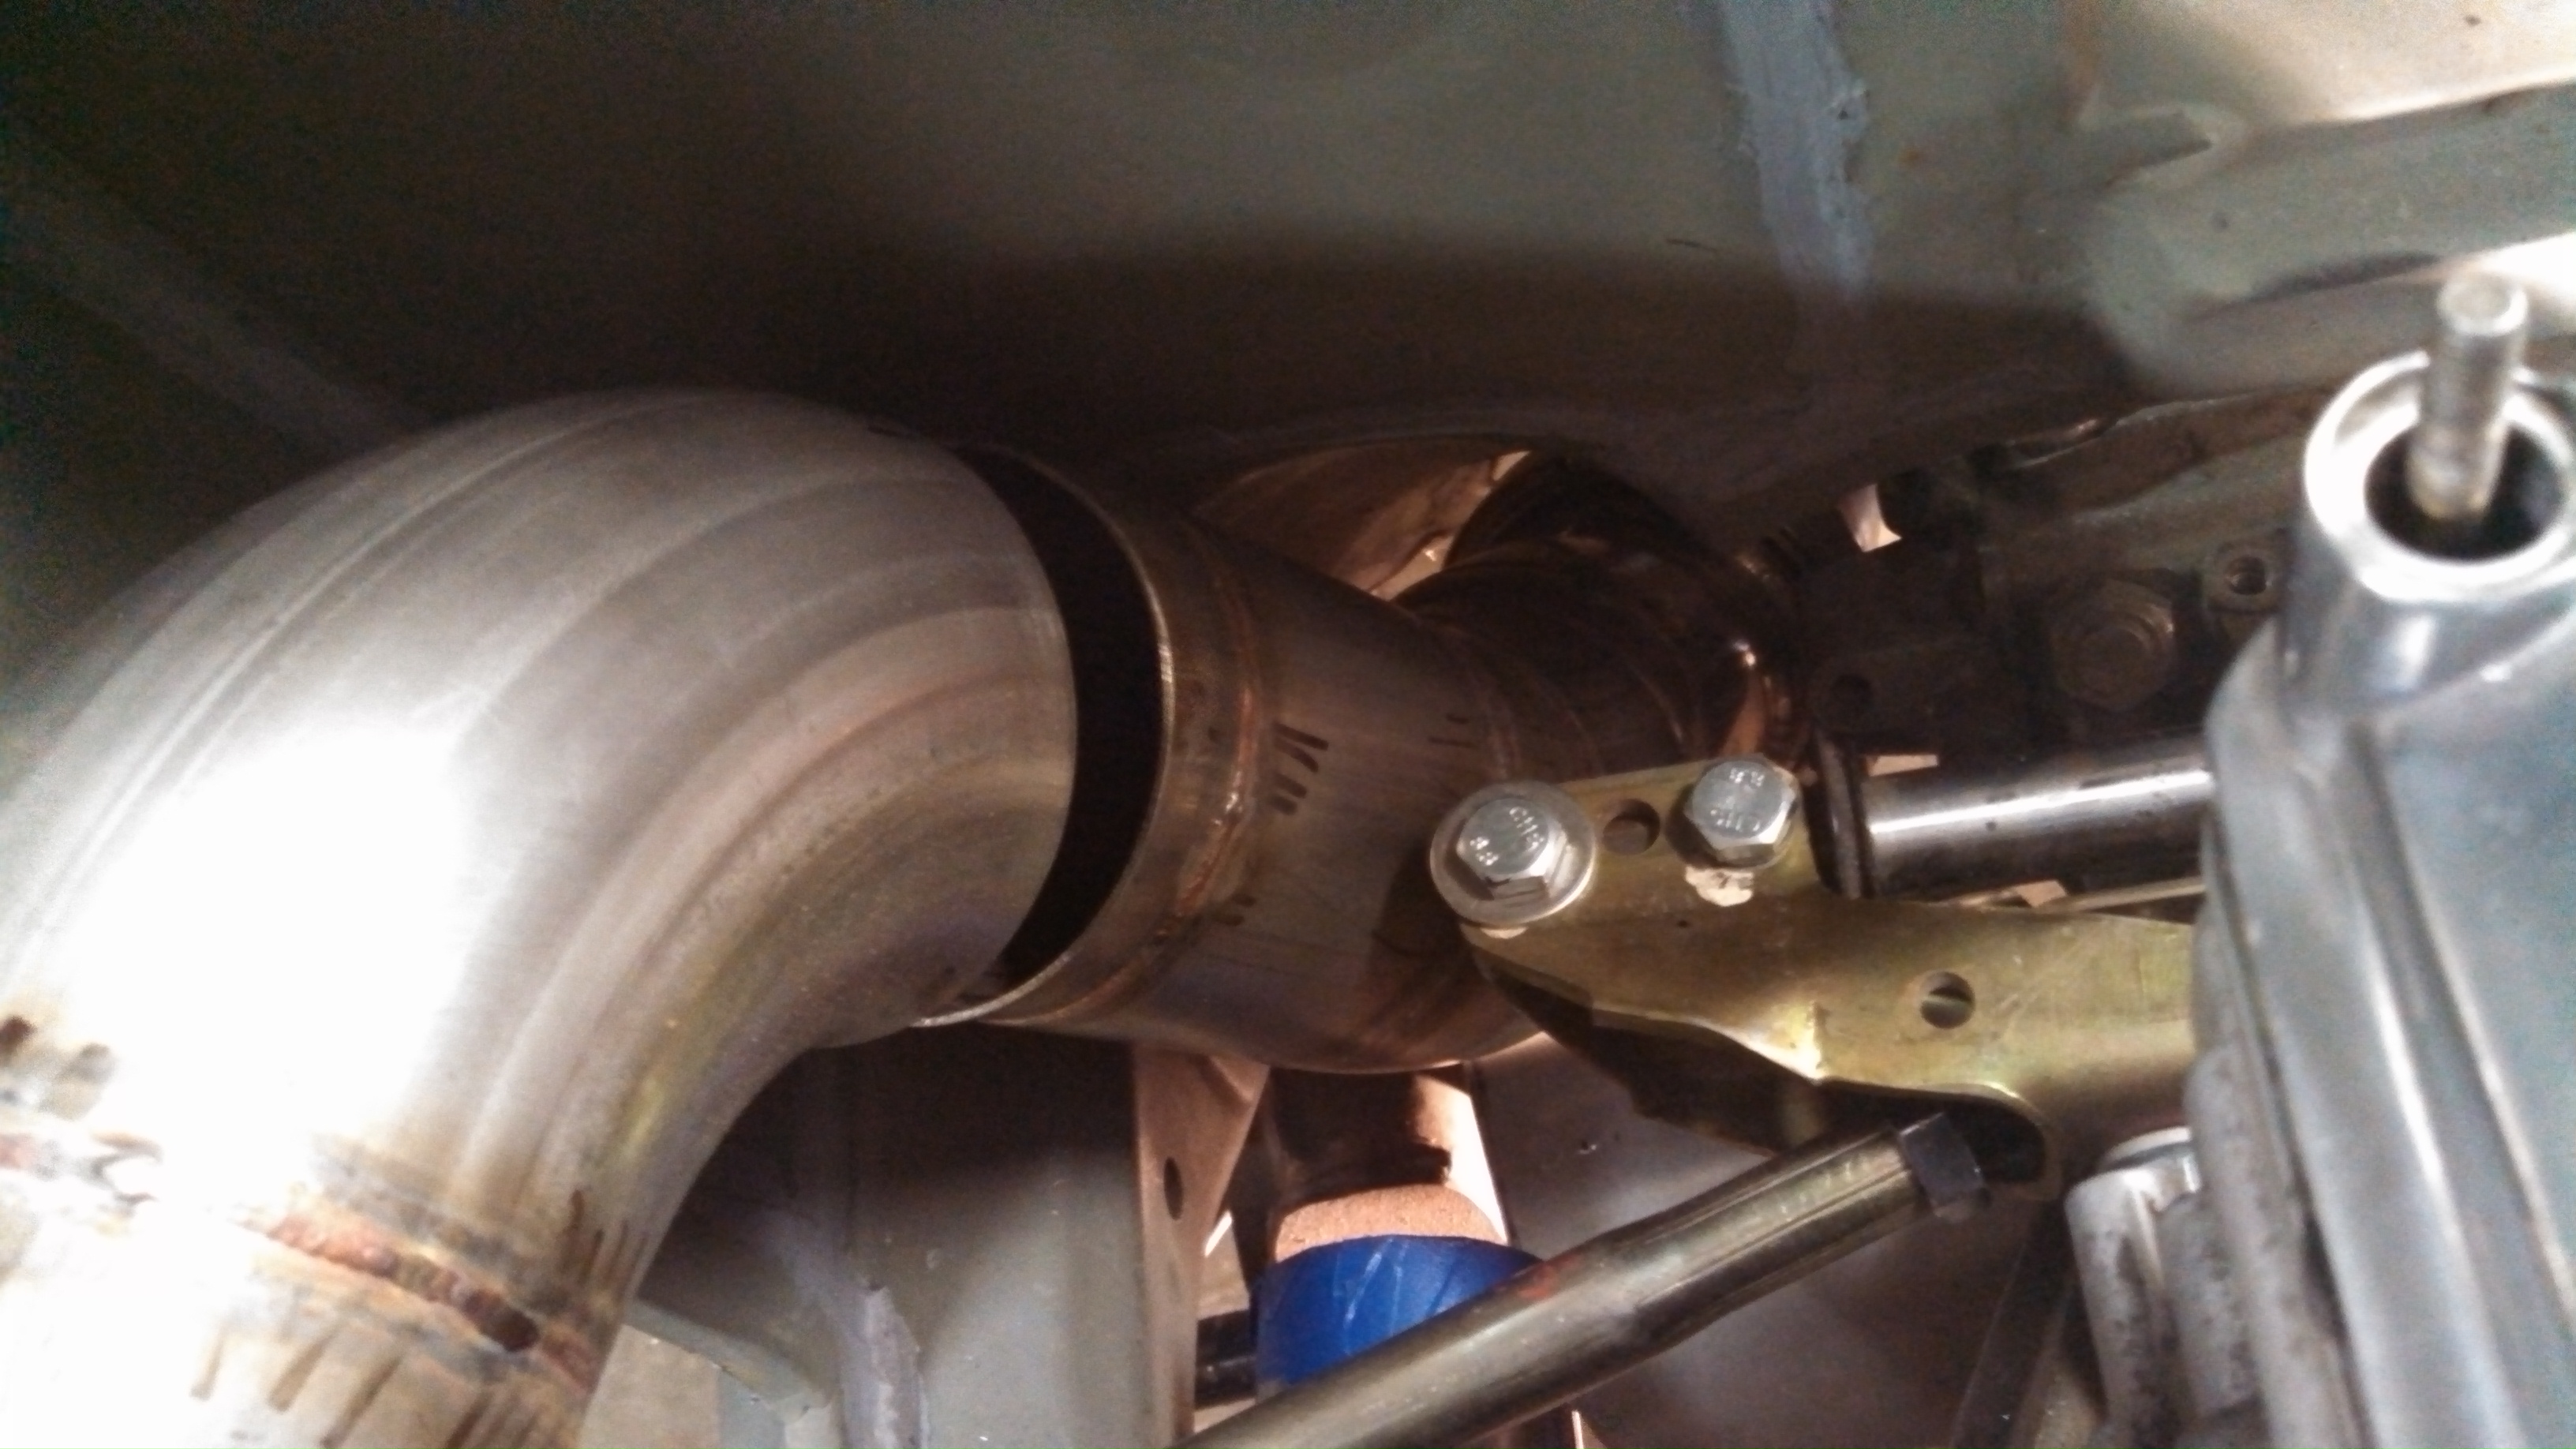
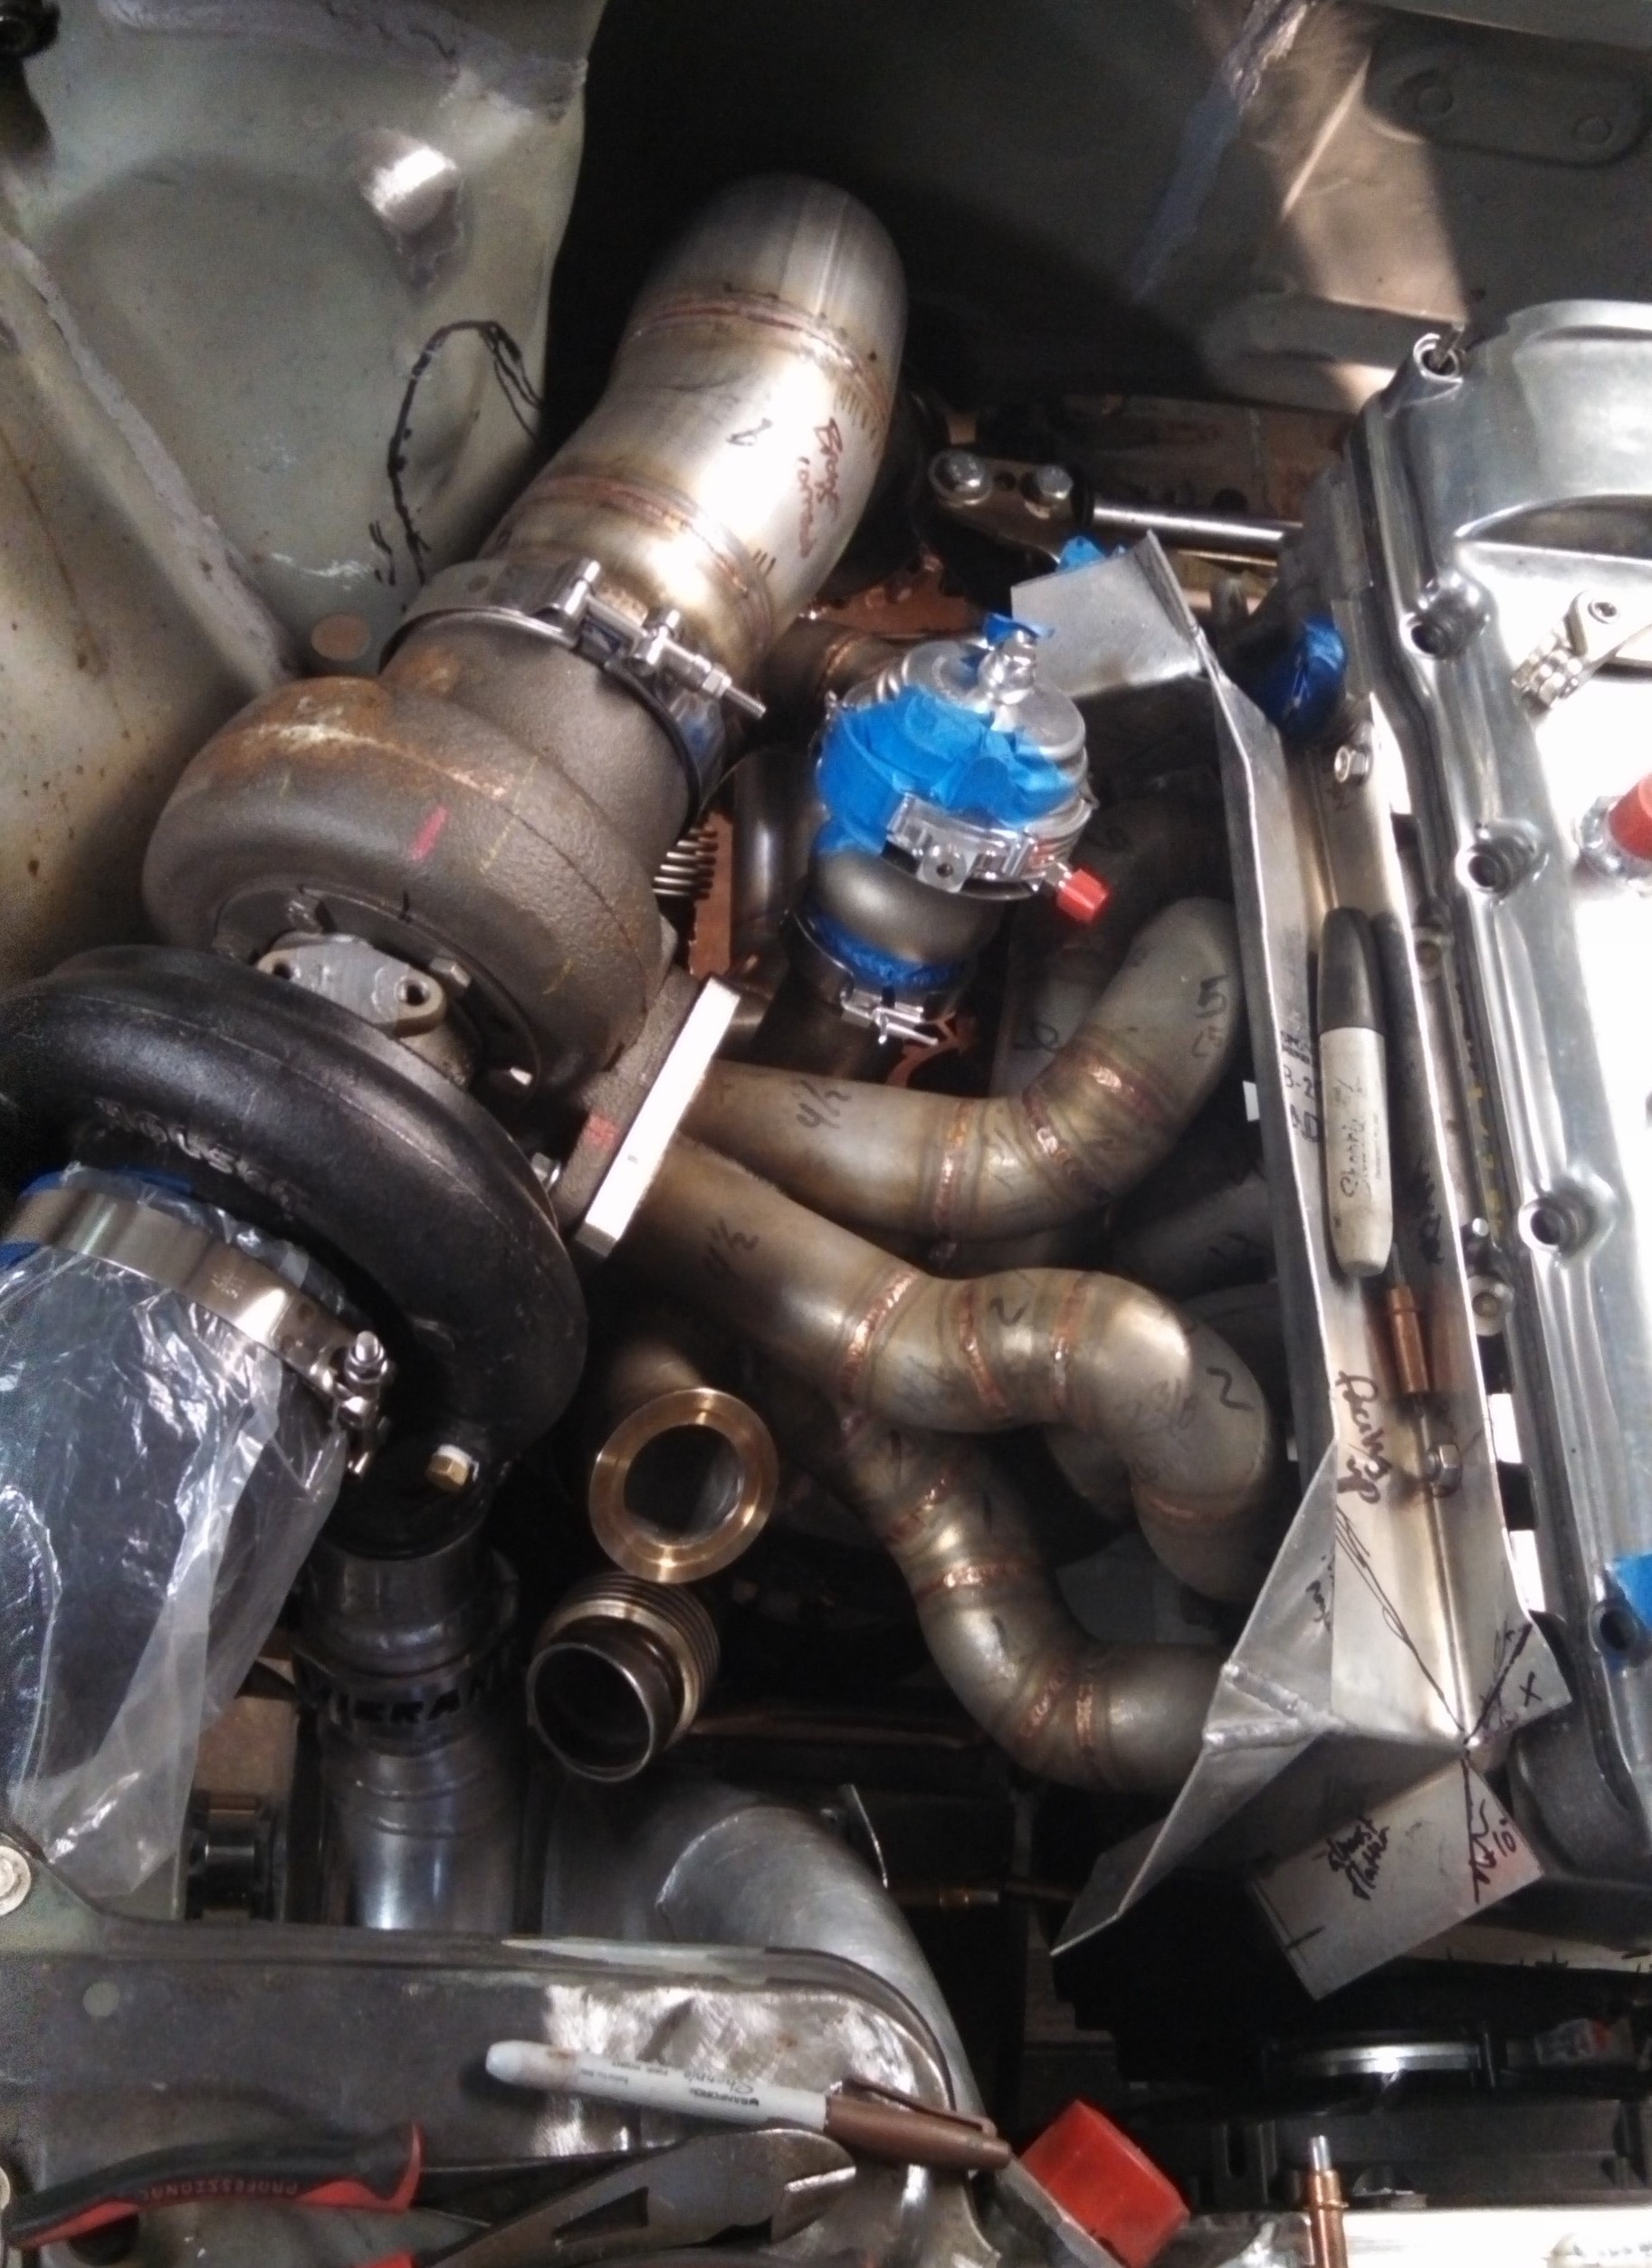
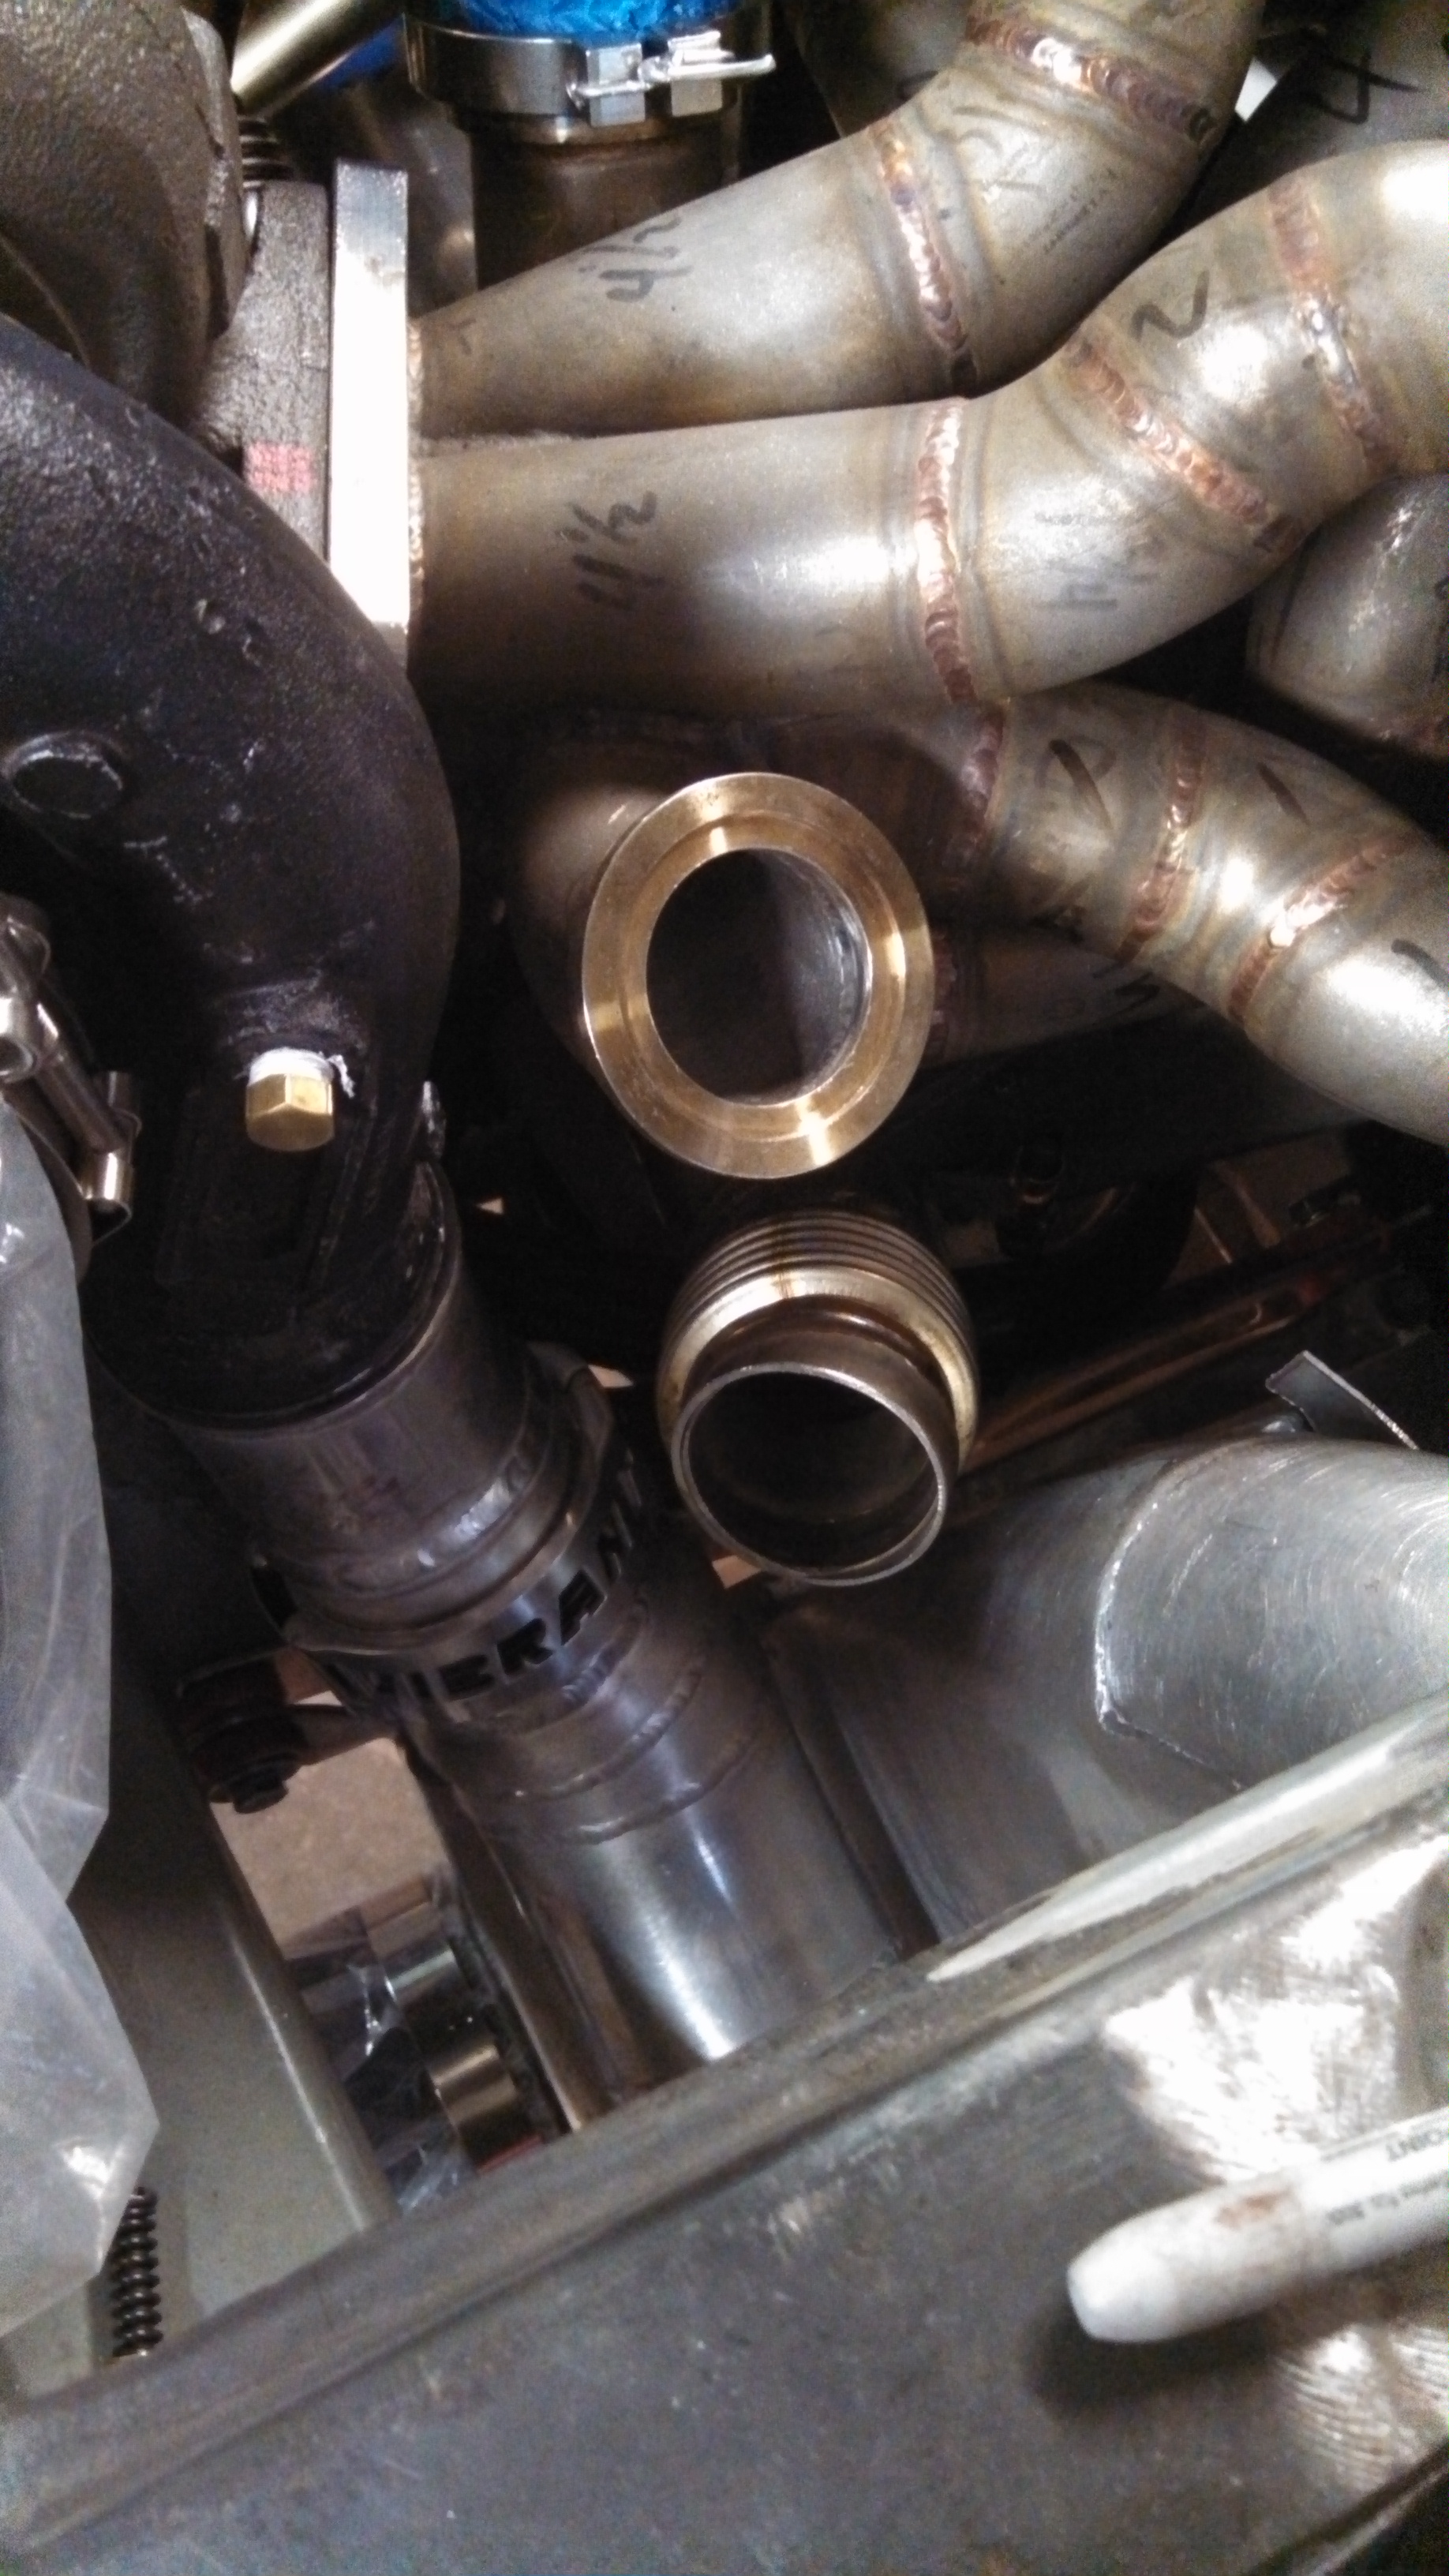
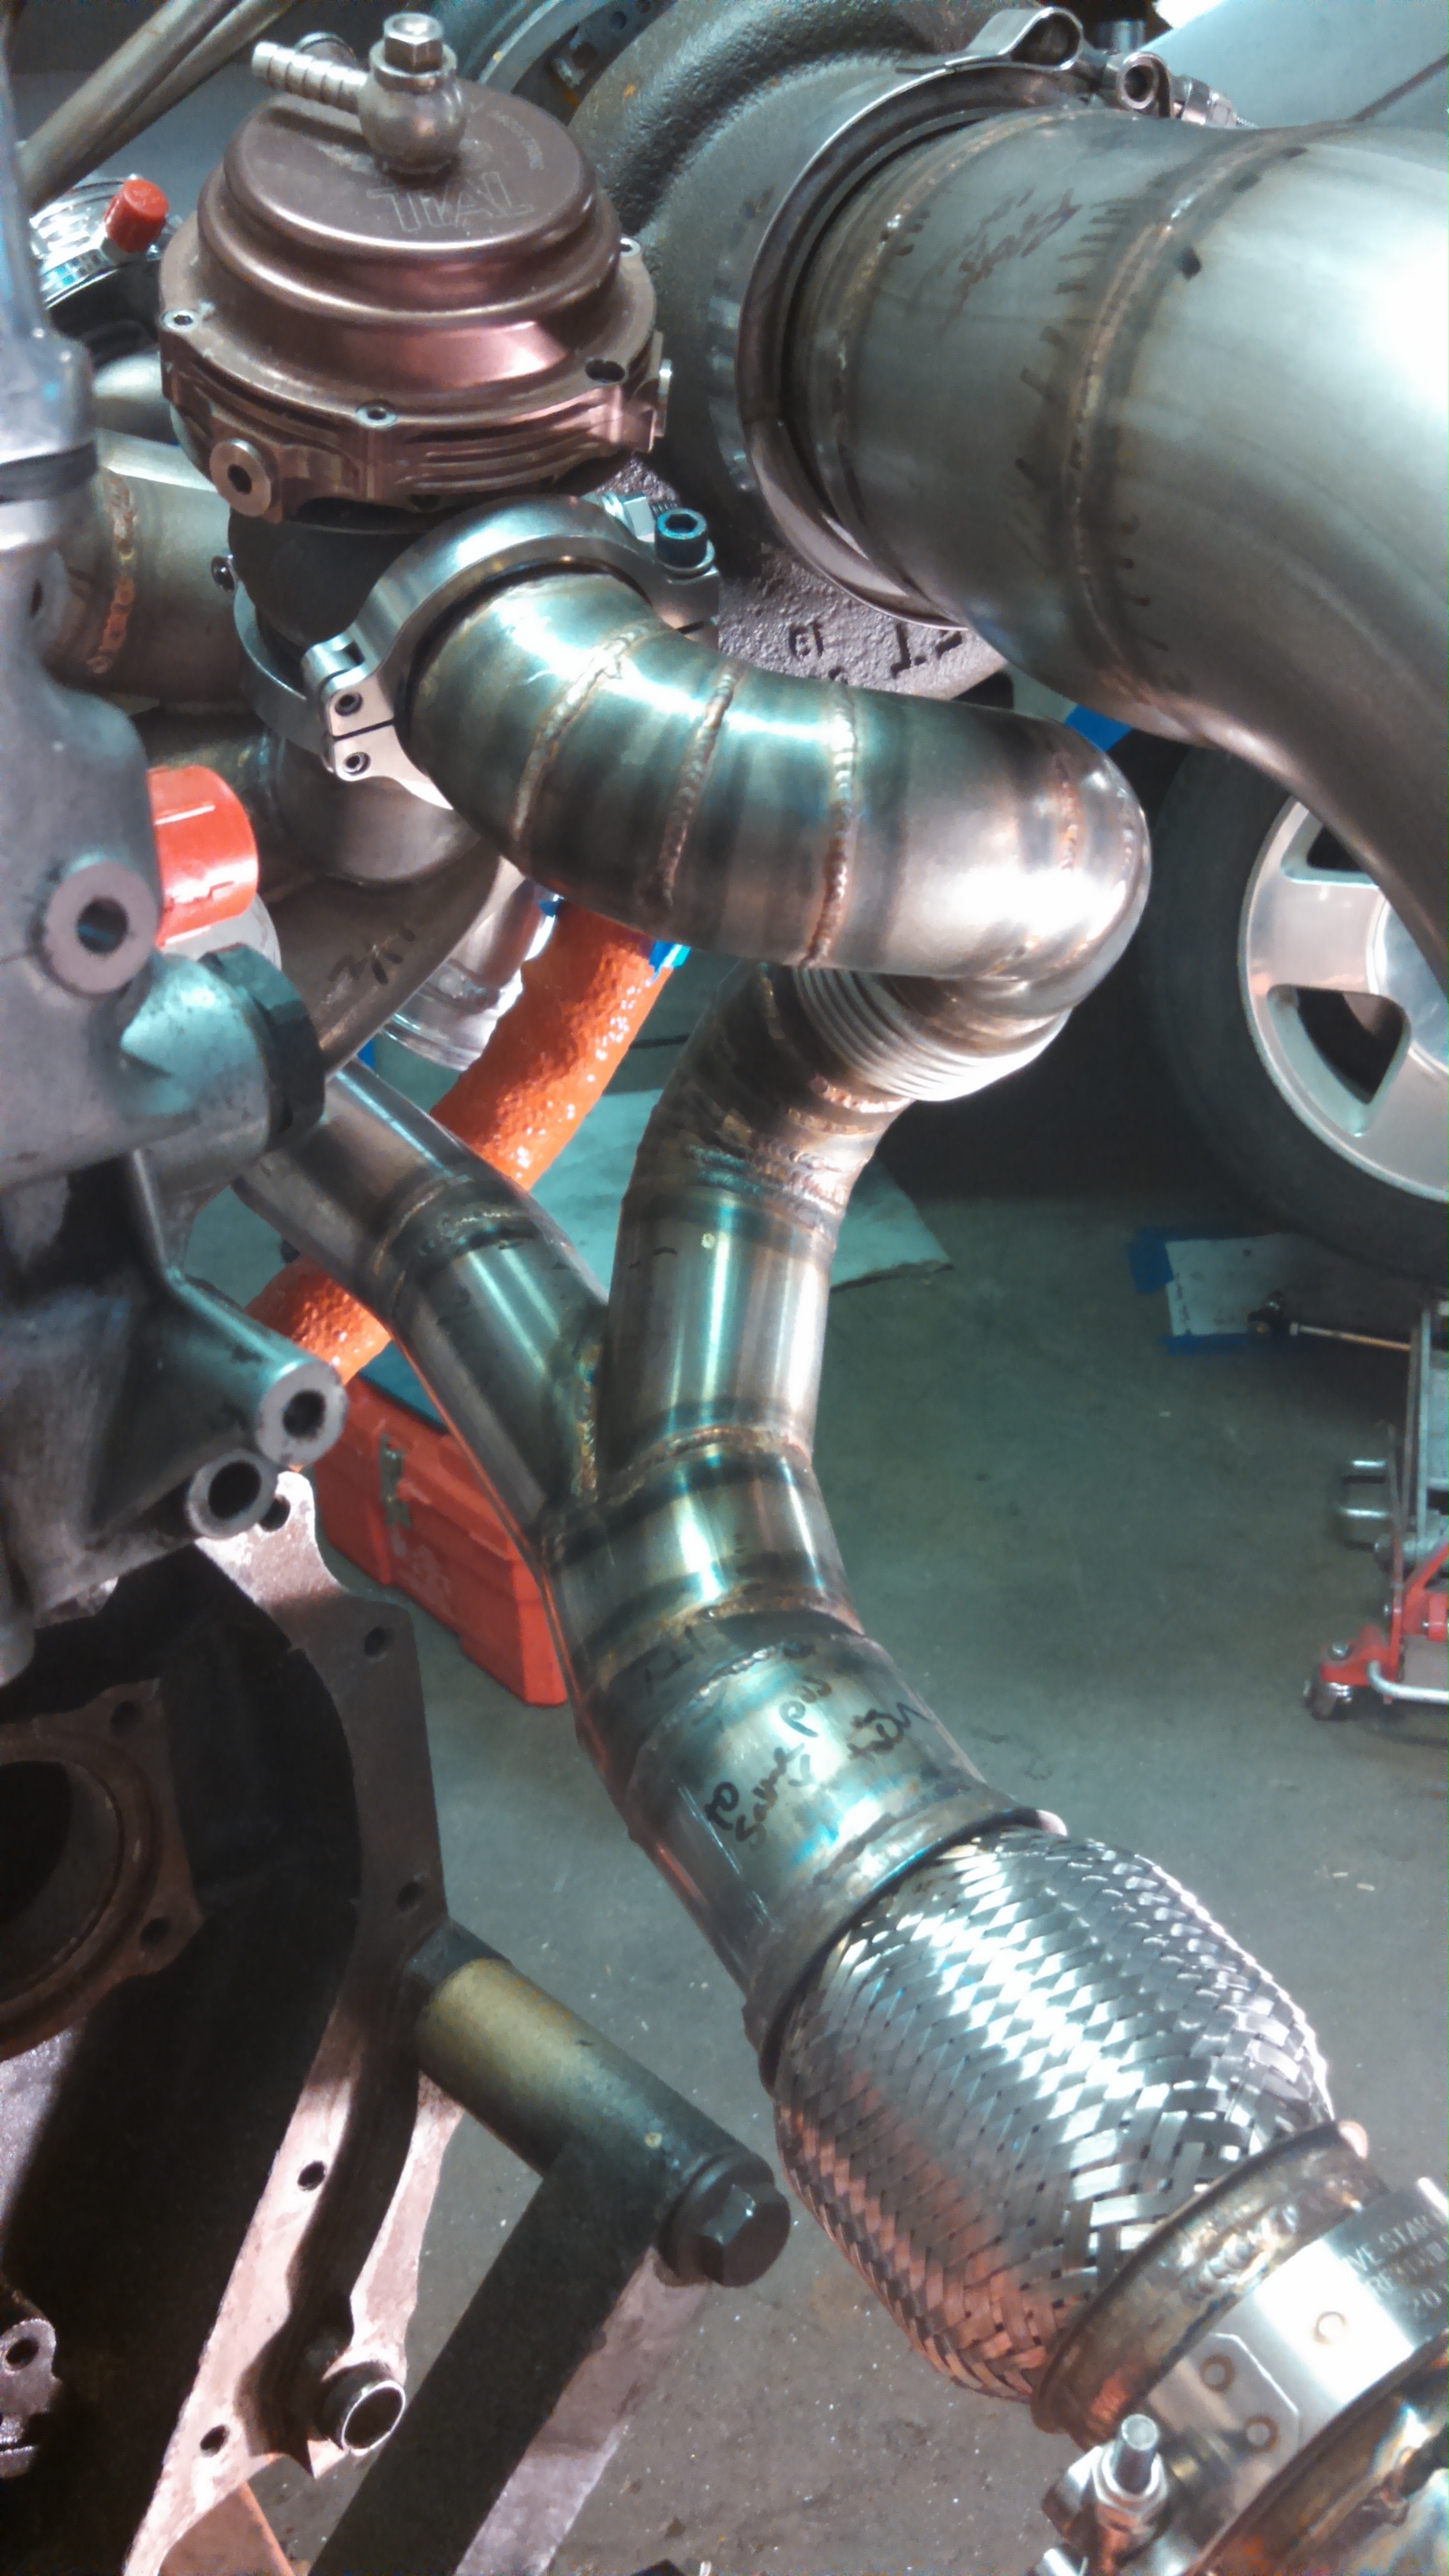
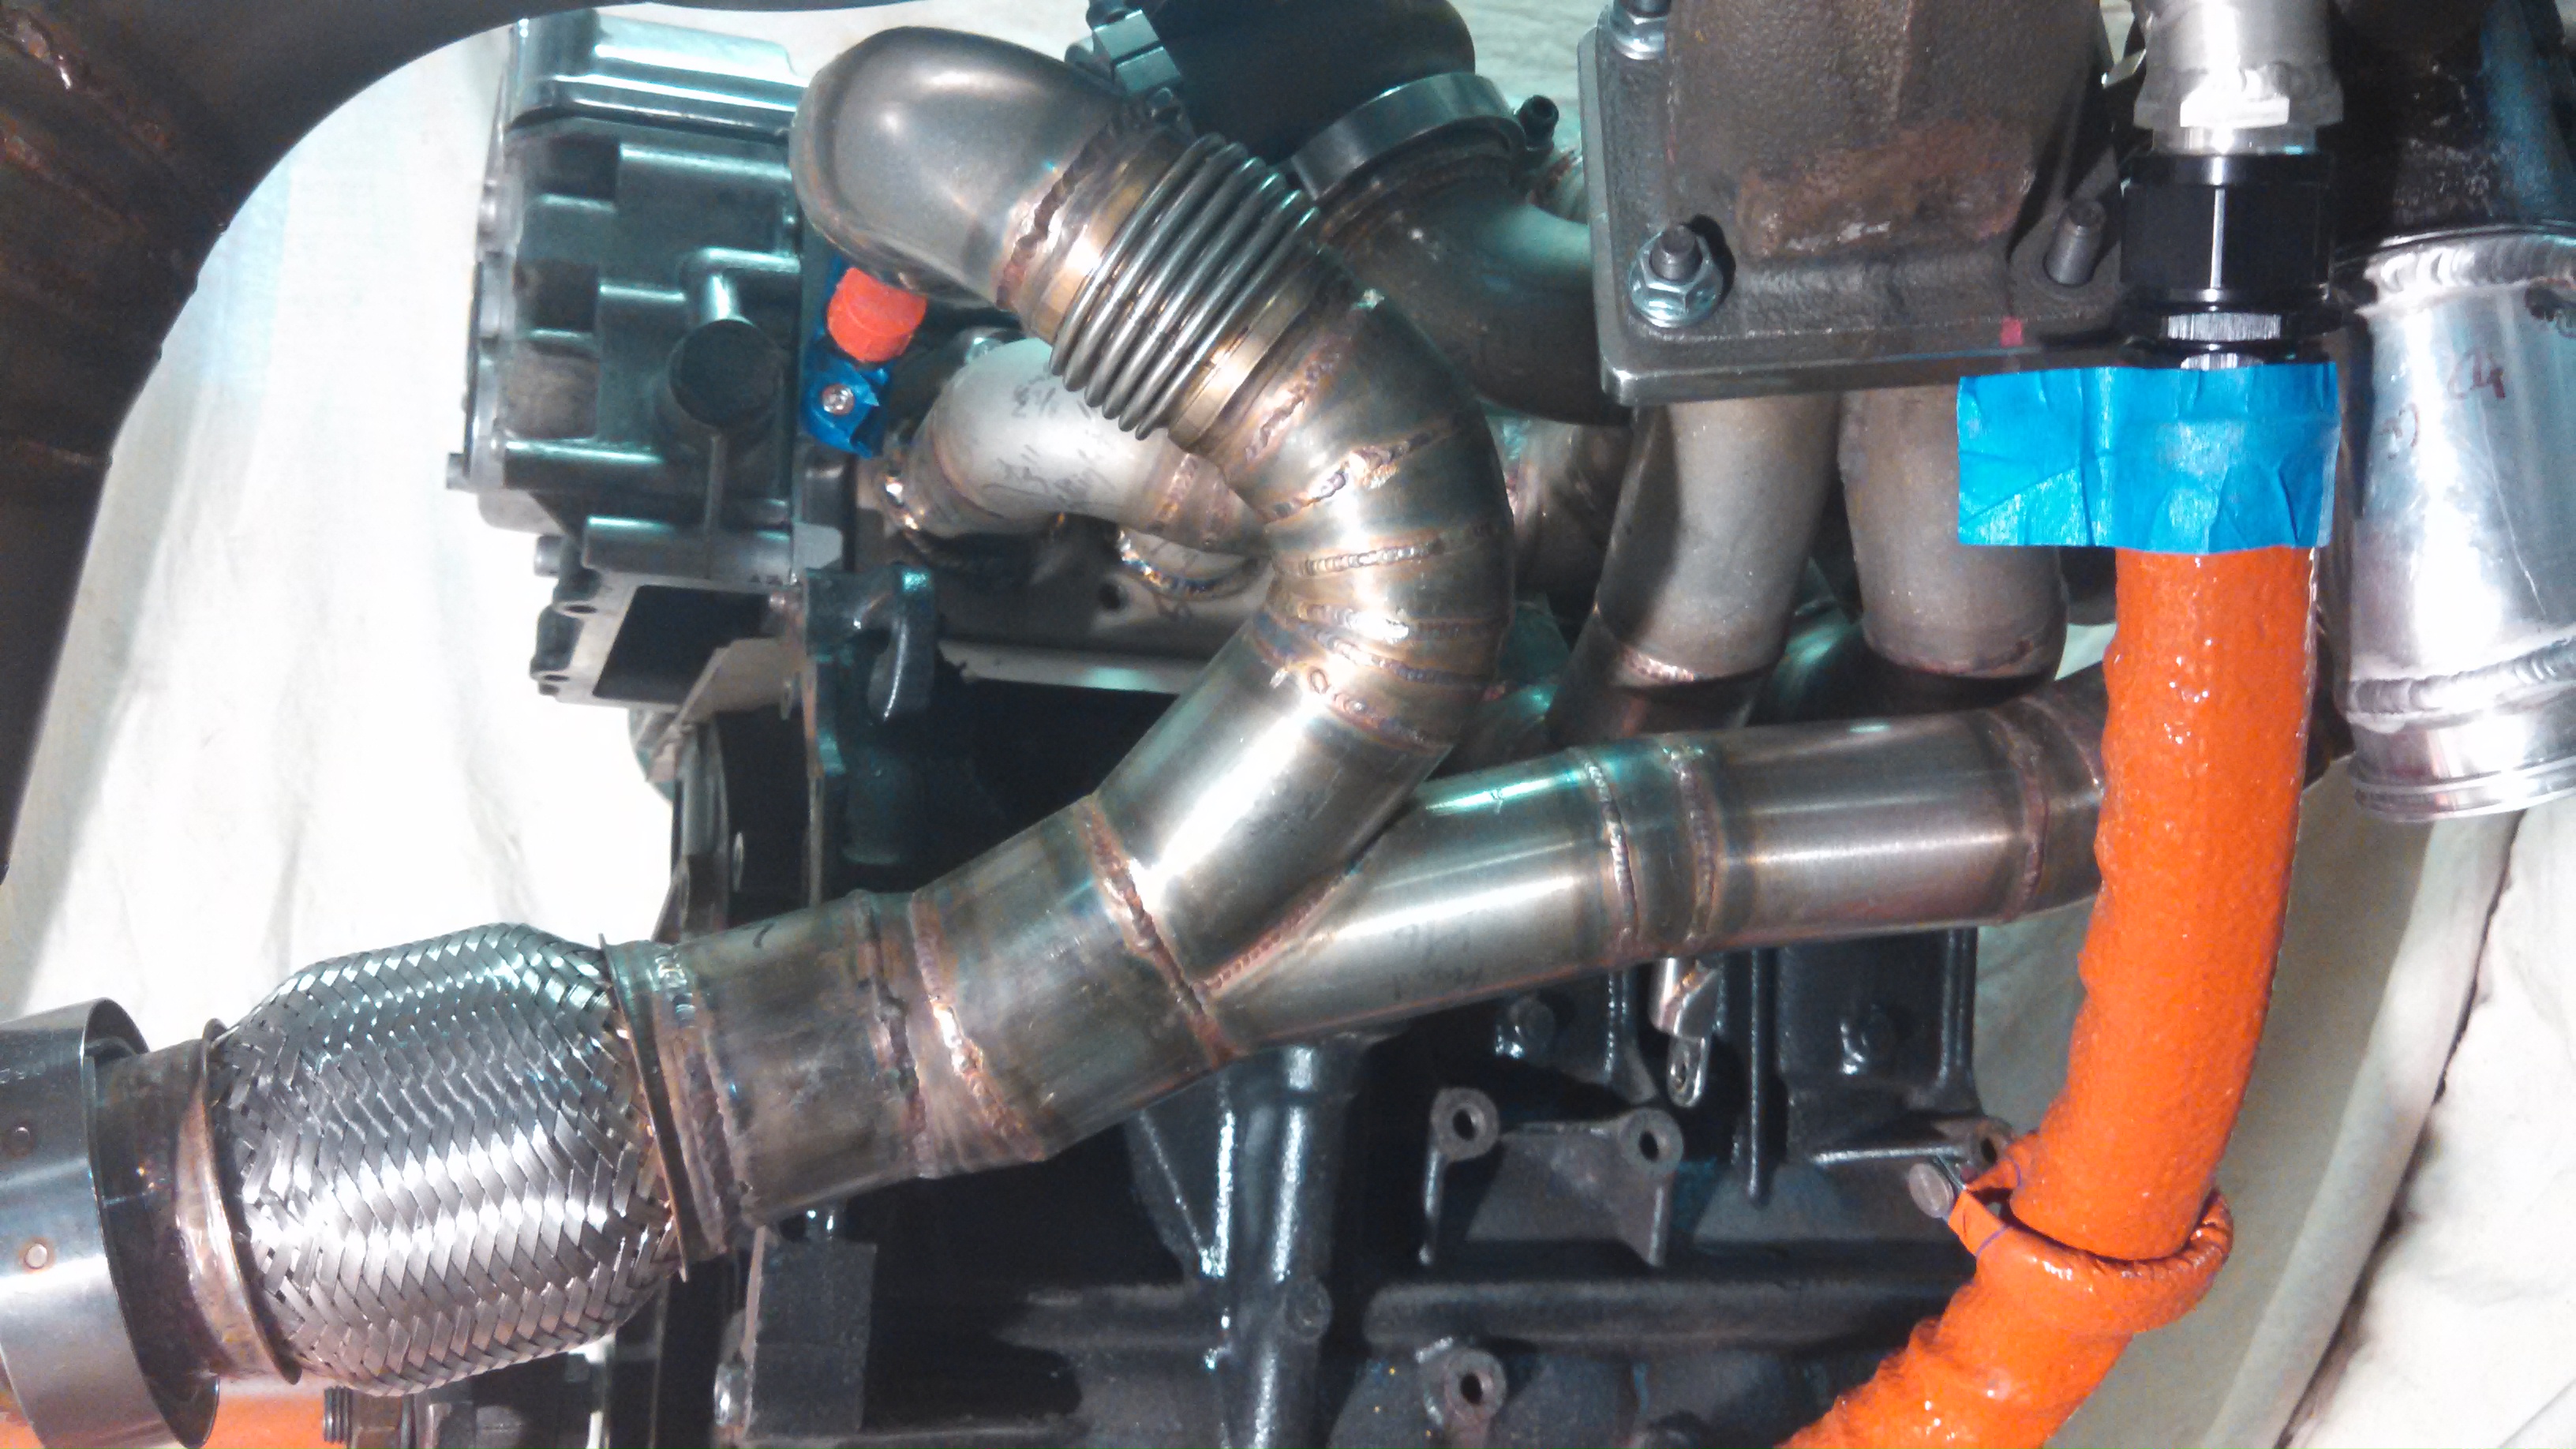
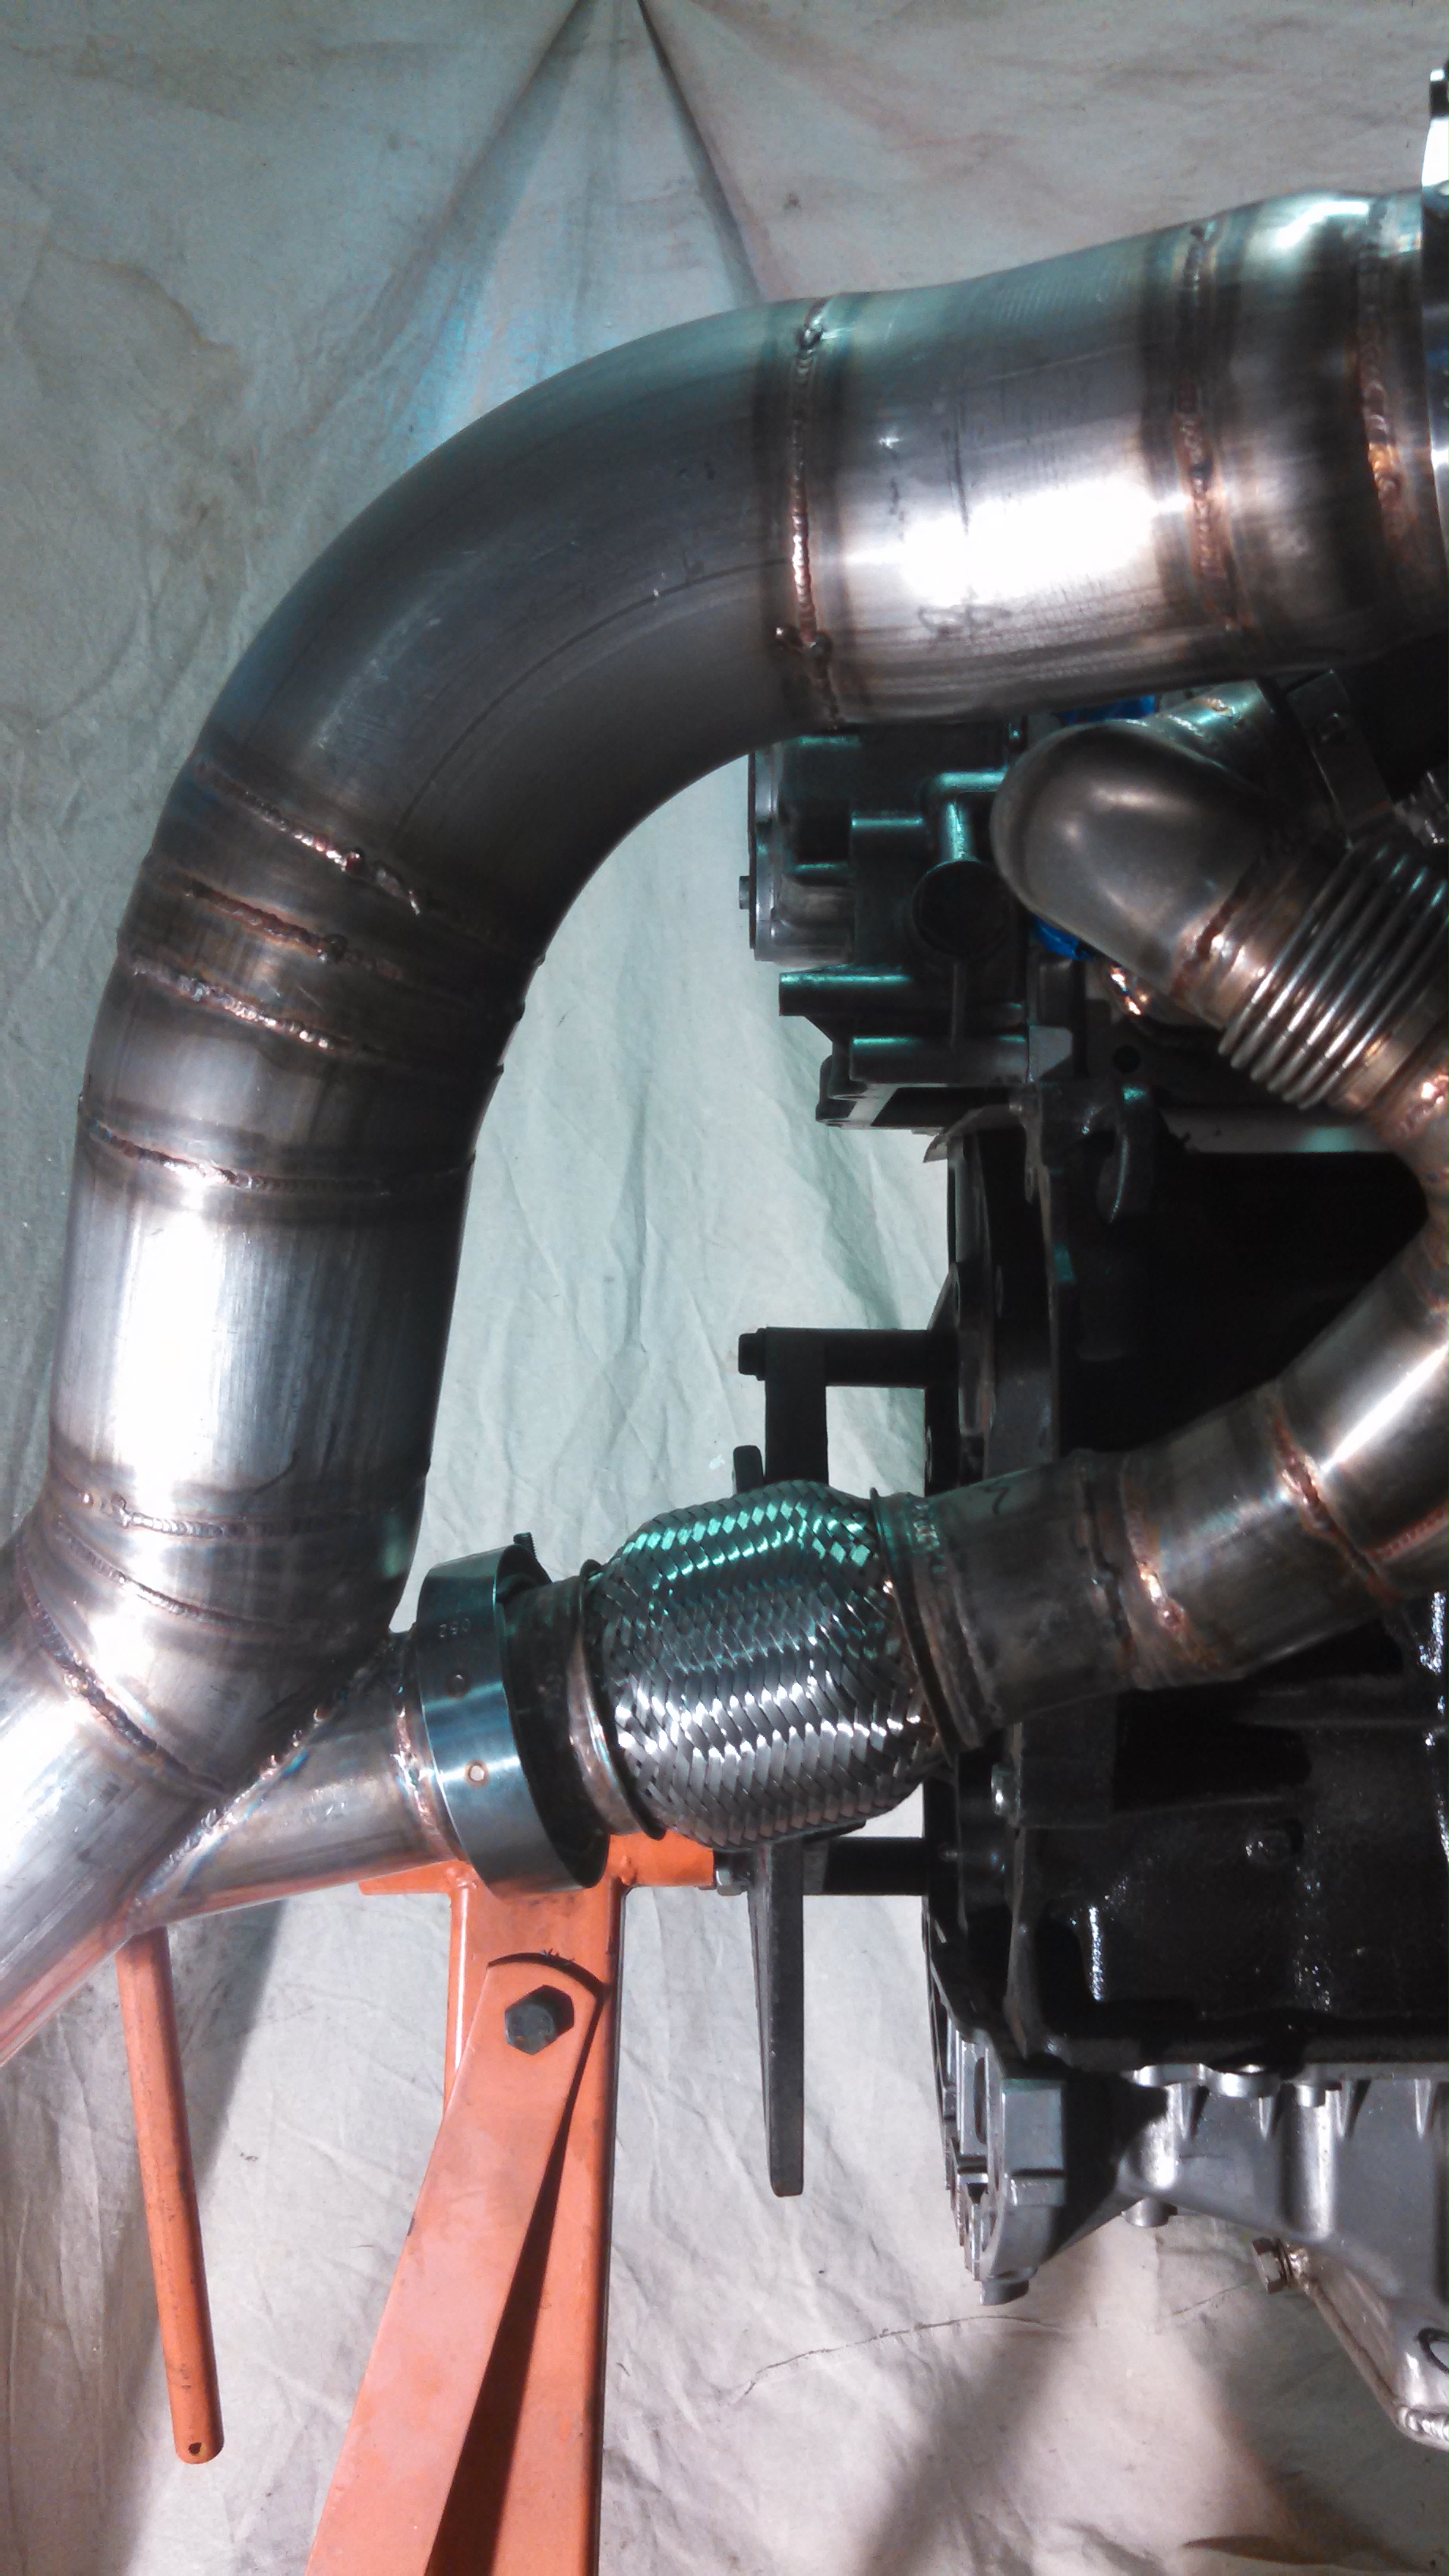
And the Wastegate merge back into the downpipe, its dual 2.0” to 2.5” v-band and flex-joint and then back into the downpipe.
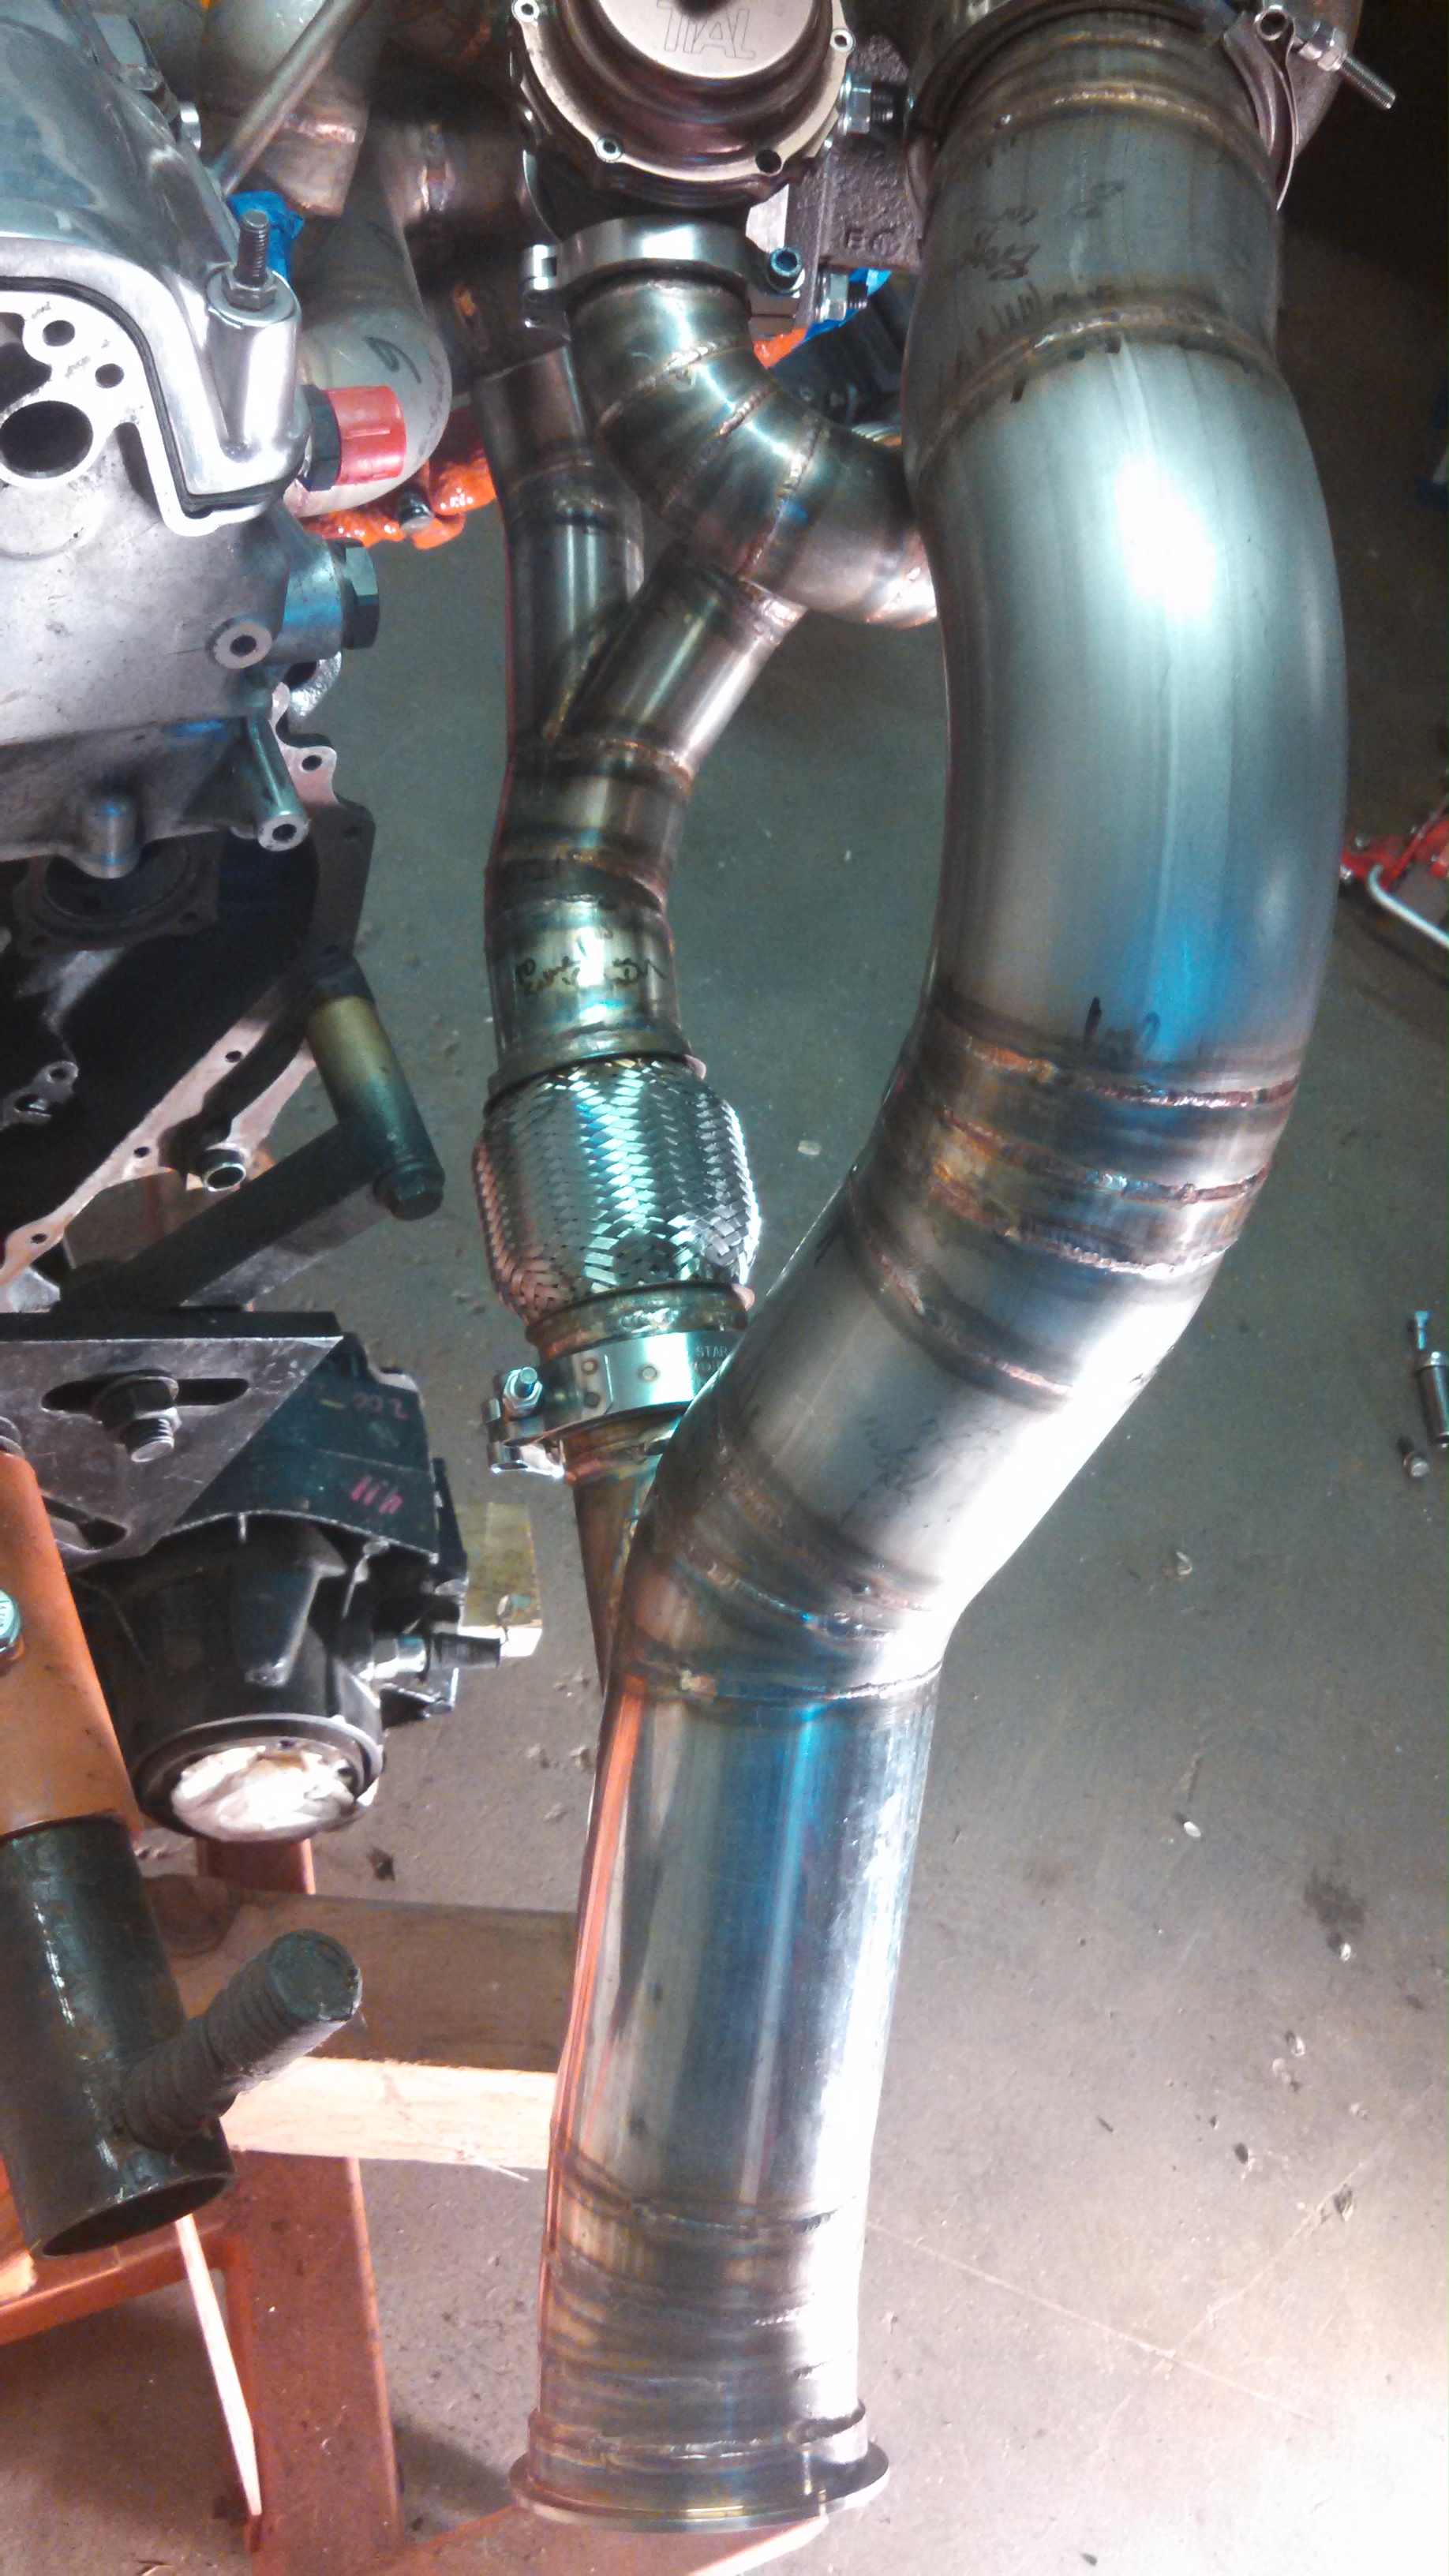
- wg dump into downpipe.jpg (1.48 MiB) Viewed 61471 times
NOTE: the sizeable hole between the downpipe and the Wastegate outlet Y , flex, v-band etc. the steering rod has to fit through there!!! With the HTMS steering arms on my strut tubes and upper ground control plates, the steering rod has been run through full droop and compression at full steering range of motion, and it clears!!!
Re: 24vVR6T CQ Project: EATSGTR, chassis FAB
Posted: Tue Jul 08, 2014 11:44 pm
by my2000apb
UPDATE!!!
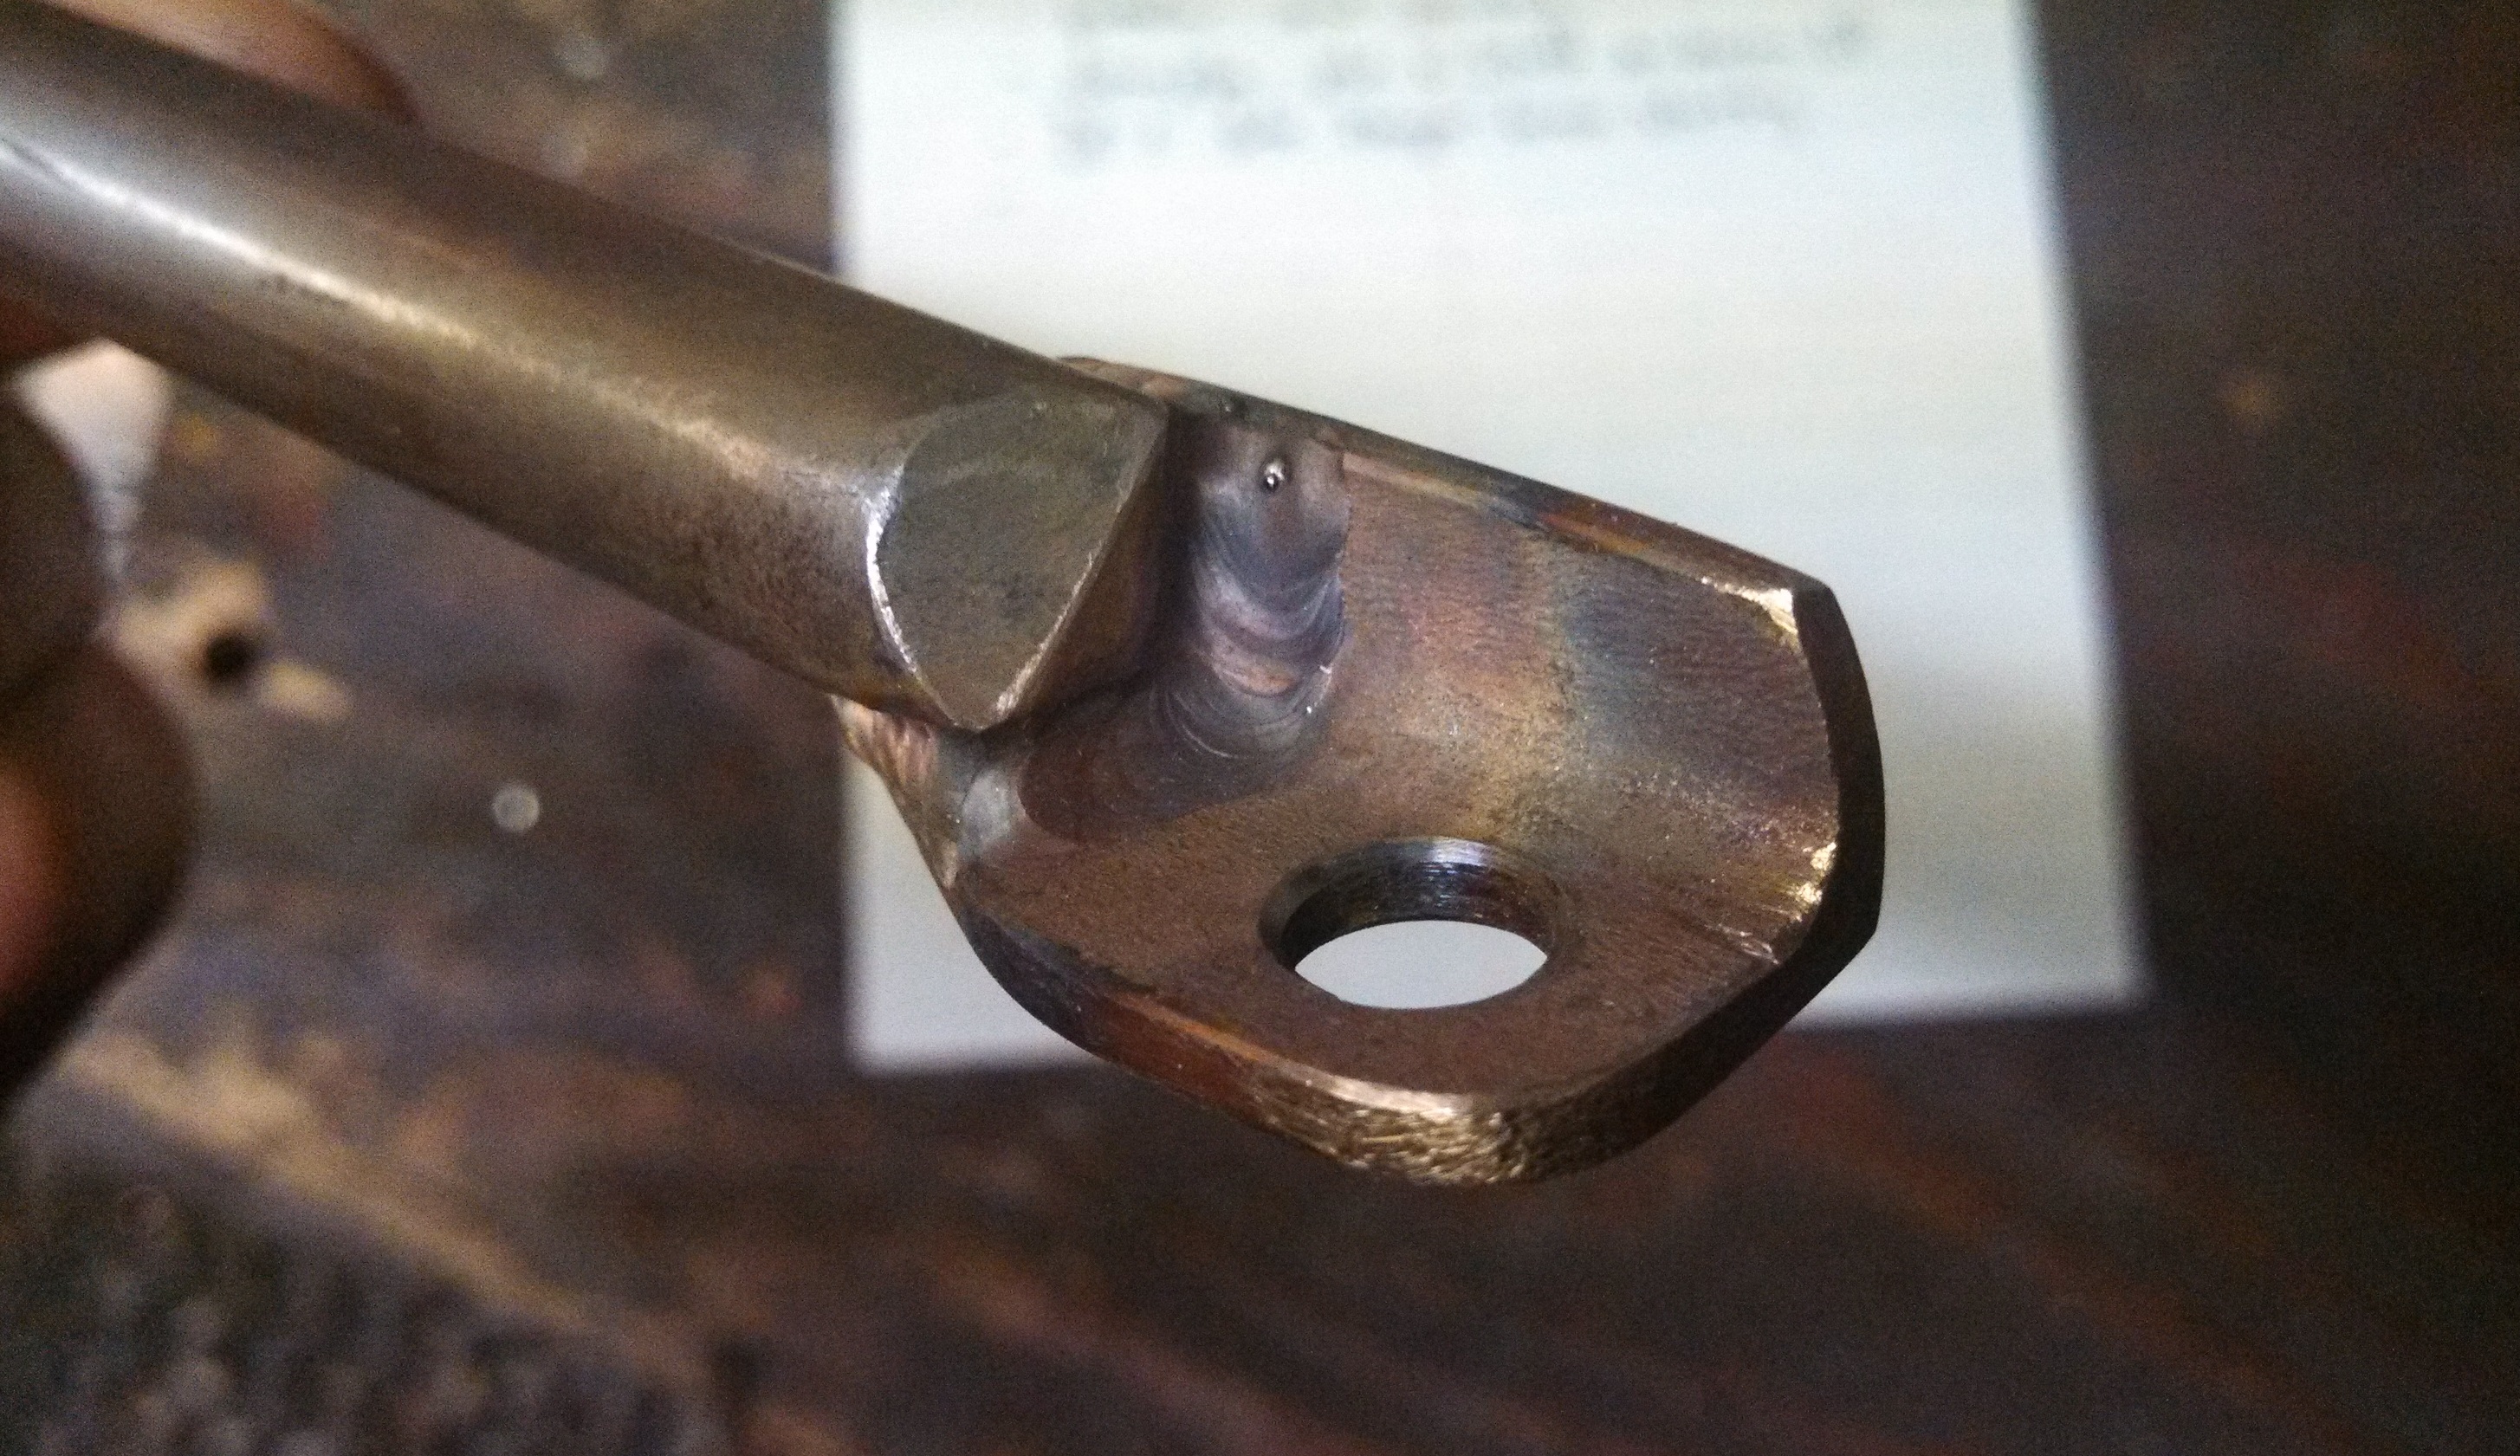
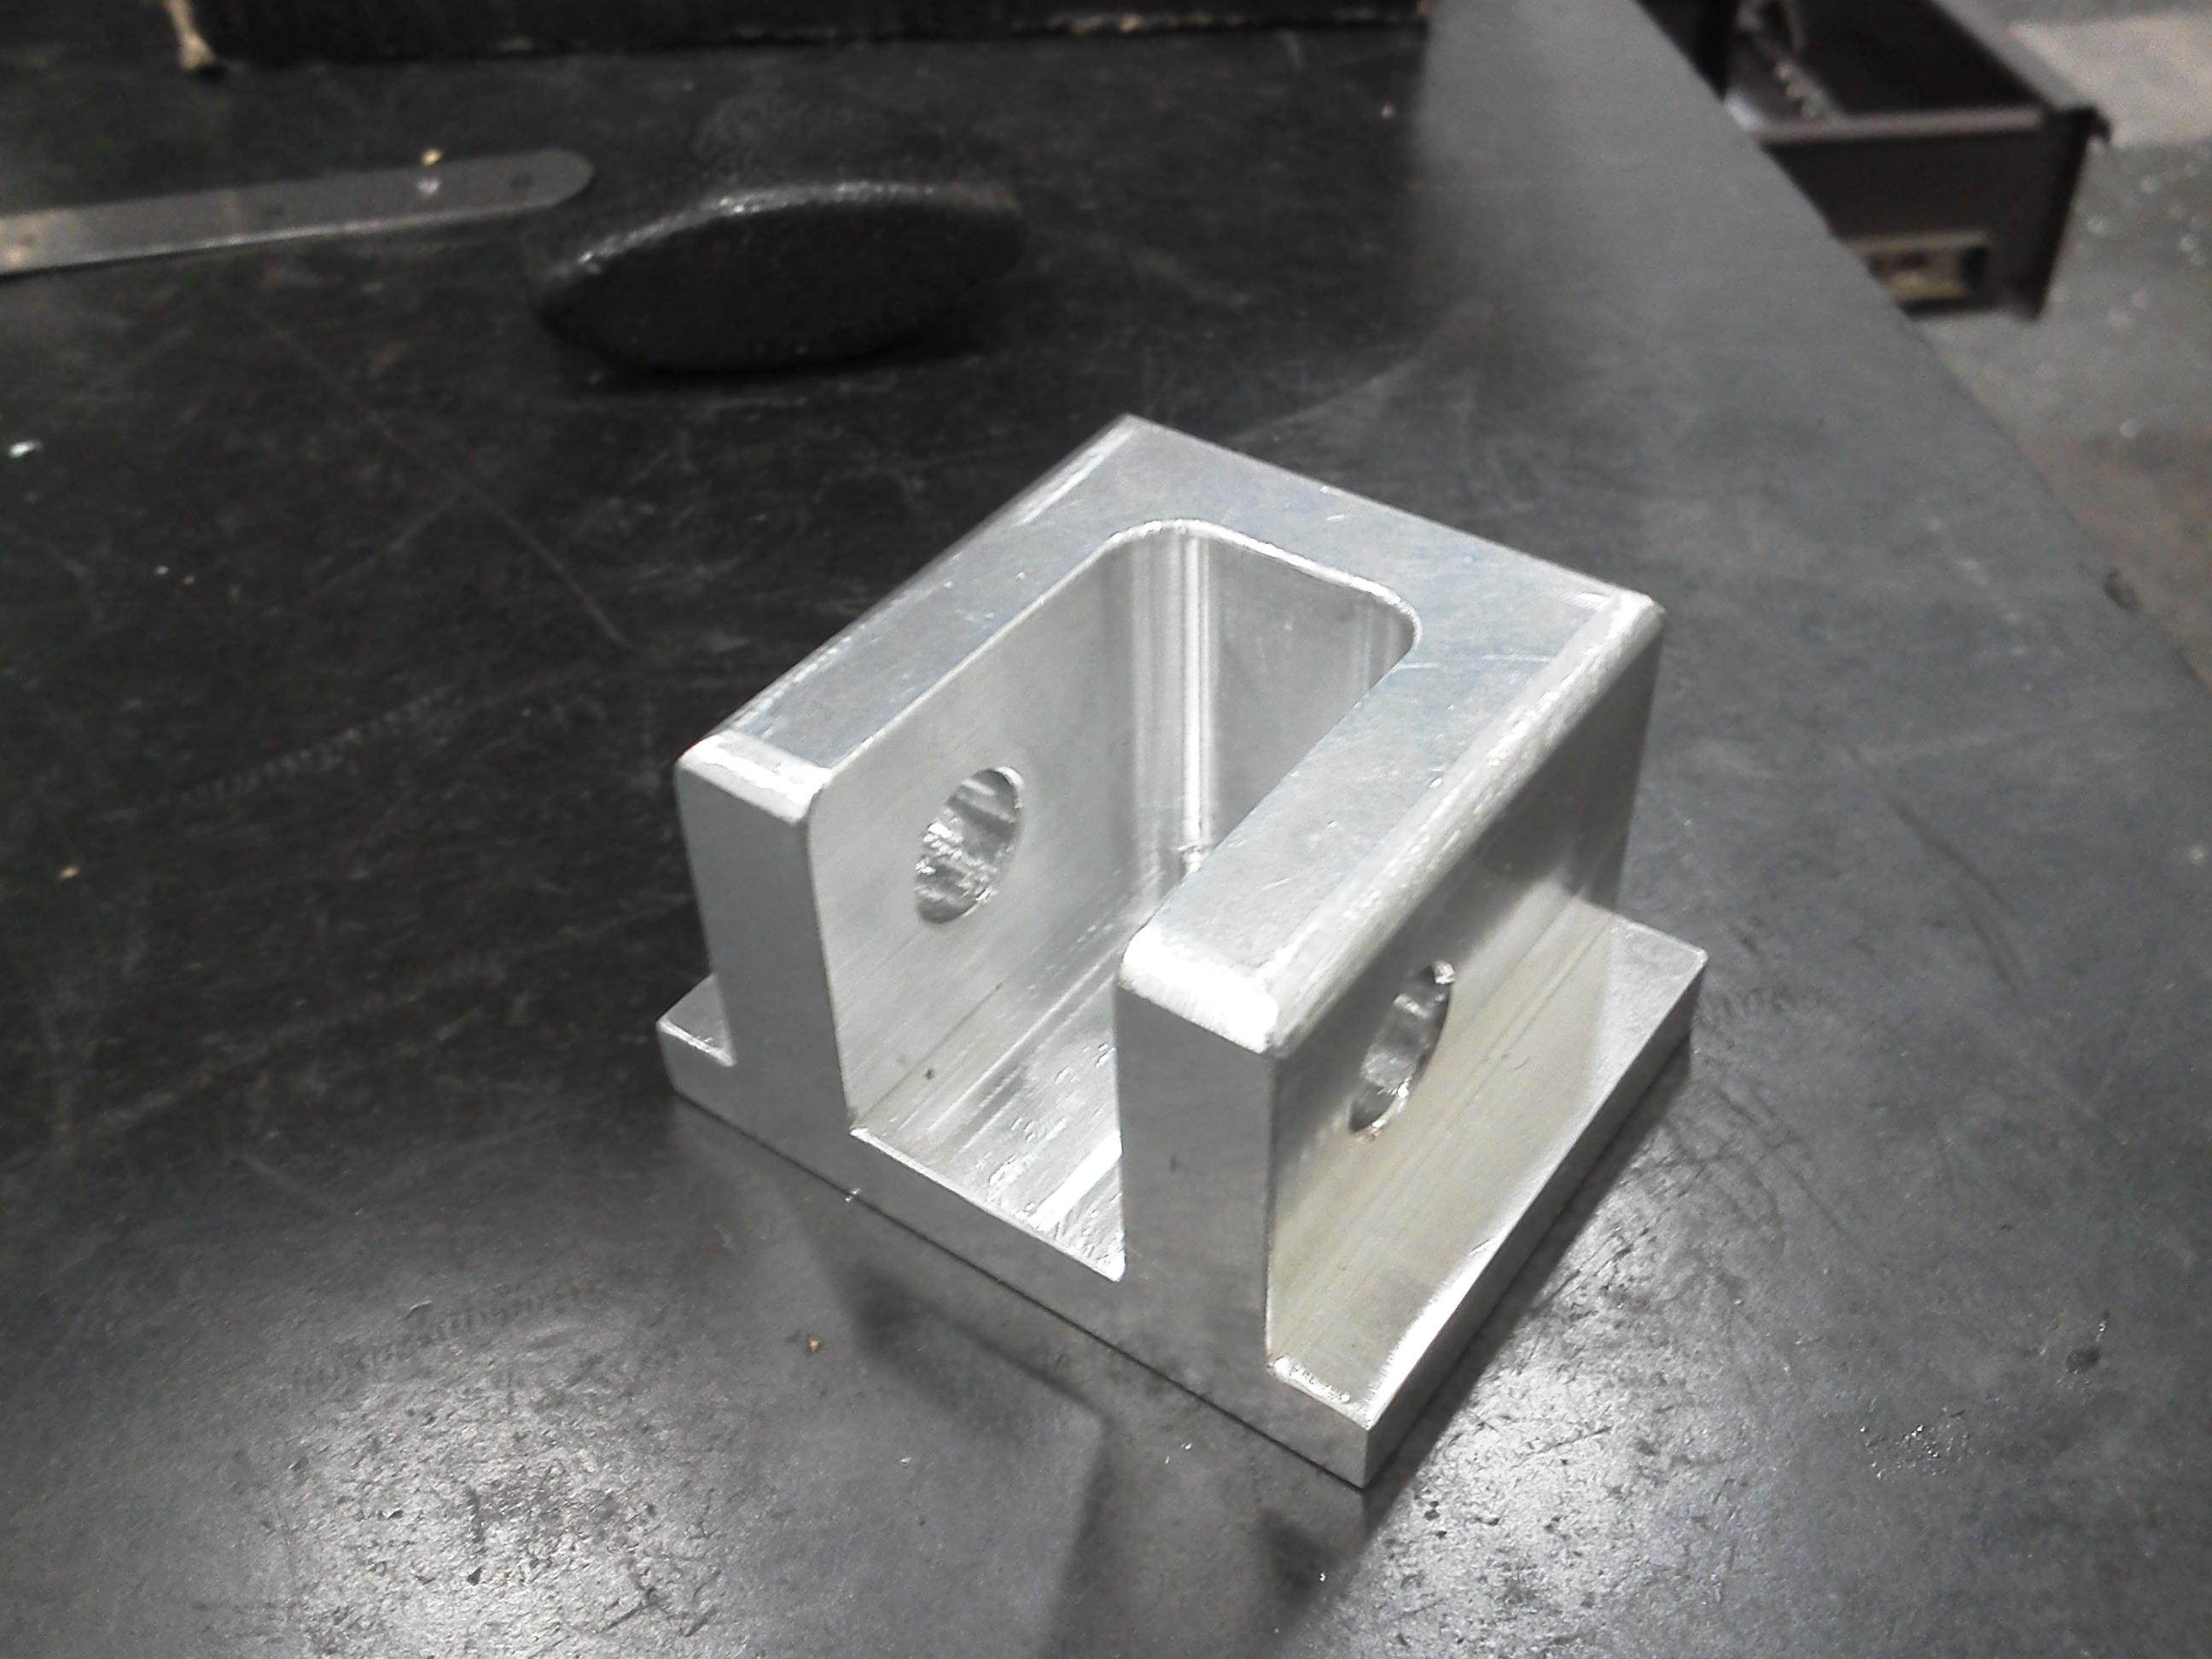
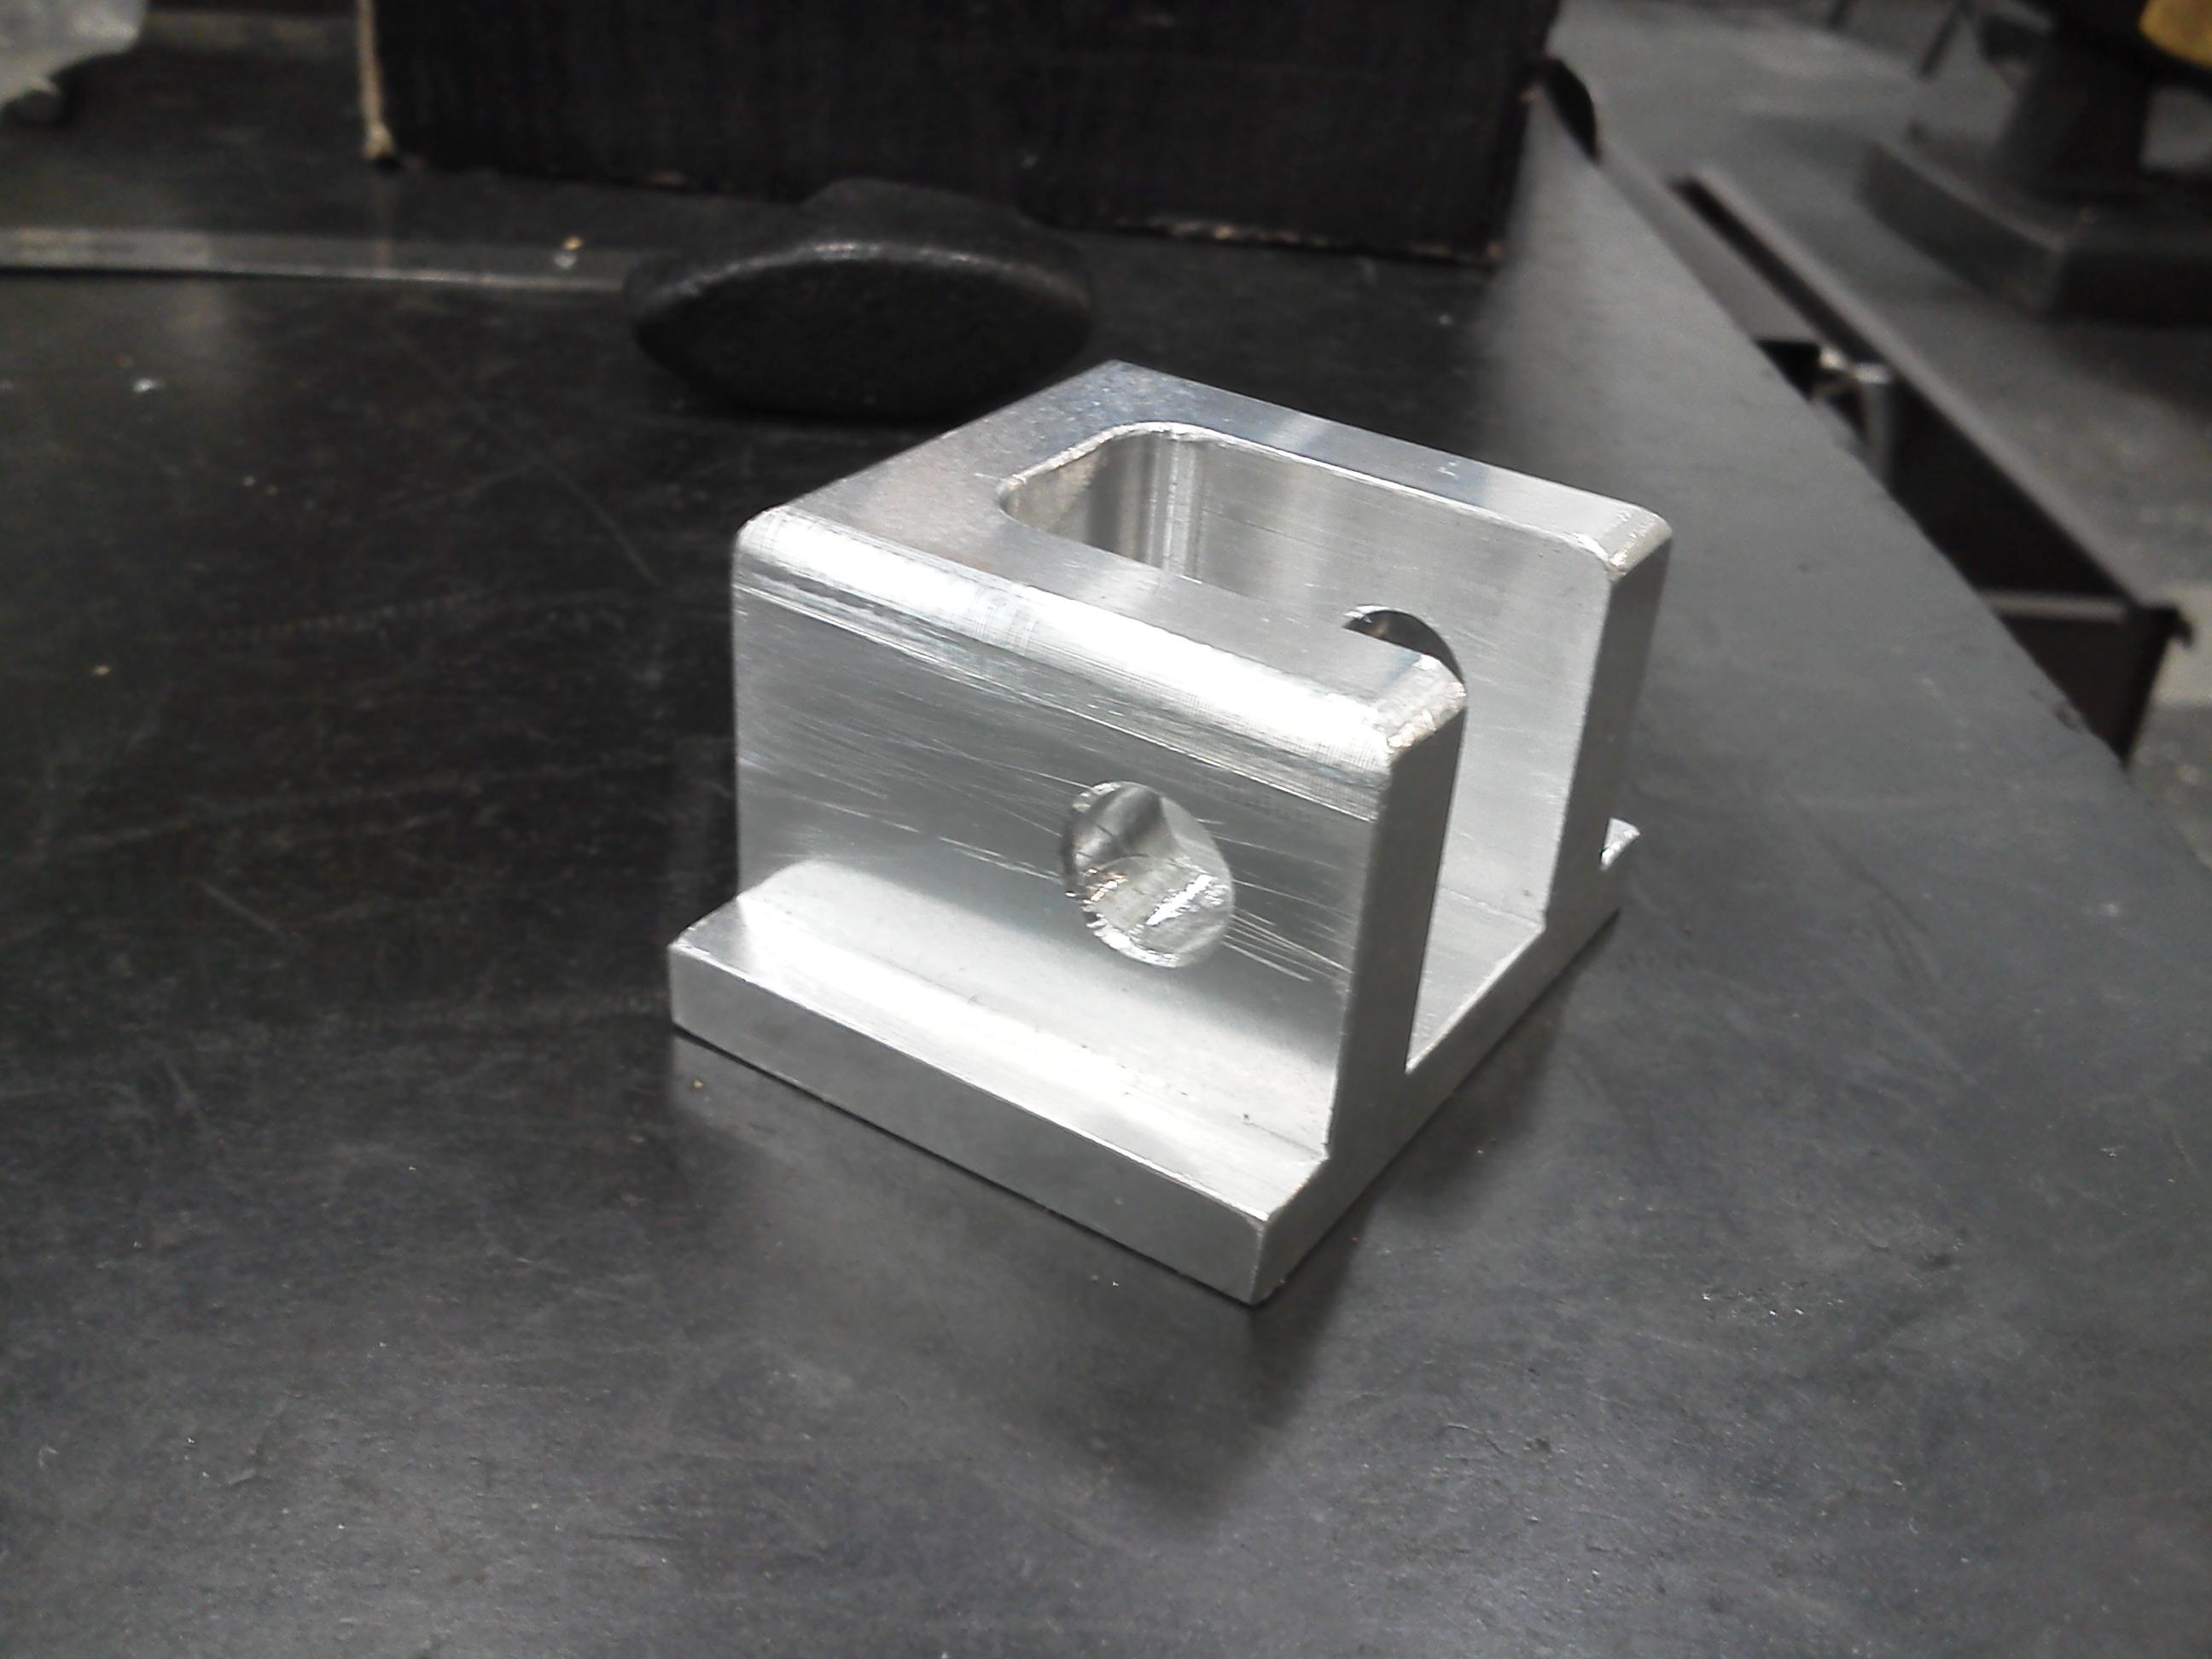
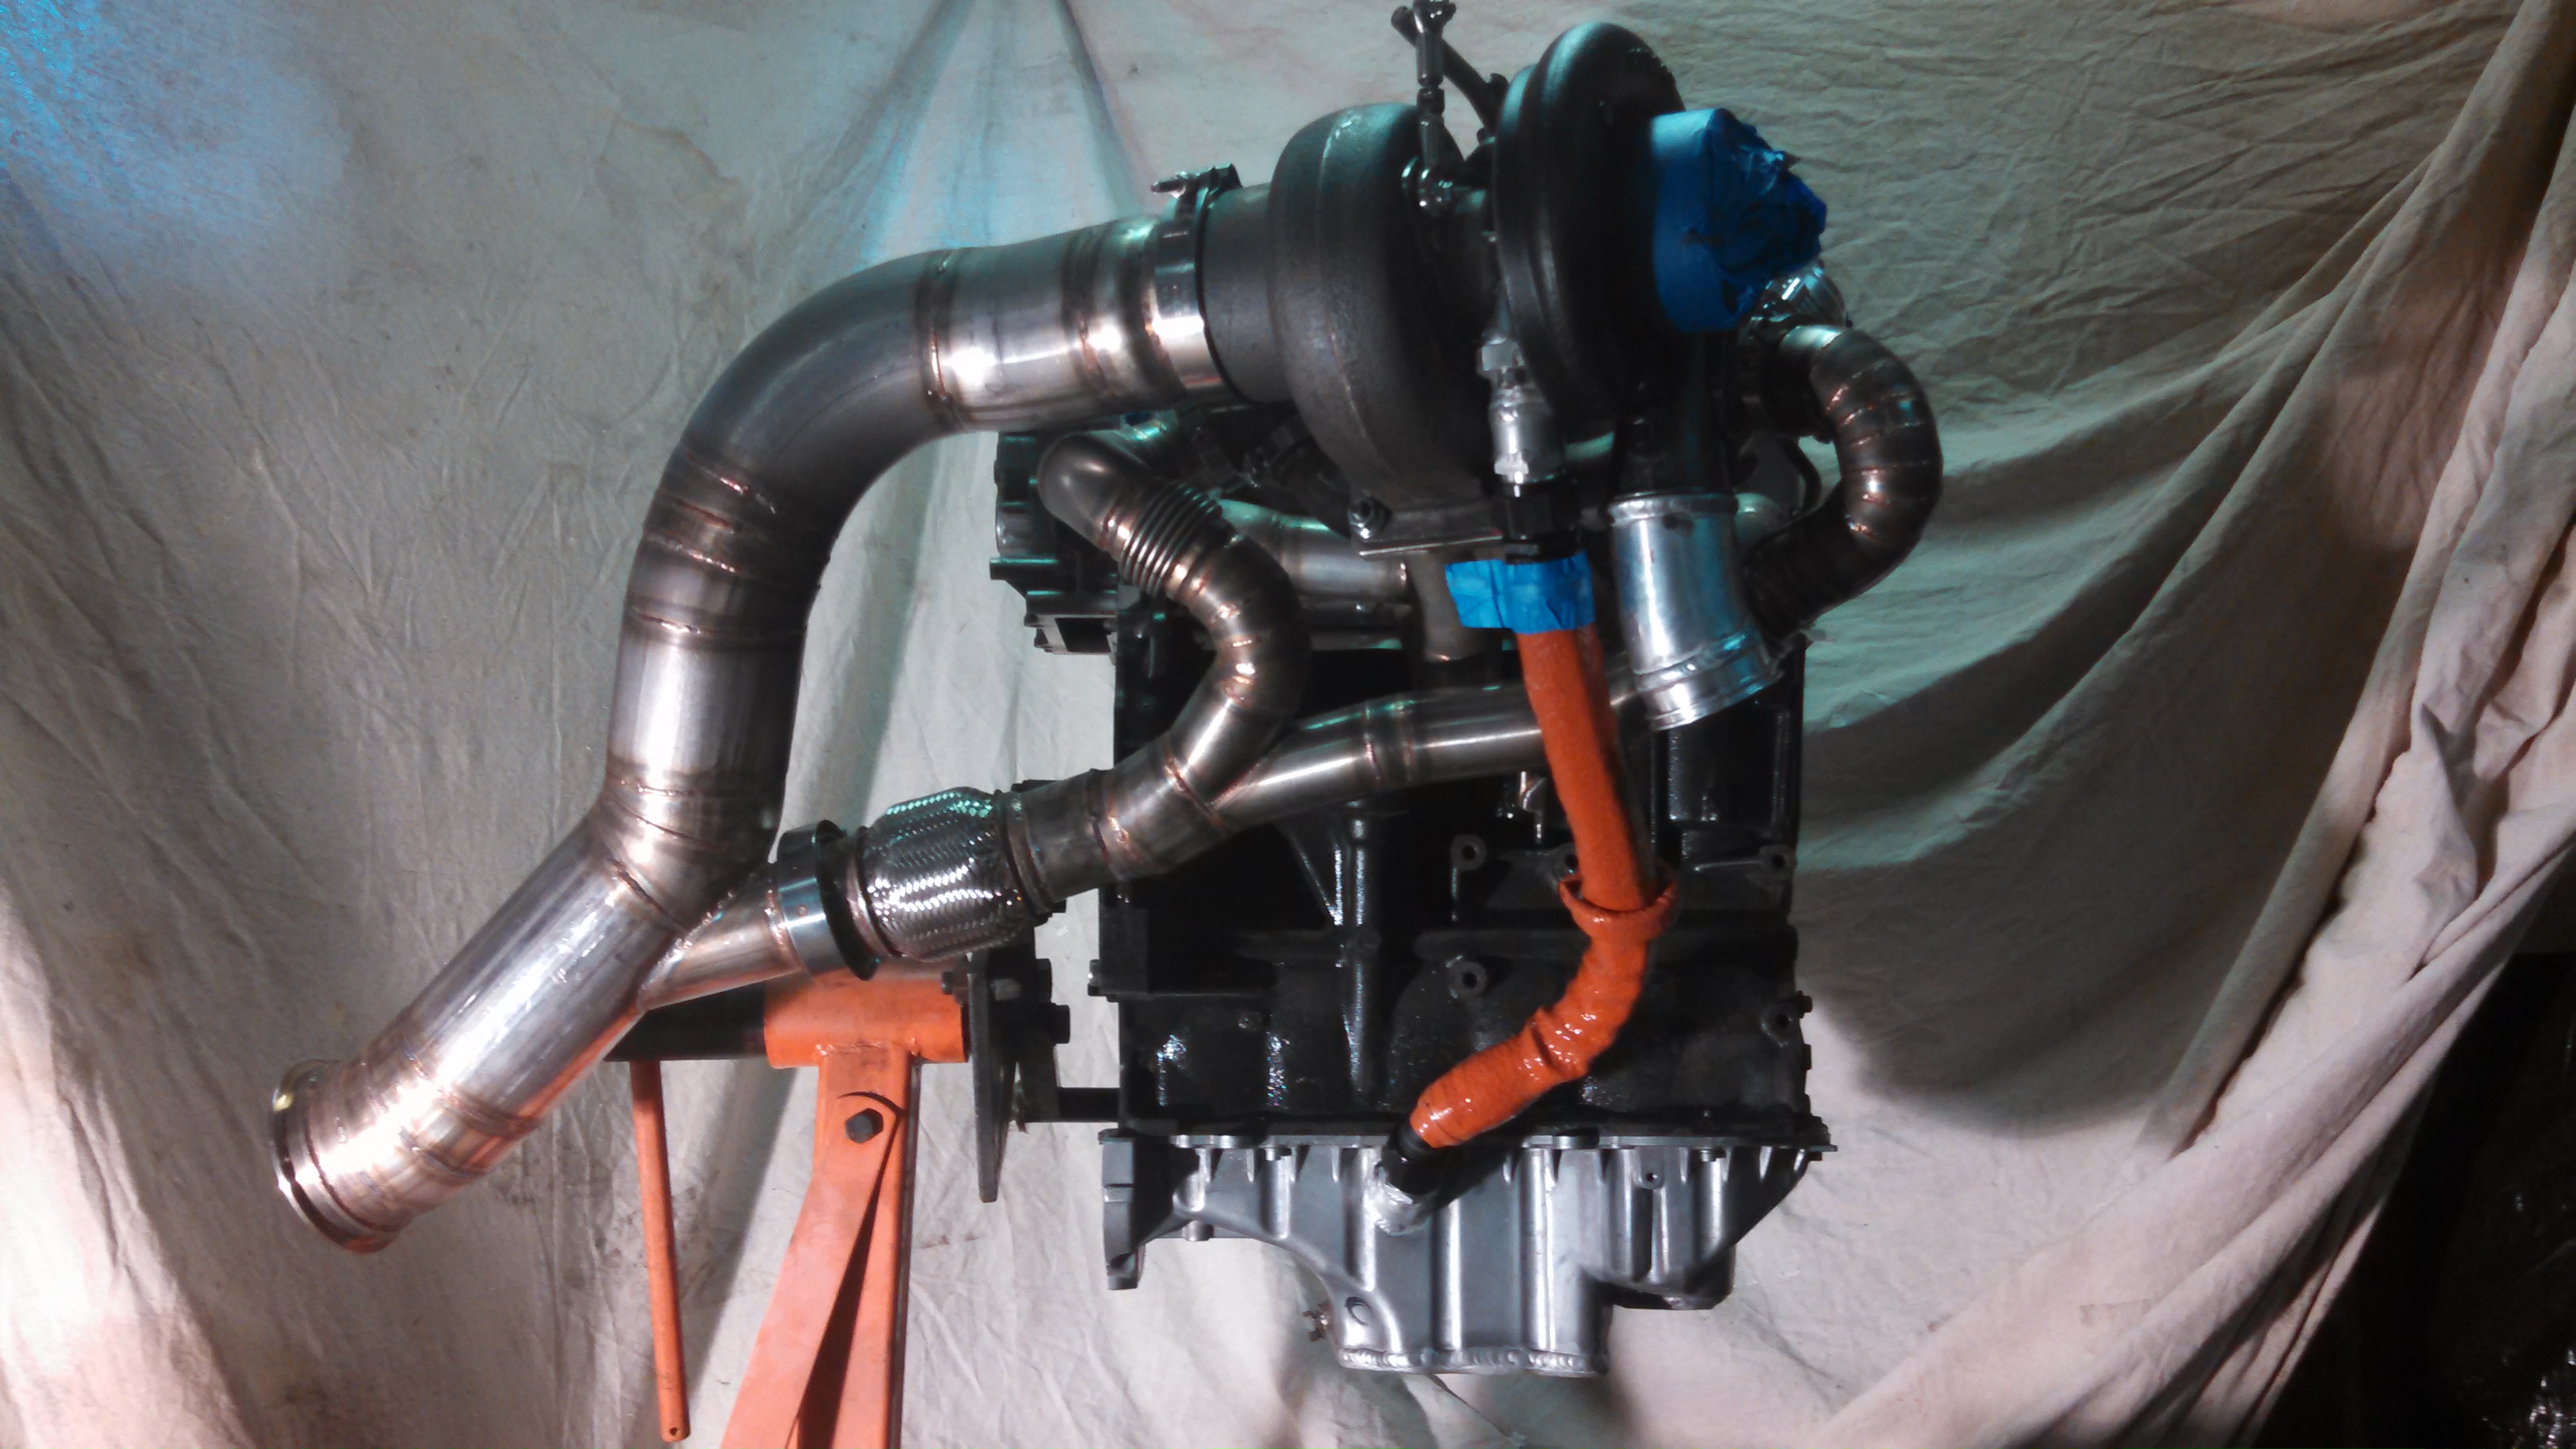
I got started building a turbo hanger brace. The main vertical is ½” stainless rod and the side supports are 3/8”. It attaches up front to two spare m8 bosses in the head, just forward of the exhaust manifold flange.
The rear mount is on an upper boss on the cylinder head and a studded boss located very high up on the exhaust manifold.
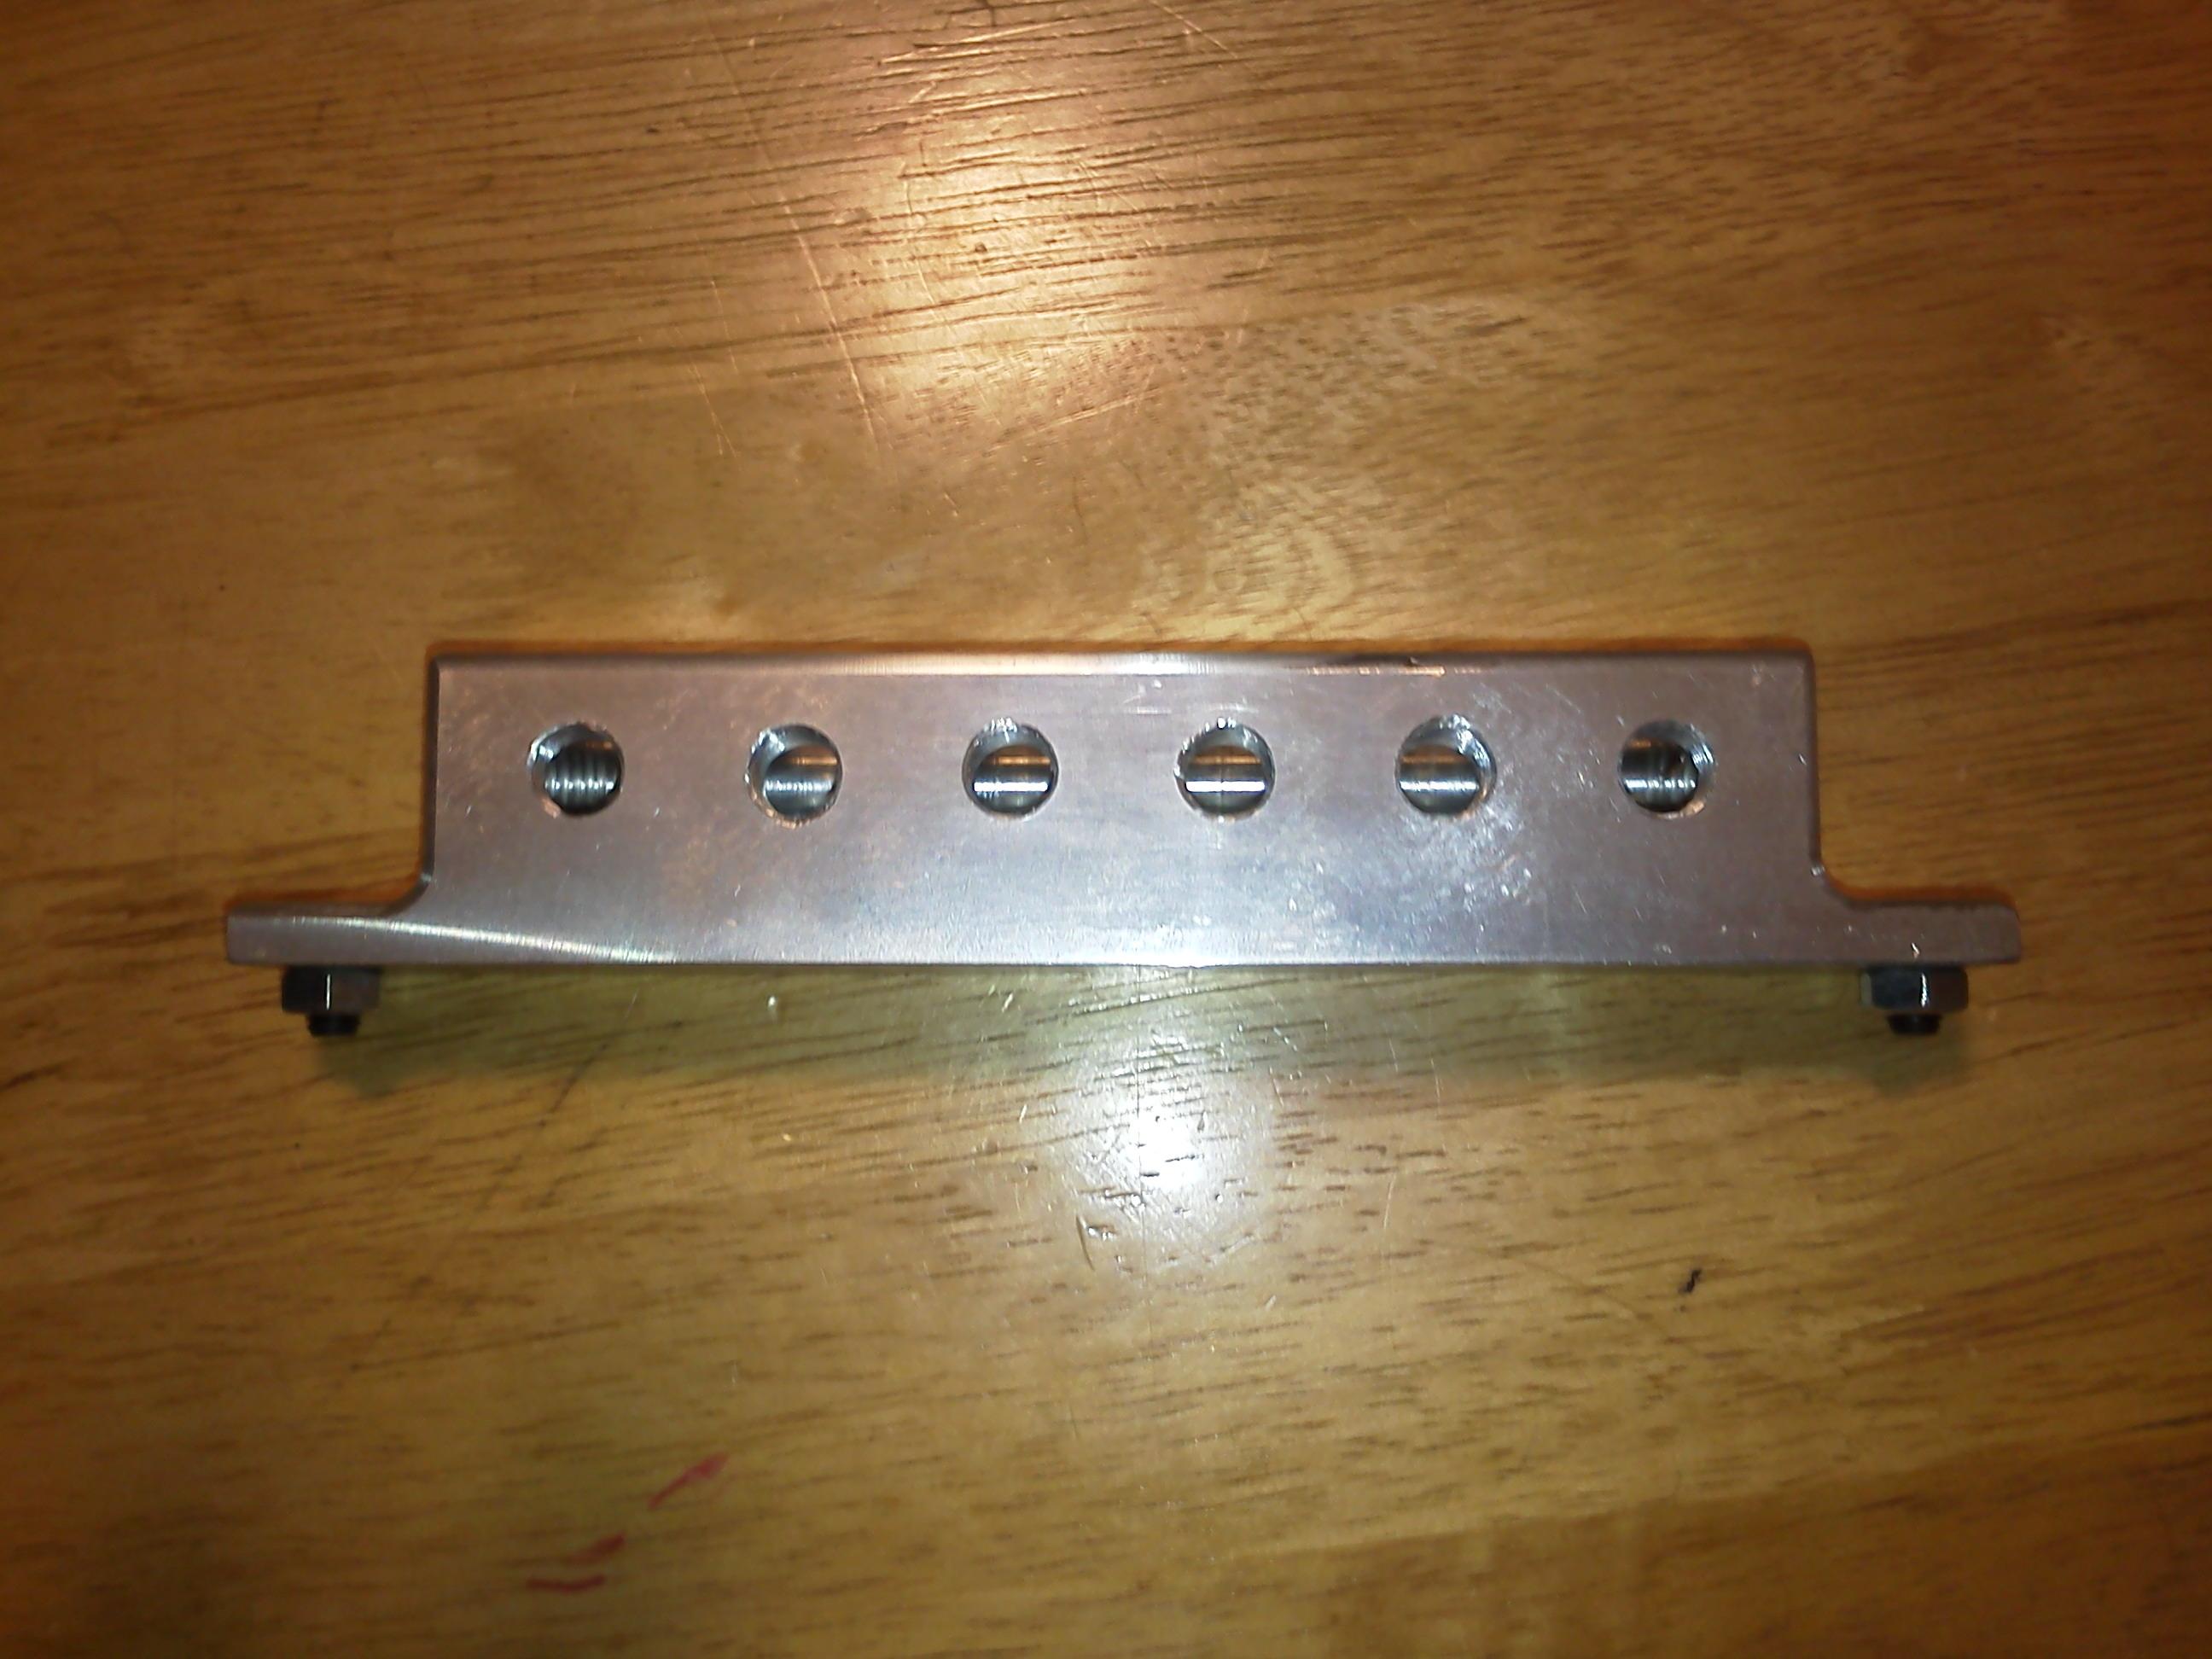
The lower center mount is a stainless, extra large diameter shoulder bolt, so the machined should part of the bolt goes though the mount arm and in shear. It is very strong
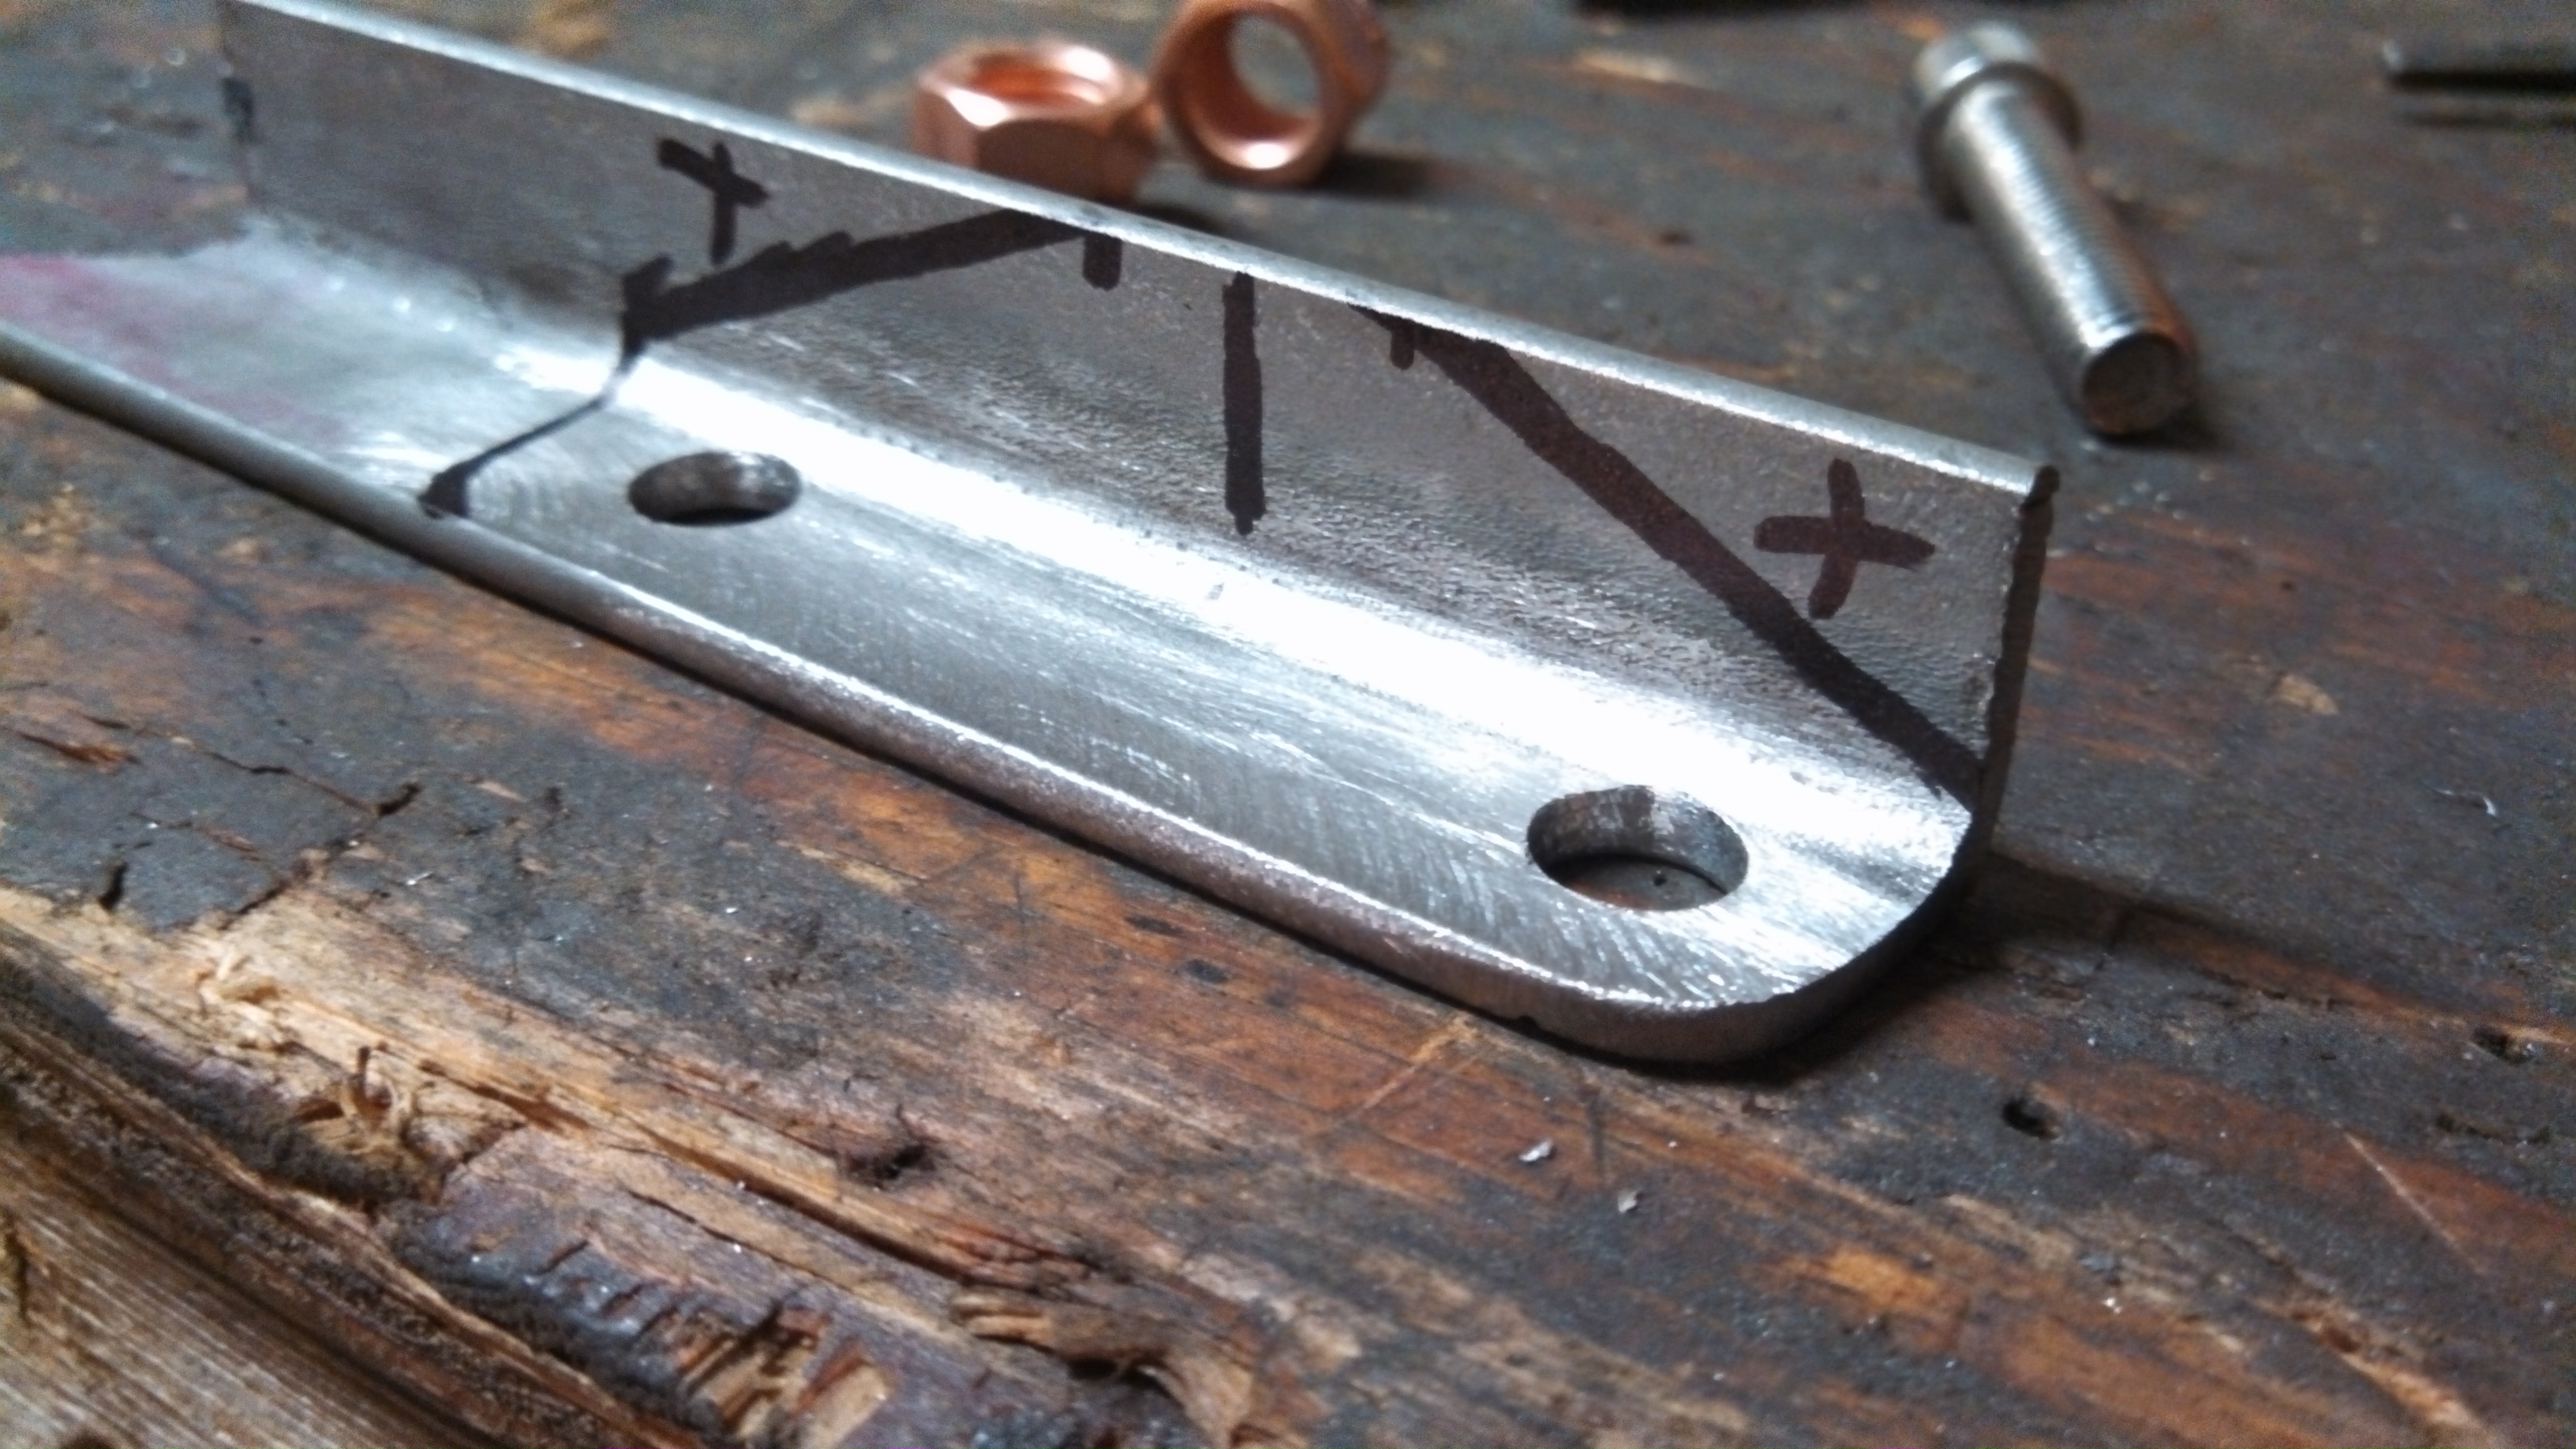
- turbo brace bracket.jpg (1.56 MiB) Viewed 61552 times
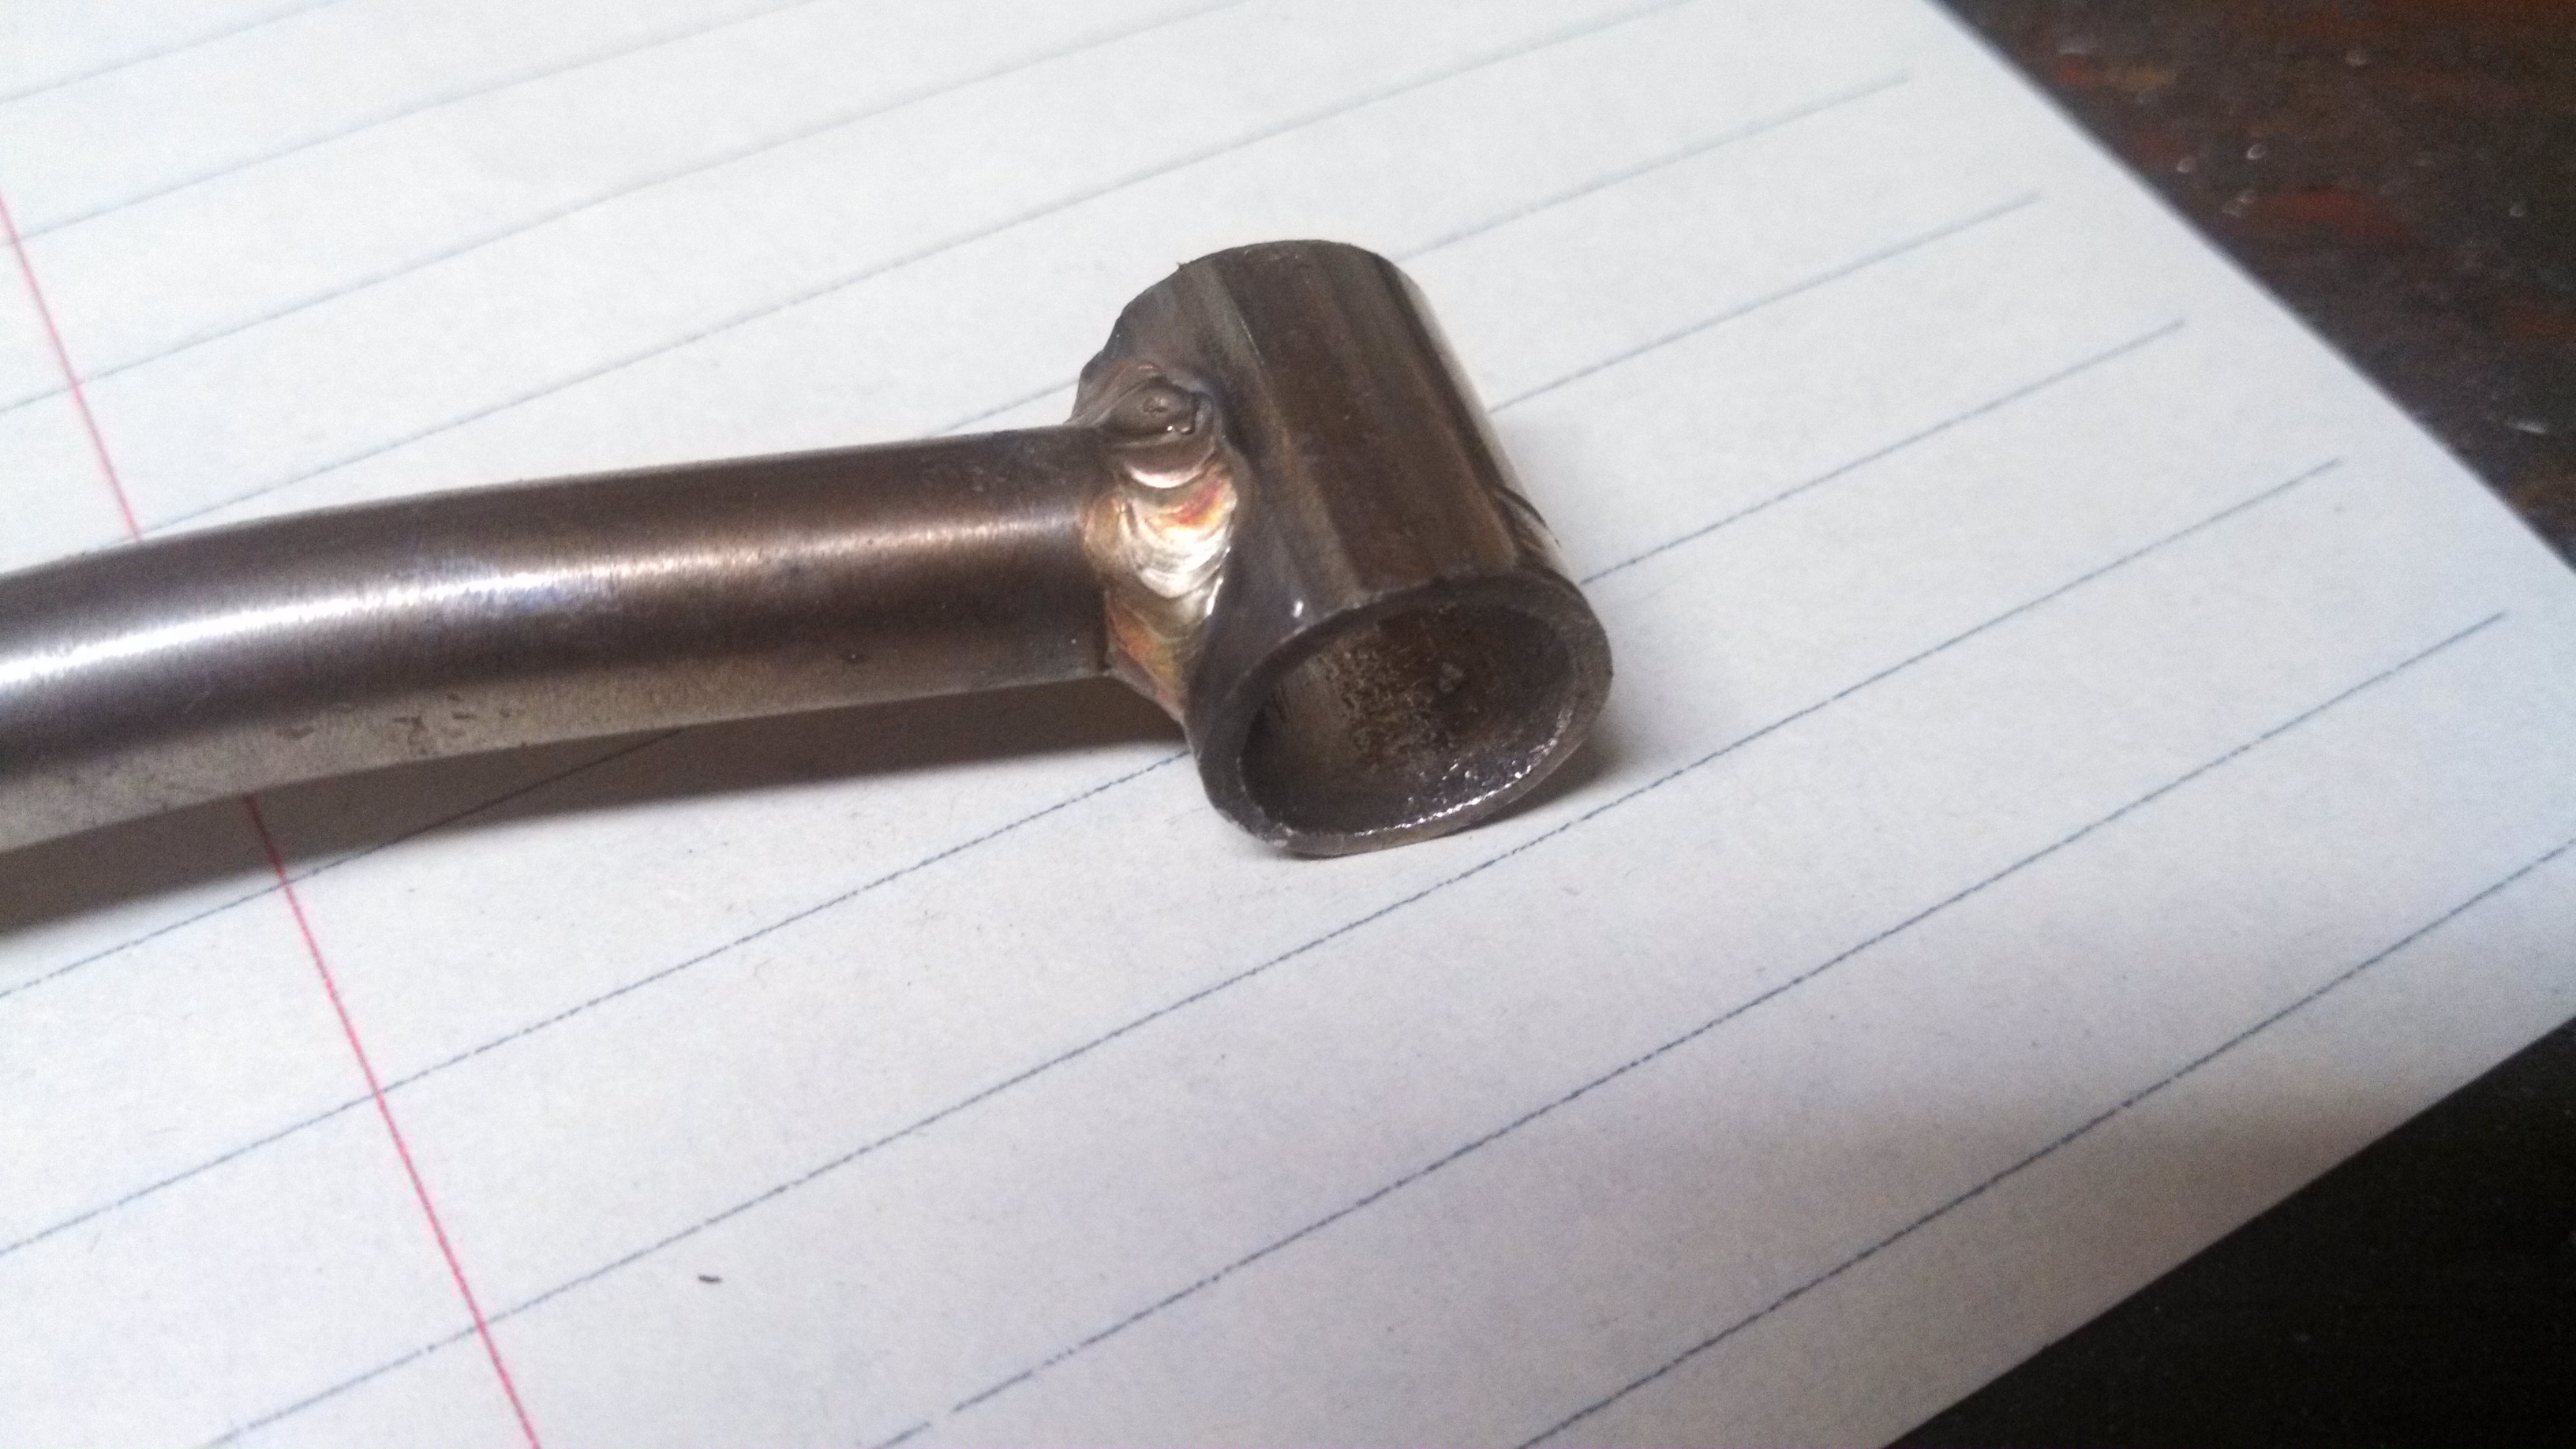
Im just waiting on a 1” punch and flare, sheetmetal tool and I’ll be adding one small, punched sheet brace to the turbo hanger brace to finish it off.
I’m awaiting some machined SS adjusters with LH and RH threads, those are just welded bolts for mockup
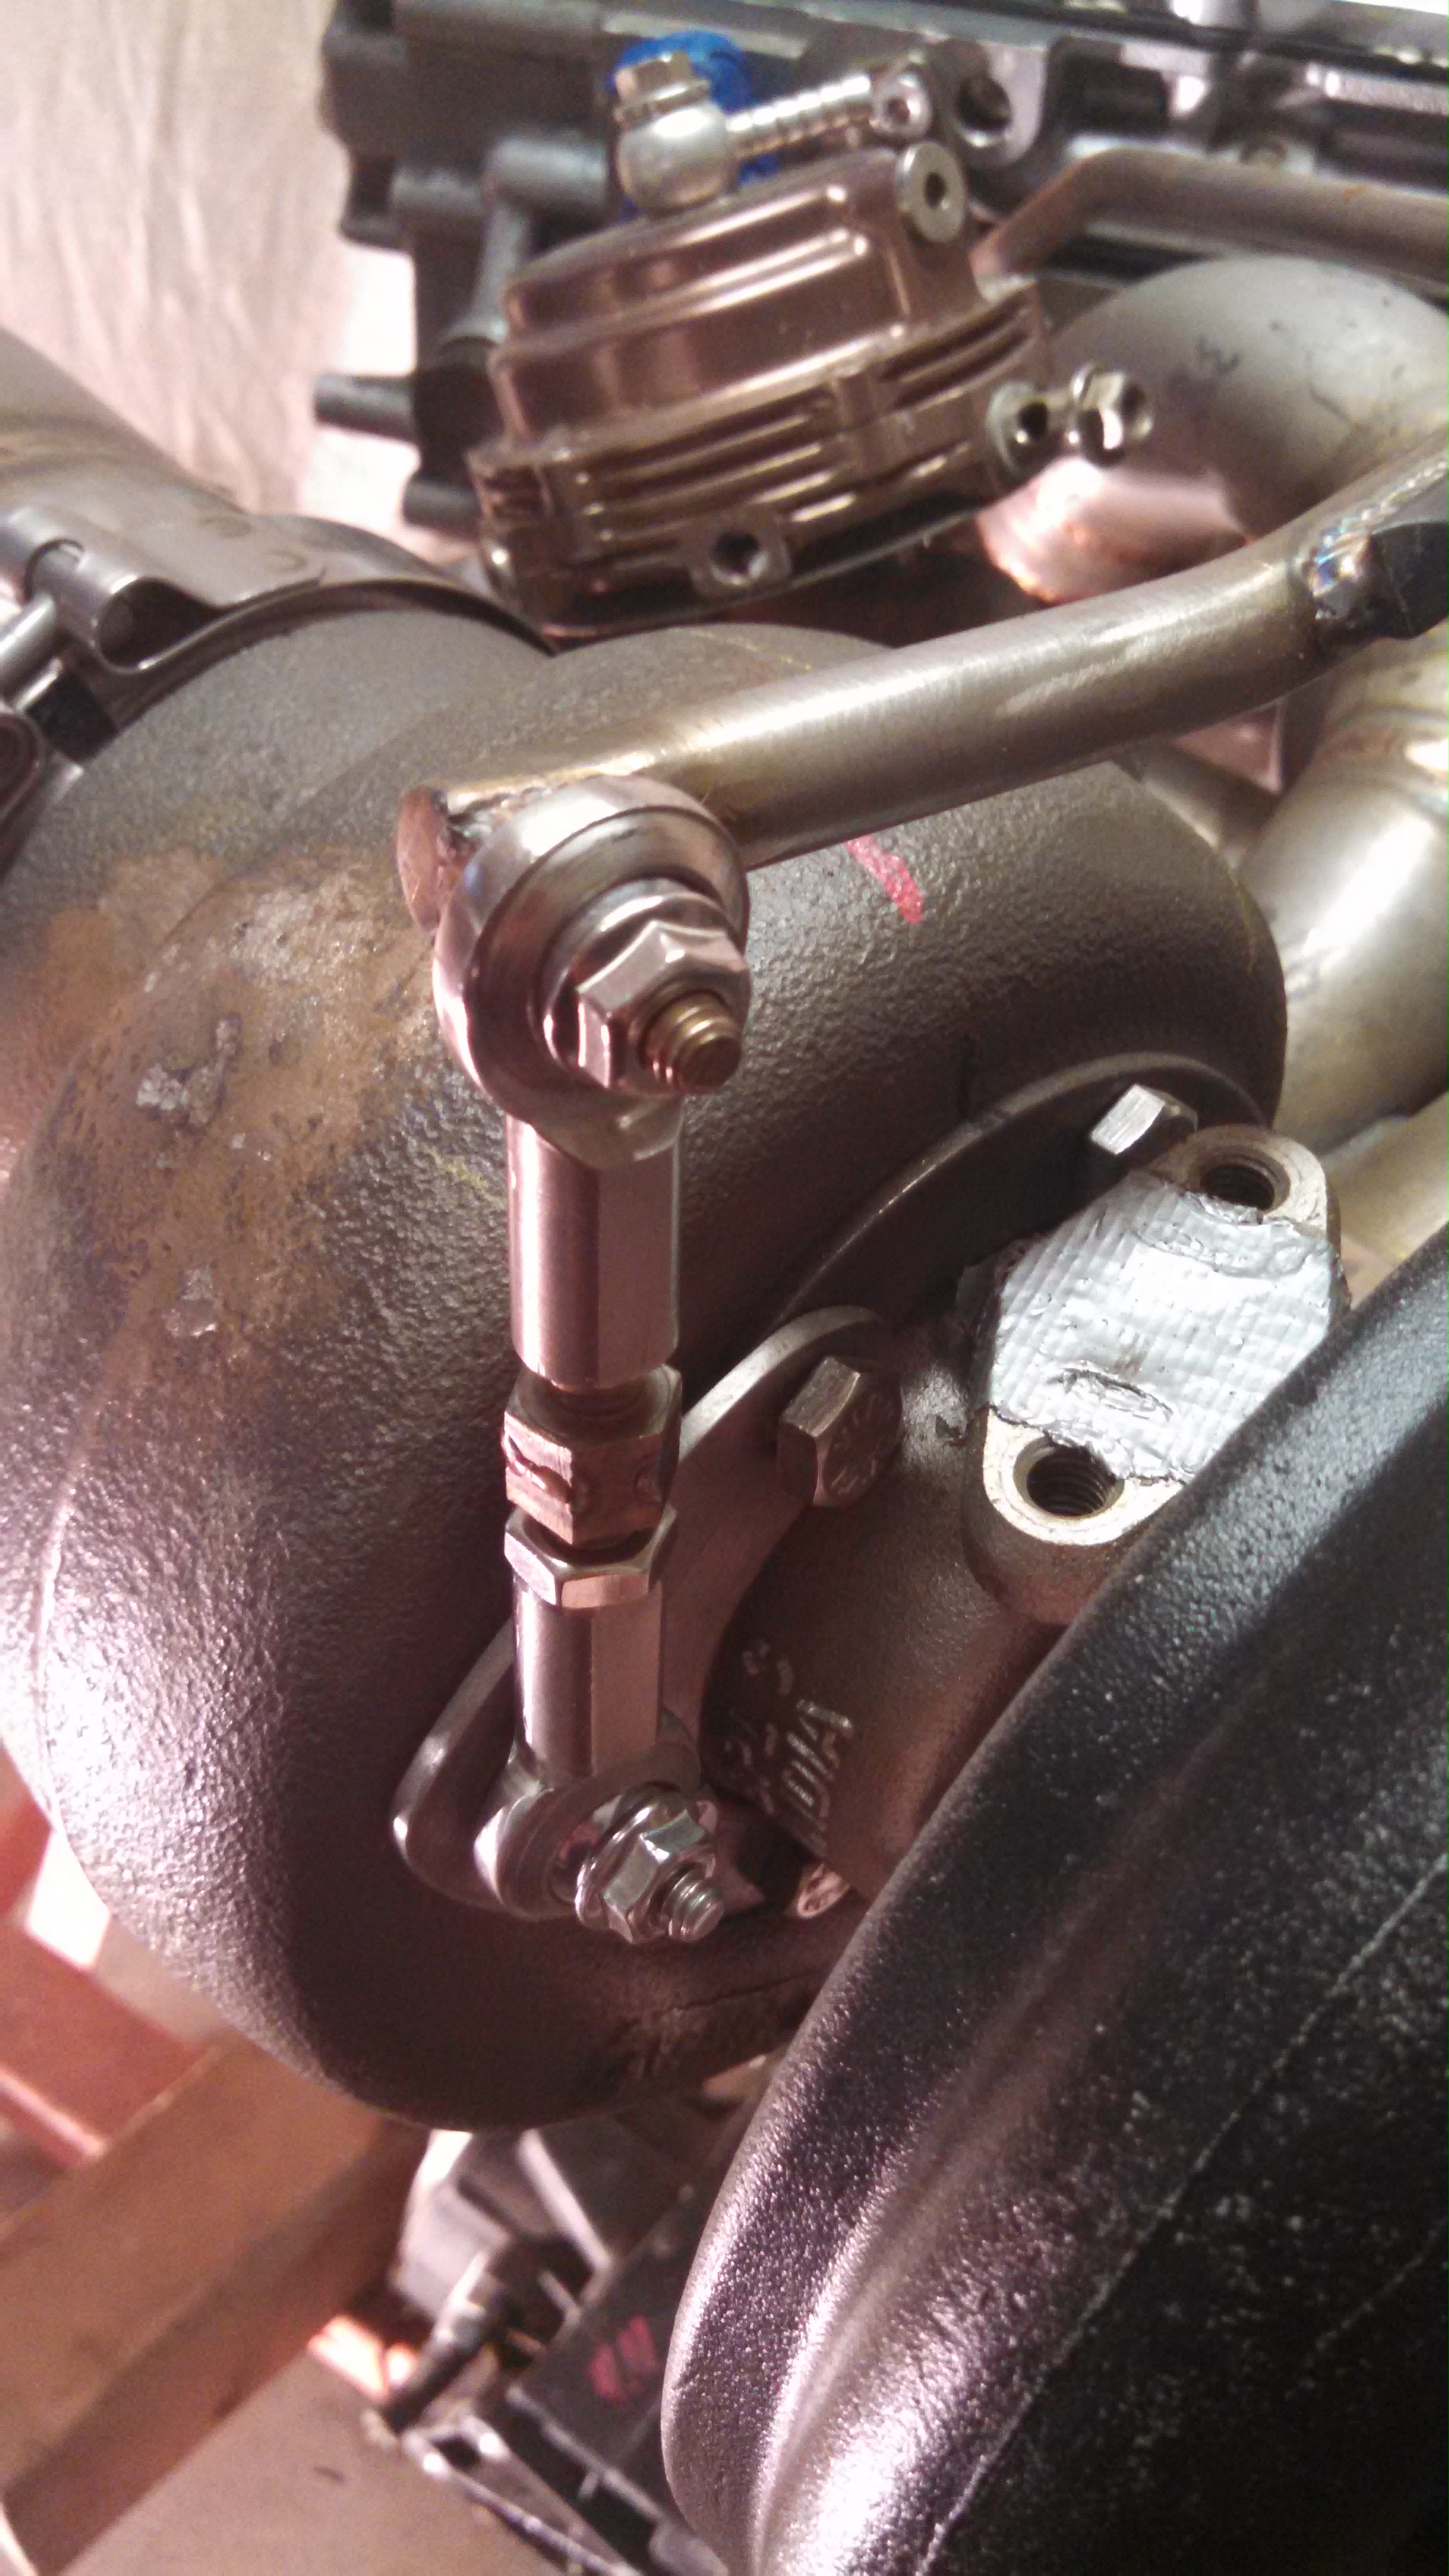
- turbo hanger brace heim.jpg (1.51 MiB) Viewed 61552 times

- turbo hanger brace.jpg (1.49 MiB) Viewed 61552 times
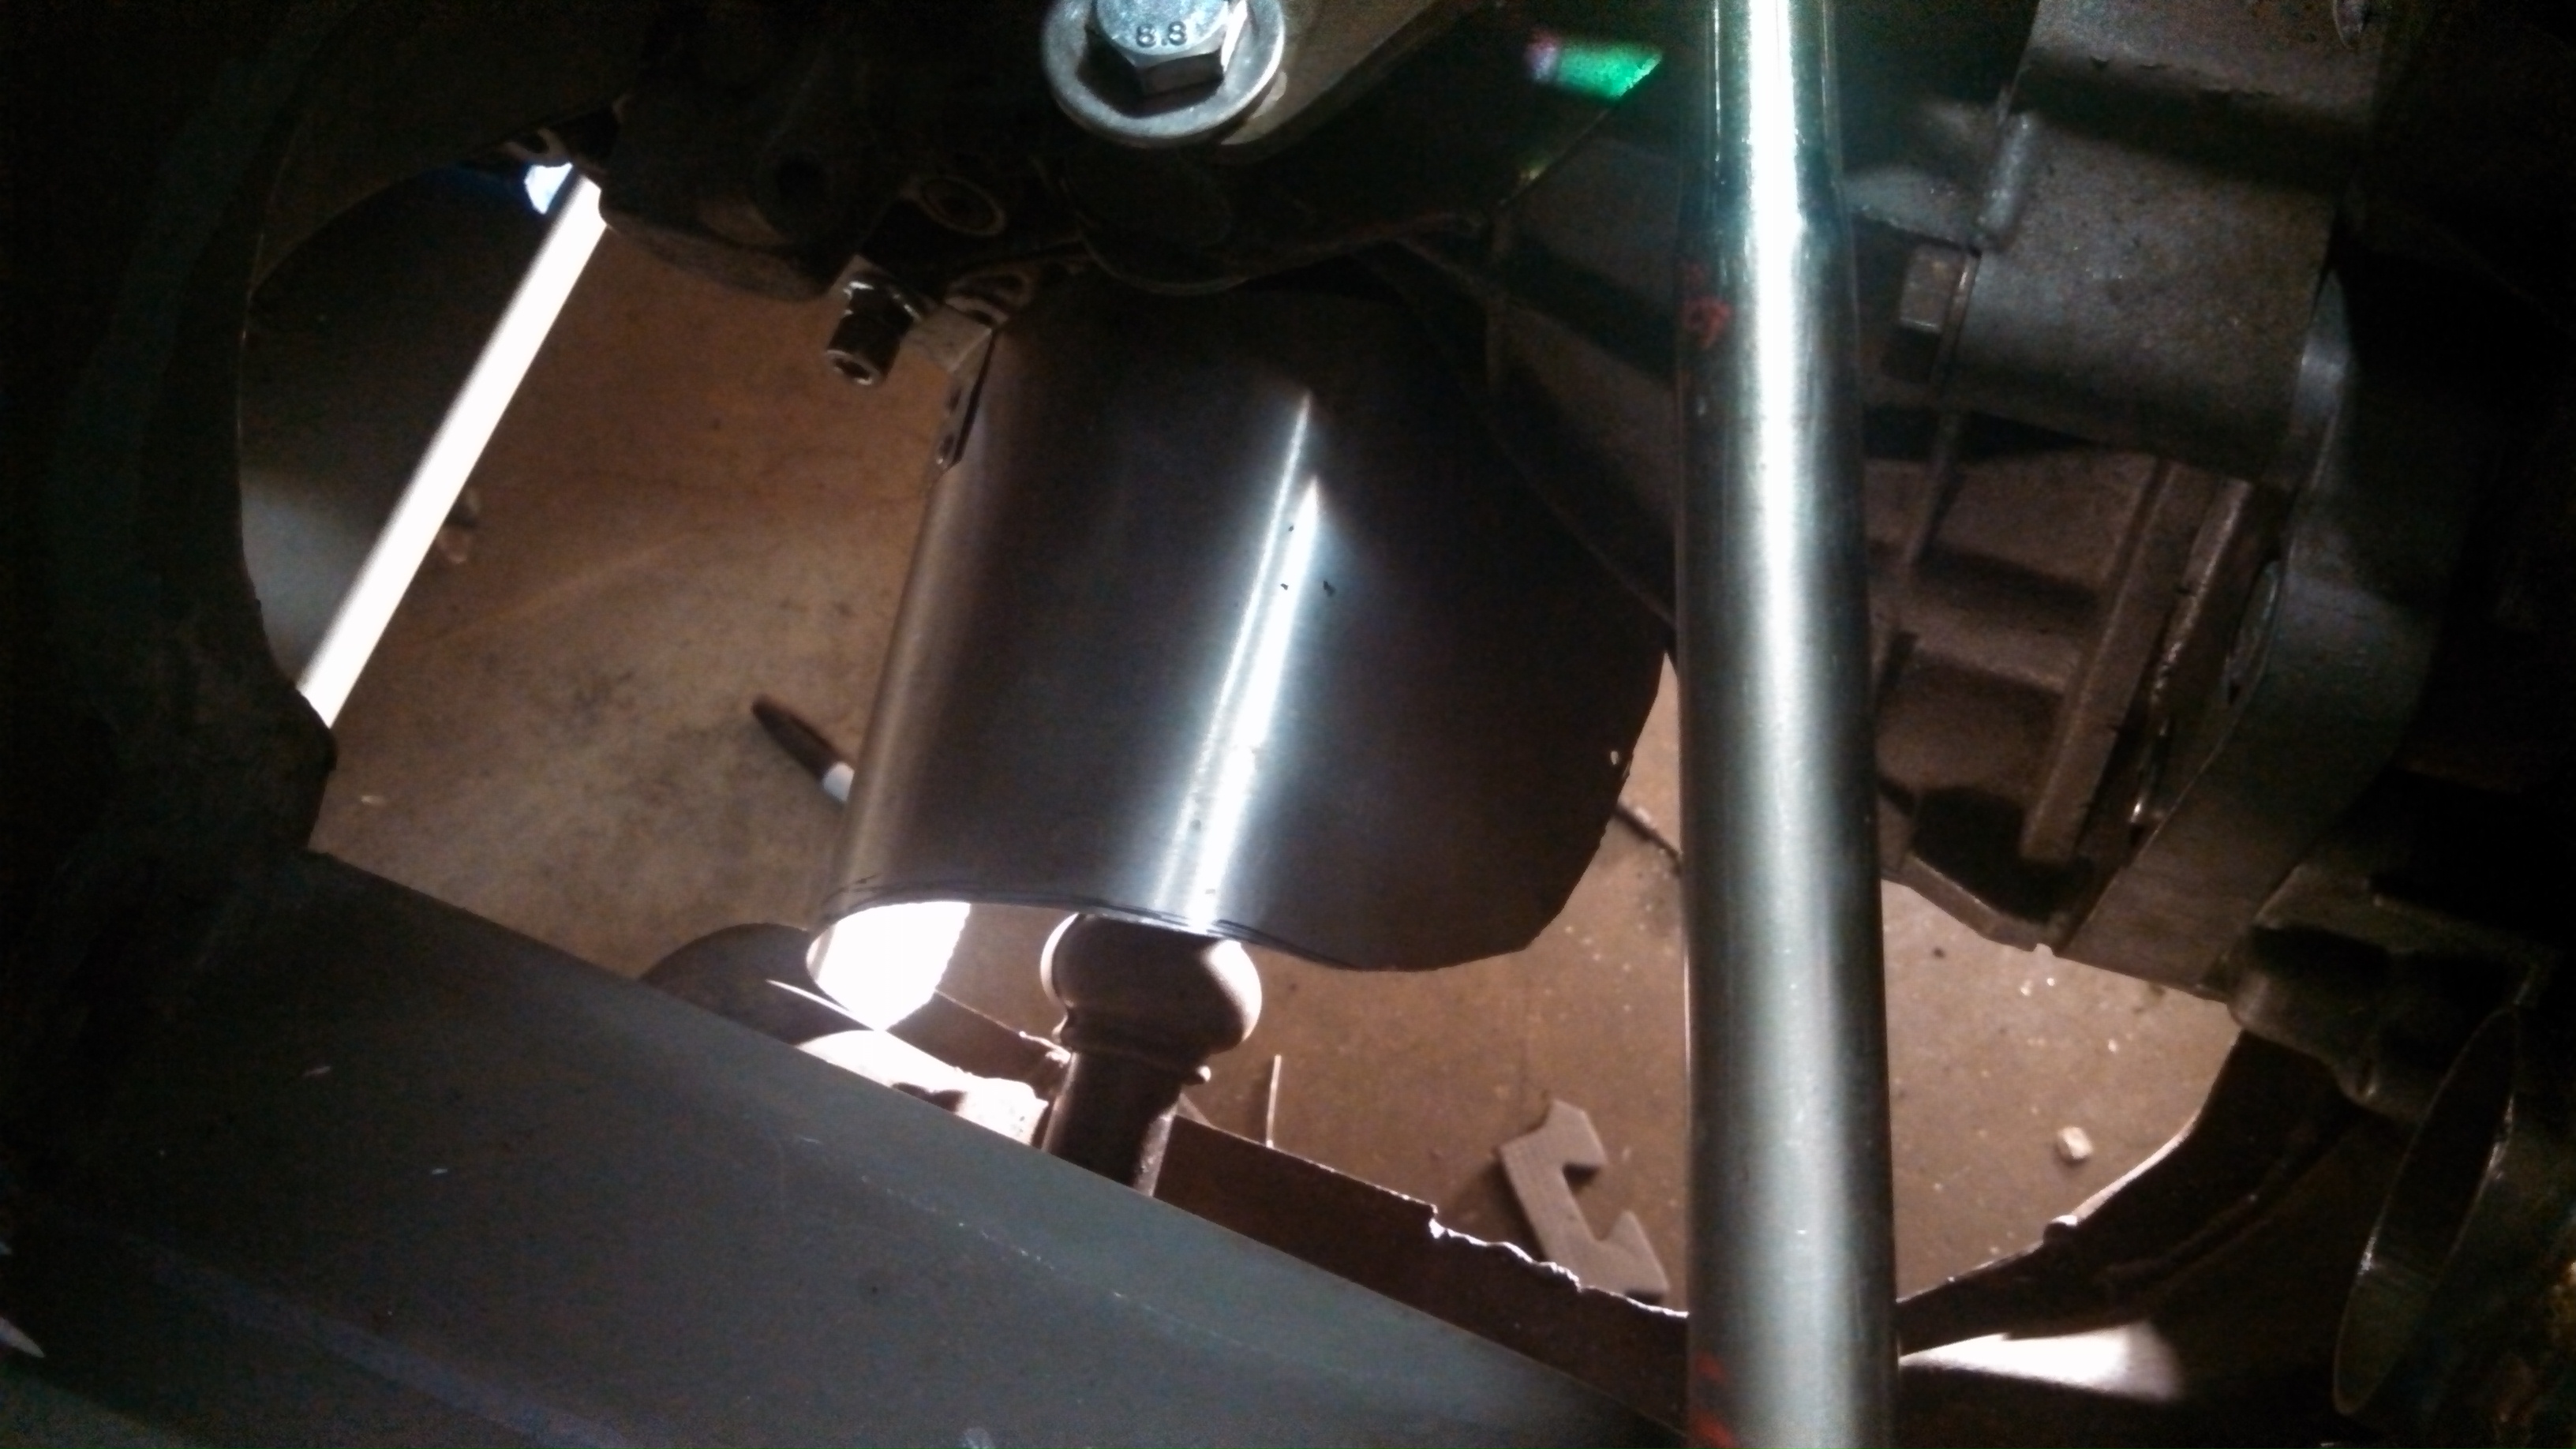
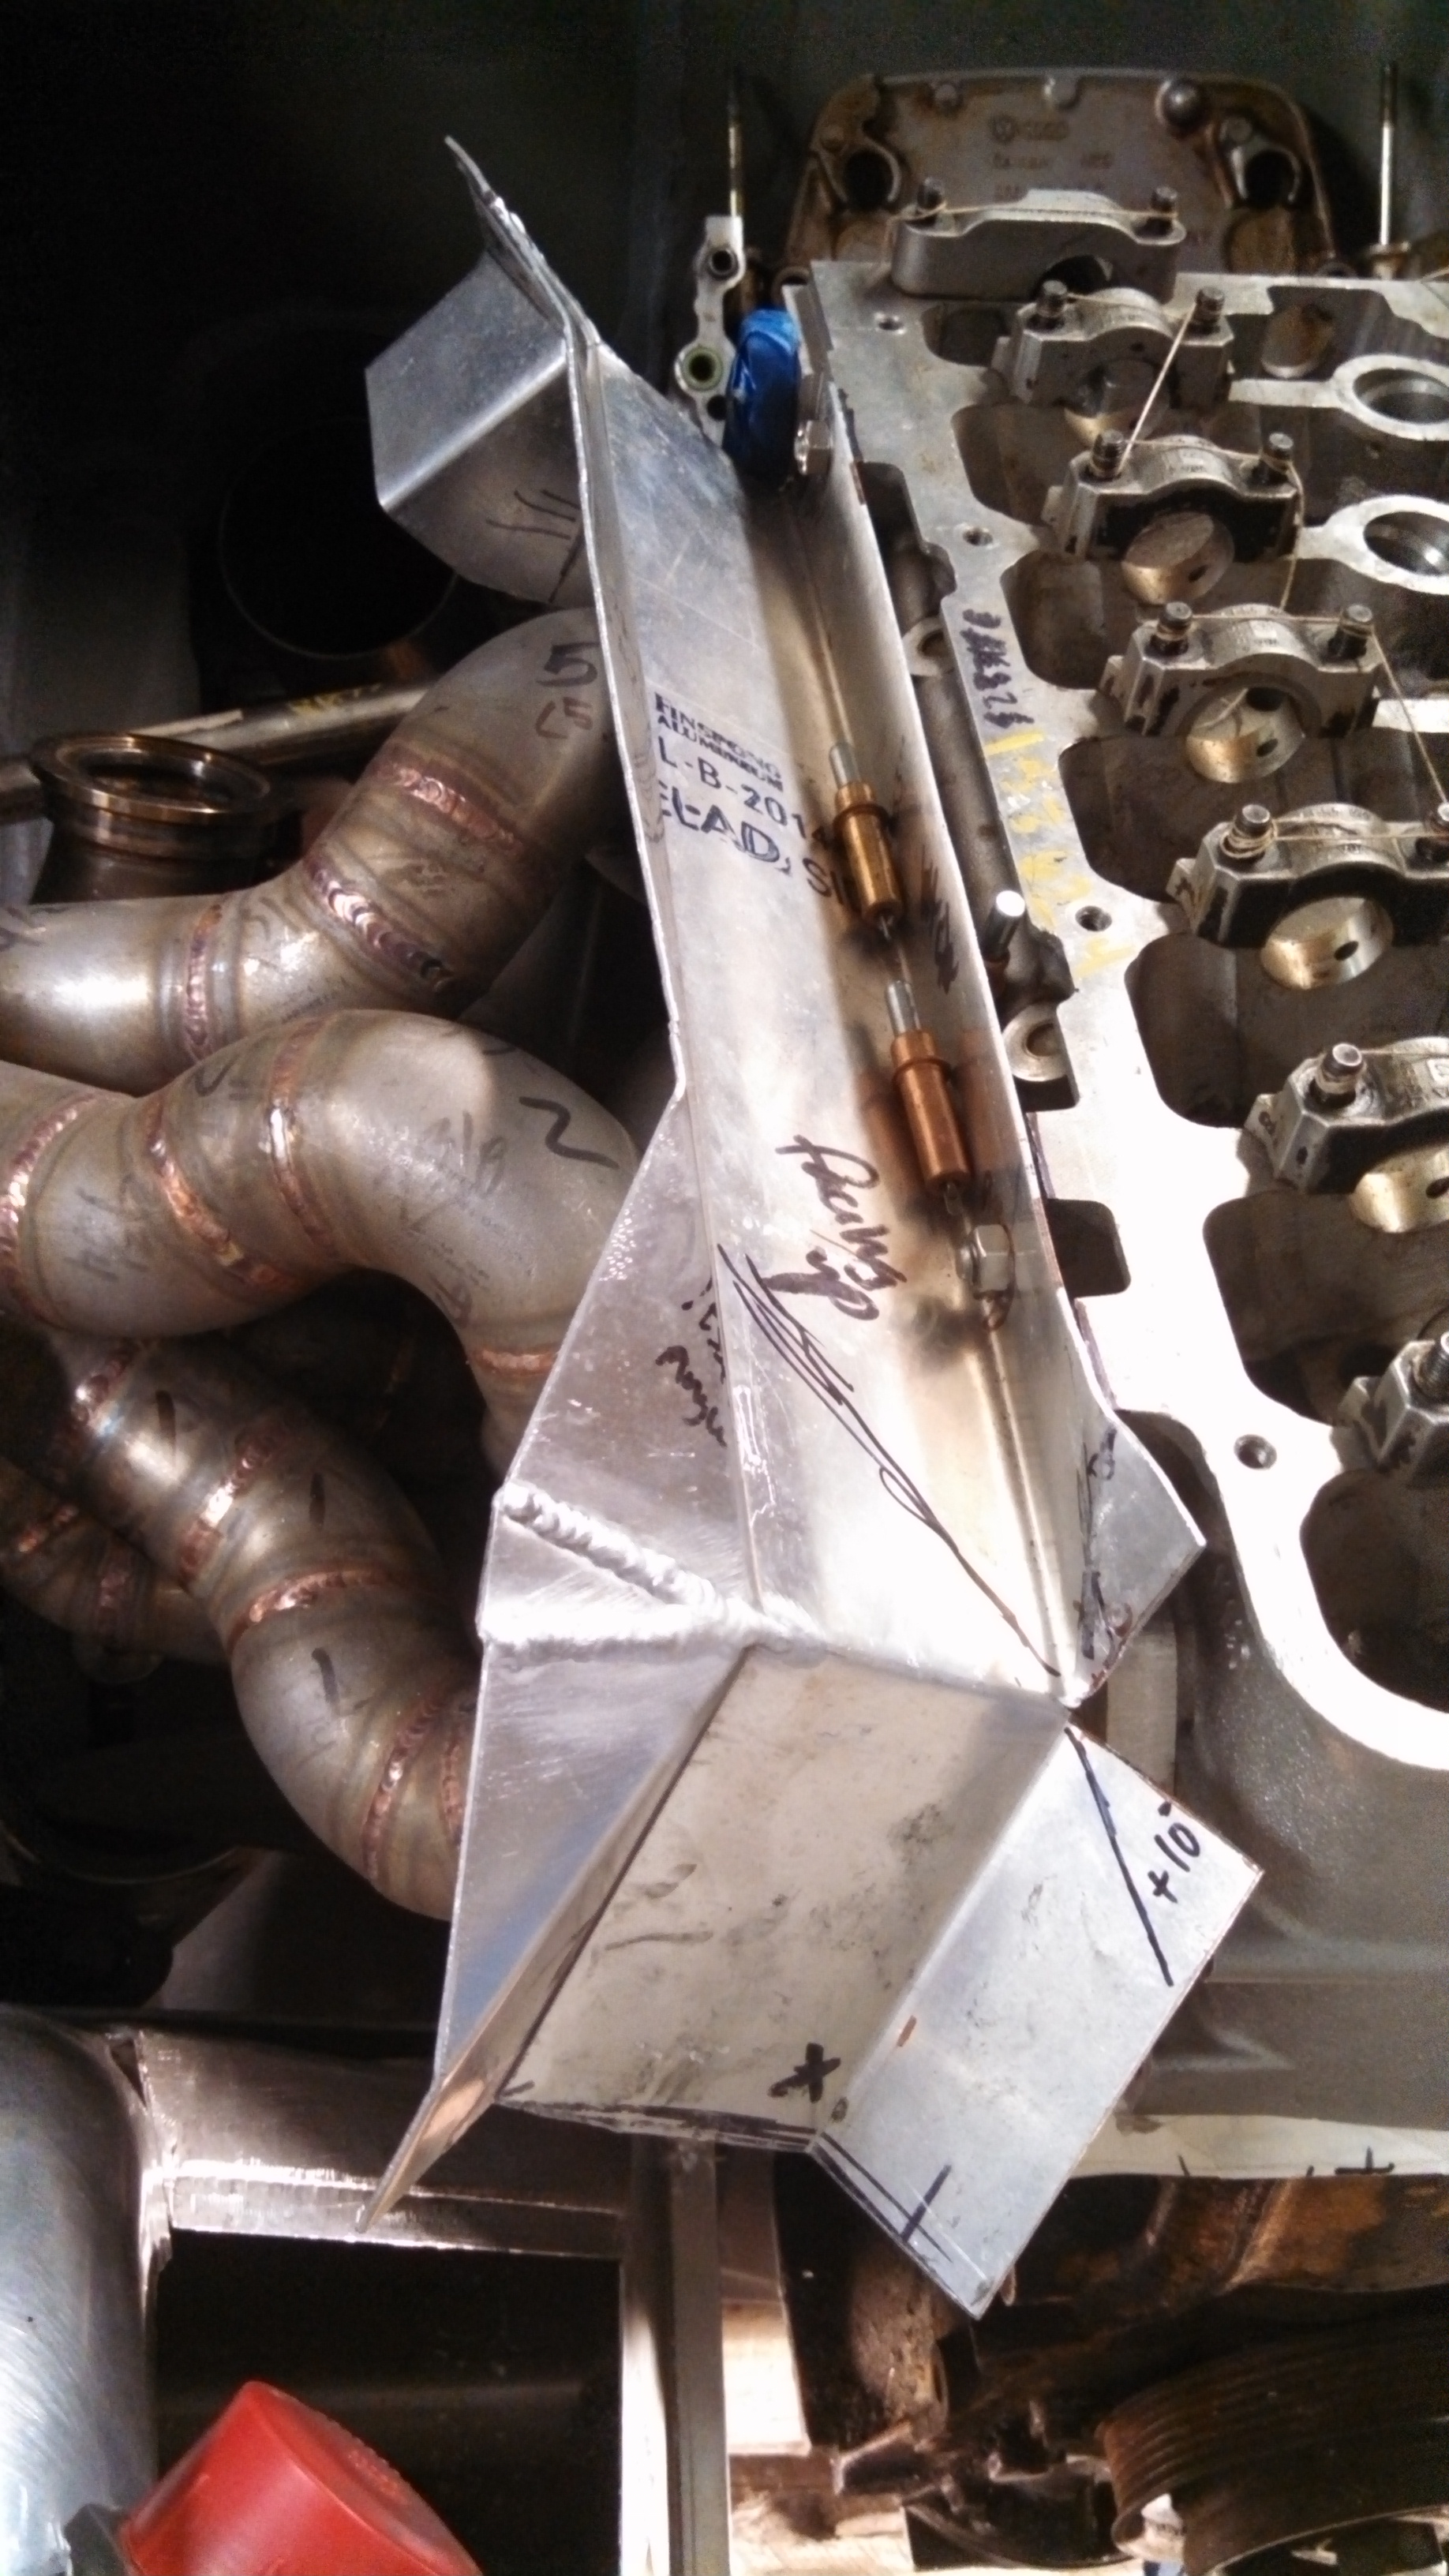
And a few pics of the oil cooler mount that Shawn, (vt10vt) helped me make up when he was down here a few weeks ago.
I just need to add another leg to a silicone isolater mount tab under the frame rail, to triangulate it, and it’s done, and time for plumbing.
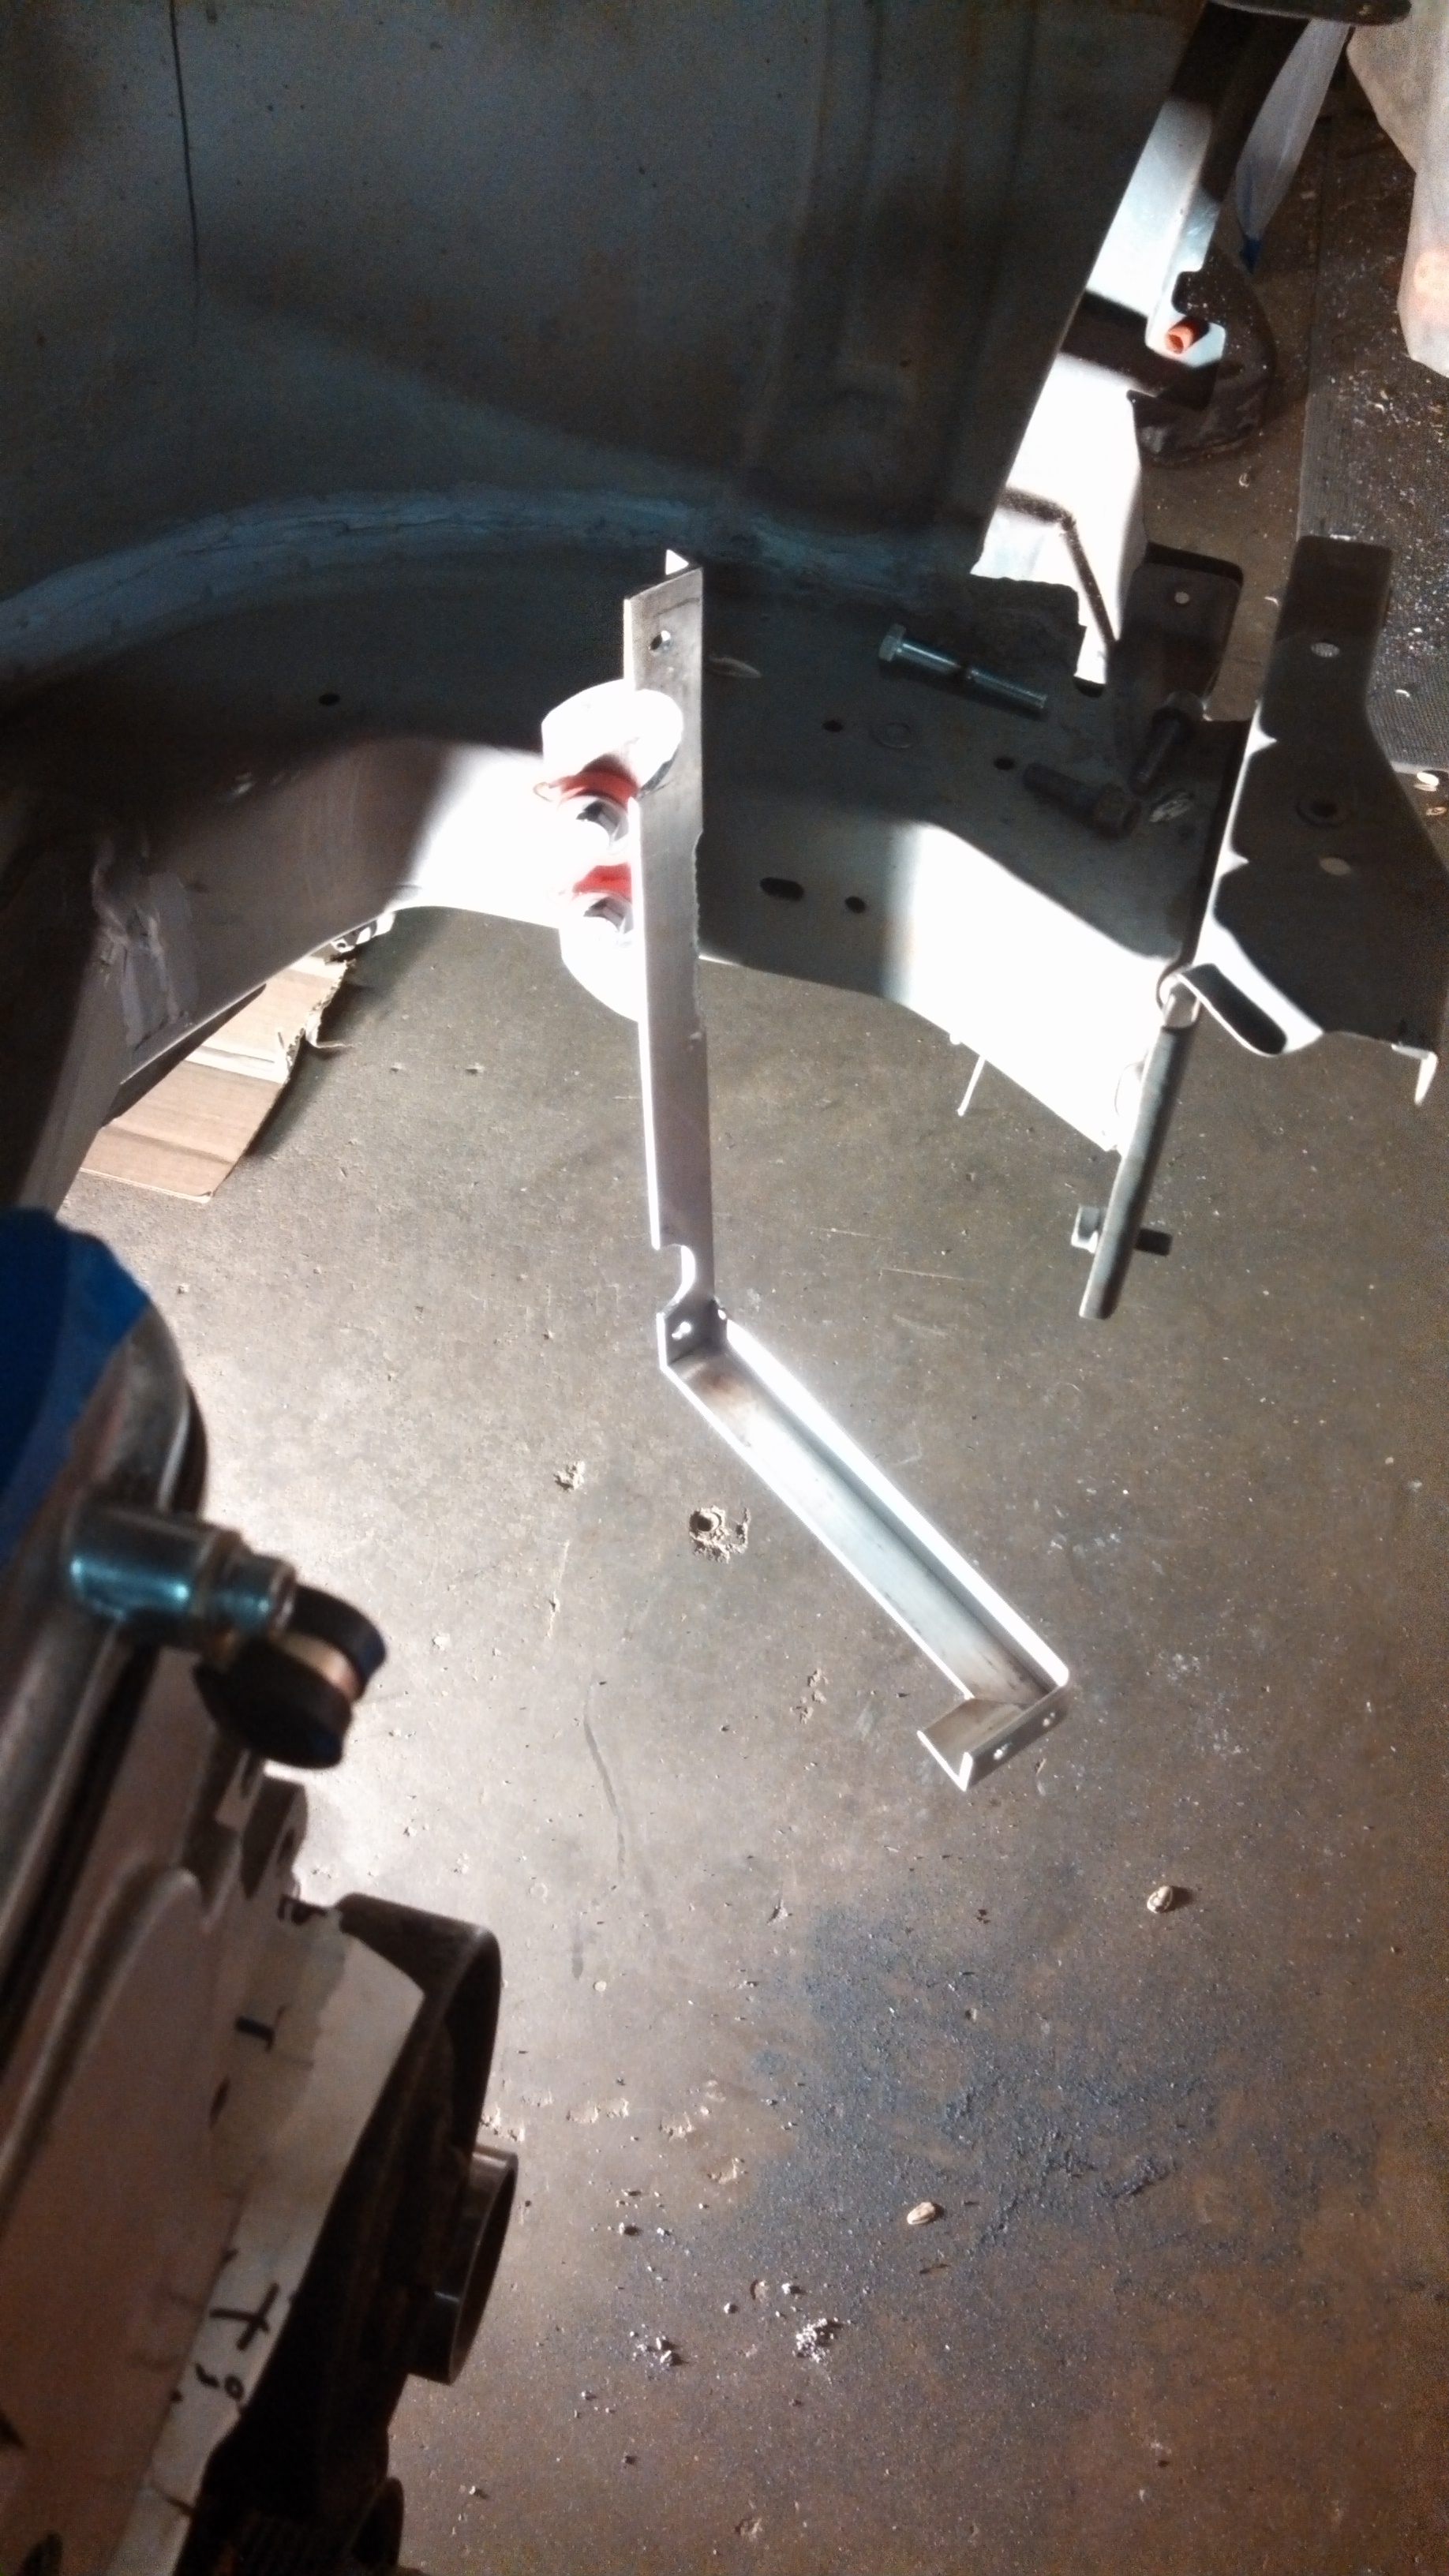
- oil cooler bracket from side.jpg (1.58 MiB) Viewed 61552 times
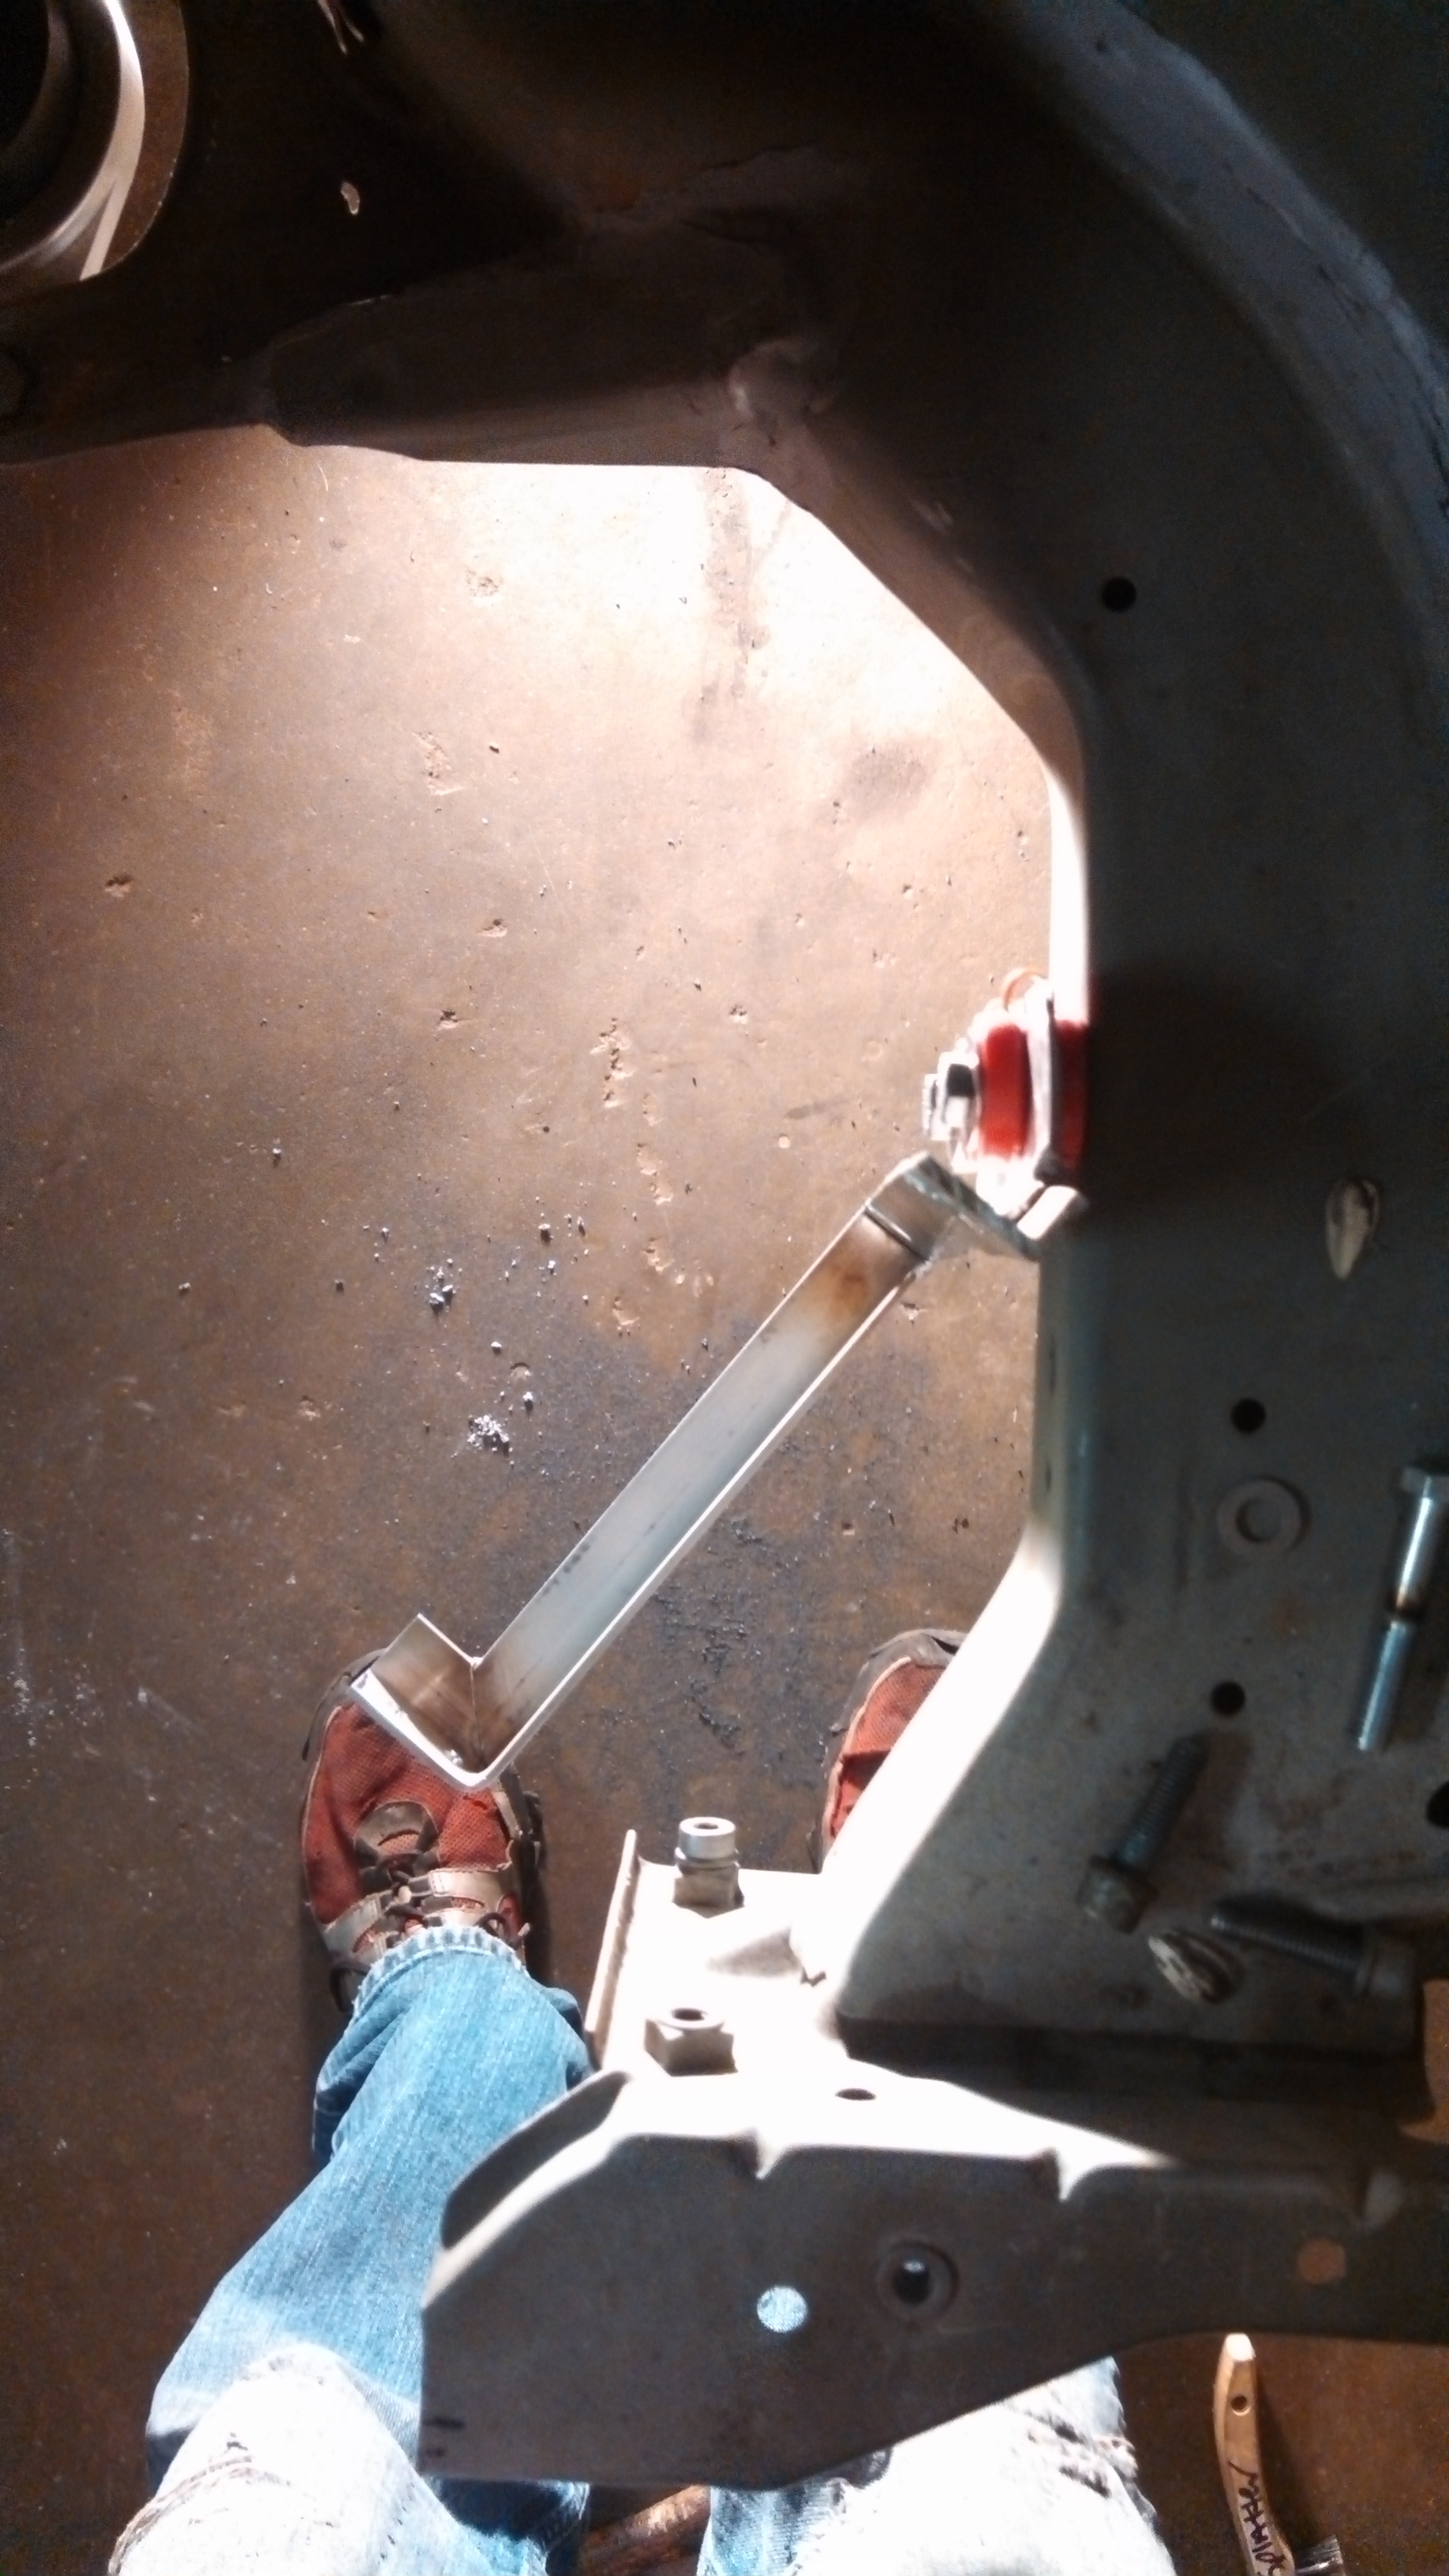
- oil cooler bracket from above.jpg (1.28 MiB) Viewed 61552 times
Re: 24vVR6T CQ Project: EATSGTR, chassis FAB
Posted: Wed Jul 09, 2014 12:14 am
by PRY4SNO
Fvcking love updates to this thread.
Re: 24vVR6T CQ Project: EATSGTR, chassis FAB
Posted: Wed Jul 09, 2014 12:15 am
by my2000apb
UPDATE!!!
I got a 16AN bung and elbow, welded up to the oil pan for the turbo oil drain return. The hose is made up with Earl’s pro-lite and wrapped in FlameGuard insulation, as it runs close to the Wastegate outlet tube.
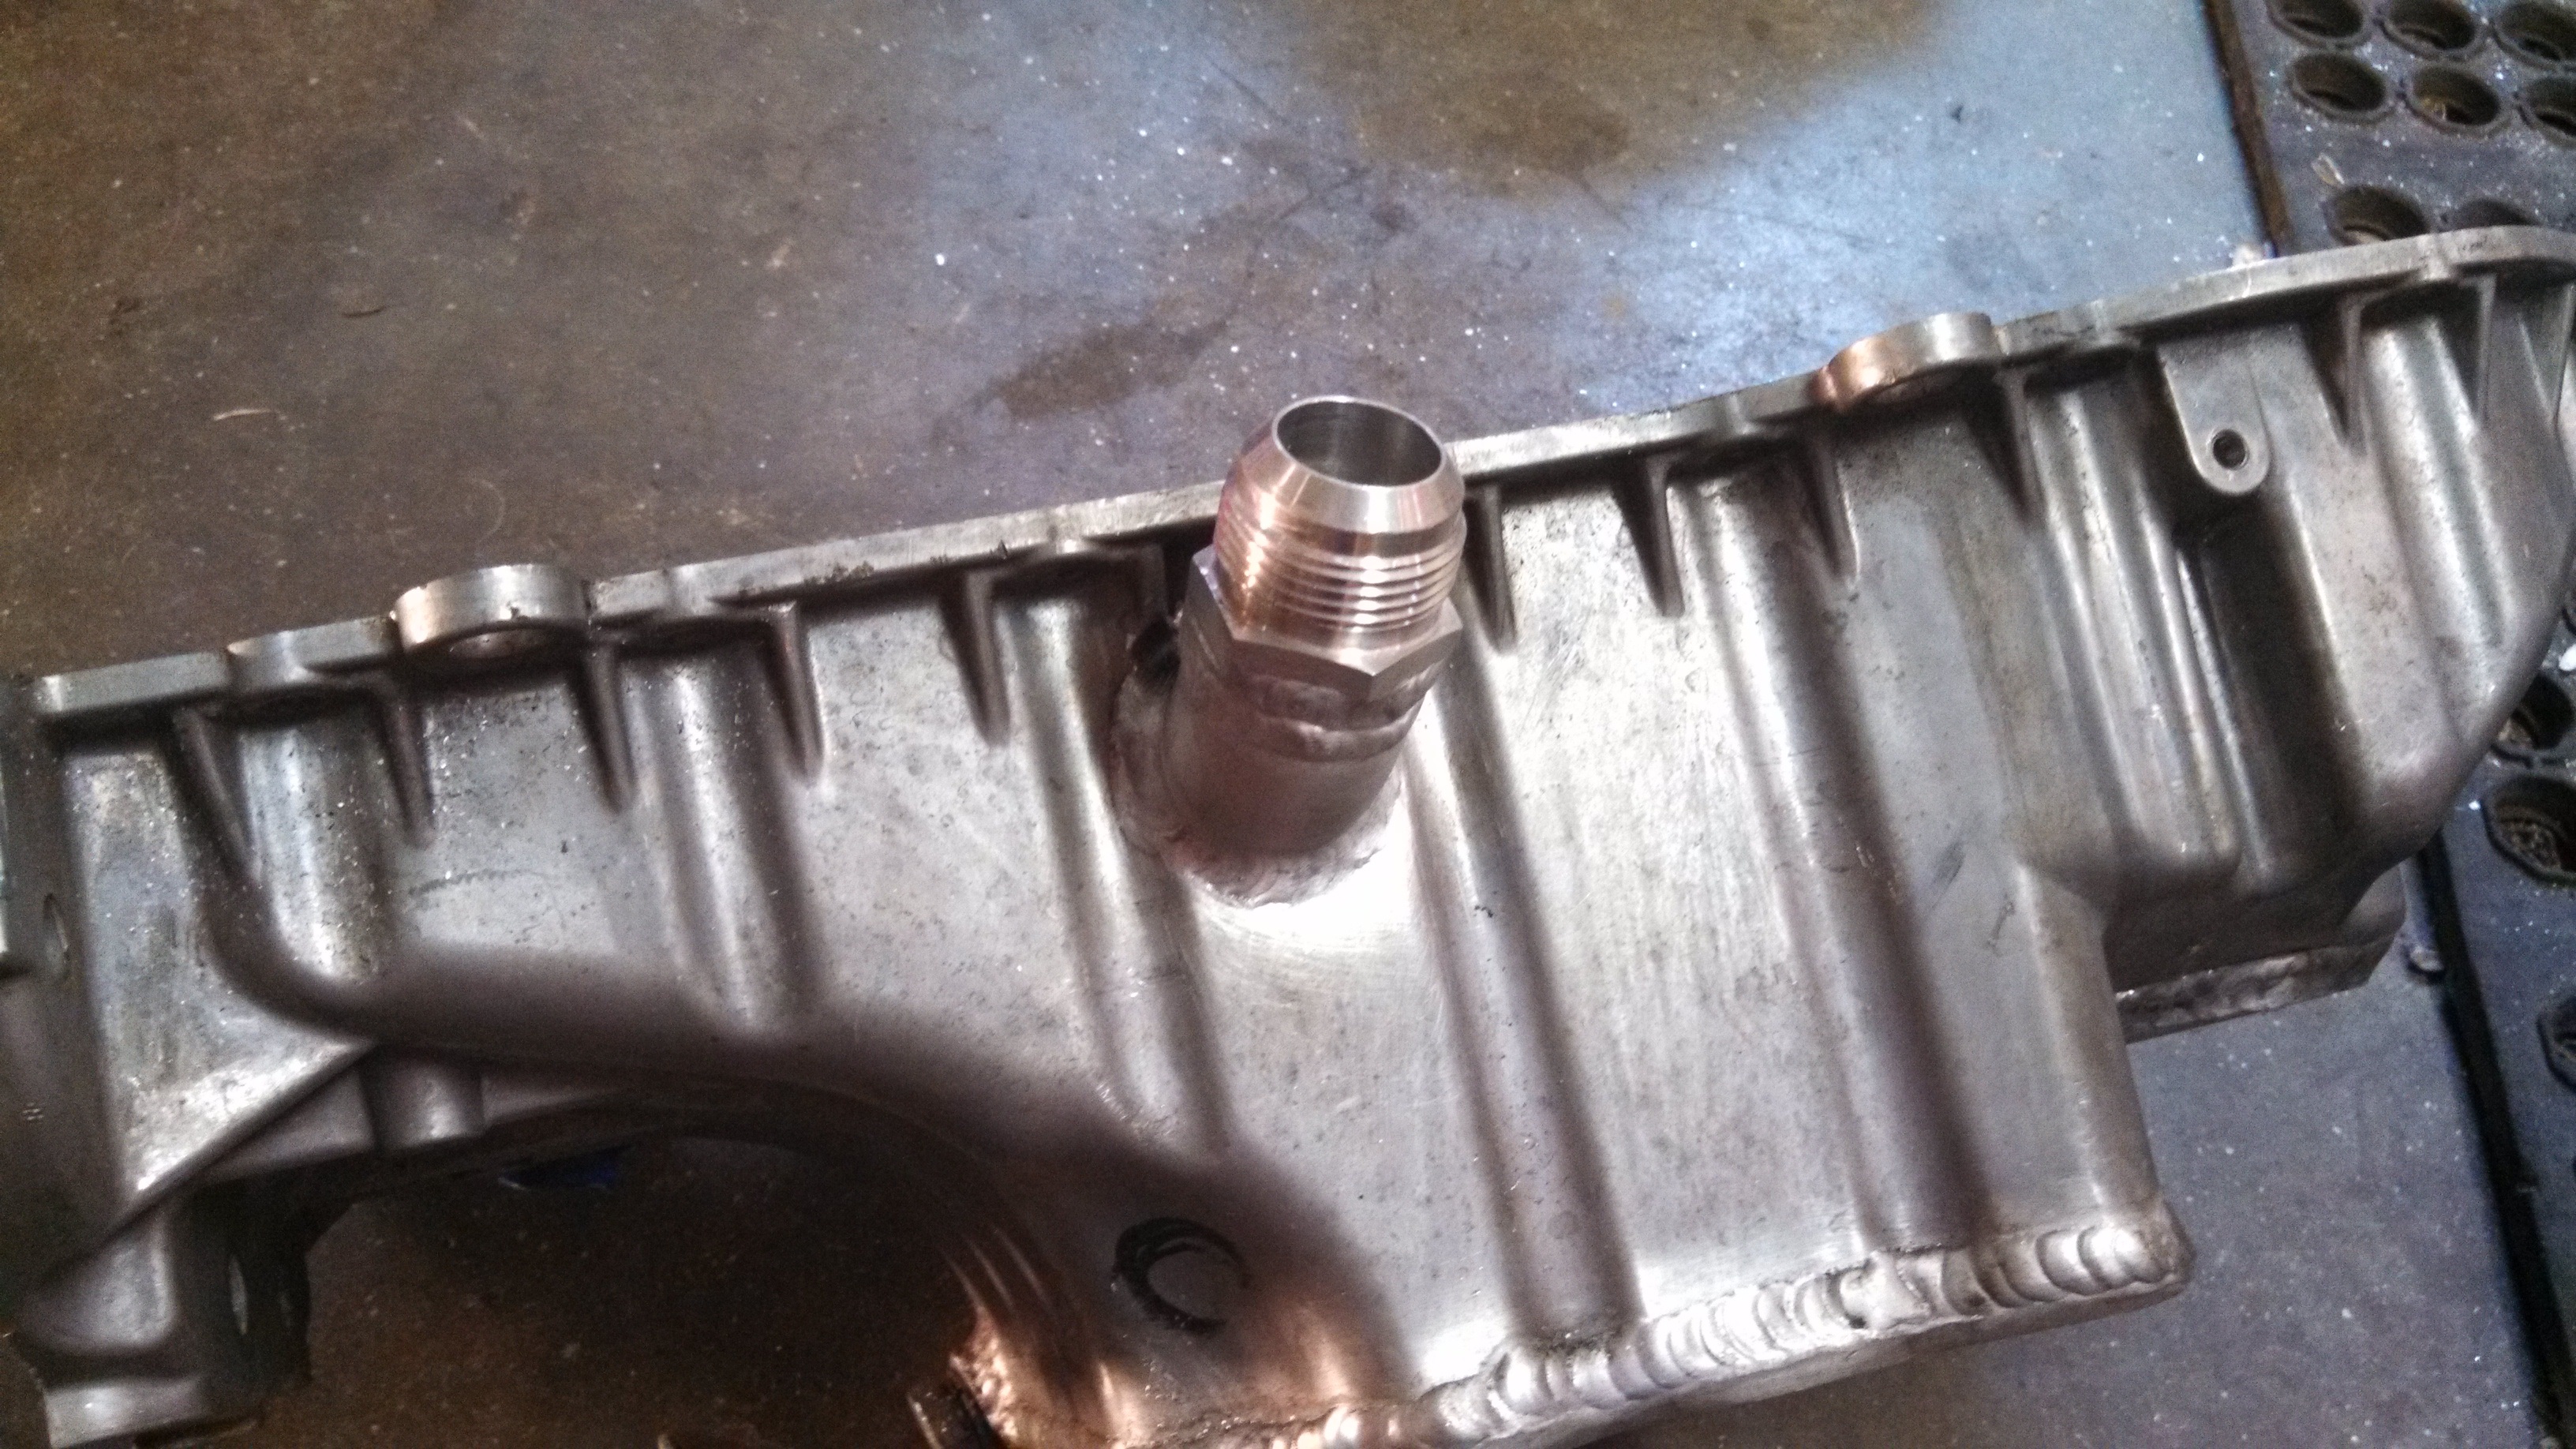
- turbo drain on pan.jpg (1.92 MiB) Viewed 61544 times
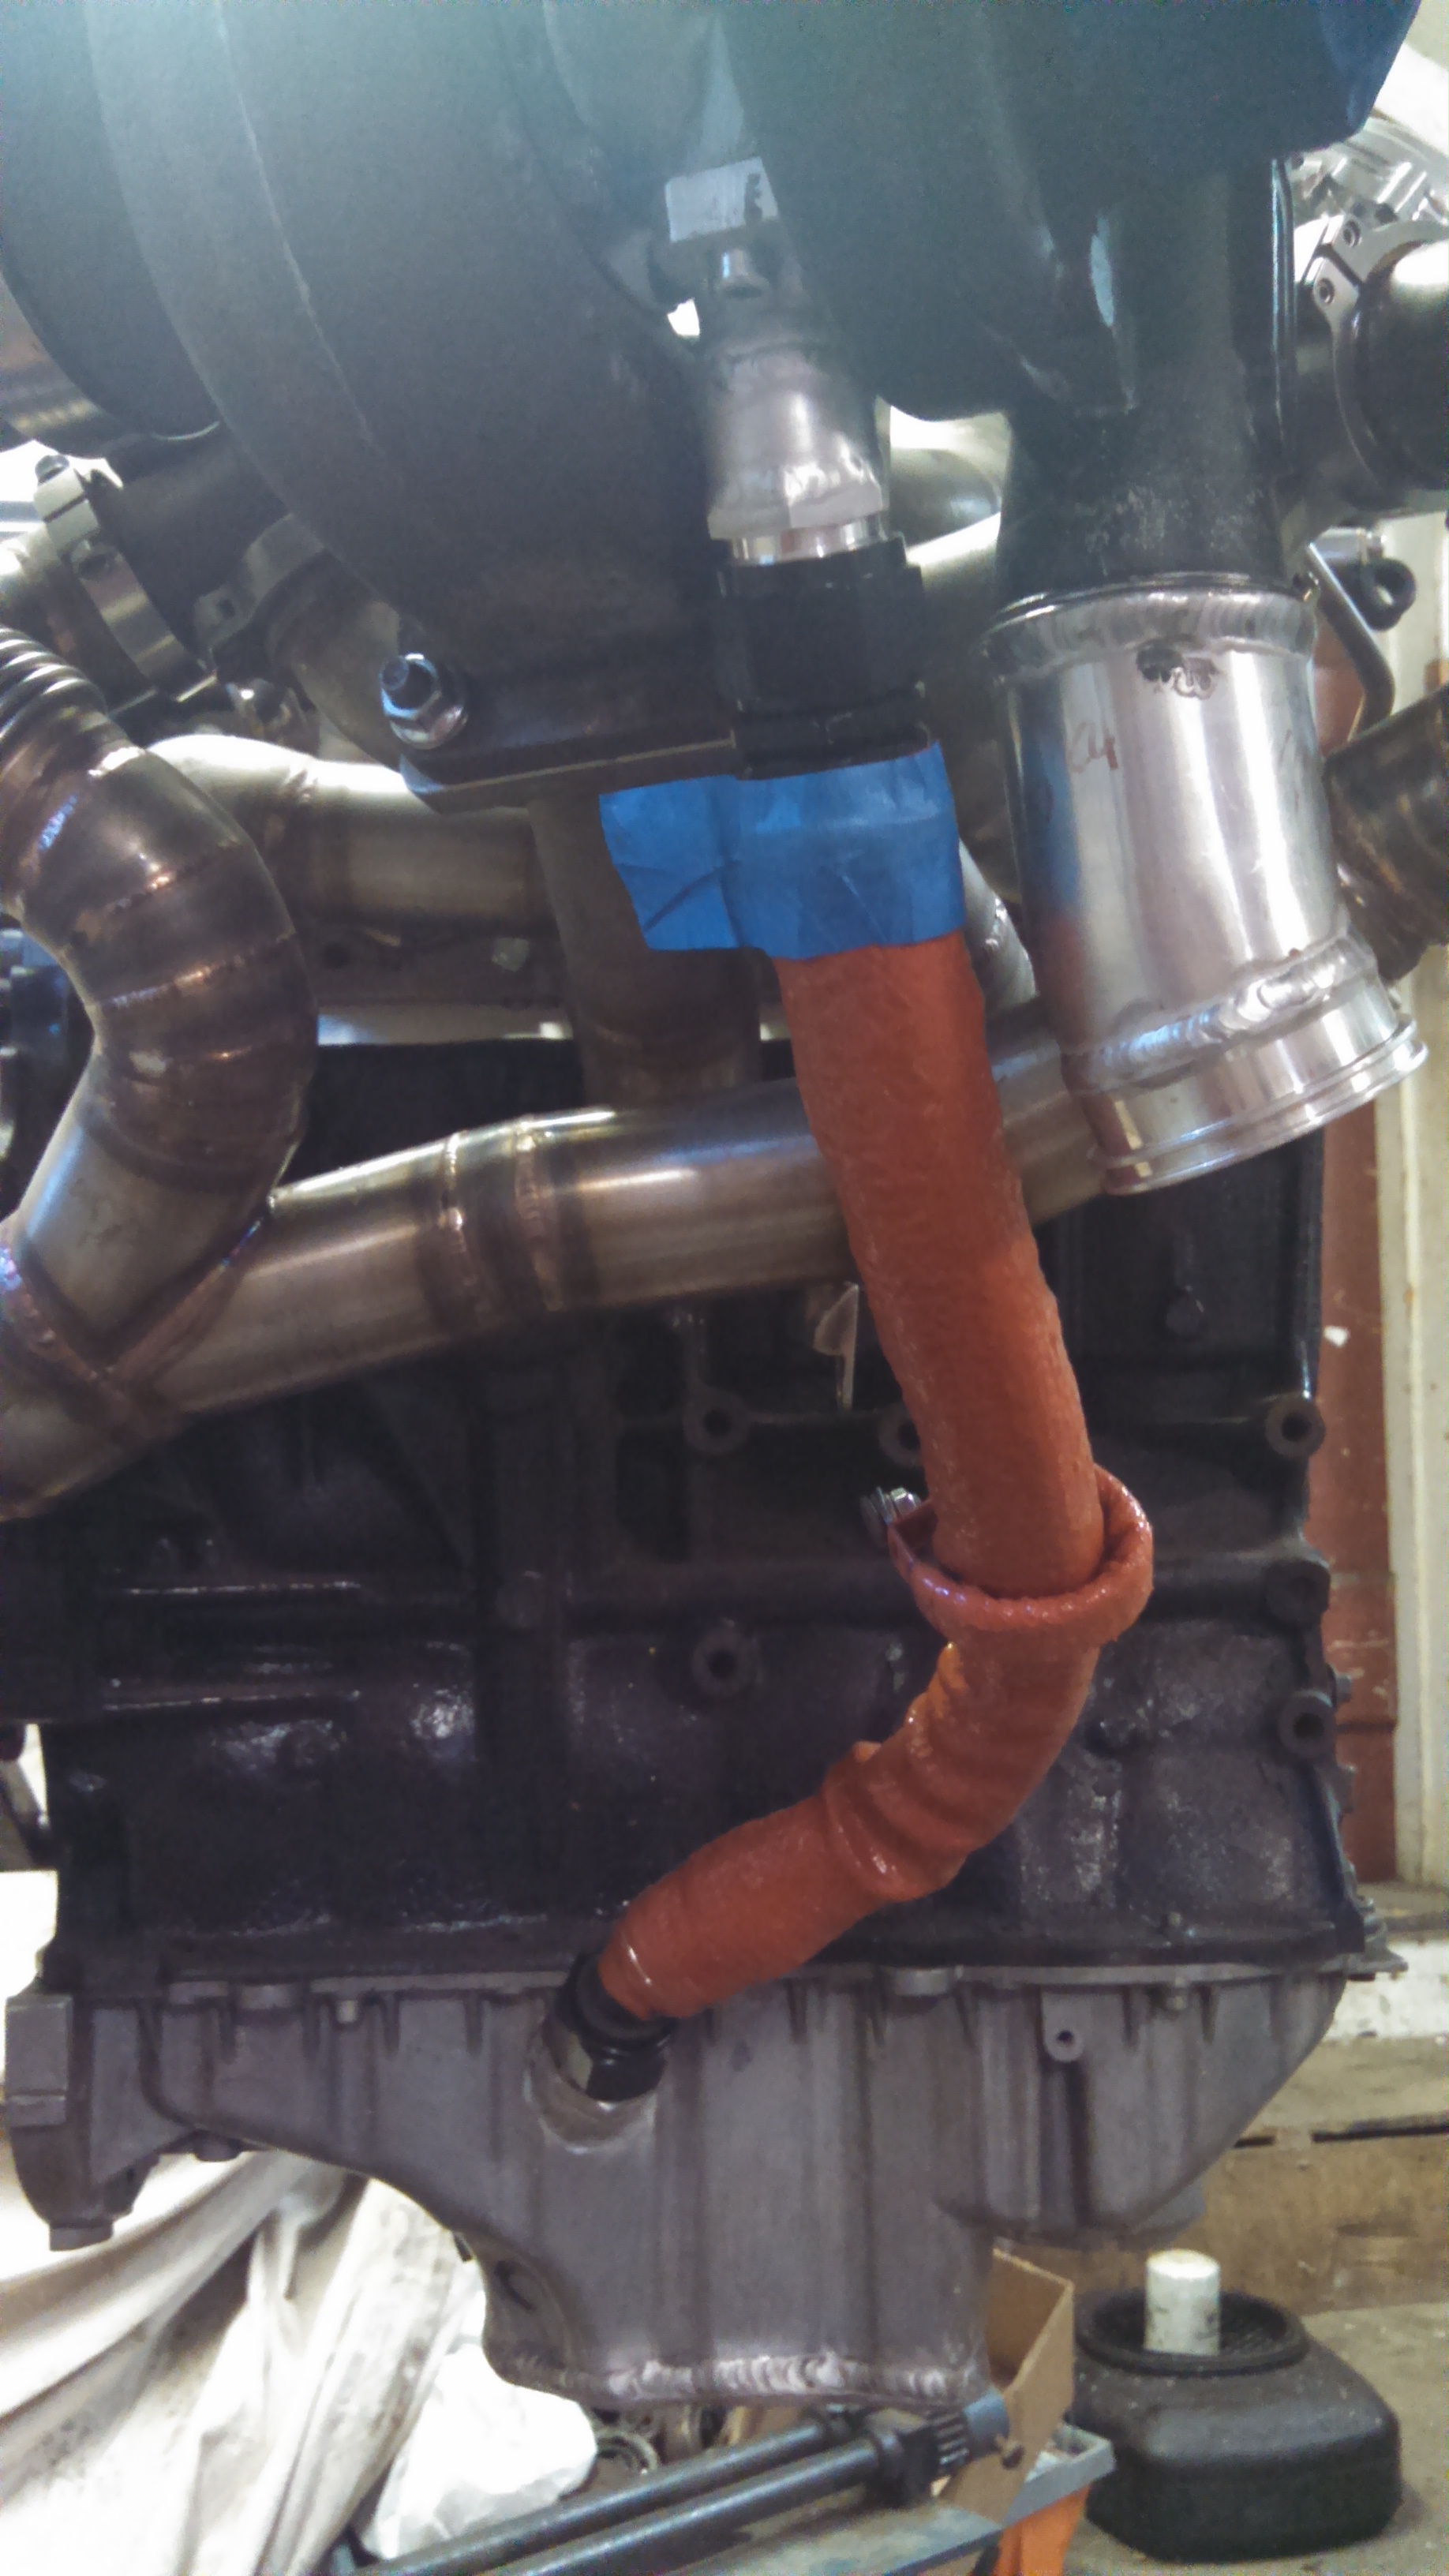
- turbo oil drain line.jpg (1.16 MiB) Viewed 61544 times
I also got a spare rear diff modded up for the pump/cooler return line. It sprays right on the rear differential ring gear.
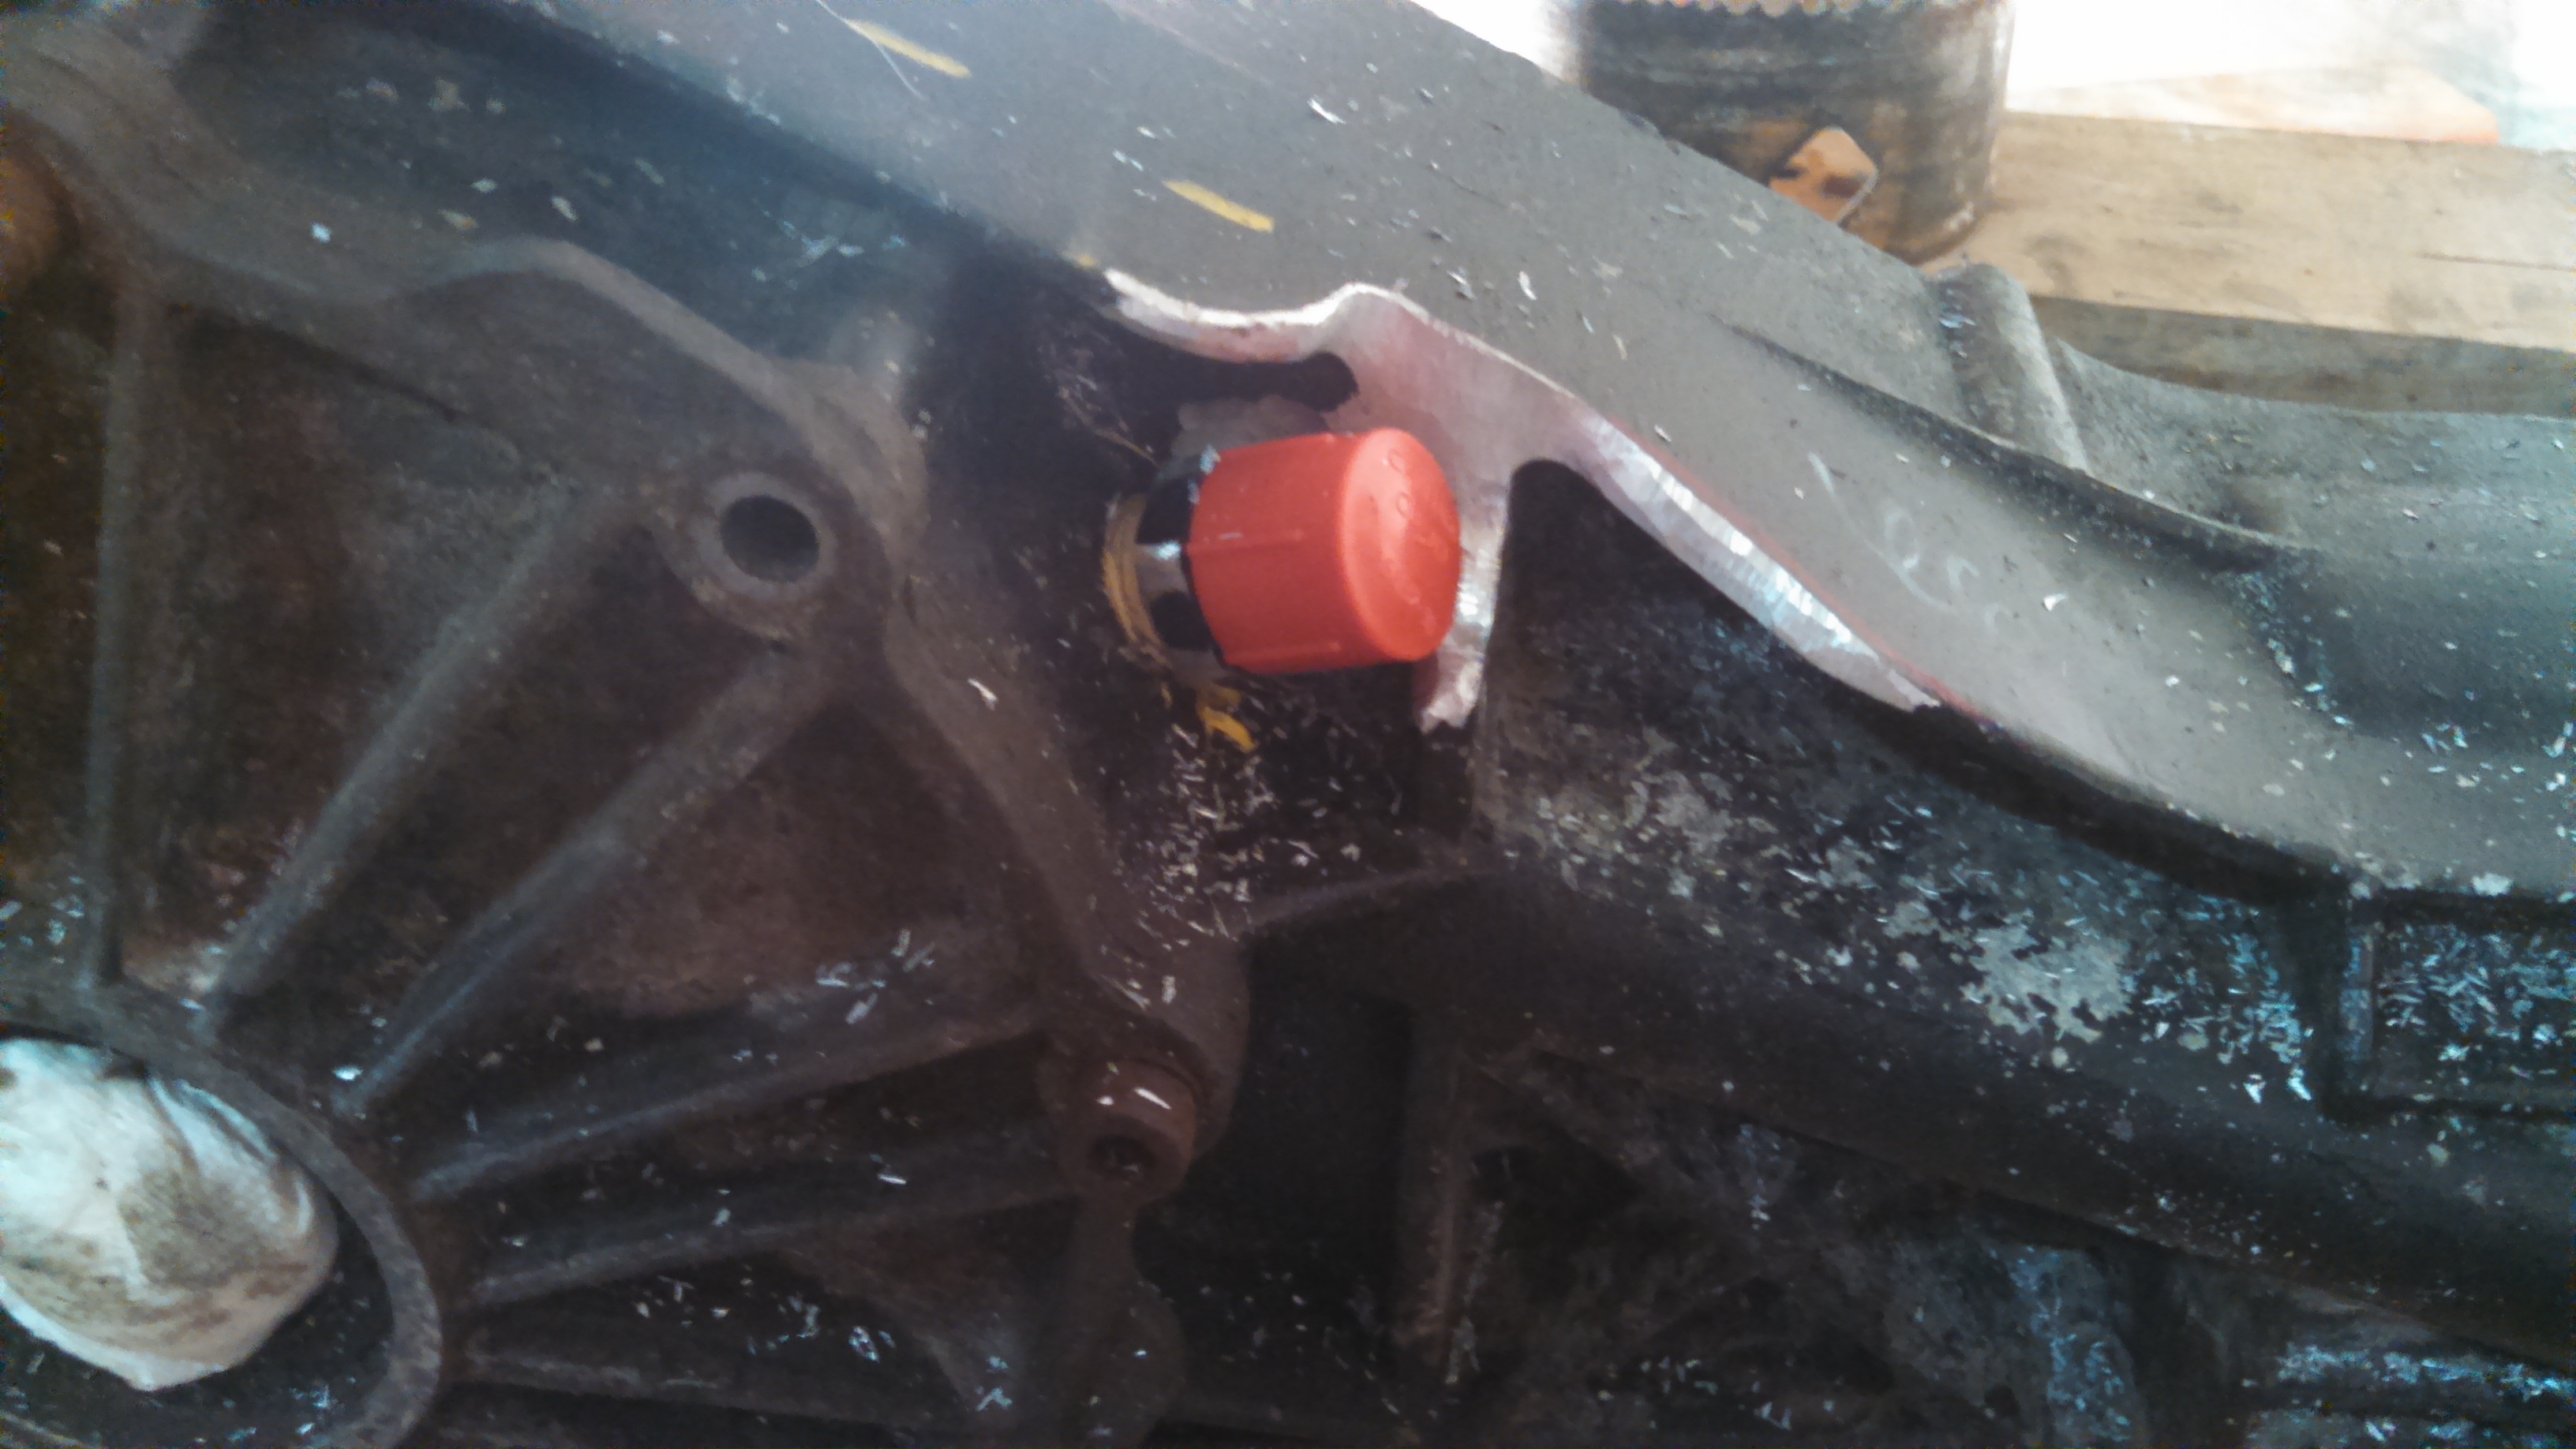
- rear diff pump return.jpg (1.17 MiB) Viewed 61544 times
I just need to make the pump and cooler brackets, more on that later.
I also had Ryan replace the plate on my valve cover with something a bit thicker so some engravings, more on that later
- new VC plate for engraving.jpg (44.78 KiB) Viewed 61544 times
Re: 24vVR6T CQ Project: EATSGTR, chassis FAB
Posted: Wed Jul 09, 2014 12:17 am
by my2000apb
MORE!!!
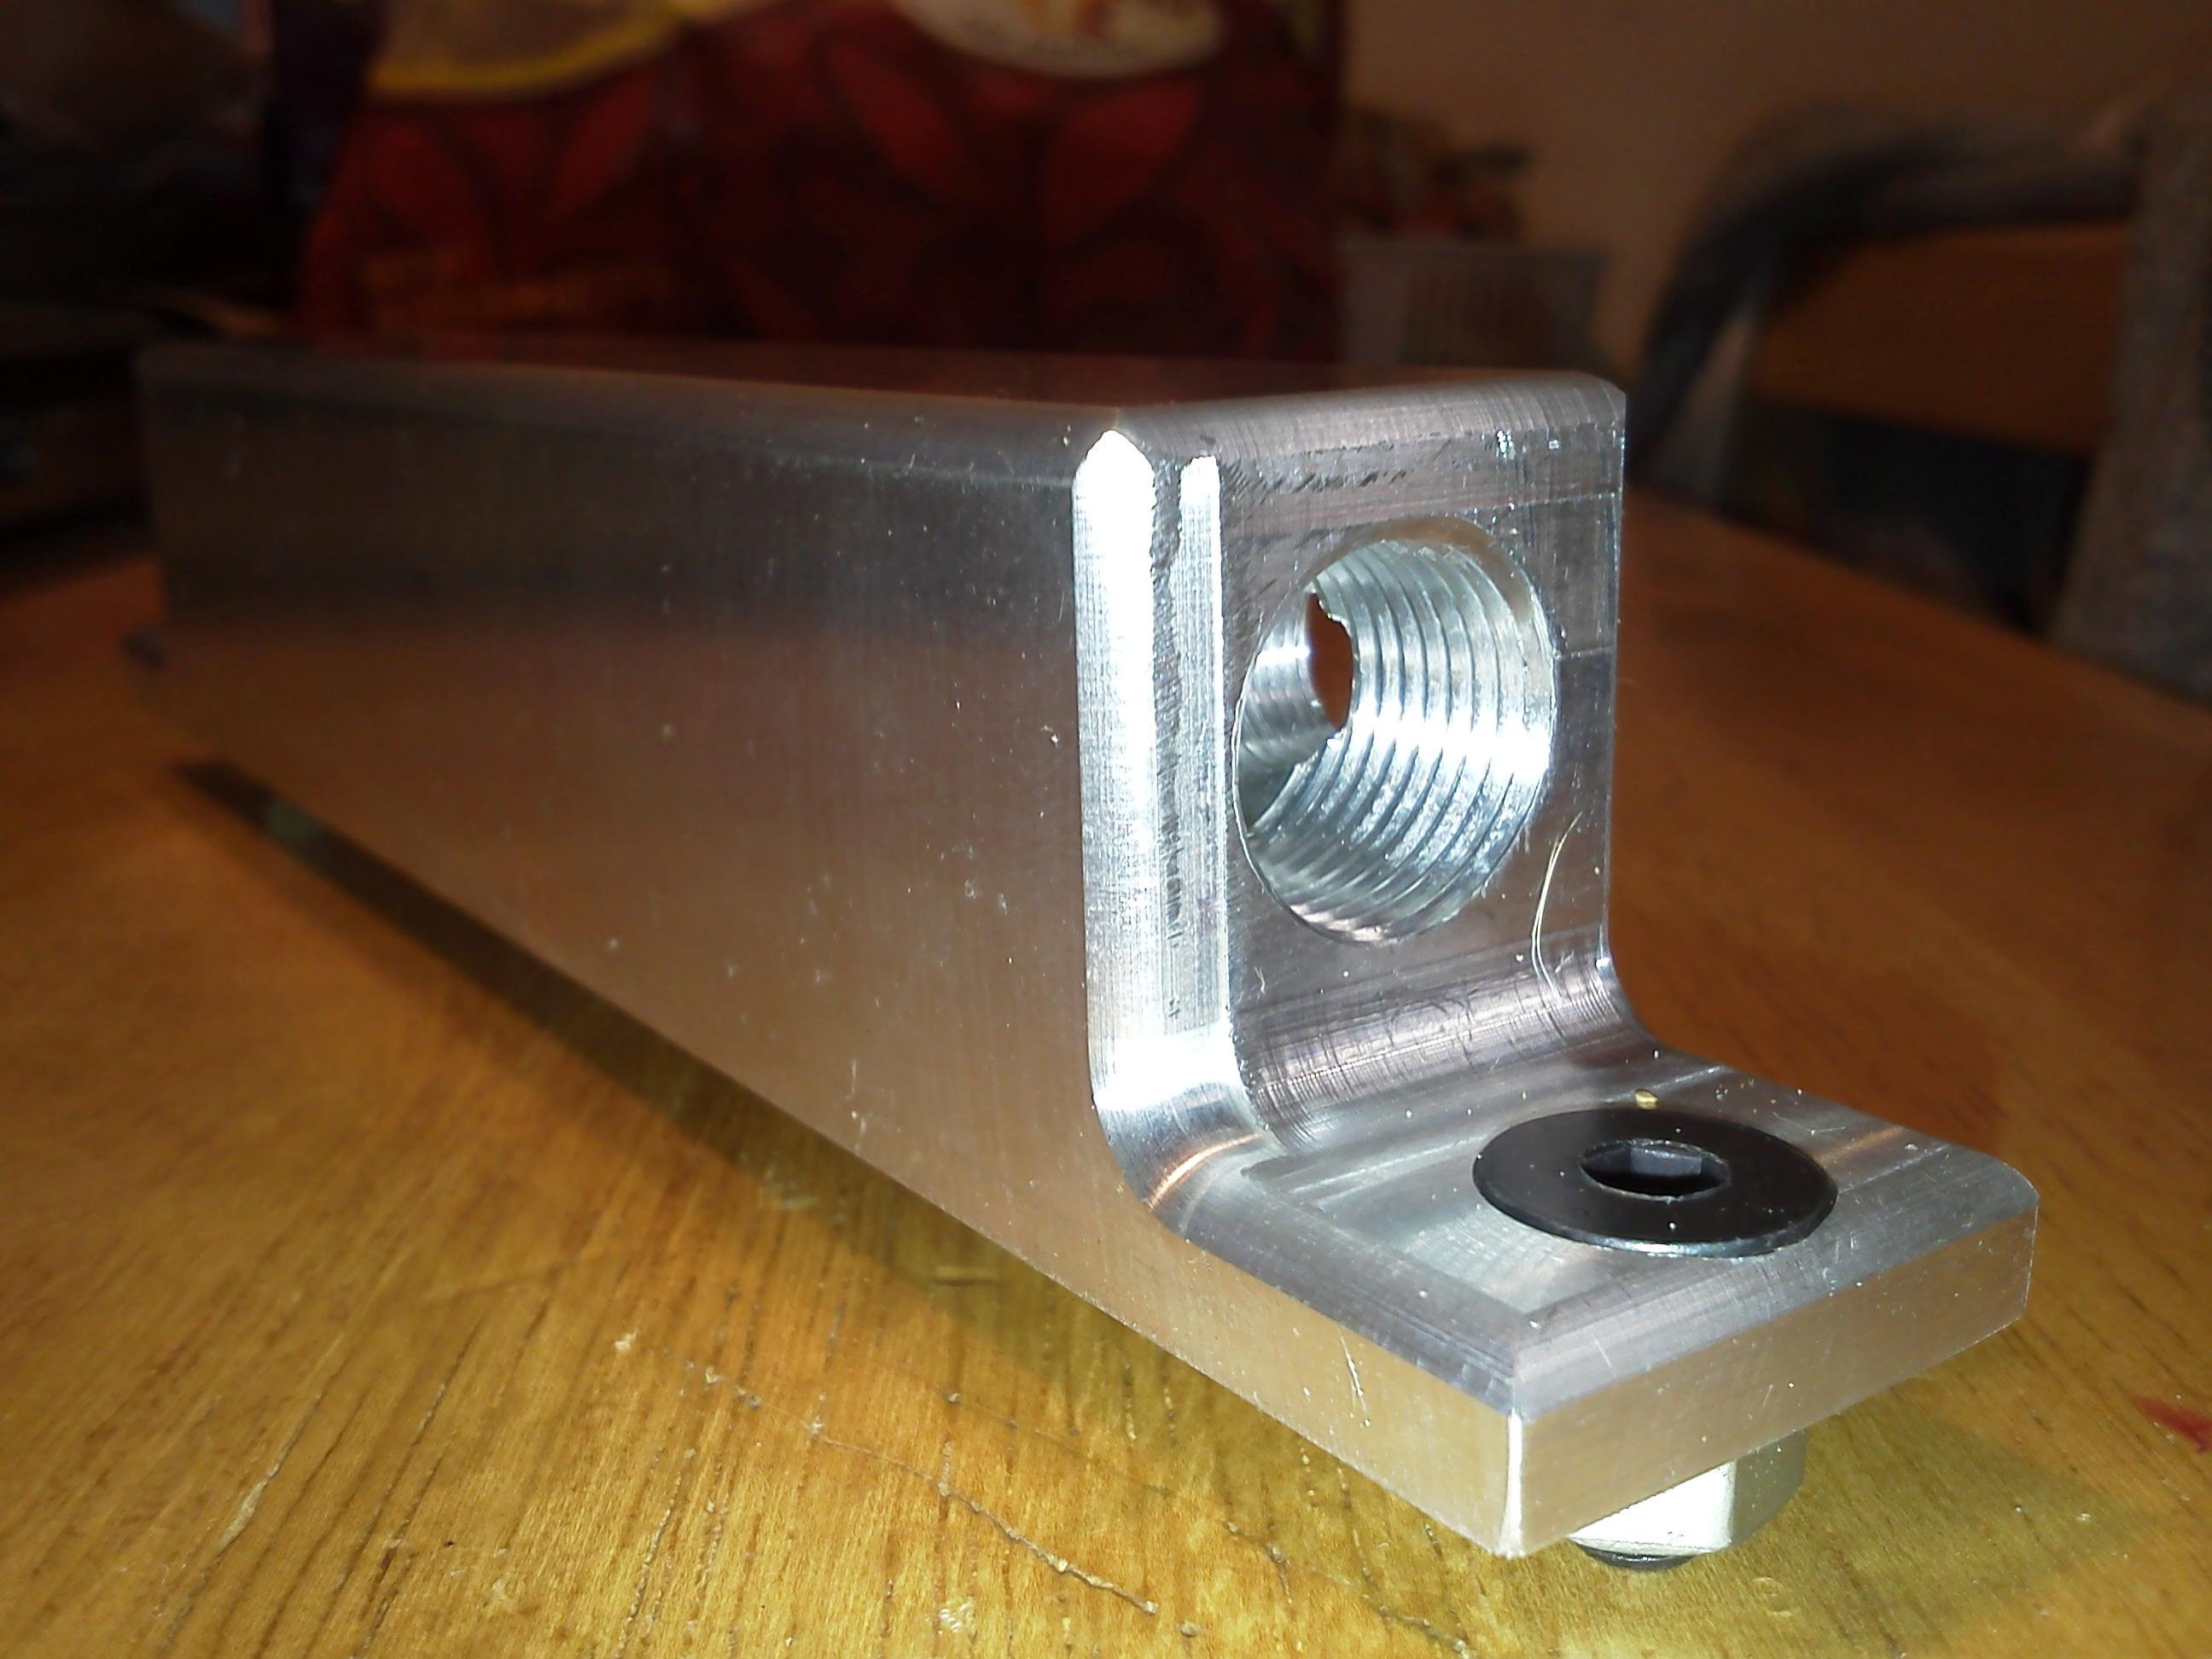
I sent some drawings to a machinist buddy of mine and got the these beautiful pieces back!!!
The first is a receiver for a 3/8” rod end. I am also having a threaded RH/LH adjuster made to tension/adjust the serpentine belt. The rod end fits in snugly with washers and Seals-It rod end seals.
- upper alt tensioner mount.jpg (353.17 KiB) Viewed 61544 times
- upper alt tensioner mount2.jpg (284.29 KiB) Viewed 61544 times
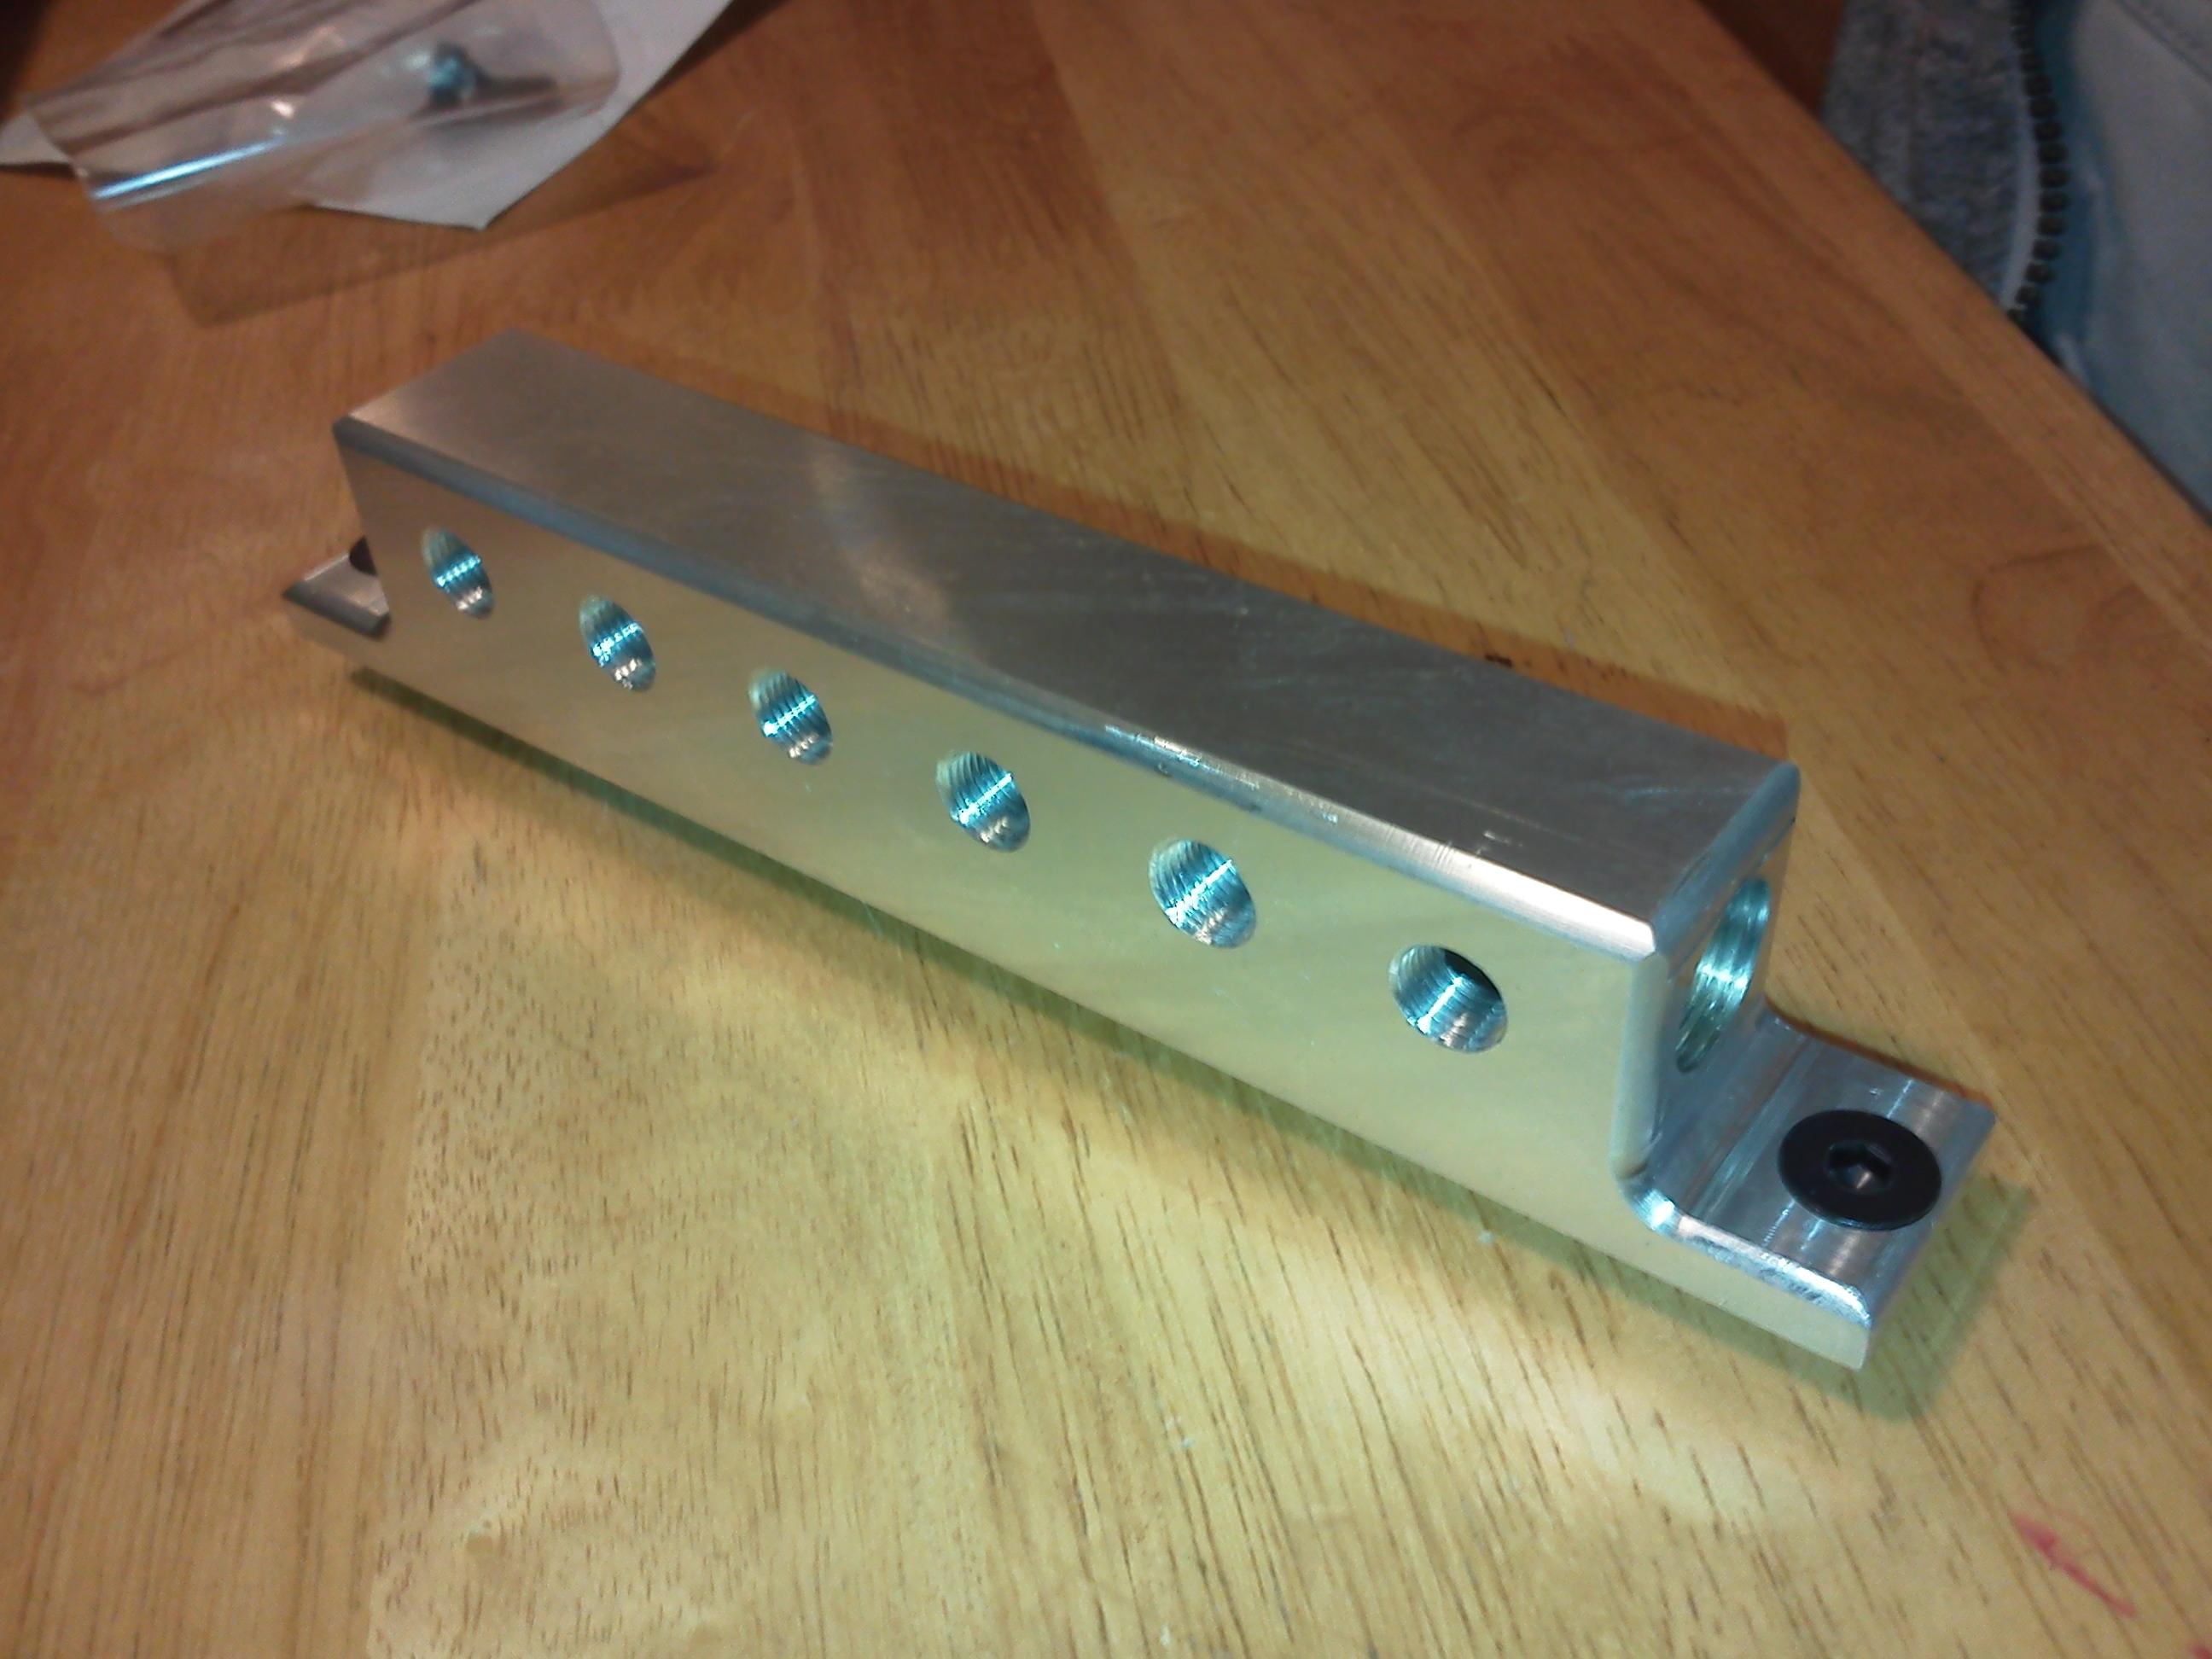
The second piece is the water/methanol manifold. It has an 1/8” NPT outlet for a 4AN adapter for each cylinder and an add’l outlet for a nozzle at intercooler outlet. It will be mounted on threaded bosses on the intake manifold for nice short lines to each cylinder’s nozzle.
It will also get anodized black when all the parts go out.
- water meth manifold.jpg (327.26 KiB) Viewed 61544 times
- water meth manifold2.jpg (314.58 KiB) Viewed 61544 times
- water meth manifold3.jpg (327.41 KiB) Viewed 61544 times
Re: 24vVR6T CQ Project: EATSGTR, chassis FAB
Posted: Wed Jul 09, 2014 12:21 am
by my2000apb
UPDATE!!!
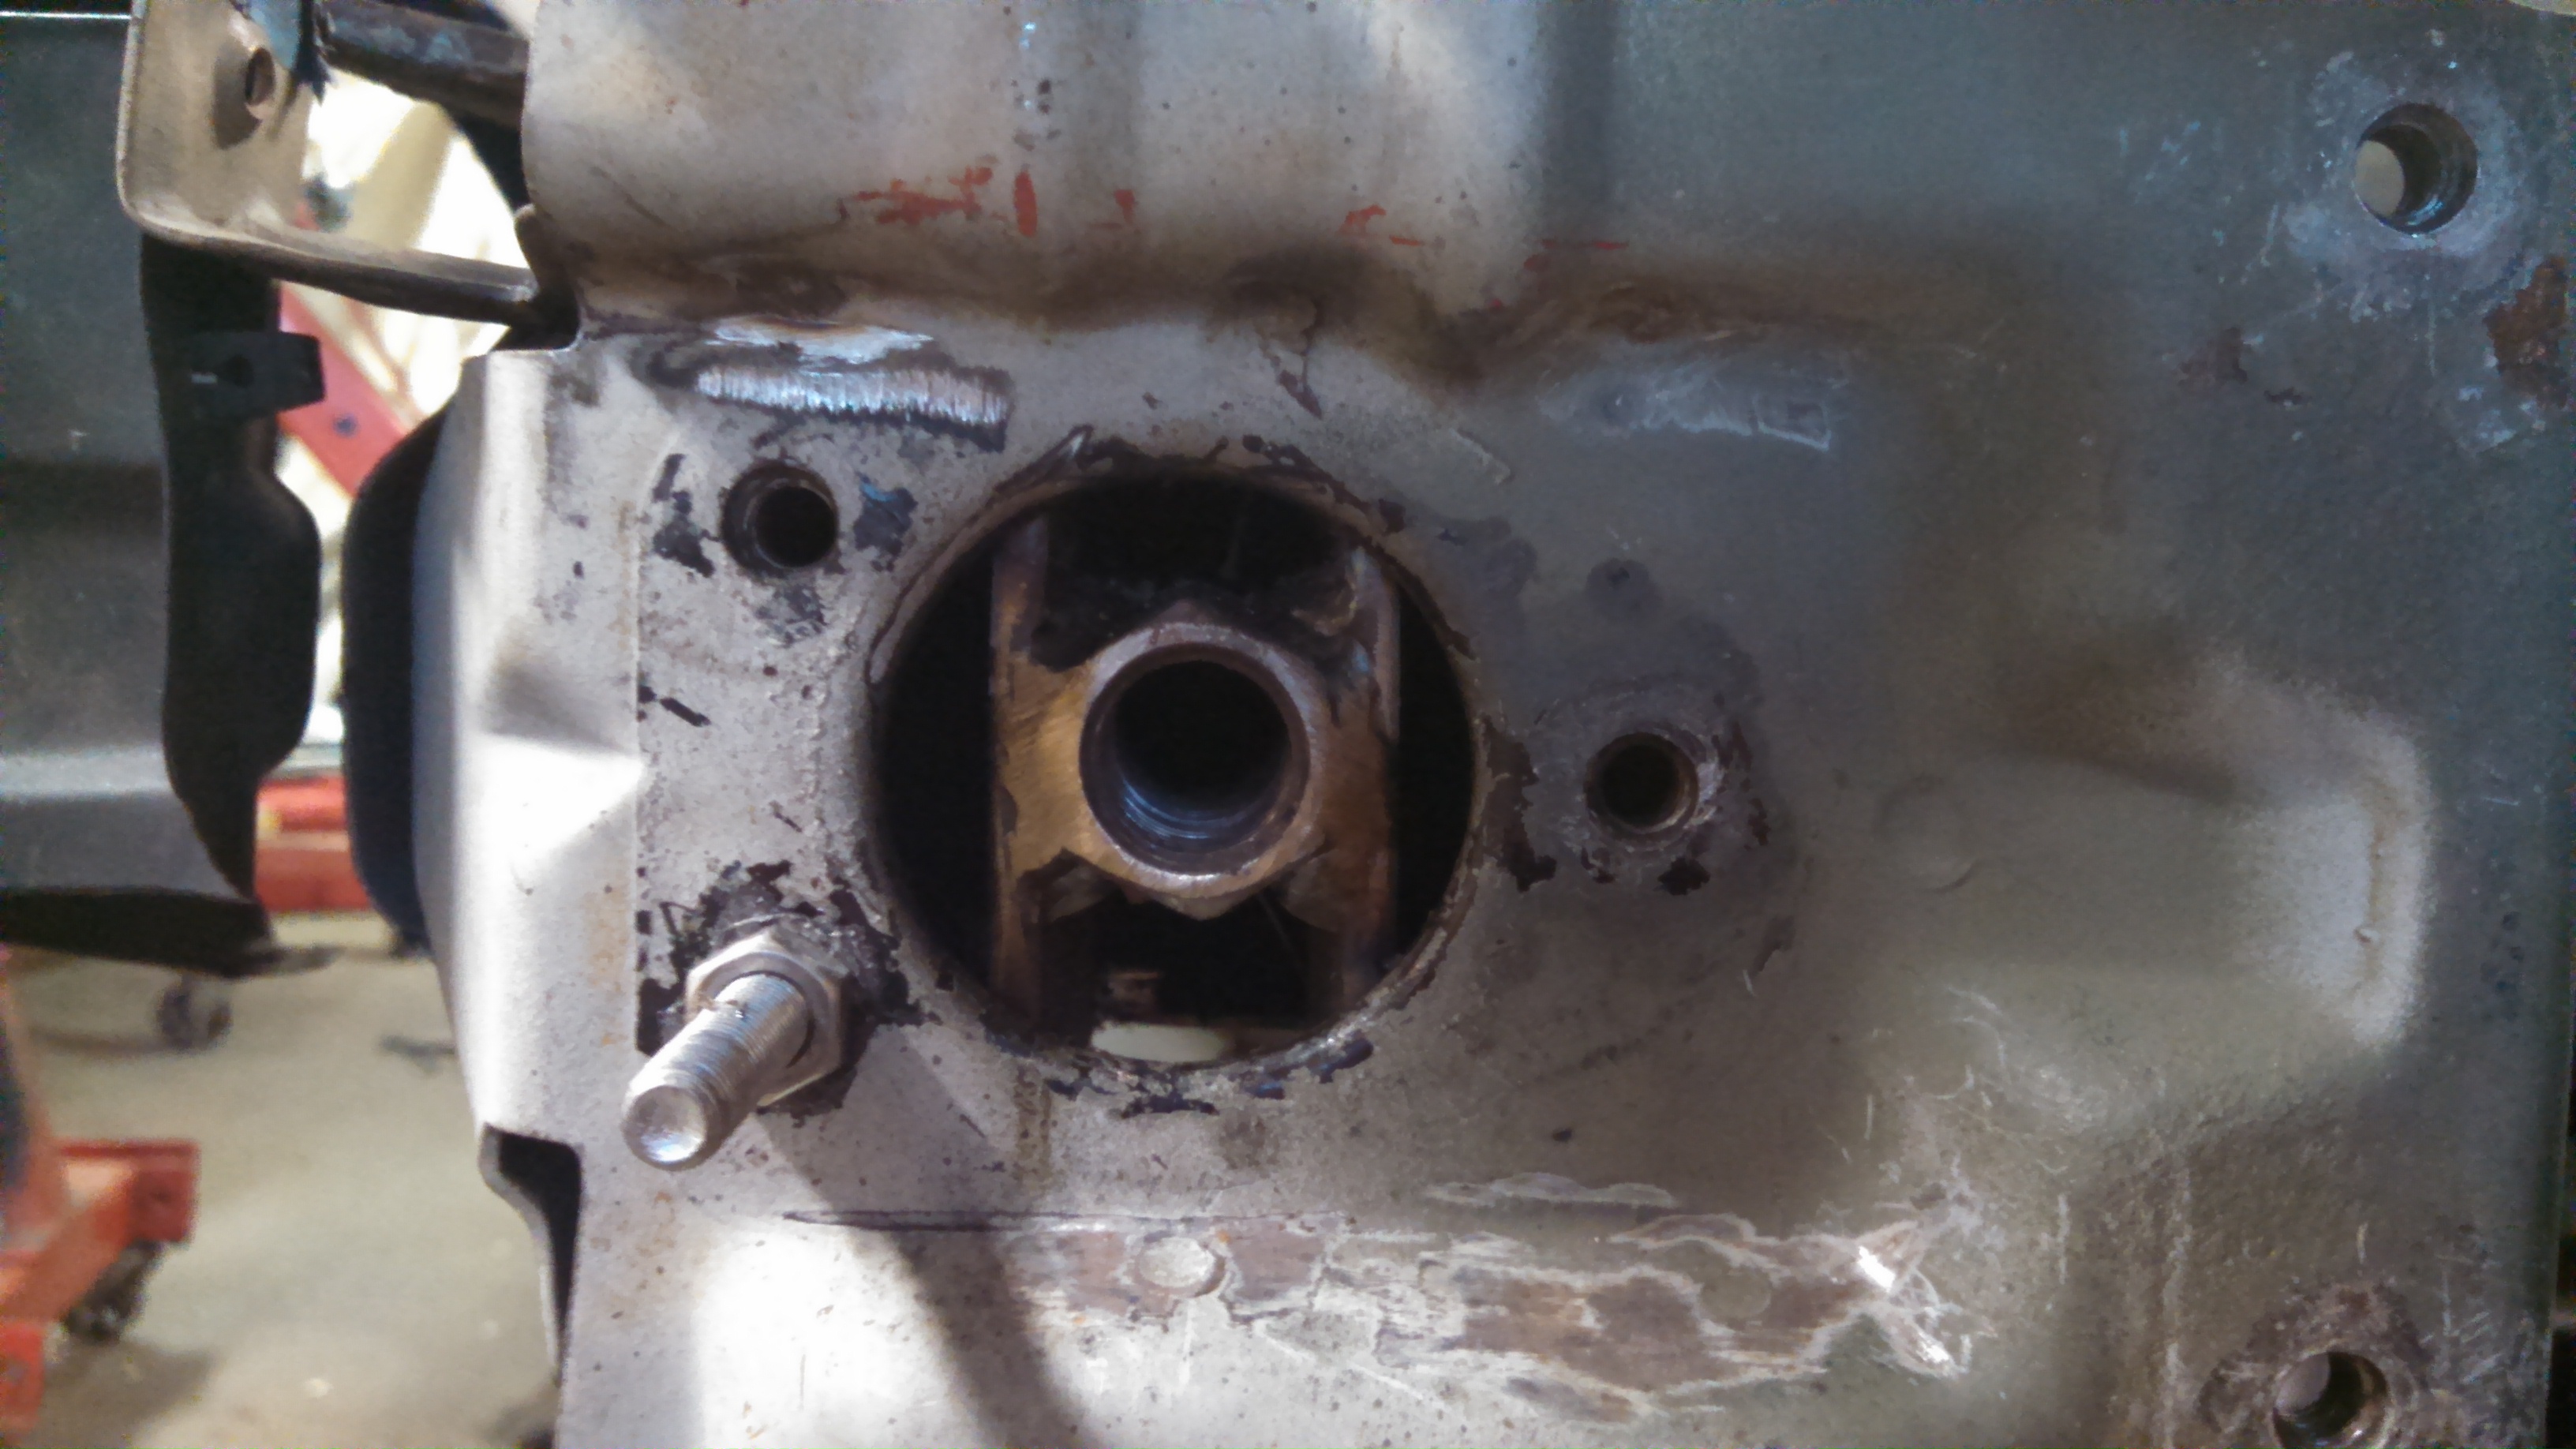
So the engine and trans has been pulled so I can get some work done in the engine bay. Here it is on the engine stand.
- steering arm hole.jpg (1.32 MiB) Viewed 61544 times
- current engine stuff shot SIDE.jpg (1.35 MiB) Viewed 61544 times
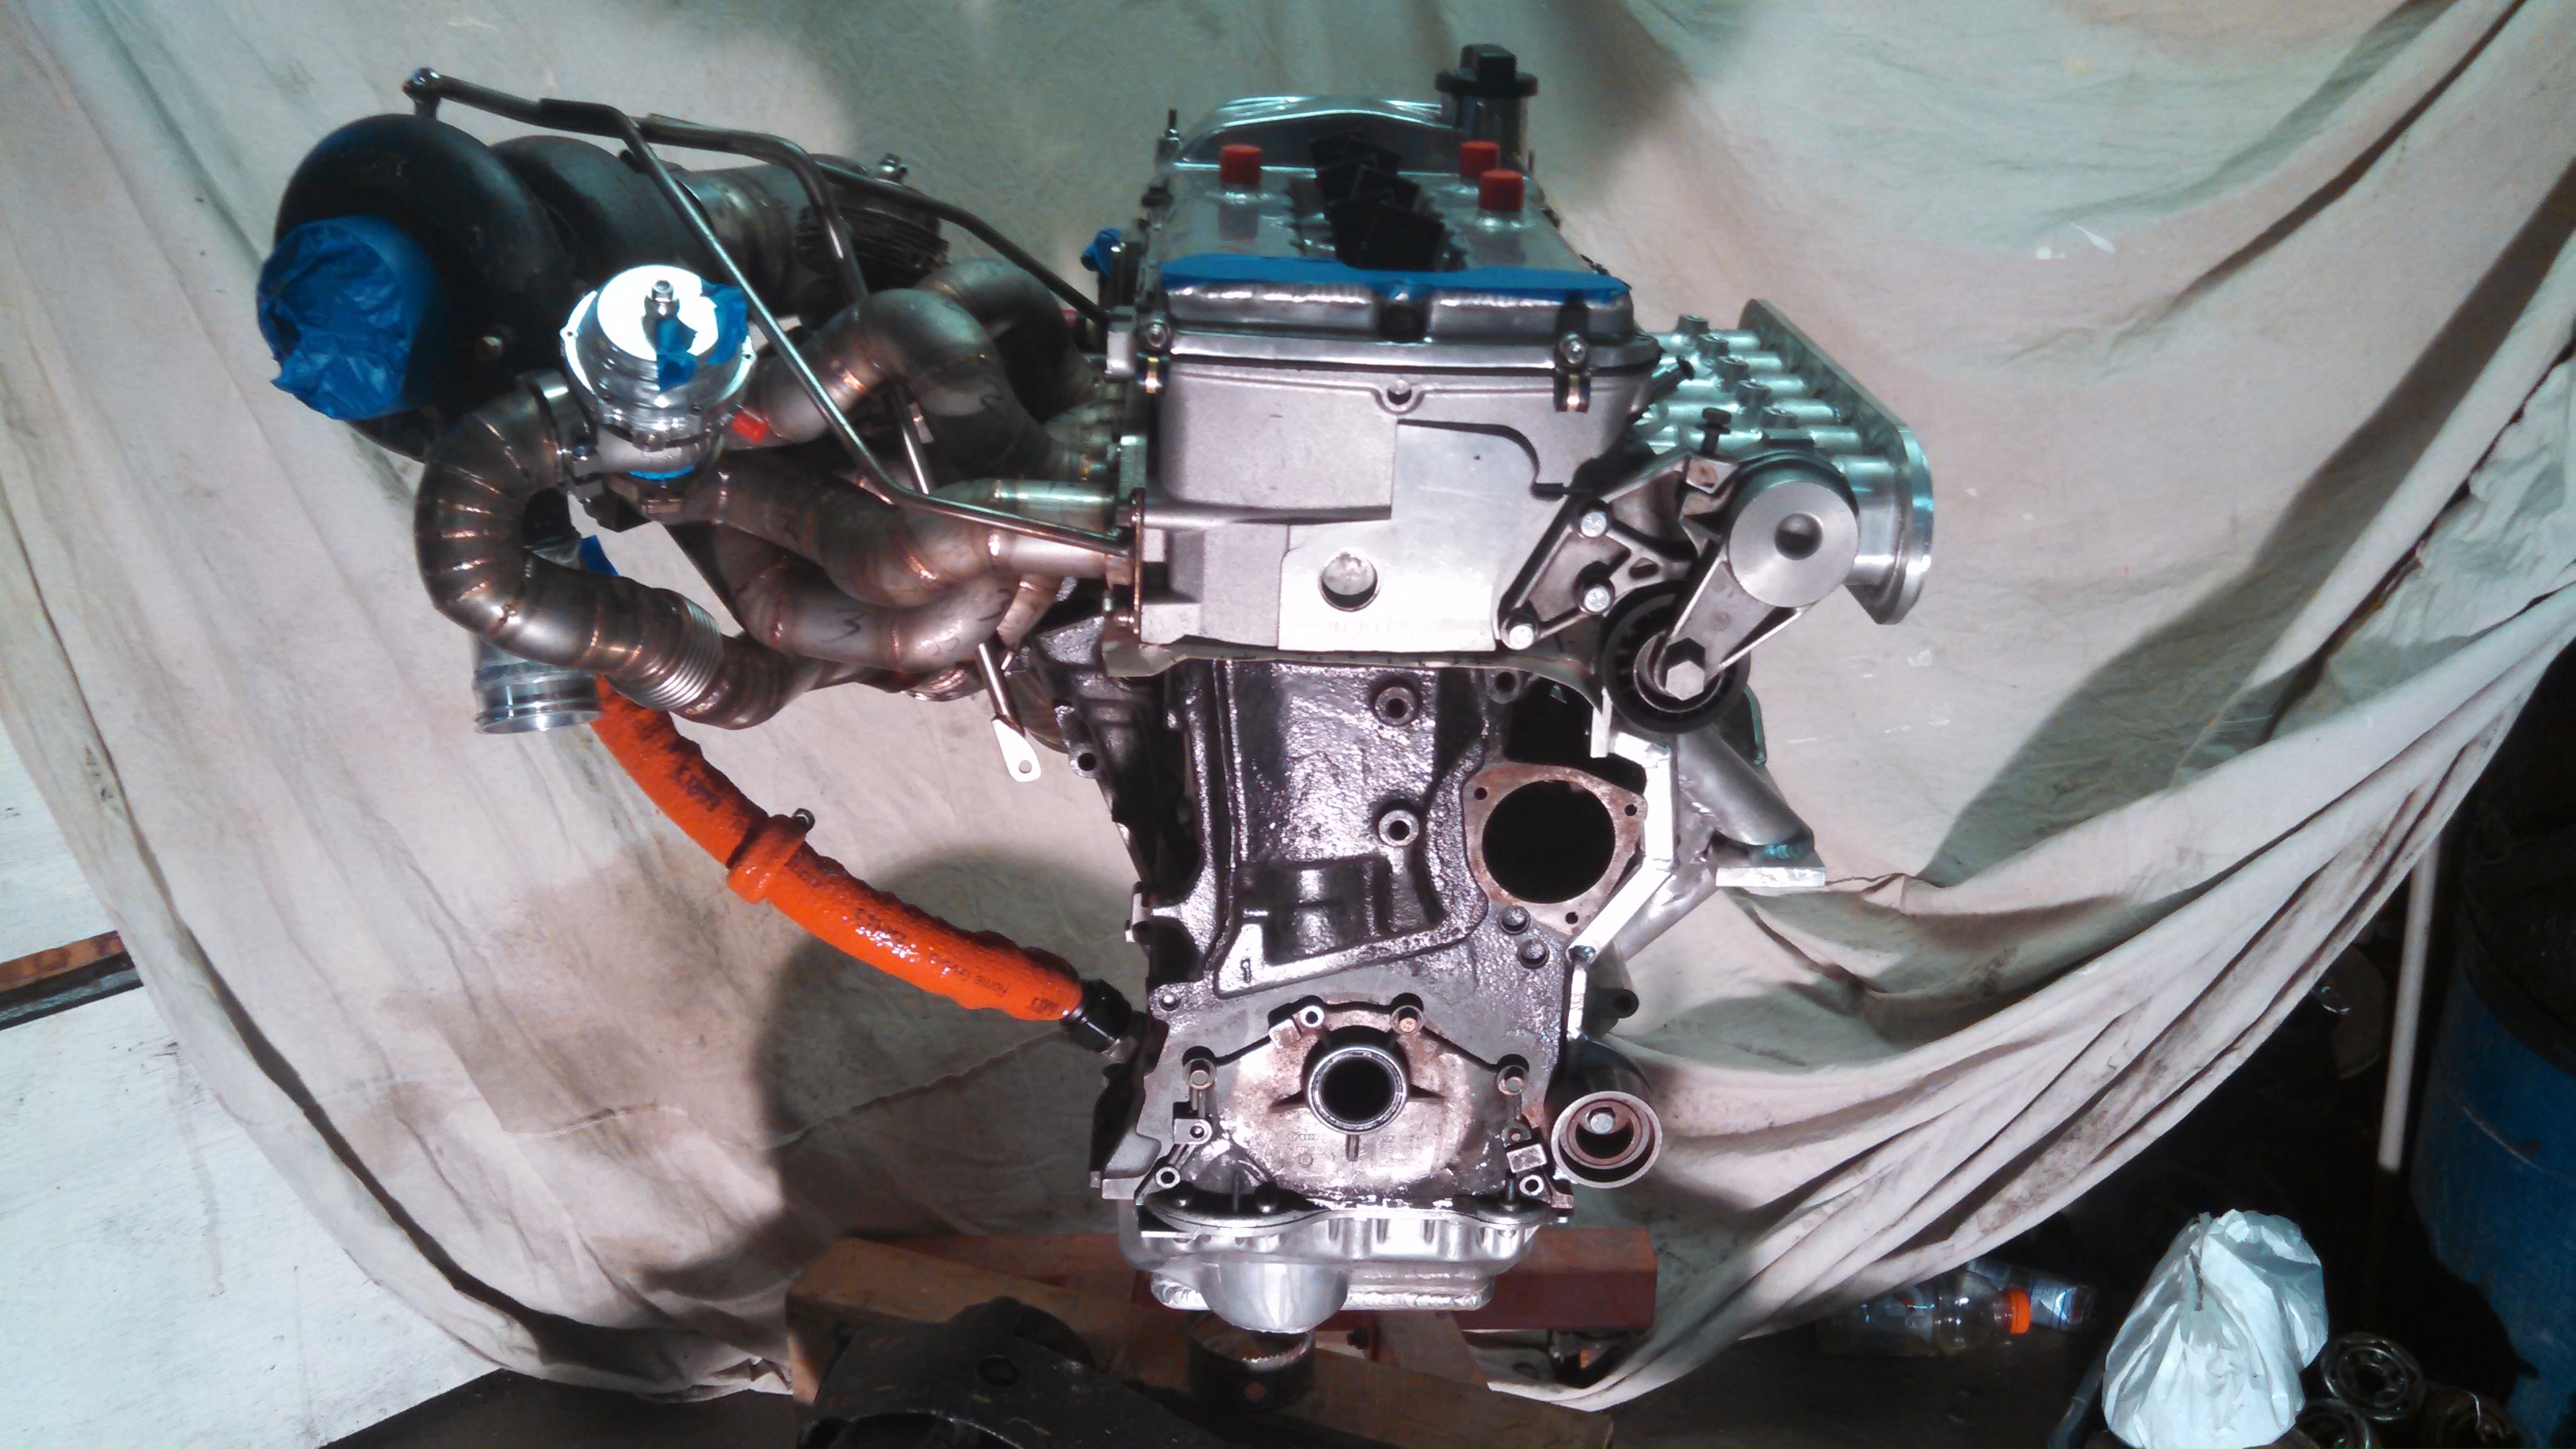
- current engine stuff shot.jpg (1.53 MiB) Viewed 61544 times
Re: 24vVR6T CQ Project: EATSGTR, chassis FAB
Posted: Wed Jul 09, 2014 12:27 am
by my2000apb
UPDATE!!!
I picked up these ‘70-78 Z car flares online somewhere and will be doing a bit of work to get them to flow well with the CQ, like it or not, I’m doing it, I need/want all the tire I can get under there. 265/40/17 yup no prob, will go 275/35 at some point once its dialed in.
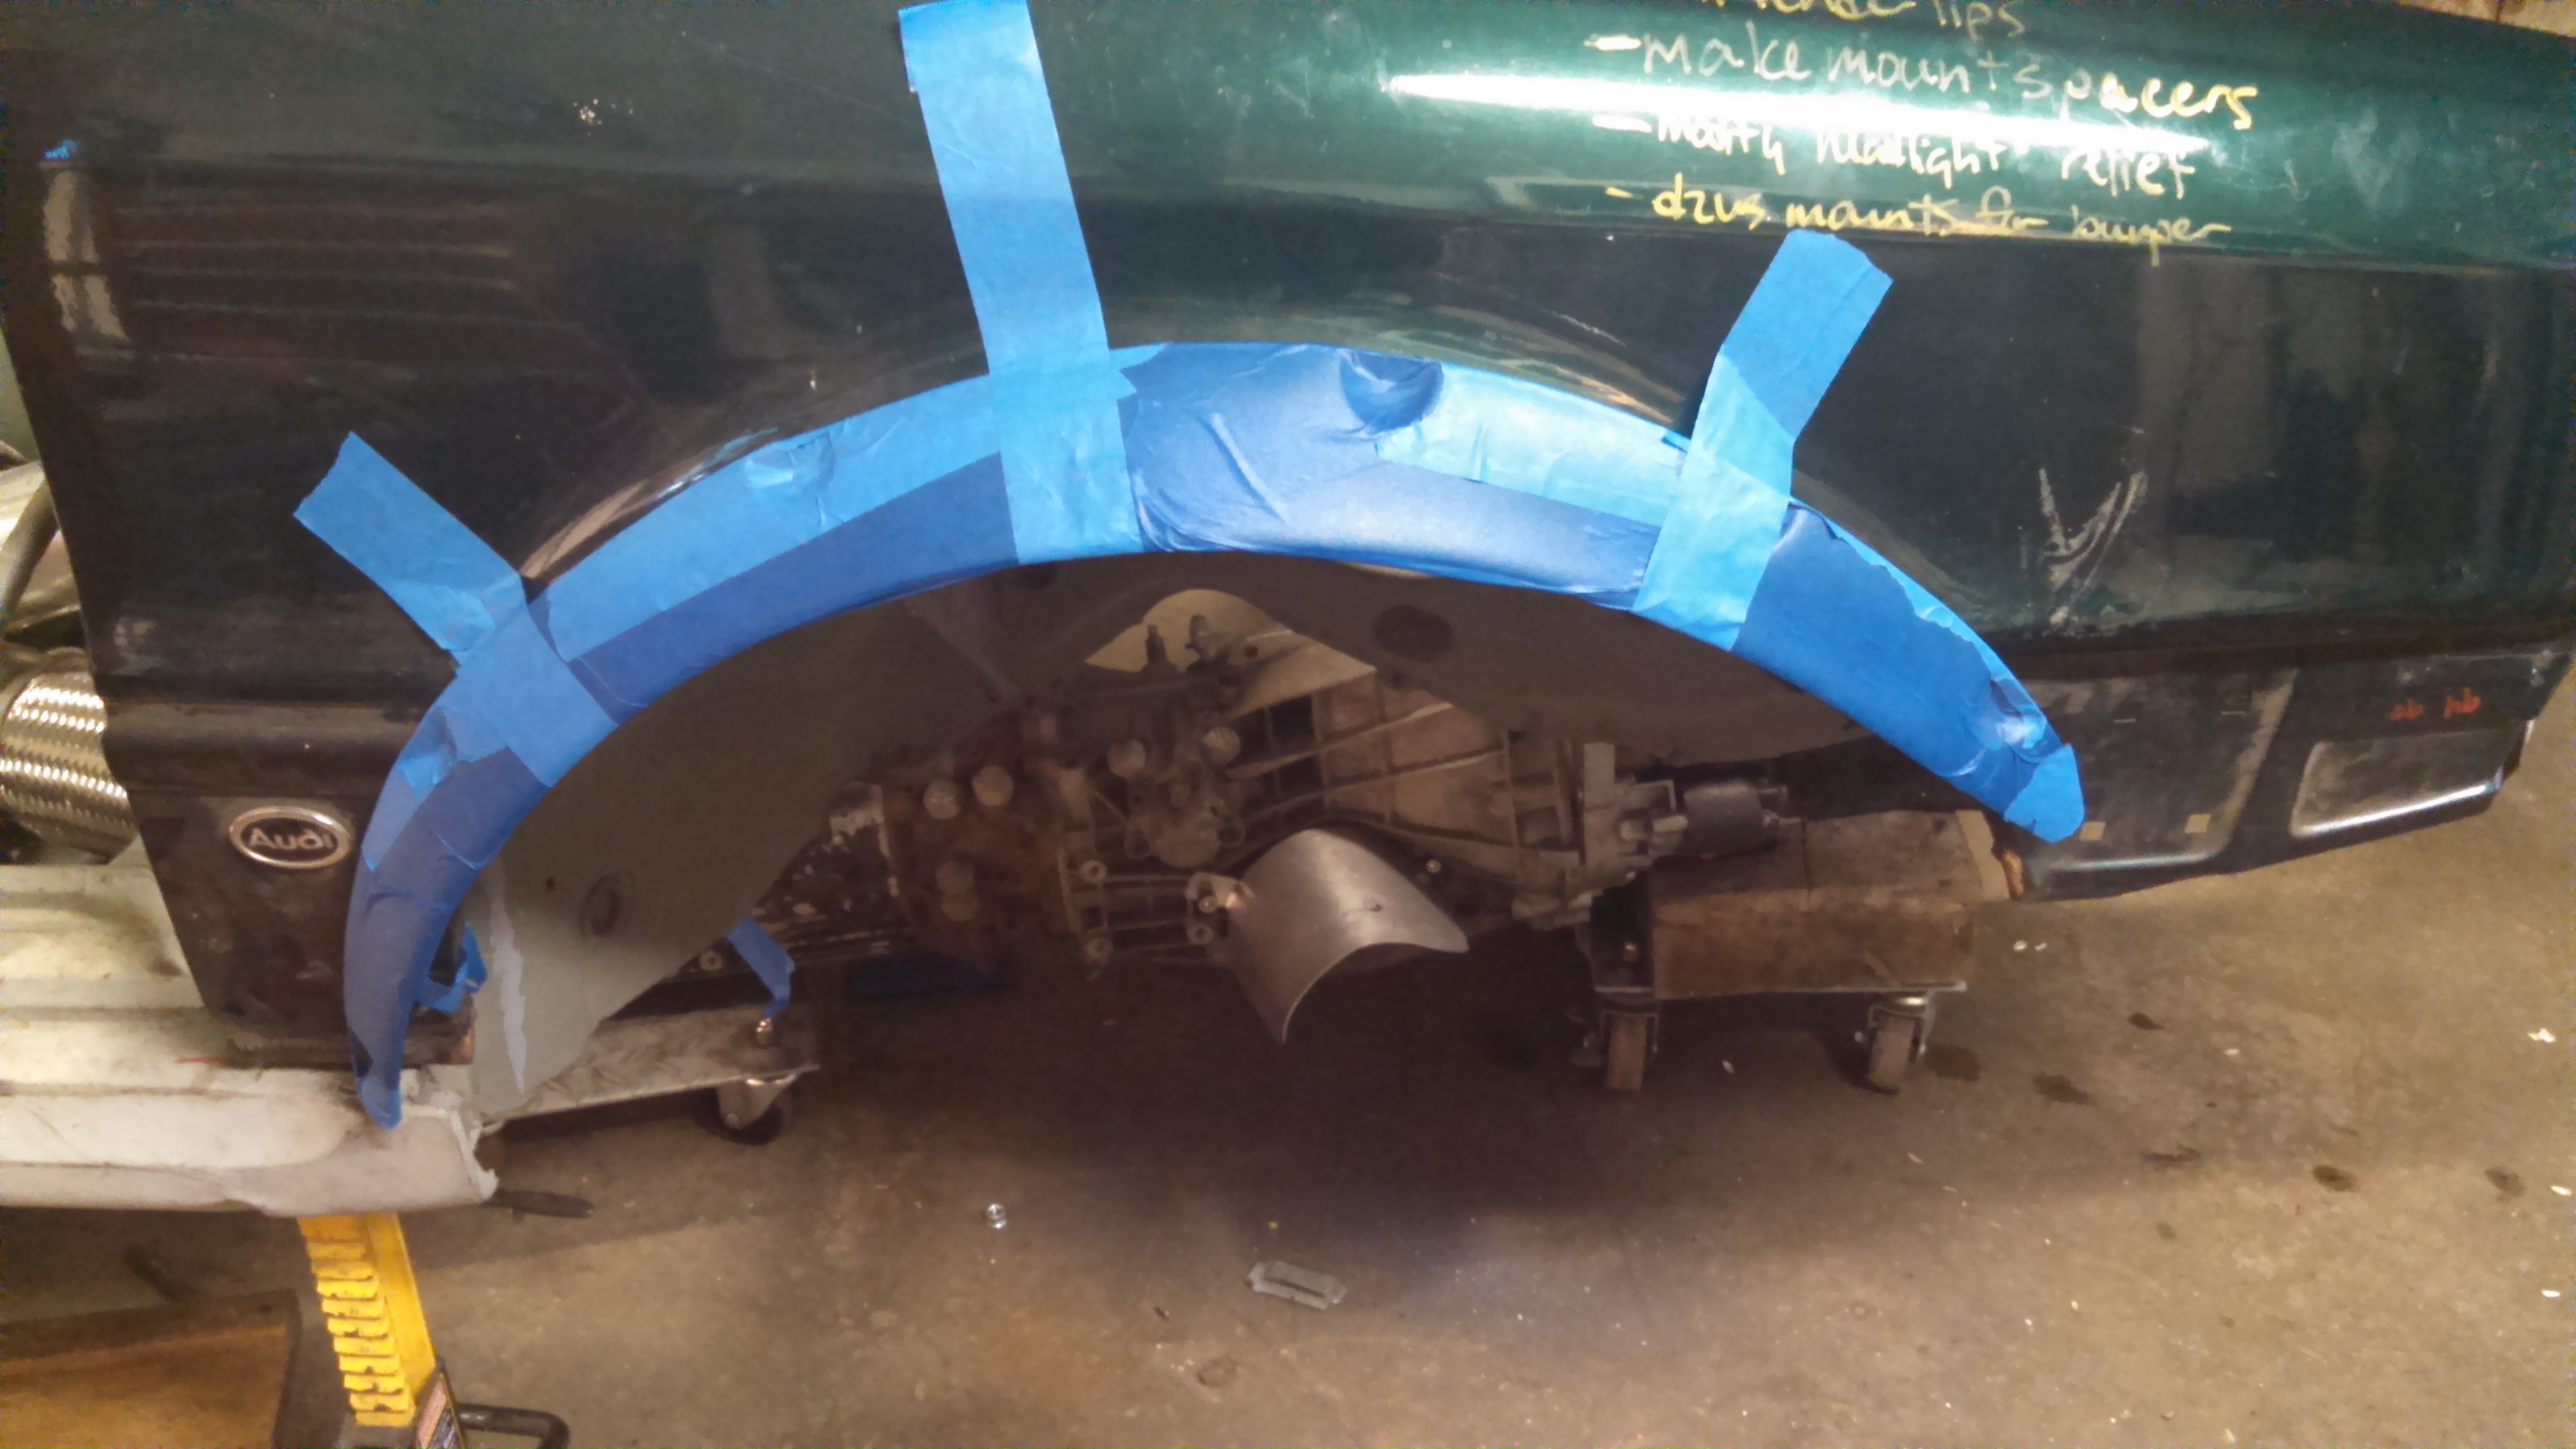
- front flare.jpg (1.12 MiB) Viewed 61544 times
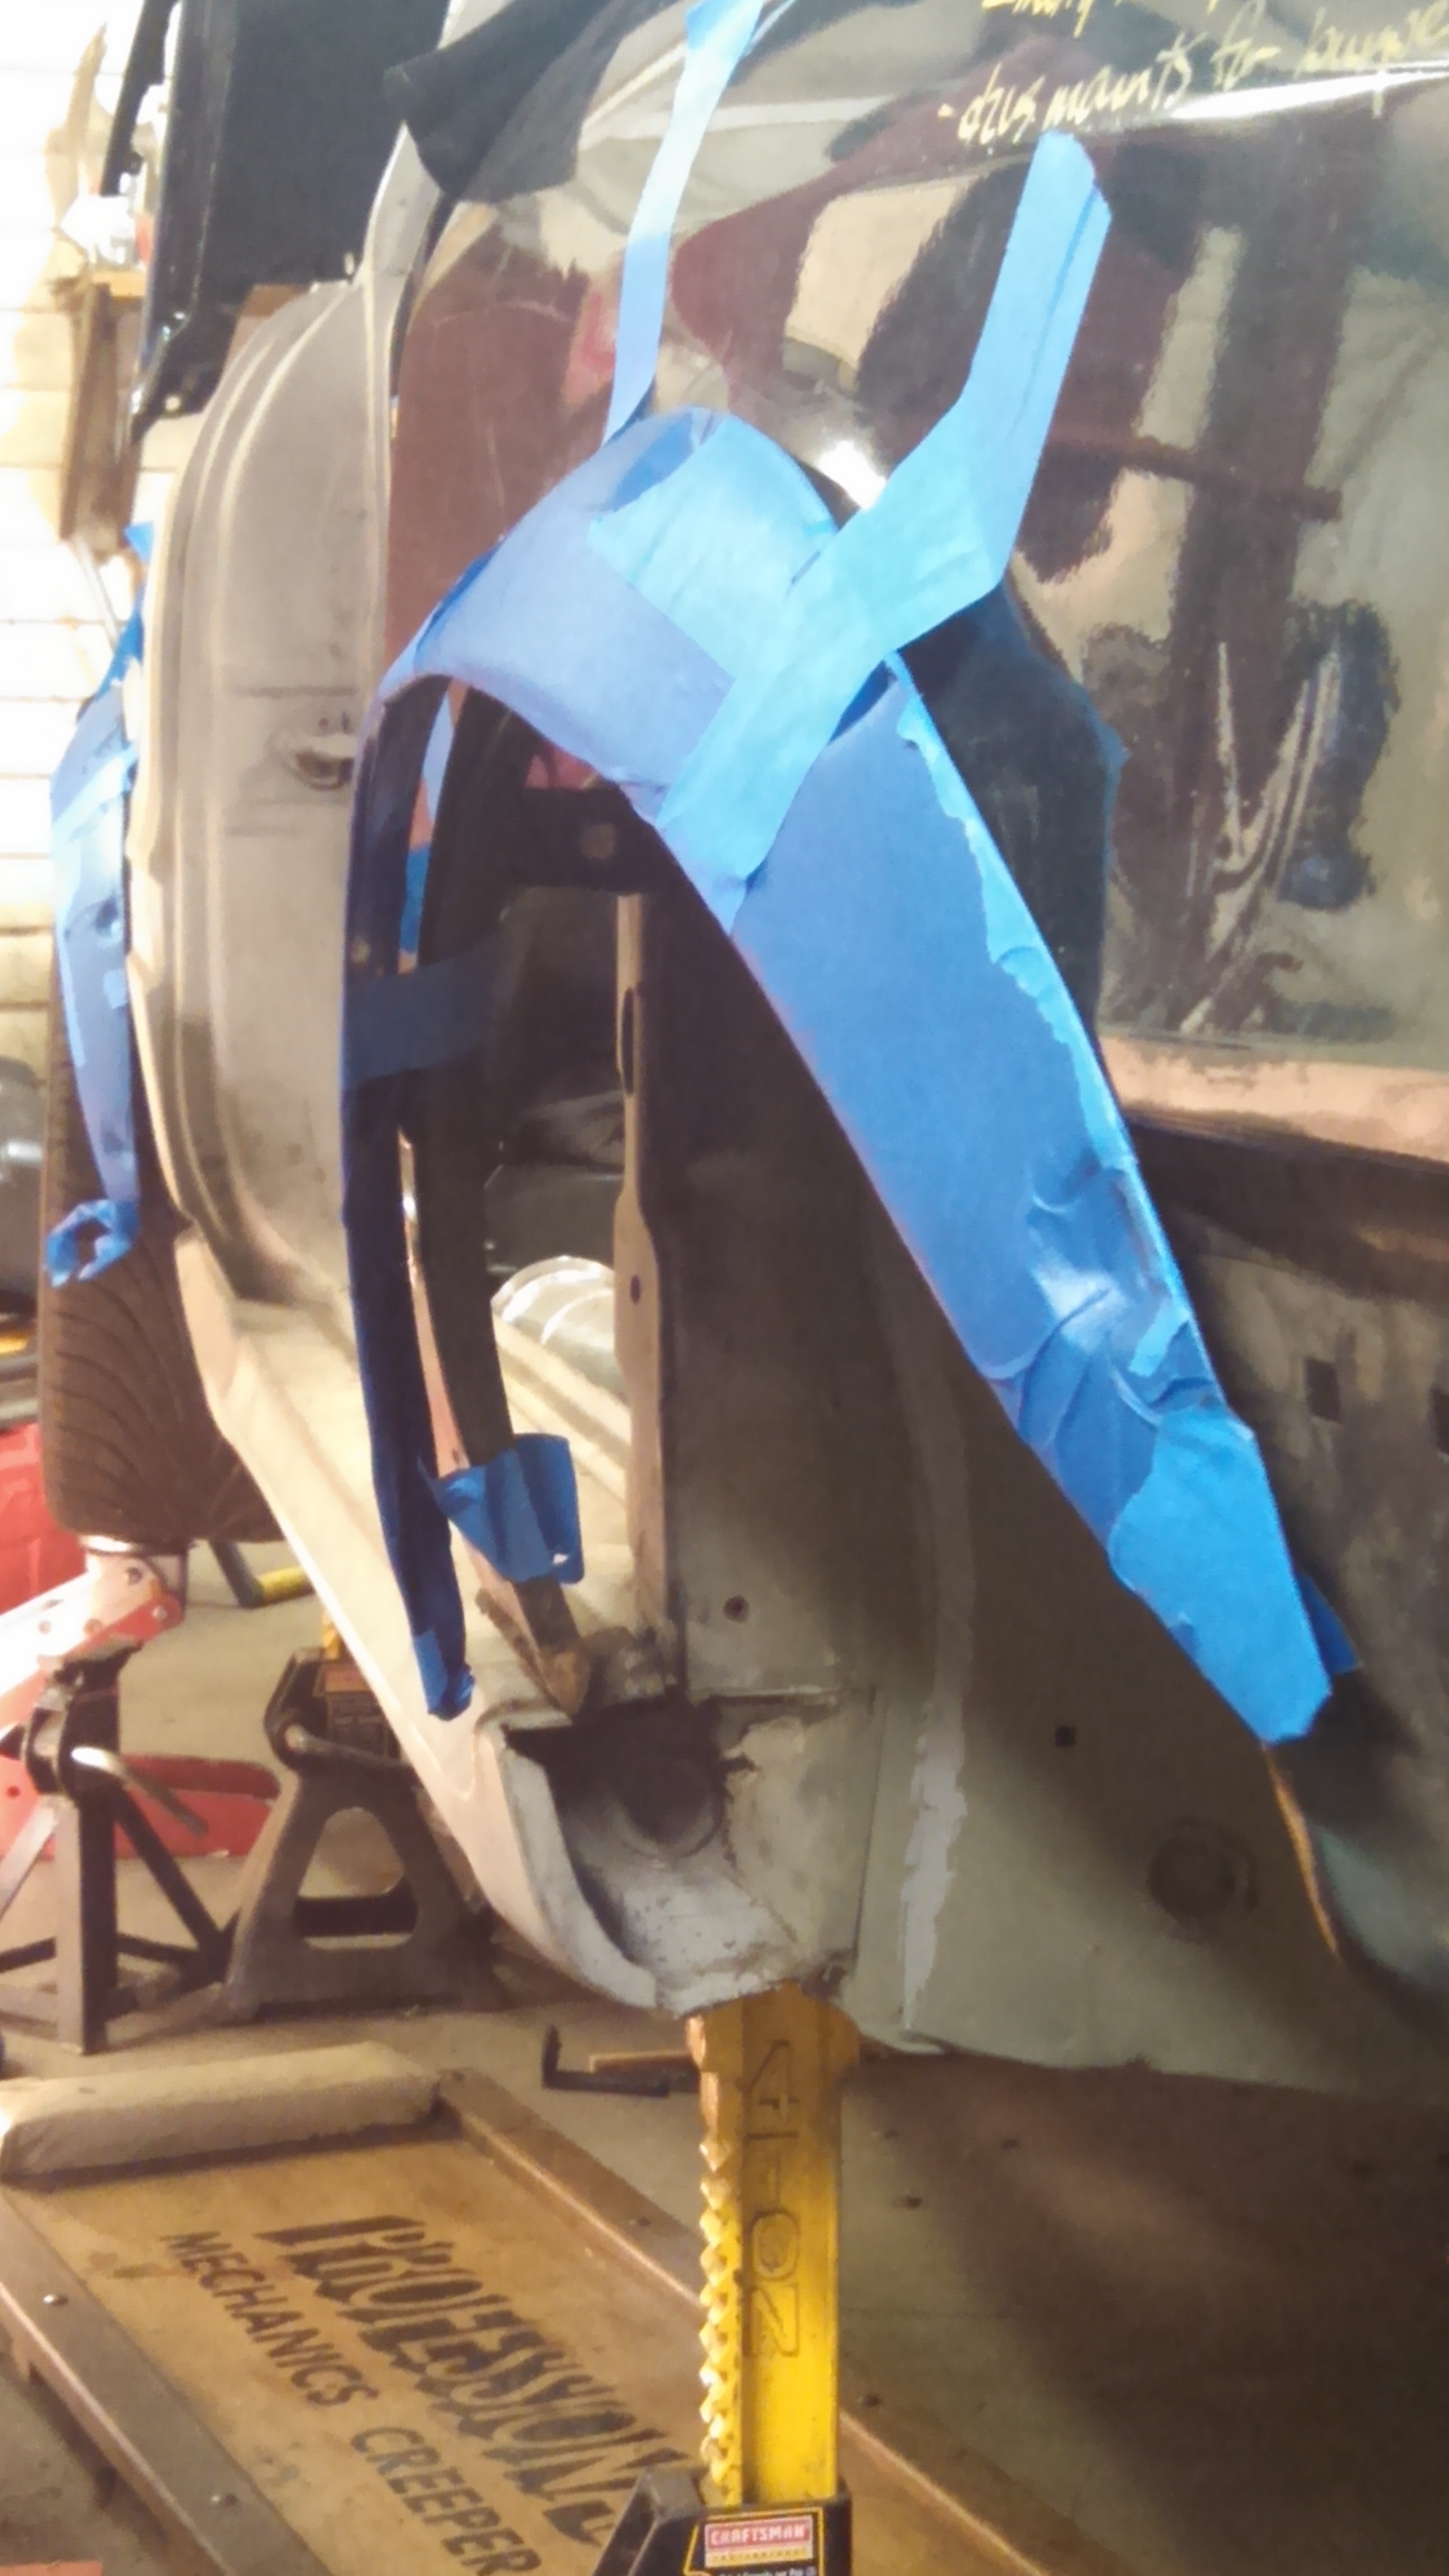
- front flare2.jpg (973.39 KiB) Viewed 61544 times
And just screwing around with a 245 on a 17x8” fat five
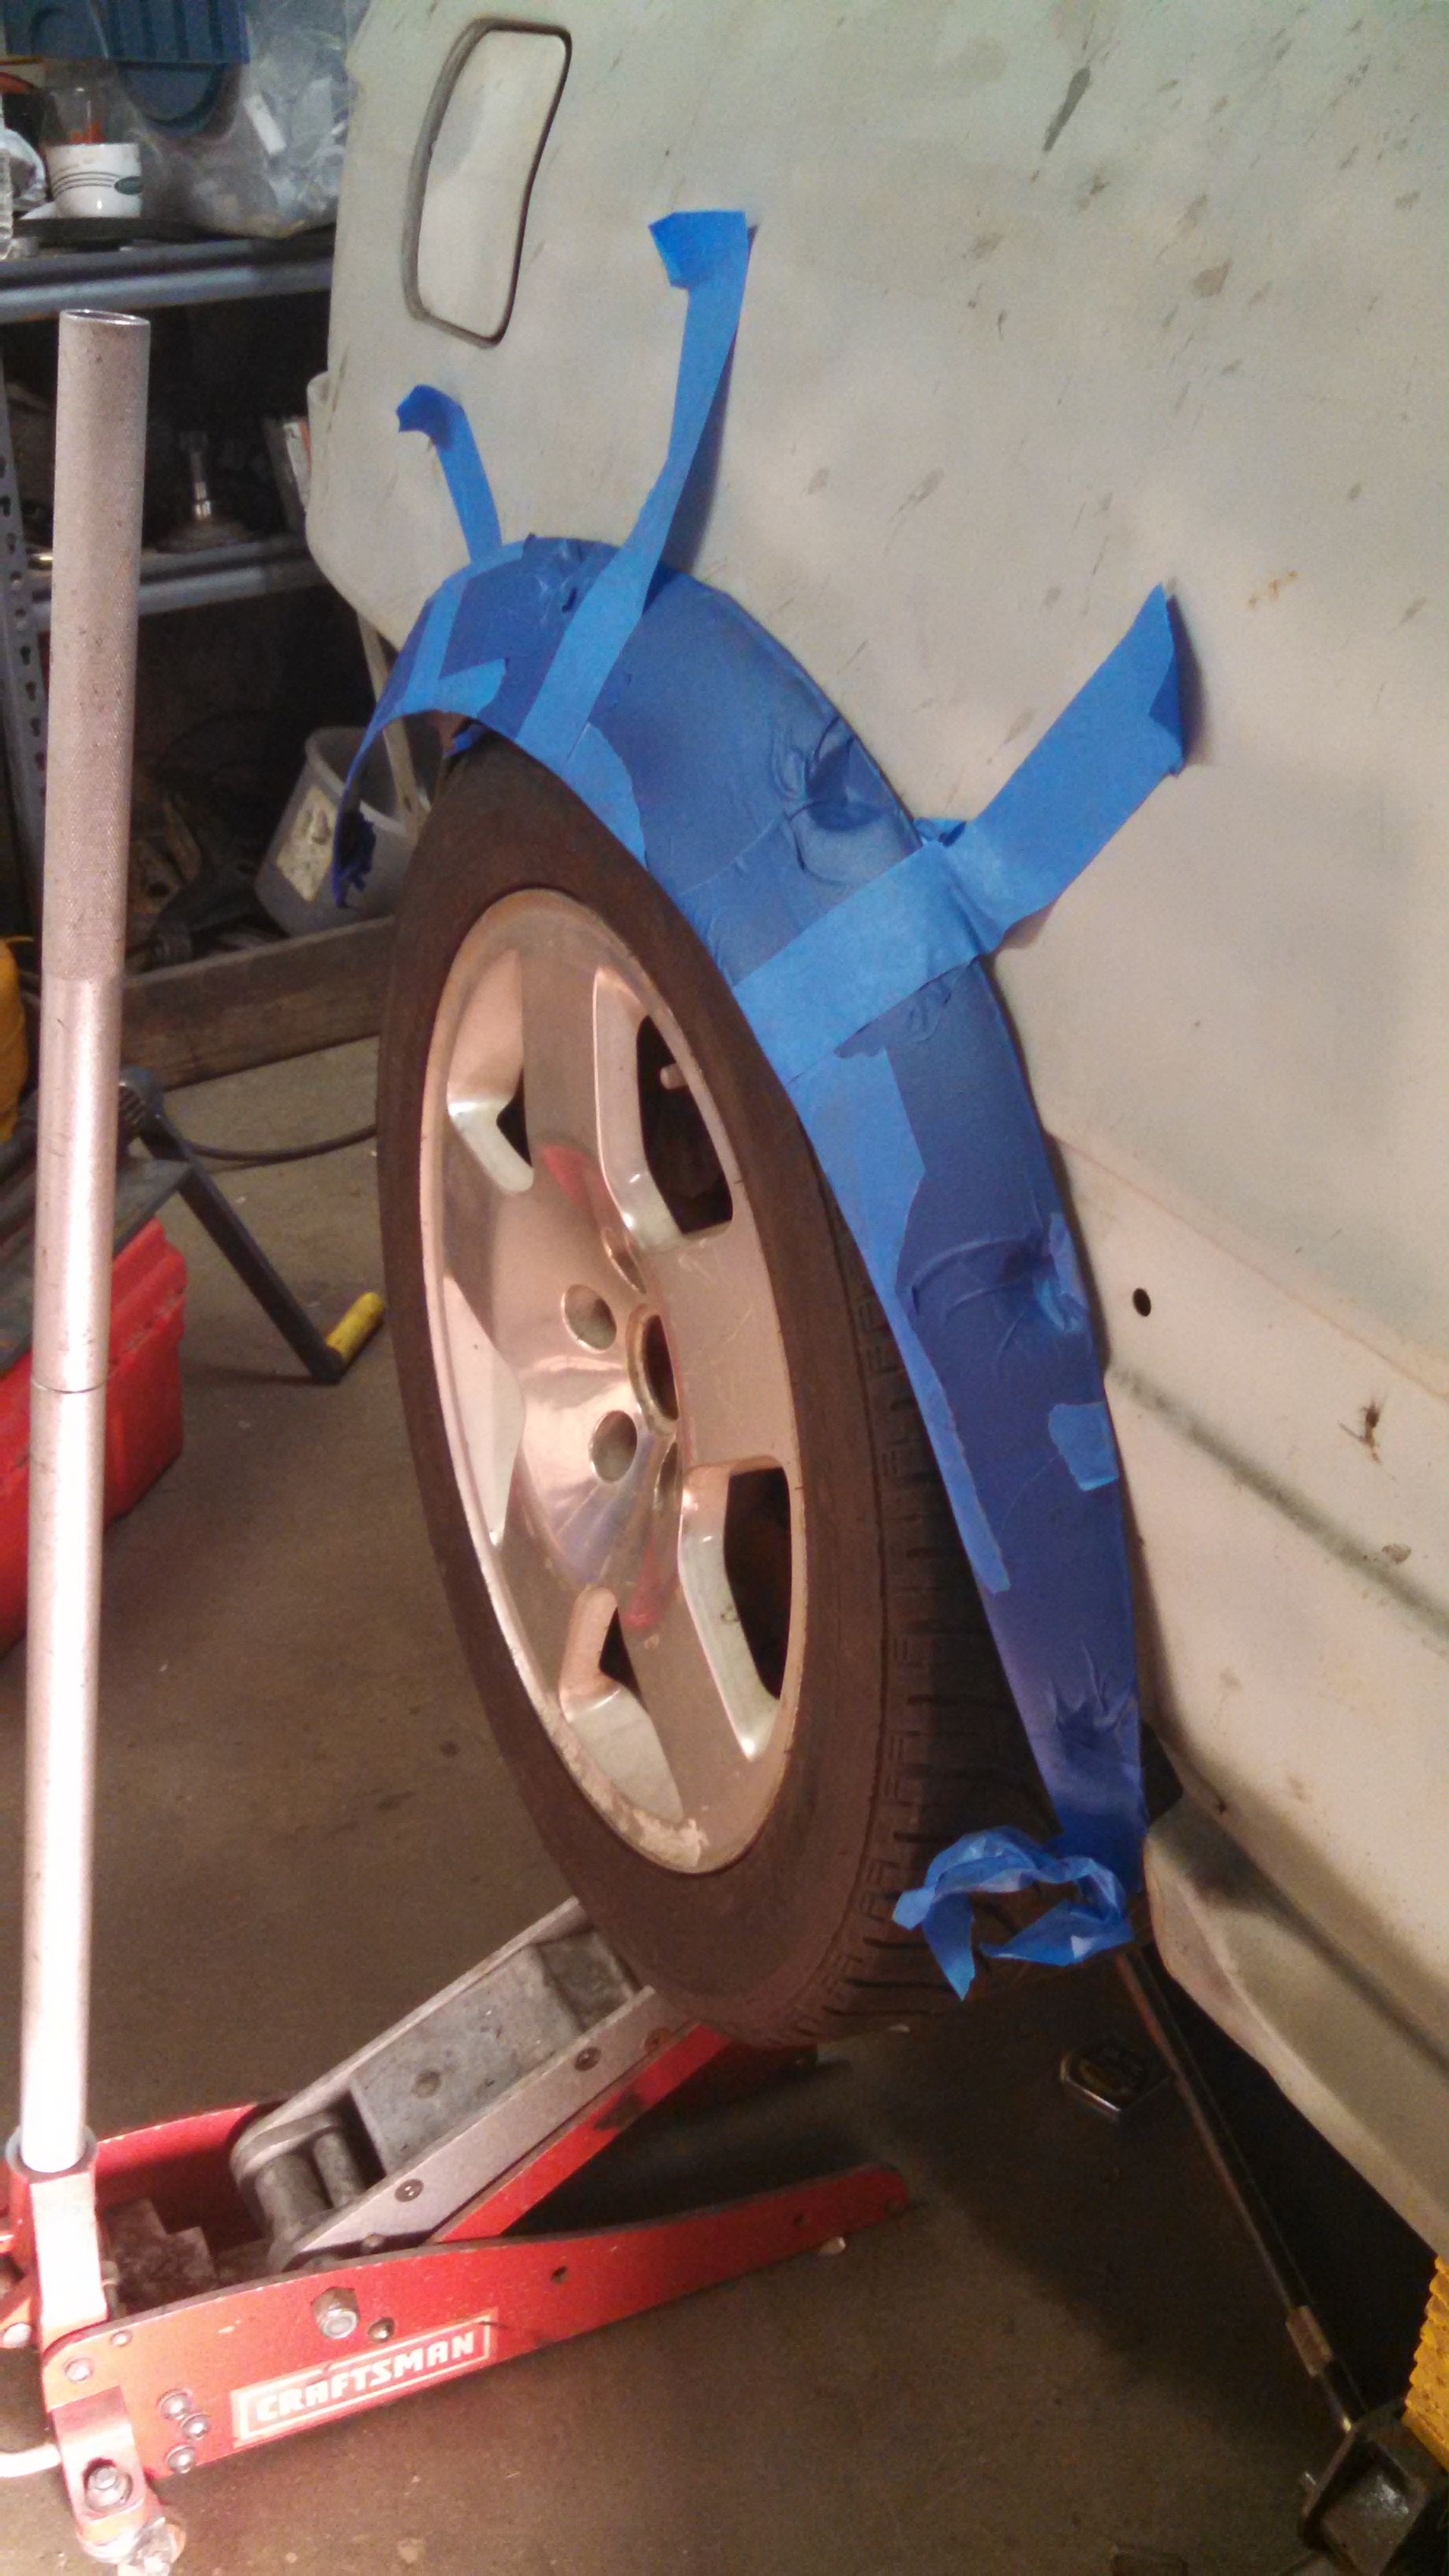
- rear flare w fat five.jpg (1.33 MiB) Viewed 61544 times
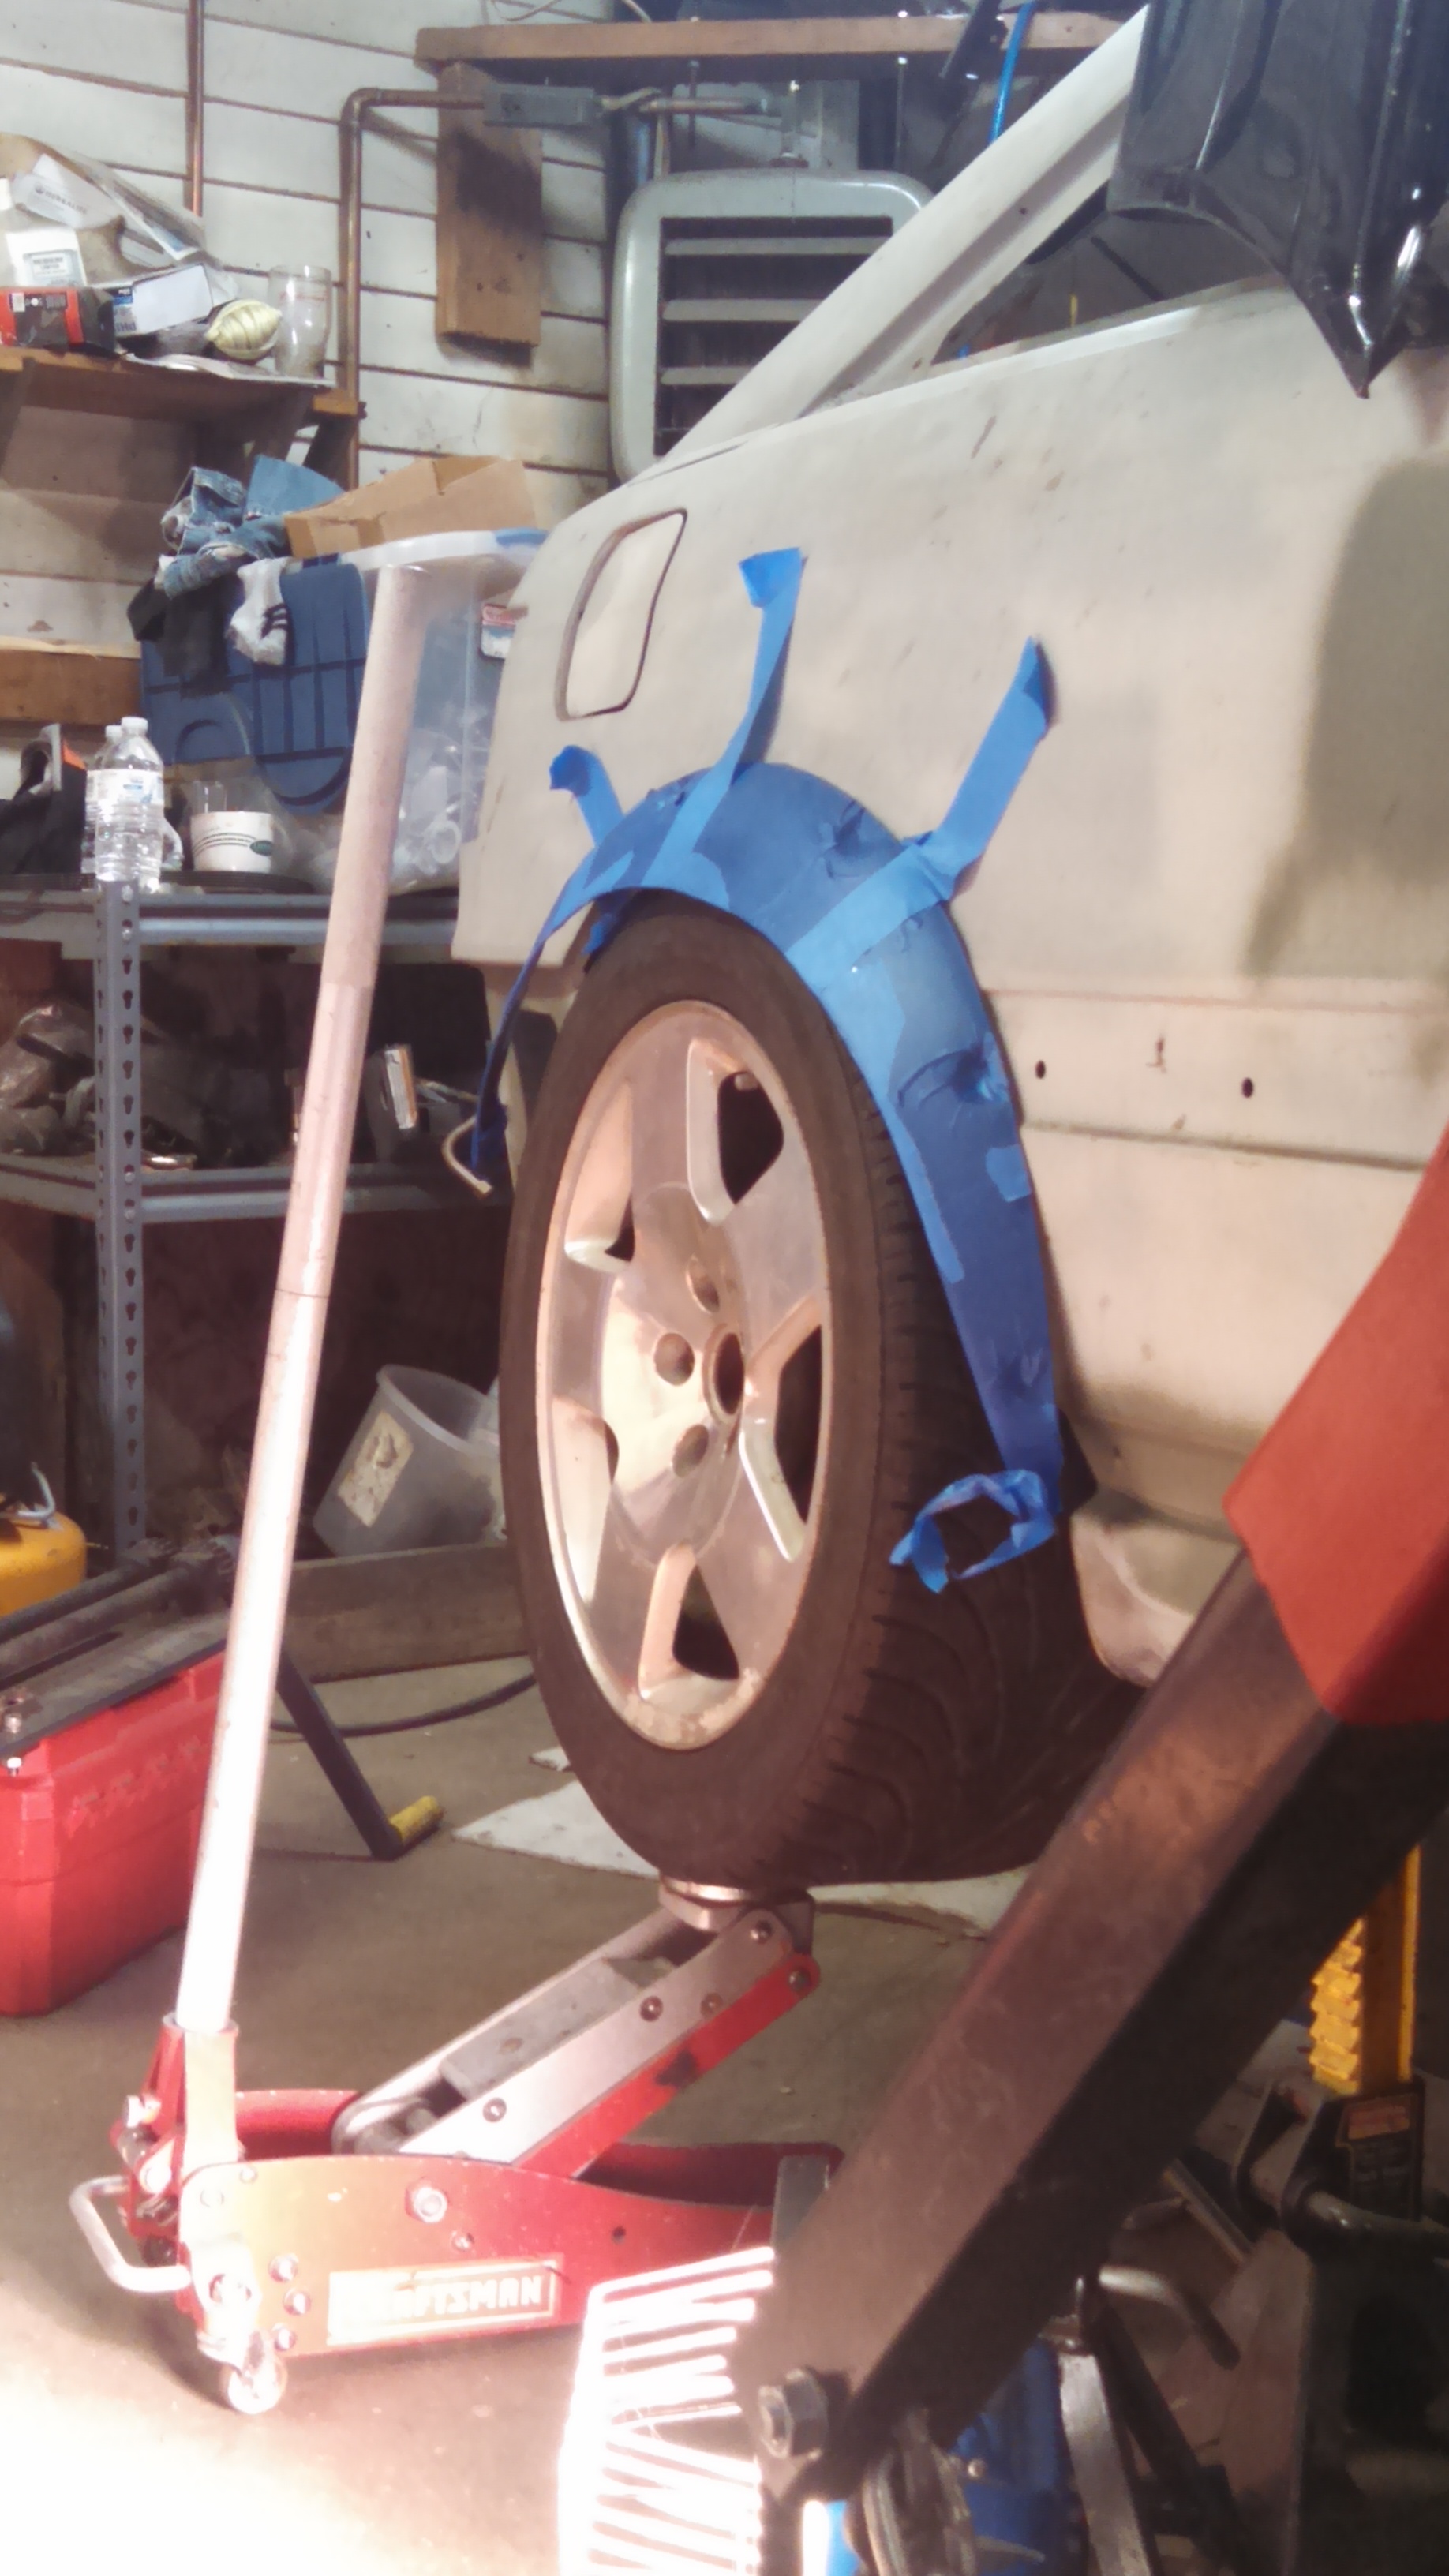
- rear flare with fat five2.jpg (1006.22 KiB) Viewed 61544 times
I also picked up a SEAT Cupra R lip spoiler to put on the bottom of my S2 front bumper.
Now back to it!!
Re: 24vVR6T CQ Project: EATSGTR, chassis FAB
Posted: Wed Jul 09, 2014 7:31 am
by DE80q
HOLY SHIT! Now that's an update. This thing is going to scream!
Re: 24vVR6T CQ Project: EATSGTR, chassis FAB
Posted: Wed Jul 09, 2014 8:17 am
by EDIGREG
NICE update tim!!
Re: 24vVR6T CQ Project: EATSGTR, chassis FAB
Posted: Wed Jul 09, 2014 10:00 am
by Zerb
how much do those flares stick out? the ones im using are universal ebay fiberglass ones, $180 shipped. 3" height on em.
Re: 24vVR6T CQ Project: EATSGTR, chassis FAB
Posted: Wed Jul 09, 2014 10:14 am
by scubagli
I'm about to put a set if those flares on a buddies b5 passat. Your fab work and attention to detail is completely over the top!
Old Audi's rule all.
Re: 24vVR6T CQ Project: EATSGTR, chassis FAB
Posted: Wed Jul 09, 2014 10:47 am
by themagellan
Wow, blown away by the fab. Do you own a shop? Amazing stuff.