Nick's Black 90 - 3B Swap: Running!
Re: Nick's Black 90 - 3B Swap: Phase 4 In Progress
Thanks Jim! That would actually be pretty nice sitting there in the engine bay or below if I go that route.
-
audifreakjim

- Posts: 2142
- Joined: Sun Mar 03, 2013 3:00 pm
Re: Nick's Black 90 - 3B Swap: Phase 4 In Progress
Route it down low if you don't have AC and ram some air into it!
Re: Nick's Black 90 - 3B Swap: Phase 4 In Progress
What about rain? Do you run your's down low?
-
audifreakjim
- Posts: 2142
- Joined: Sun Mar 03, 2013 3:00 pm
Re: Nick's Black 90 - 3B Swap: Phase 4 In Progress
Yes, never had an issue. Just don't drive through deep puddles.
Re: Nick's Black 90 - 3B Swap: Phase 4 In Progress
audifreakjim wrote:I wish they had these air filters out when I built mine, pretty much identical to what I hacked together.
http://www.spectreperformance.com/searc ... ?prod=9831

Last edited by Mcstiff on Tue Mar 17, 2015 11:52 am, edited 1 time in total.
-
audifreakjim
- Posts: 2142
- Joined: Sun Mar 03, 2013 3:00 pm
Re: Nick's Black 90 - 3B Swap: Phase 4 In Progress
Ed, I am just going to start PMing you when I can't remember something, lol.
Re: Nick's Black 90 - 3B Swap: Phase 4 In Progress
Moving along with cleaning the engine bay and starting to prep parts for paint. This is a lot of work! I remember now why I didn't do any of this when initially doing the swap.
I've been gathering parts for the 01E 5Speed swap for the past few months and almost have everything. Just need to get the flanges machined, find some B5 shift linkage and buy a clutch. Probably going to end up with the SPEC Stage 3+ (if money allows, the lightweight flywheel too). I drove a coupe with this setup in it and boy was it amazing. Smooth action and great rev matching ability.
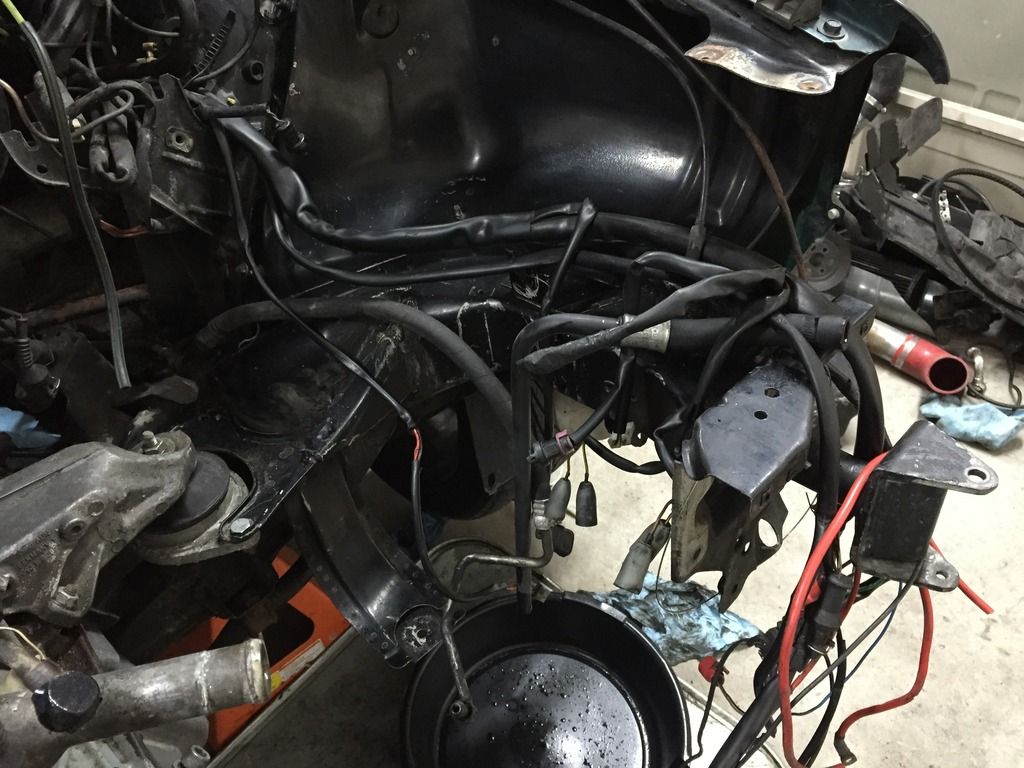
Boring pics of boring engine bay:
Wiring getting cleaned (literally) up.
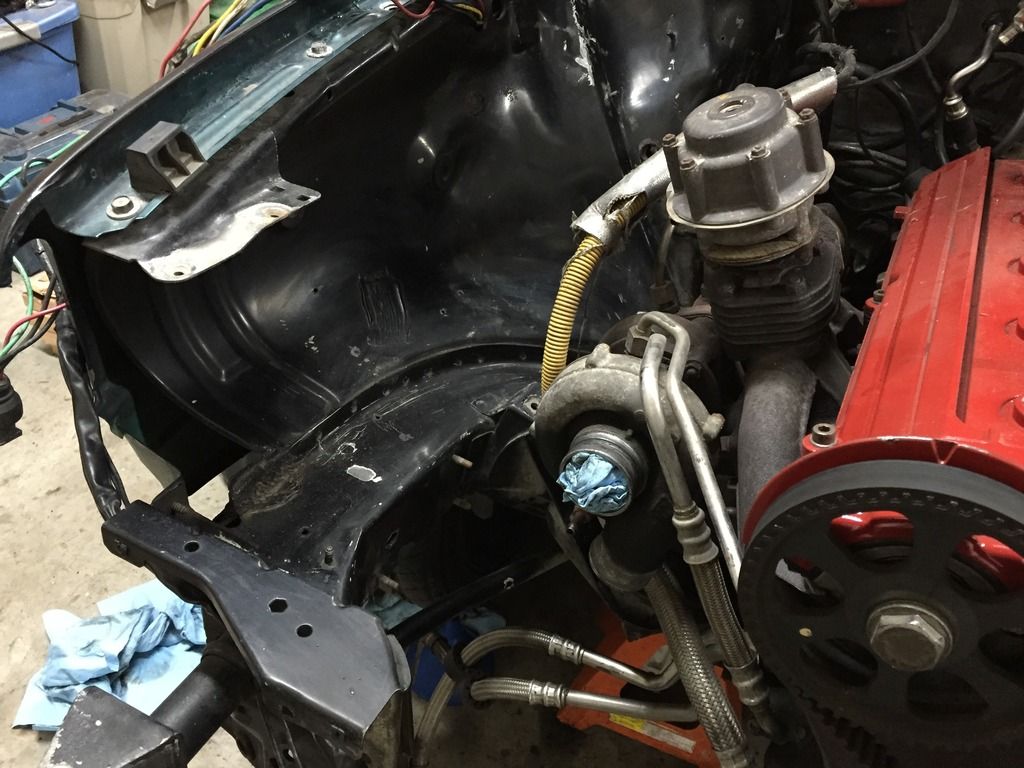
Turbo side cleaning(have no fear, a K26 hybrid will eventually make it in there):
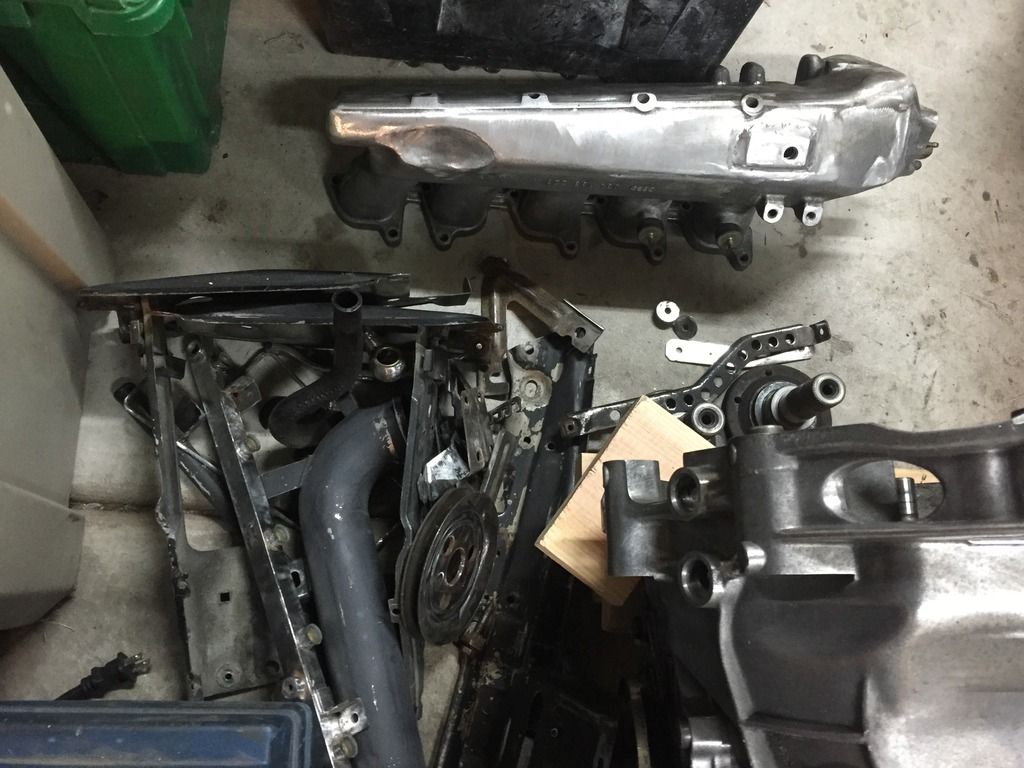
Parts yet to be cleaned:
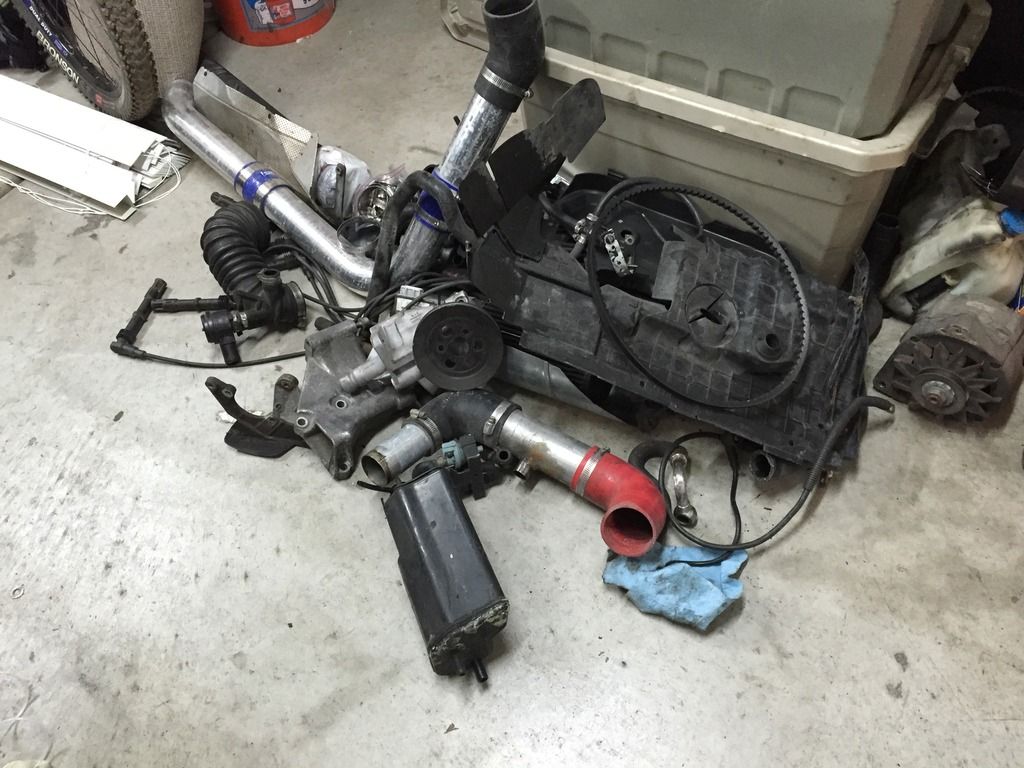
Moar parts to be prepped for paint:

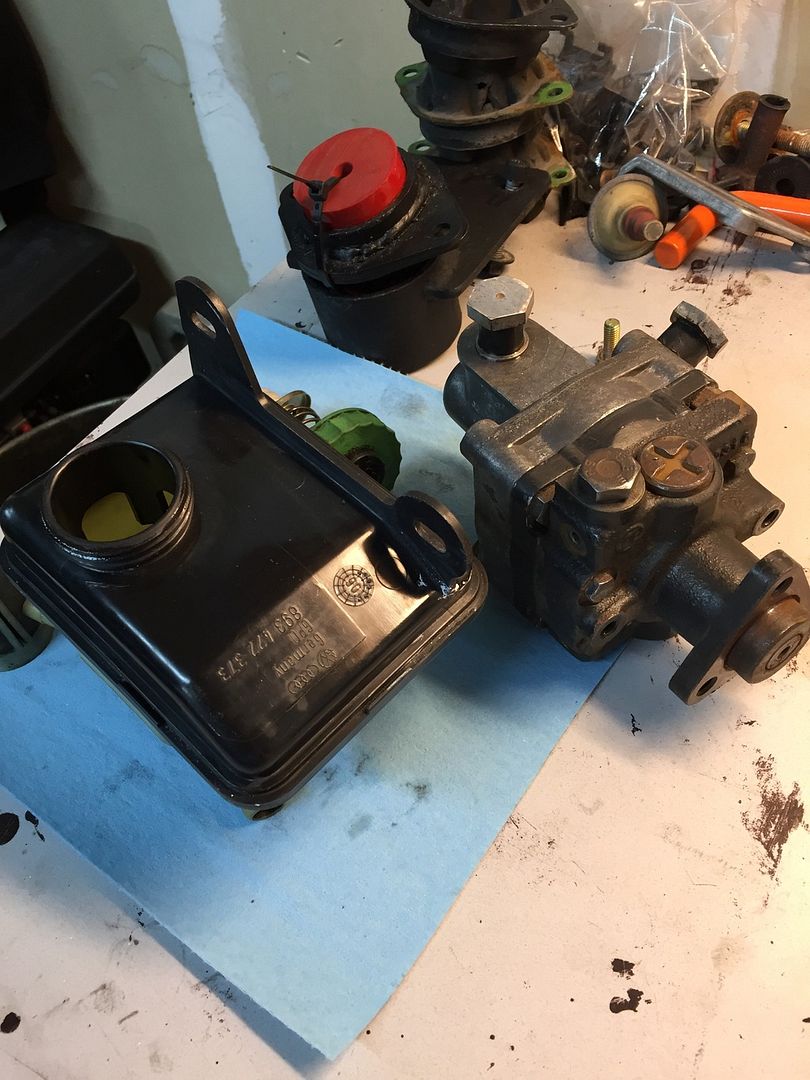
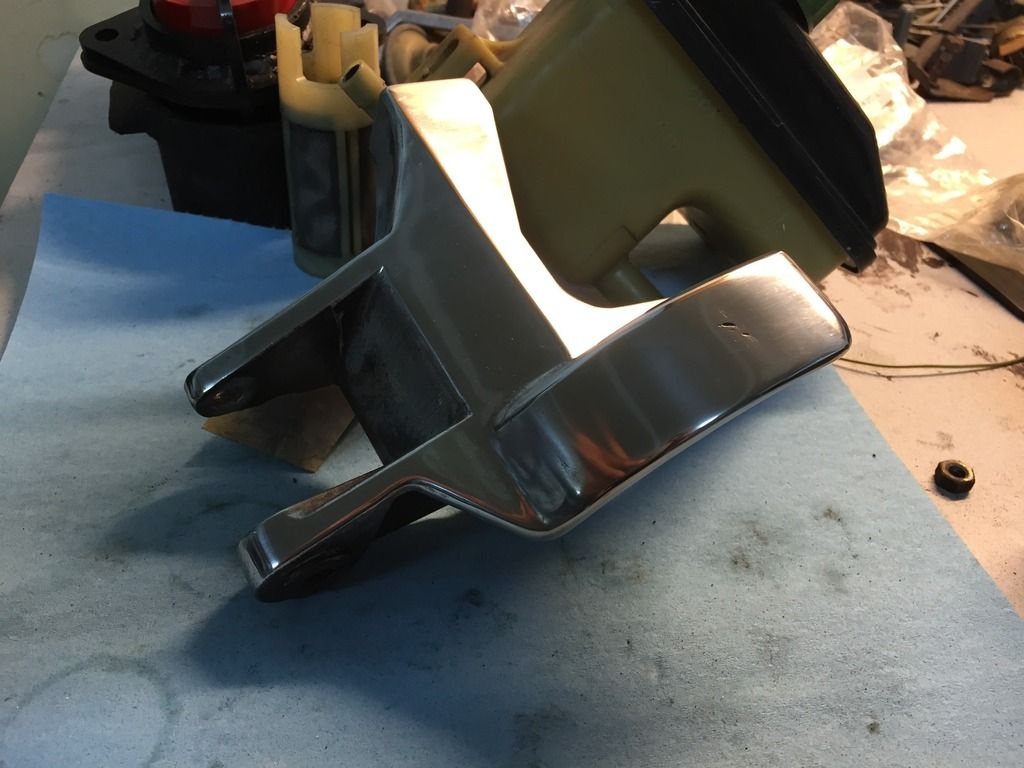
Power steering reservoir and pump. Pump will be painted:
That's it for now. More next week.
I've been gathering parts for the 01E 5Speed swap for the past few months and almost have everything. Just need to get the flanges machined, find some B5 shift linkage and buy a clutch. Probably going to end up with the SPEC Stage 3+ (if money allows, the lightweight flywheel too). I drove a coupe with this setup in it and boy was it amazing. Smooth action and great rev matching ability.
Boring pics of boring engine bay:
Wiring getting cleaned (literally) up.
Turbo side cleaning(have no fear, a K26 hybrid will eventually make it in there):
Parts yet to be cleaned:
Moar parts to be prepped for paint:
Power steering reservoir and pump. Pump will be painted:
That's it for now. More next week.
Re: Nick's Black 90 - 3B Swap: 2.0 Coil Setup
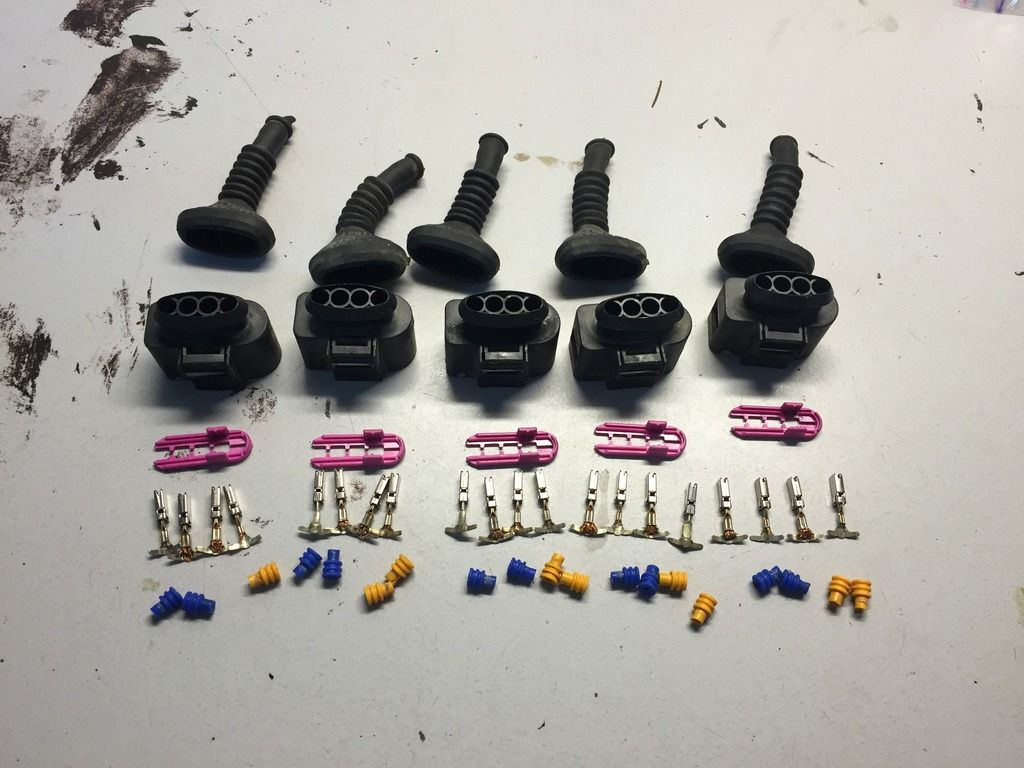
So I'm thinking of making up a 2.0 coil harness. Picked up some coil plugs from a local junkyard (and they didn't charge me) and hopefully I have enough spare wire in the electrical bin to make it all work. Couple questions (clarification on my assumptions really):
- Based on page 16 and 17 of the VEMS documentation I believe that the coil setup needed is the 5v signal "Option 0 All 8 ignition channels are using logic level(+5v) control for coils that have built in igniters or
systems where you wish to use an existing igniter pack."
- I'll need to ground the coils to either the valve cover or the intake manifold as a group (Pin 4 on each coil).
- I'll need to take the main ground all the way back to the ECU (Pin 2 on each coil connector) and merge it in with pin 26 on the 36 pin VEMS connector..
- I'll need to feed a constant 12v to the coils from an Ignition-ON power source at the firewall (Pin 1 on each coil connector).
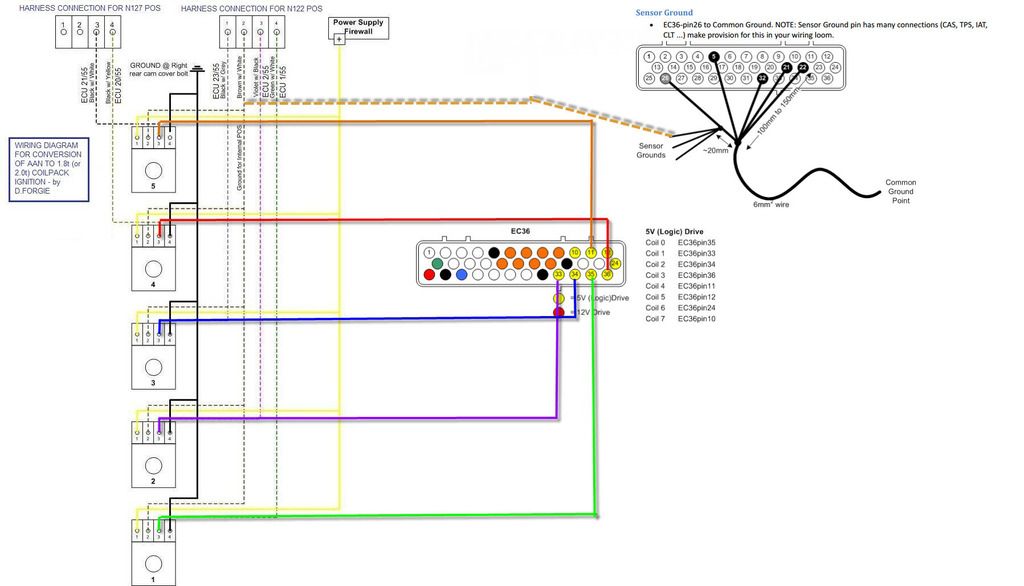
I borrowed the pin out found on Quattroworld http://forums.quattroworld.com/s4s6/msgs/183485.phtml and modified it to point the Pin 3's to the ECU Pins I believe are correct.
Yes there are pre-made wire conversion kits but right now I have to put that budget elsewhere with the build.
- Based on page 16 and 17 of the VEMS documentation I believe that the coil setup needed is the 5v signal "Option 0 All 8 ignition channels are using logic level(+5v) control for coils that have built in igniters or
systems where you wish to use an existing igniter pack."
- I'll need to ground the coils to either the valve cover or the intake manifold as a group (Pin 4 on each coil).
- I'll need to take the main ground all the way back to the ECU (Pin 2 on each coil connector) and merge it in with pin 26 on the 36 pin VEMS connector..
- I'll need to feed a constant 12v to the coils from an Ignition-ON power source at the firewall (Pin 1 on each coil connector).
I borrowed the pin out found on Quattroworld http://forums.quattroworld.com/s4s6/msgs/183485.phtml and modified it to point the Pin 3's to the ECU Pins I believe are correct.
Yes there are pre-made wire conversion kits but right now I have to put that budget elsewhere with the build.
Re: Nick's Black 90 - 3B Swap: 2.0 Coil Setup
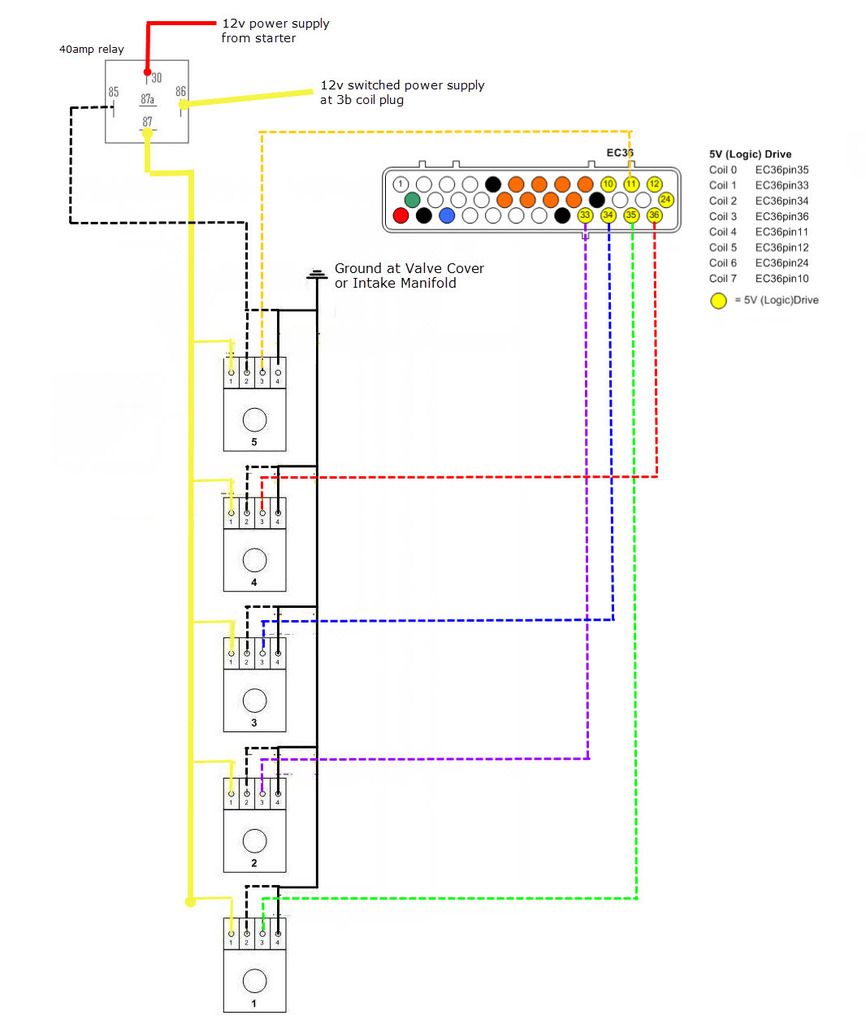
Here's the latest version of the wiring schematic for 3b to vems econoseal for 2.0 coil conversion. If this changes I'll update. If anyone has any input please let me know.
-
mr_aj_johnson
- Posts: 220
- Joined: Mon Apr 22, 2013 11:01 am
Re: Nick's Black 90 - 3B Swap: 2.0 Coil Setup
can you pull 12v from the fuel pump relay?
Re: Nick's Black 90 - 3B Swap: 2.0 Coil Setup
I could but there's also a 12v power block on my firewall already. It's closer so I might as well use it.
This schematic will be updated with new ground locations. The High Current and Low Current grounds need to be separated to keep cross - noise out. I'll update it and post.
This schematic will be updated with new ground locations. The High Current and Low Current grounds need to be separated to keep cross - noise out. I'll update it and post.
-
audifreakjim
- Posts: 2142
- Joined: Sun Mar 03, 2013 3:00 pm
Re: Nick's Black 90 - 3B Swap: 2.0 Coil Setup
Taking notes 
Re: Nick's Black 90 - 3B Swap: 2.0 Coil Setup
I'm using the same outputs for my LS coils; my 12v and grounds are a bit different (same idea) with the VEMS harness and fuse block.
Re: Nick's Black 90 - 3B Swap: 2.0 Coil Setup
Version 4 Update.
I separated the High and Low current grounds so they are separate. I plan on running the low current grounds into the cabin to one of the footwell grounds. It''s not required that the low current be connected in with the other sensor grounds at the ECU. I also separated the relay ground as I will just be running it to the firewall where it will be mounted anyway.
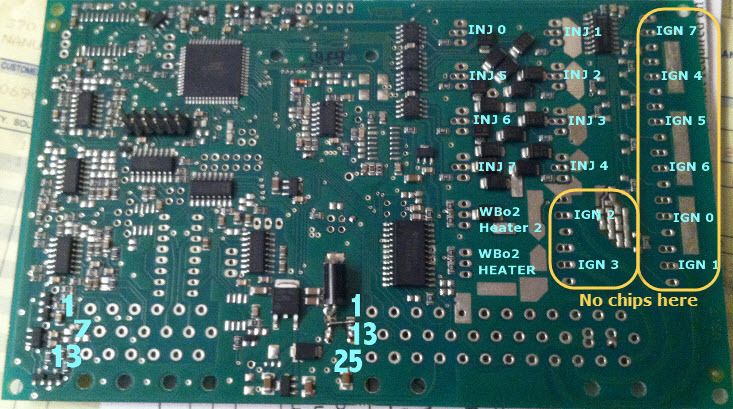
One other important note: The Ignition sockets on the VEMS board must not have IGBT driver chips installed. I will be opening up my box later and verifying that the ignition sockets are empty.
Pic of the Board and what it should look like:
Updated Schematic (Version 4):
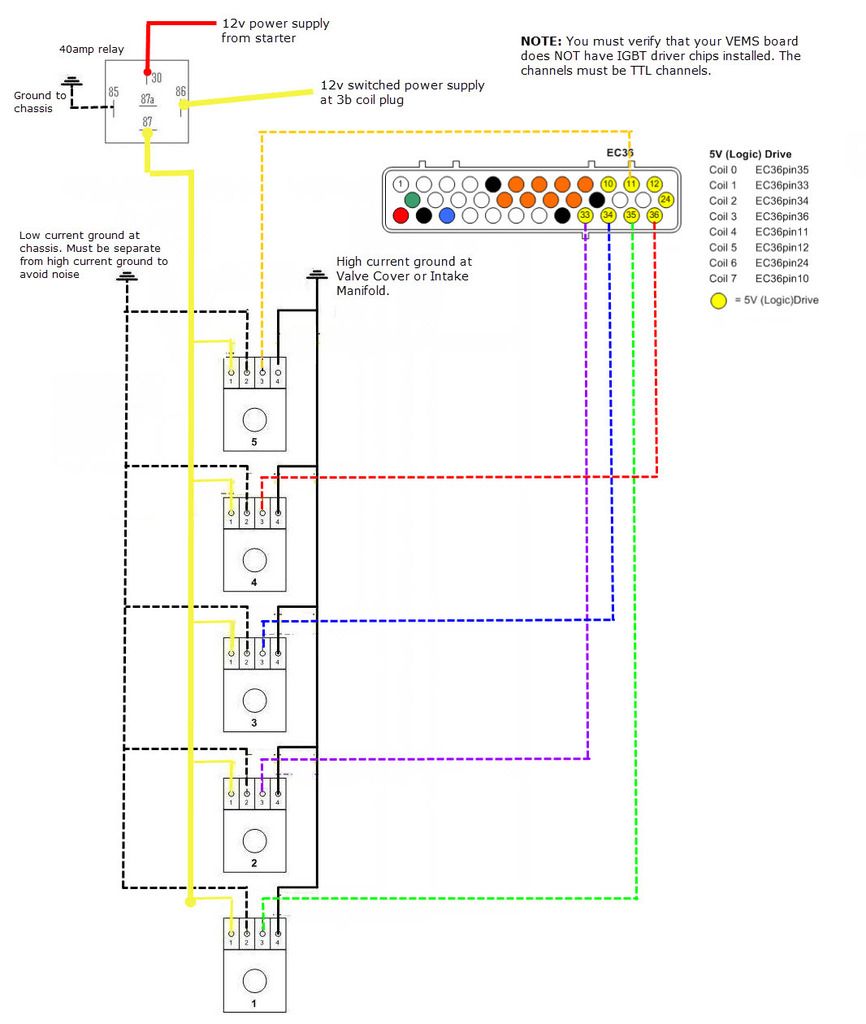
I separated the High and Low current grounds so they are separate. I plan on running the low current grounds into the cabin to one of the footwell grounds. It''s not required that the low current be connected in with the other sensor grounds at the ECU. I also separated the relay ground as I will just be running it to the firewall where it will be mounted anyway.
One other important note: The Ignition sockets on the VEMS board must not have IGBT driver chips installed. I will be opening up my box later and verifying that the ignition sockets are empty.
Pic of the Board and what it should look like:
Updated Schematic (Version 4):
Re: Nick's Black 90 - 3B Swap: 2.0 Coil Setup
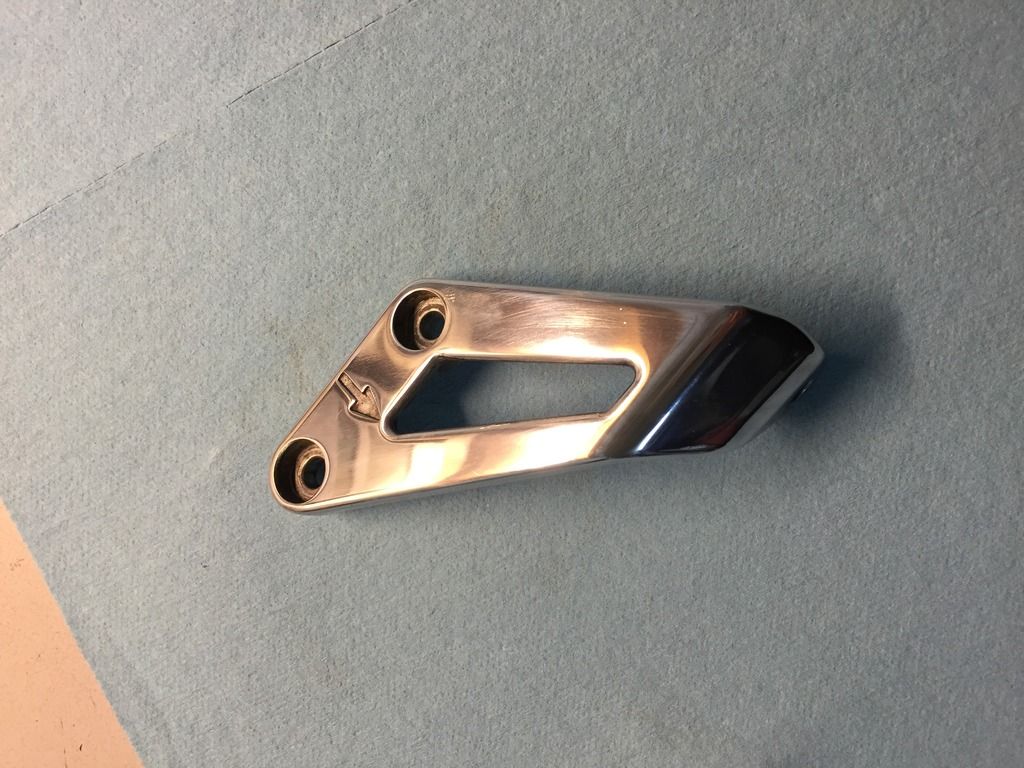
Was doing some paint prepping on the front core support stuff and some other bits (there's a lot of bits to be painted) and got a little carried away with the power steering pump mount...
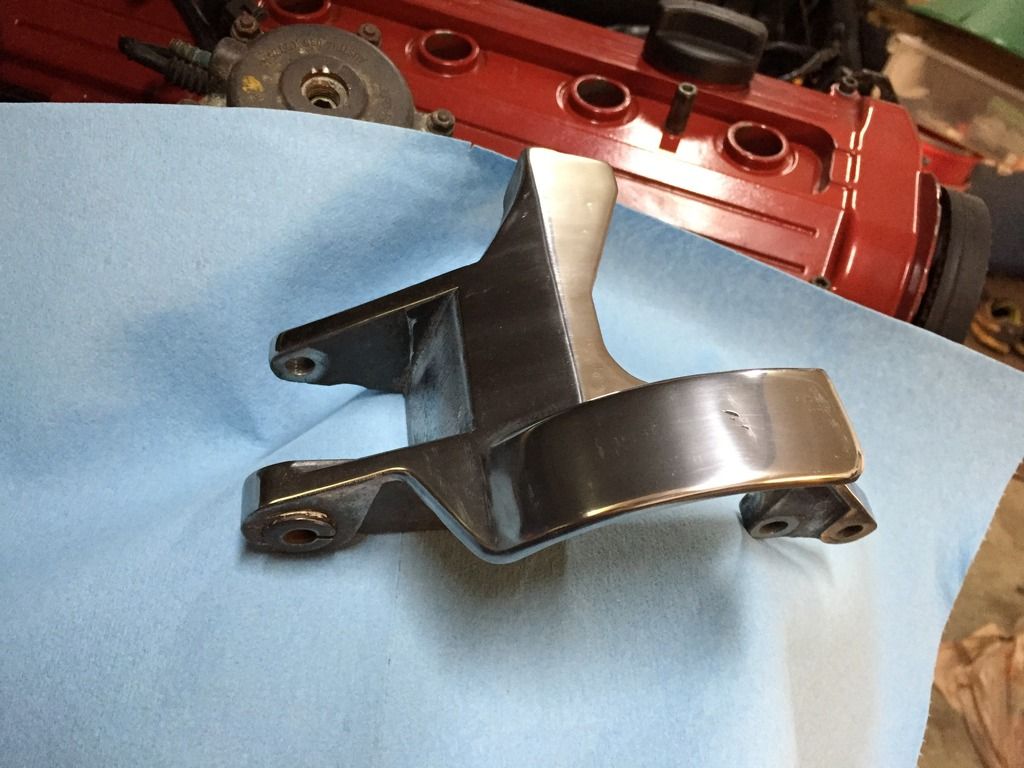
My first attempt at sanding and polishing. Went from a 60 grit flappy wheel down (up?) to 1500 dry then Mother's polish with my dremel buff wheel and some hand buffing to finish it off. Probably won't do many parts like this but it'll be nice to have some shiny under the hood
My first attempt at sanding and polishing. Went from a 60 grit flappy wheel down (up?) to 1500 dry then Mother's polish with my dremel buff wheel and some hand buffing to finish it off. Probably won't do many parts like this but it'll be nice to have some shiny under the hood
-
ringbearer

- Posts: 1282
- Joined: Wed Feb 27, 2013 12:50 pm
- Location: Nor-Cal

Re: Nick's Black 90 - 3B Swap: 2.0 Coil Setup
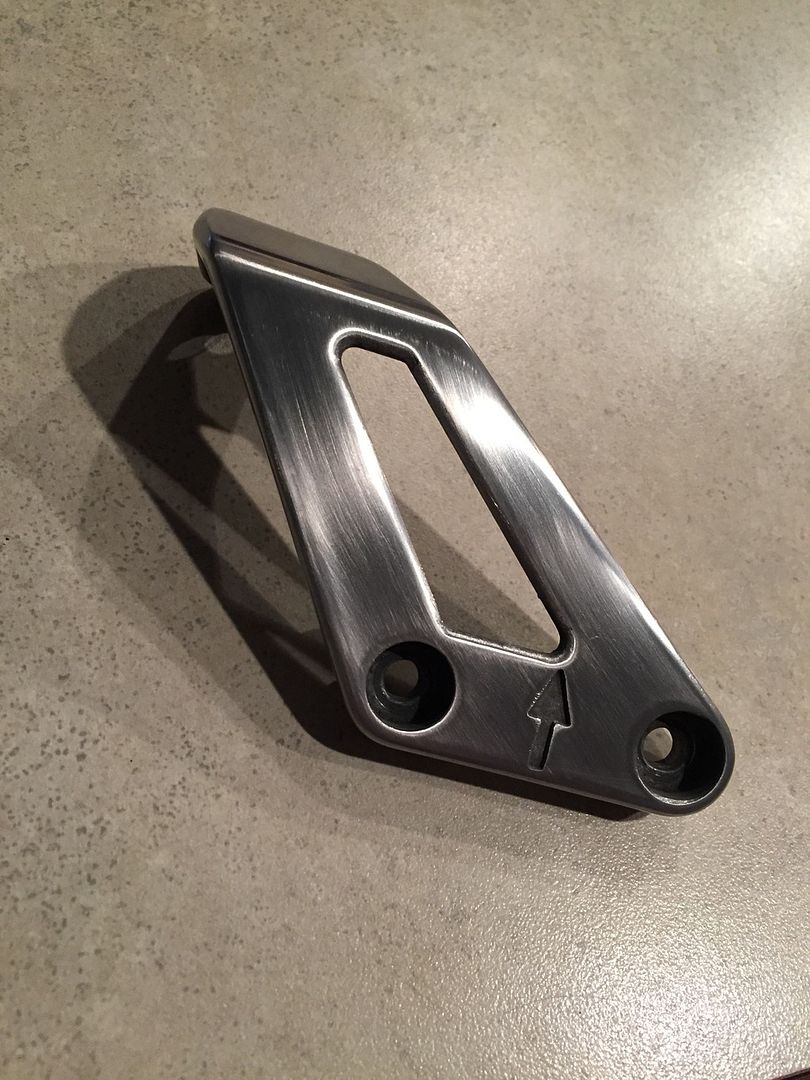
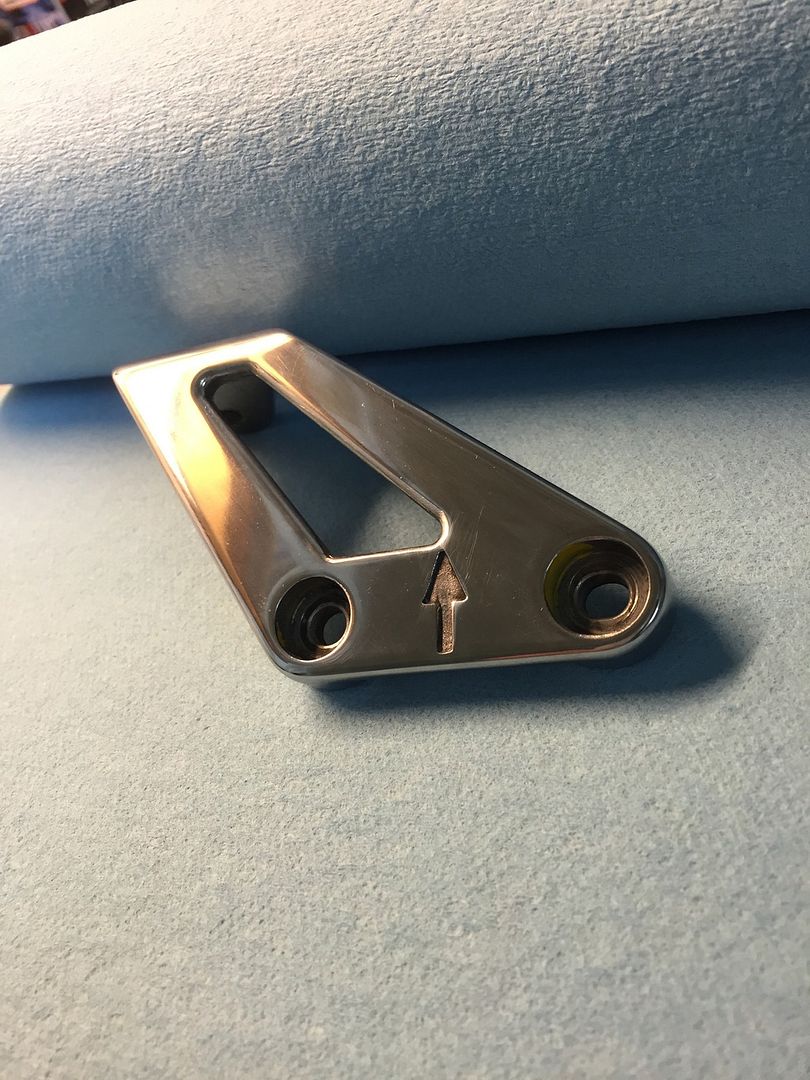
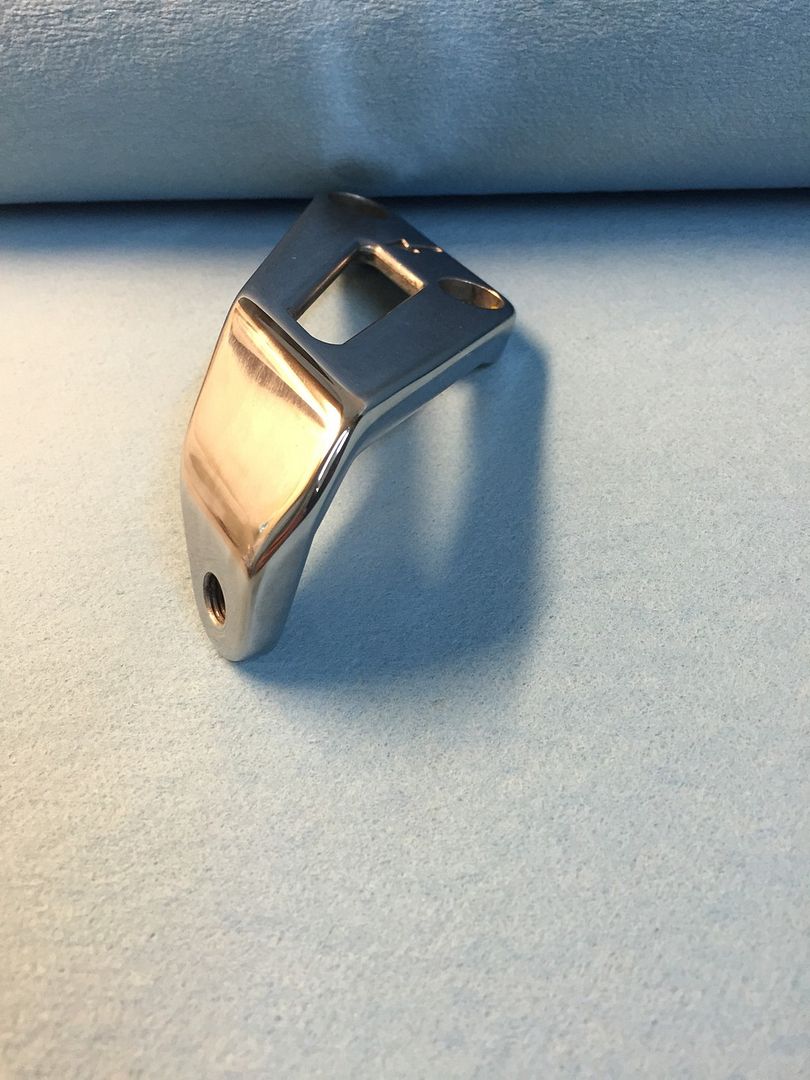
Thanks I also did the throttle damper last night. Another couple hours spent on that. Pics to come. These will be the only parts I do this to probably. I'm typically not a polish stuff kind of person but these two pieces should add some excitement to the bay once things get put back together.
Last night I found wires to run for my coil swap as well amongst the two donor harnesses. Should be started on that part in the next week or so. Lots to do! I have a hard time focusing on one section but it'll come together.
I also did the throttle damper last night. Another couple hours spent on that. Pics to come. These will be the only parts I do this to probably. I'm typically not a polish stuff kind of person but these two pieces should add some excitement to the bay once things get put back together.Last night I found wires to run for my coil swap as well amongst the two donor harnesses. Should be started on that part in the next week or so. Lots to do! I have a hard time focusing on one section but it'll come together.
-
ringbearer
- Posts: 1282
- Joined: Wed Feb 27, 2013 12:50 pm
- Location: Nor-Cal
Re: Nick's Black 90 - 3B Swap: 2.0 Coil Setup
I hear you on the focus. I decided to complete my rear suspension upgrades before I do anything up front and I'm still doing a bunch of things back there at once.
I polished my IM, valve and coil covers, took forever but it sure makes it far more impressive when I open the hood!
I polished my IM, valve and coil covers, took forever but it sure makes it far more impressive when I open the hood!
Re: Nick's Black 90 - 3B Swap: 2.0 Coil Setup
and you added rings it looks like Looks super nice for sure!
I plan on going with black on the intake mani and charge pipe, gray on the fuel rail and red 7a valve cover with 2.0 coils. Lots of other bits will be painted black as well.
Looks super nice for sure! I plan on going with black on the intake mani and charge pipe, gray on the fuel rail and red 7a valve cover with 2.0 coils. Lots of other bits will be painted black as well.
-
ringbearer
- Posts: 1282
- Joined: Wed Feb 27, 2013 12:50 pm
- Location: Nor-Cal
Re: Nick's Black 90 - 3B Swap: 2.0 Coil Setup
I didn't want to paint the.aluminum, it seems to not last and is a pain to strip and repaint. I got the IM with the rings from Hank, it also has the access tube removed.
Re: Nick's Black 90 - 3B Swap: 2.0 Coil Setup
Made some more cleaning progress yesterday. I almost have all the parts ready that need to be painted! It'll be so nice to get some parts painted and get further along with putting things back together.
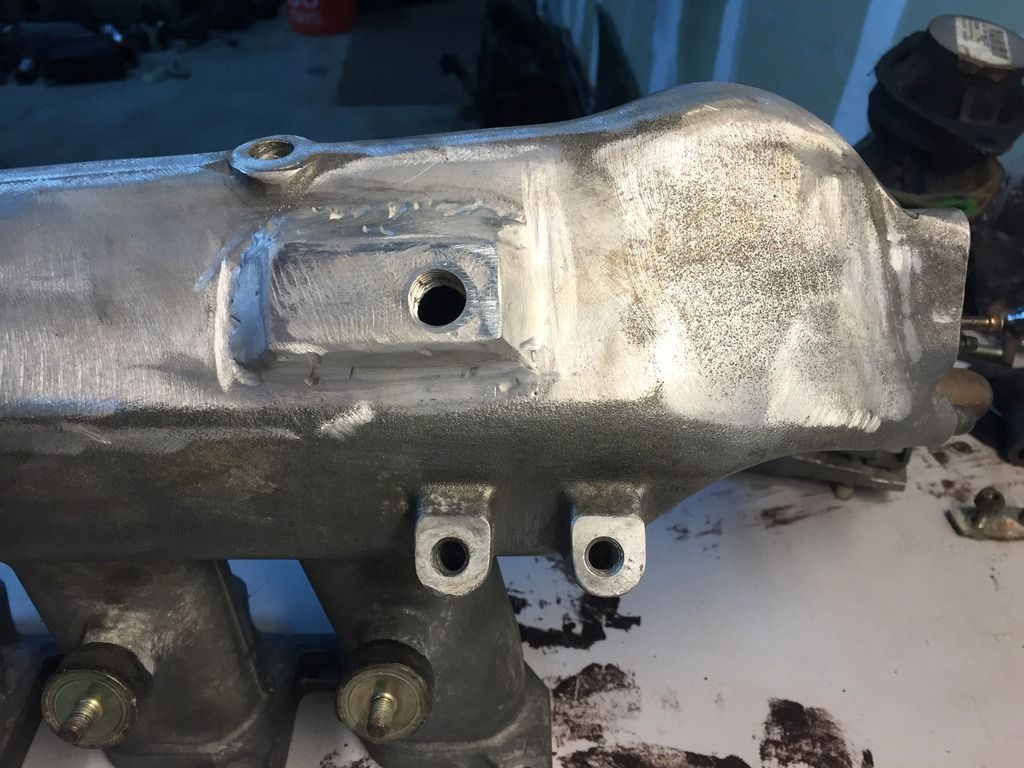
Also drilled and tapped for the brake booster line. I hope I did this right and I am really really making sure that all the stuff gets out of the intake before install.
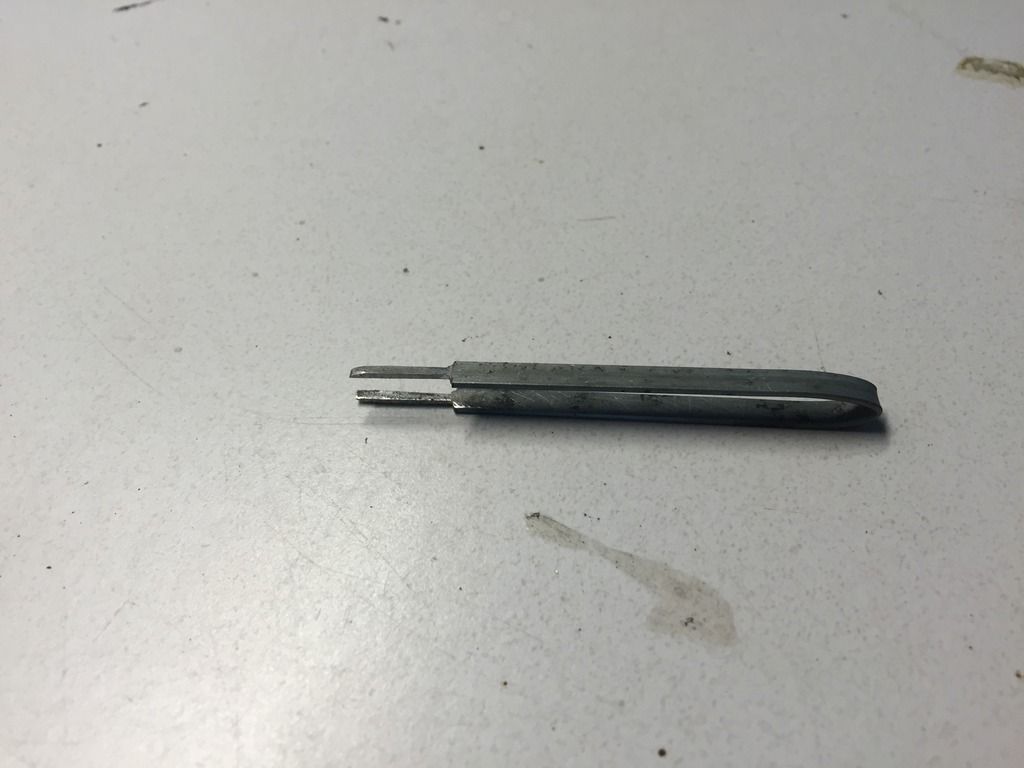
Made myself a Junior pin poker outer tool as well. Second one I've made (lost the first one) and works like a dream. Picking up some Chinese finger trap wire cover today from Grainger (well my dad is anyway) and soon the 2.0 coil conversion will be progressed as well.
Pics because they are more fun:
Junior Pin Tool:
Also drilled and tapped for the brake booster line. I hope I did this right and I am really really making sure that all the stuff gets out of the intake before install.
Made myself a Junior pin poker outer tool as well. Second one I've made (lost the first one) and works like a dream. Picking up some Chinese finger trap wire cover today from Grainger (well my dad is anyway) and soon the 2.0 coil conversion will be progressed as well.
Pics because they are more fun:
Junior Pin Tool:
-
mr_aj_johnson
- Posts: 220
- Joined: Mon Apr 22, 2013 11:01 am
Re: Nick's Black 90 - 3B Swap: 2.0 Coil Setup
Spend some money on a really good set of crimpers.
Re: Nick's Black 90 - 3B Swap: 2.0 Coil Setup
Would love to. I plan on soldering the wires to the connections and should take care of the connection. If I find otherwise then new pins and a set of crimpers

Re: Nick's Black 90 - 3B Swap: 2.0 Coil Setup
I have this and it works great for JPT/PT:
http://www.amazon.com/Tool-Aid-18930-Ra ... B000K1CFXO
http://www.amazon.com/Tool-Aid-18930-Ra ... B000K1CFXO
-Alex-
@vexartmedia @odd.cylinders @5cylinder_porsche
Odd Cylinders YouTube Page
1992 Porsche 968 (07K transplant in progress)
1983 Aud UrQ (MC1, GT2871R, IIc)
1985 Audi 4kq
2003 Audi S8 (Avus/Oxblood; DD; 6MT swap)
@vexartmedia @odd.cylinders @5cylinder_porsche
Odd Cylinders YouTube Page
1992 Porsche 968 (07K transplant in progress)
1983 Aud UrQ (MC1, GT2871R, IIc)
1985 Audi 4kq
2003 Audi S8 (Avus/Oxblood; DD; 6MT swap)
Re: Nick's Black 90 - 3B Swap: 2.0 Coil Setup
awesome! Do you have a source for new JPT connectors?