Page 1 of 2

Alex's '83 UrQ Project

Posted: Thu Apr 07, 2016 1:18 am
by alxdgr8
Well after parting out my Cosworth Merc, selling my S6 Avant, and selling a bunch of other spare parts I was able to raise enough funds to join the UrQ family. I should've done this a year or two ago when prices were reasonable, but whatever. I also could've waited around for a better deal but I wanted one now! :D Spent several months shopping for one with cash in hand and found quite a few, but only a couple owners were really open to selling or were within my price range. This I felt was the best deal of the inventory I found.

'83 UrQ
DA900204
Build 03/1982
Option codes: D08, R82, 253, 425, 560, 749
Diamond Silver Metallic exterior with Chocolate Brown interior
225k miles

I bought the car from Dave Schaible in NY who's owned it since 2000. He purchased the car from Bruce Haymann (Karmann Auto Body, rally driver with his brother Greg, driving instructor at Lime Rock). Some of east cost guys will recognize the car, it attended some of the early 2000's UPG events. Dave said Bruce did some restoration work on it in the late 90's so the car may have been repainted. The paint is in spectacular shape minus some rust since it's been garage most of its life. There is oddly some evidence of a respray in the engine bay to red, but then put back to silver at some point. Not sure if this was some repair at some point, but the red is only evident in the engine bay, nowhere else on the car.
The car has been sitting for quite a while, it was last registered in 2007. The head gasket blew on Dave and he parked it. Some work travel kept him from fixing it right away so when he pulled the head he found water had gotten into the bores and rusted them. He then planned on swapping in a 3B, but didn't get around to it. Looks like he thought about selling it in 2012, but that didn't happen. He later came across a low mileage UrS4 and pulled the engine/trans which he provided me with to swap in along with a 4.11 4kq rear diff.

Mods installed:
-Zimmerman driller rotors
-CAC 3" SS rear muffler
-H&R lowering springs
-'Poor mans' taxi dash (analog lower aux gauges with a plastic cover installed on the dash)
-Relayed headlights
-Momo wheel with Audi horn button
-Aftermarket stereo with rear speakers and amp
-Late 4kq diff lock with digi-gauges (gauges not hooked up)
-15x8 Ronals

Parts included:
-Disassembled WX parts
-Reproduction oil cooler duct
-Lots of spare brake parts
-Vacuum servo rebuild kit
-Spare odometer gears
-140k mile AAN/5spd 01E with chipped ECU
-Lots of spare mechanical bits

Parts purchased:
-Late CGT wiring harness, fusebox, raintray sheetmetal
-3B wiring harness (this can be made to work with AAN right?)
-STR exhaust manifold

Plans:
-Install 20vt and get it reliably driving for Battle Born Quattro 2016
-Eventually fix bodywork after engine is running
-Late dash swap?
-Brakes?
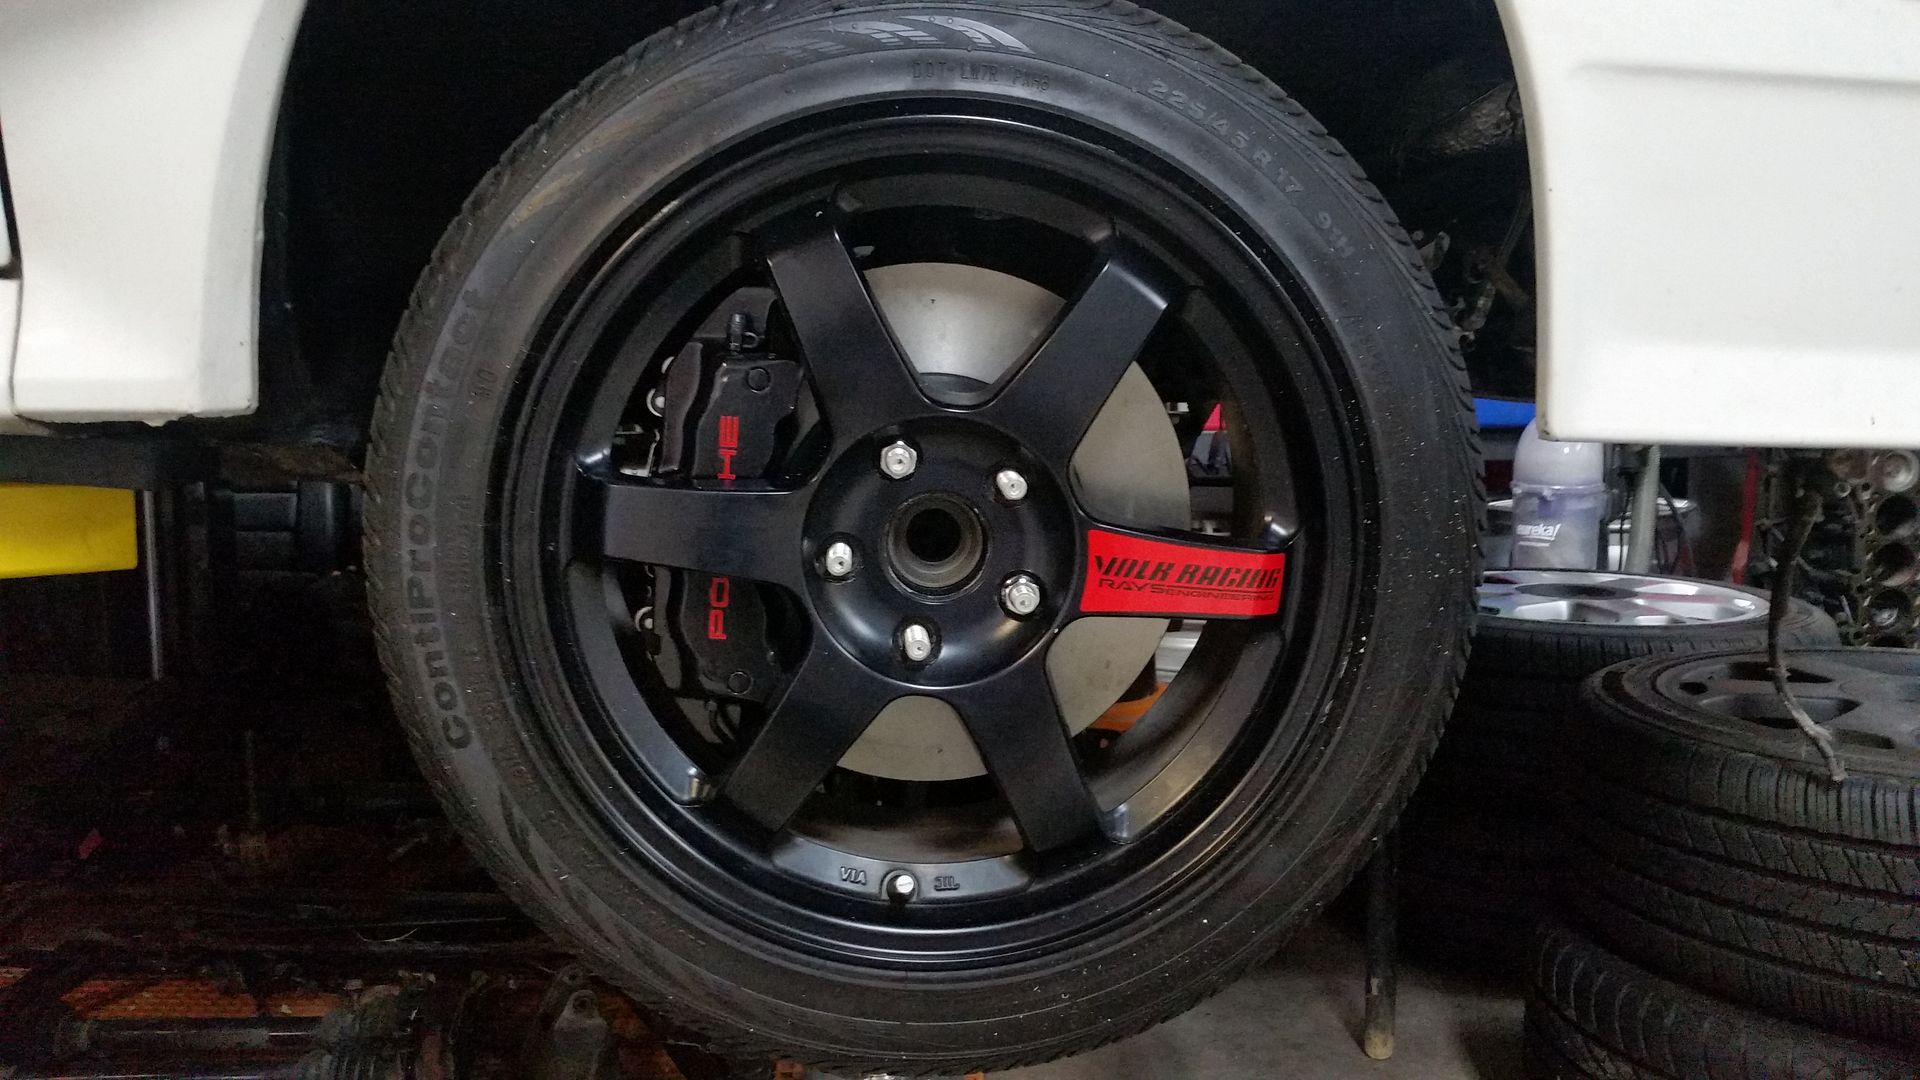
-Wheels? (Already have a few sets sitting around I plan on trying on :) )

Re: Alex's '83 UrQ Project

Posted: Thu Apr 07, 2016 1:19 am
by alxdgr8
The journey:

Since the car was located in NY and I am located in WA I had to figure out a way to transport the car. I deliberated having the car shipped, but the amount of spares included would require closed trailer shipping. That and the engine was located at a different shop than the car, so more complications. In the end I decided it was best to take a few days off work, fly out to NY, and two the car back. I had to rent a Penske box truck/trailer as nobody will do a one-way rental with towing capabilities with a pickup. Uhaul and Budget were other options, but I much prefer Penske due to their prices and customer service from past rentals with them. I rented a '22 foot truck/car trailer to move from IN to WA 6 years ago from Penske. I averaged 9mpg with a fully loaded box towing my 944 Turbo. This time I rented a 16' box truck and trailer, so I was hoping for closer to 10mpg since I'd be hauling a lot less weight. Sadly I averaged around 8.5mpg this trip, but mostly due to weather. I ran into a nasty wind storm in Indiana (that nearly rolled the truck with 65mph gusts and also toppled a tree right in front of me) and a thunderstorm in Montana that was pretty scary. I'm guessing it was the low weight of the box truck, but with 30mph sustained winds I would have to use 45-60 degress of steering input to keep the truck driving straight. Larger gusts would forcibly change lanes for me or damn near not enable me to exit the interstate to wait out the storm. NOT FUN! Thankfully winds were really only a concern for about half the drive, but gas mileage suffered badly when the winds were strong. My worst tank was 6.7mpg over the ~40 gallon tank :( Best was 9.5mpg. Oh well, I knew I'd be using a lot of gas in 3300 miles, but it's a good thing it's cheap right now!

Timeline:
Thursday - Fly from Seattle to Allentown, PA (for some reason it was about $800+ cheaper to rent a truck in PA and drive an extra 2.5hrs to pickup the car than rent in NY/NJ/MA/etc)
Friday - Pickup truck, drive to the Hudson Valley area of NY, pickup some spare parts to transport for other people back to Seattle, pickup car, drive to just outside of Cleveland, OH
Saturday - Drive from OH to IN to surprise my parent's and meet my 1-week old nephew, survive near-death experience in 65mph windstorm
Sunday - Drive from IN to SD, less gusty winds but stll pretty brutal, 900 mile day
Monday - Drive from SD to MT, easy weather day until a brief thunderstorm in Bozeman, MT, 3rd 'near-death' experience with strong winds, another 900 mile day
Tuesday - Short 480 mile day, stop to visit Jared in ID, easy driving, unloaded the truck and parts

Pictures!

The journey:
Image12795036_10106094468892418_368252560989289352_o by Vex Art, on Flickr

Brand new Penske truck, had 79 miles on it when I picked it up. Has over 3300 now!
Image2016-04-06_11-36-57 by Vex Art, on Flickr

Car picked up and loaded on the trailer, ready for the ride home!
Image2016-04-02_01-53-31 by Vex Art, on Flickr

On the road
Image2016-04-06_11-39-45 by Vex Art, on Flickr

More pics of the trip coming soon...

Re: Alex's '83 UrQ Project

Posted: Thu Apr 07, 2016 1:19 am
by alxdgr8
The car:

Unloading the car from the trailer into the shop for surgery
ImageIMG_20160405_195643 by Vex Art, on Flickr

The right side brake calipers seem to be sticking so it's a bit difficult to roll. I bought a 120V AC winch from Harbor Freight so I could roll the car out to wash it and winch it back in (will also help pull the 90qs into the garage when that time comes). Didn't get around to putting the anchors in the concrete for the winch, but in the meantime tow straps around the lift worked just fine.

ImageIMG_20160406_210720 by Vex Art, on Flickr

Spare parts:

ImageIMG_20160405_214058 by Vex Art, on Flickr

Came with the nicest raintray cover I've seen besides new ones...I'll try not to breath on it and make it crack

ImageIMG_20160405_214159 by Vex Art, on Flickr

Reproduction oil cooler shroud:

ImageIMG_20160405_214210 by Vex Art, on Flickr

AAN/01E:

ImageIMG_20160405_214050 by Vex Art, on Flickr

The workshop:

ImageIMG_20160405_214133 by Vex Art, on Flickr

Some pre-wash pictures:

Image2016-04-06_03-48-19 by Vex Art, on Flickr

ImageIMG_20160405_214317 by Vex Art, on Flickr

After a quick wash. The paint is in really nice shape minus the rot, should be even better with a cut/polish/wax.

ImageIMG_20160406_212555 by Vex Art, on Flickr

ImageIMG_20160406_212047 by Vex Art, on Flickr

ImageIMG_20160406_211755 by Vex Art, on Flickr

ImageIMG_20160406_211802 by Vex Art, on Flickr

ImageIMG_20160406_211808 by Vex Art, on Flickr

ImageIMG_20160406_211816 by Vex Art, on Flickr

ImageIMG_20160406_211819 by Vex Art, on Flickr

ImageIMG_20160406_212027 by Vex Art, on Flickr

ImageIMG_20160406_212055 by Vex Art, on Flickr

ImageIMG_20160406_212127 by Vex Art, on Flickr

Flat rear window glass. Is this an early-chassis thing? I noticed how flexible it was while washing it. My CGT rear window is curved and doesn't flex at all.

ImageIMG_20160406_212134 by Vex Art, on Flickr

Now for pictures of the rot. Considering it's a NY car, rust is inevitable, but it's not nearly as bad as it could be. Shows that the car has been taken care of, despite the high miles.

Passenger fender is pretty nice, small bubble:

ImageIMG_20160406_212221 by Vex Art, on Flickr

Rear arches are probably the worst, but totally salvageable.

ImageIMG_20160406_212210 by Vex Art, on Flickr

ImageIMG_20160406_212203 by Vex Art, on Flickr

ImageIMG_20160406_212141 by Vex Art, on Flickr

Rear passenger quarter has a few dents in front of the arch rust that will need to be addressed.

ImageIMG_20160405_214432 by Vex Art, on Flickr

Driver's fender is probably the worst part of the car, I might just replace it instead of trying to salvage it:

ImageIMG_20160405_214330 by Vex Art, on Flickr

ImageIMG_20160405_214512 by Vex Art, on Flickr

ImageIMG_20160406_212114 by Vex Art, on Flickr

Evidence of the 'odd' red respray in the engine bay:

ImageIMG_20160406_211827 by Vex Art, on Flickr

ImageIMG_20160406_211835 by Vex Art, on Flickr

ImageIMG_20160406_211842 by Vex Art, on Flickr

Silver->Red->Silver again

ImageIMG_20160405_214347 by Vex Art, on Flickr

Despite the wheel arch rust, the strut towers look like they're in great condition and not rusted out like usual.

ImageIMG_20160405_214846 by Vex Art, on Flickr

ImageIMG_20160405_214909 by Vex Art, on Flickr

The trunk cubbies are rusted through though, those will need replacement:

ImageIMG_20160406_193807 by Vex Art, on Flickr

ImageIMG_20160406_193815 by Vex Art, on Flickr

Some other small surface rust on the bottom, otherwise it's not bad. I certainly wish it were a PNW car like my CGT and 90qs which have absolutely zero rust on anything, but whatever. Those cars were also galvanized.

ImageIMG_20160406_193630 by Vex Art, on Flickr

ImageIMG_20160406_193642 by Vex Art, on Flickr

ImageIMG_20160406_193651 by Vex Art, on Flickr

ImageIMG_20160406_193700 by Vex Art, on Flickr

ImageIMG_20160406_193719 by Vex Art, on Flickr

ImageIMG_20160406_193749 by Vex Art, on Flickr

ImageIMG_20160406_193759 by Vex Art, on Flickr

ImageIMG_20160406_193848 by Vex Art, on Flickr

ImageIMG_20160406_193854 by Vex Art, on Flickr

Will need a replacement spoiler. Will also eventually repaint the black portion of the trunk lid. Anyone know why they did that section in black? Odd.

ImageIMG_20160405_215141 by Vex Art, on Flickr

Sunroof seal also looks like non-OEM as it's all felt coated. Mk1 scrirroco mabye? I need a replacement for my CGT so it'd be nice to find out what it is.

ImageIMG_20160405_215204 by Vex Art, on Flickr

Interior is pretty musty from sitting for so long and the seat have a few tears. Will try and soften them up and get it cleaned up some. Is the 4kq carpet the same (like with a B3 sedan vs coupe)? This carpet is pretty faded, wouldn't mind getting a nice one to put in.

ImageIMG_20160405_214243 by Vex Art, on Flickr

ImageIMG_20160406_212311 by Vex Art, on Flickr

Manufacture date of Nov. '94, I'd say the harnesses are a little past expired!

ImageIMG_20160406_212334 by Vex Art, on Flickr

Re: Alex's '83 UrQ Project

Posted: Thu Apr 07, 2016 1:26 am
by Afterthought
Yes!! I will keep my eyes peeled for some newer dashes, I was planning on looking for one too.

Re: Alex's '83 UrQ Project

Posted: Thu Apr 07, 2016 8:09 am
by ads
Nice looking project you have there. I also have the felt sunroof seal and always wondered if that was a factory seal or a common replacement

Re: Alex's '83 UrQ Project

Posted: Thu Apr 07, 2016 8:35 am
by varia
im glad that you got it Alex, you deserve it. Seeing what happened with the CGT under your hands, im sure this car will be beautiful.
Good luck whit it!

Re: Alex's '83 UrQ Project

Posted: Thu Apr 07, 2016 10:04 am
by audifreakjim
Good to hear you finally got the car you wanted! Looks like a solid starting point.

Re: Alex's '83 UrQ Project

Posted: Thu Apr 07, 2016 12:36 pm
by Grillage
Firstly, congrats on the car! looks great!

Secondly, That storm came through Cincinnati too. It was intense. I lost two trees to the wind. I can't imagine driving a box truck in that!

Re: Alex's '83 UrQ Project

Posted: Thu Apr 07, 2016 5:13 pm
by PRY4SNO
Definitely going to be following the build, looks like it's in pretty good shape. Congrats on the good find.

Re: Alex's '83 UrQ Project

Posted: Fri Apr 08, 2016 11:00 pm
by Dan McBoost
Awesome stuff. Will need some love, but what car doesnt?

Re: Alex's '83 UrQ Project

Posted: Sun Apr 10, 2016 11:57 pm
by alxdgr8
Had a productive weekend working on the car.
With it being decently warm and sunny on Saturday I decided to experiment with reviving the seats. I'll eventually buy some leatherique (probably their dye kit too), but I wanted to see if i could soften them up some before that. Heard a tip from a fellow Porsche owner to try coconut oil. That combined with some Lexol seems to have helped. Will need a few more applications though.

Before:

ImageIMG_20160409_152614 by Vex Art, on Flickr

After:

ImageIMG_20160409_210951 by Vex Art, on Flickr

Anyone know of a good chocolate brown dye? Driggs gave me the thought to try and dye my ecru UrS6 seats brown and then use those.

Before the front end came off I decided to test fit some wheels...some might recognize these from my Merc. 17x7.5 Borbet Type A with a 215/40R17. They need a small spacer and the correct centering rings, but so far I'm loving the look of them on the car.

ImageIMG_20160409_224146 by Vex Art, on Flickr

ImageIMG_20160409_224301 by Vex Art, on Flickr

Next up, the engine came out. Oh how I love my lift.

ImageIMG_20160410_194320 by Vex Art, on Flickr

I'd say this engine mount was shot:

ImageIMG_20160410_194424 by Vex Art, on Flickr

Found some more rust hiding behind the washer reservoir :(

ImageIMG_20160410_201503 by Vex Art, on Flickr

ImageIMG_20160410_194554 by Vex Art, on Flickr

Re: Alex's '83 UrQ Project

Posted: Mon Apr 11, 2016 12:28 am
by PRY4SNO
Good find on the coconut oil, I never would have thought of that. When I used Leatherique in the two steps I was very satisfied. Made sure to do it when it was very hot out and let the heat help along the process.

If you want to go into any further depth, I have a great contact who's basically local to you who might be a great resource. I'll PM you with details.

Re: Alex's '83 UrQ Project

Posted: Tue Apr 12, 2016 12:26 pm
by Driggs
- That isnt a rust hole.. its a drivers side caliper cooling passage.. just stick a tube on it and direct it towards the caliper. instant 10hp

-colorplus makes some great kits.. I used the repair one years ago on a urs6 to fix a little wear on my bolster. I need to order some repair, cleaner and dye for my 2 sets of urq interior.. why dont we just plan a weekend to get together and do all our seats? https://colorplus.com/

-wheels do look great

Re: Alex's '83 UrQ Project

Posted: Thu Apr 14, 2016 2:39 am
by alxdgr8
Installed some anchors for the winch in the pad, works great!

ImageIMG_20160409_214221 by Vex Art, on Flickr

Box 'o' parts that have been removed is getting bigger

ImageIMG_20160412_212330 by Vex Art, on Flickr

Wiring is ready to pull through the firewall, steering rack is almost removed, and hydroboost is disconnected. Was sad to unhook the brake lines and watch the ATE Super Blue drain out since it's NLA.

ImageIMG_20160412_212313 by Vex Art, on Flickr

Got the late-CGT harness/fusebox/shettmetal in the mail. Gotta finish stripping the engine bay and then pull the interior and this will be ready to go in. Guess I need to find a new dash/etc to swap in so all of the switches/hvac/etc function.

ImageIMG_20160413_201350 by Vex Art, on Flickr

Re: Alex's '83 UrQ Project

Posted: Thu Apr 14, 2016 12:53 pm
by Wheeljack
Nice progress, Alex. We have similar approaches to this. :)

Hopefully I can draft in the wake of your progress as you go zipping by me.

If you are sticking with the quads, I may have an OEM projector solution in the works.

Also finally got a full brake setup for front and rear for either stock uprights or later 2 piece...

Image

Image

Re: Alex's '83 UrQ Project

Posted: Thu Apr 14, 2016 2:51 pm
by alxdgr8
Thanks Chris! I'll definitely be interested in some brakes down the line. I am thinking of keeping the quads, and was going to source some Westy projectors for them since I've heard they're the right size. Maybe you have a cheaper option?

Image

Re: Alex's '83 UrQ Project

Posted: Thu Apr 14, 2016 5:26 pm
by Wheeljack
Same option essentially for the quads (OEM Hella), but I may be able to do them for cheaper. They aren't real easy to find for reasonable money.

Re: Alex's '83 UrQ Project

Posted: Sun Apr 17, 2016 11:55 pm
by alxdgr8
Since I had the pressure washer going I decided to clean some engines and transmissions. Two AAN, 7A head, 016, 01E. Had already done the WX the day before otherwise that would've joined the party too.

ImageIMG_20160417_174945 by Vex Art, on Flickr

Even the pressure plates rust in NY!

ImageIMG_20160417_000923 by Vex Art, on Flickr

Good news is the WX still turns over, so the rust in the bores isn't too bad.

ImageIMG_20160416_185322 by Vex Art, on Flickr

Wish the subframe would fit in my powdercoat oven. Paint will have to do unless I feel like sending it out somewhere for coating.

ImageIMG_20160416_185328 by Vex Art, on Flickr

AAN cleaned up nicely

ImageIMG_20160416_185313 by Vex Art, on Flickr

And the spare AAN block cleaned up...was really really nasty before with lots of rust flakes built up since it came from a Canadian car. This block will eventually get built to go into the UrQ.

ImageIMG_20160417_202523 by Vex Art, on Flickr

Re: Alex's '83 UrQ Project

Posted: Tue Apr 26, 2016 12:51 am
by alxdgr8
I think I missed this in my story, but some unwanted excitement came when I got to meet New York's finest since I was driving a truck and trailer on a parkway. I had missed the signs that say 'passenger vehicles only'. But no worries, NY State Patrol found me within a mile and informed me of my wrong doing. NY tickets are odd, you must plead guilty/not guilty and then they'll send you the disposition (aka fine/etc). So I didn't know what it would be until I sent in my guilty plea. I was expecting $400-500, so I was pleased when I got the letter saying I only owed $300. Still more than I would've liked to pay, but it could've been worse. Oh well, another adventure story to tell Audi buddies over beer.

Image2016-04-25_10-35-53 by Vex Art, on Flickr

Anyways, back to work on the car. It's slowed a bit since I've been busy with some other obligations and trying to get my Ducati back on the road. Here's a pic so you understand the fun of doing a timing belt and valve adjustment on a 4v Ducati twin. 2 cylinder, 4 cams, 8 valves, 16 rocker arms with shims (that all have to be adusted). Not as complicated as a timing chain Audi V8, but pretty close!

ImageIMG_20160329_195111 by Vex Art, on Flickr

Got an Audi flag from a fellow enthusiast to hang in the shop

ImageIMG_20160423_180610 by Vex Art, on Flickr

Despite finding some notching in a control arm mount of my subrame that's not supposed to be there, I figured I'd wire wheel it and paint it. I might eventually swap to a later subframe, but for now I'll use the stock one despite the potential alignment issues with the elongated hole. We'll see how it aligns first before I mess with it and replace it. Wish I was sandblasting and powdercoating, but alas it won't fit in my oven.

ImageIMG_20160424_211610 by Vex Art, on Flickr

Also in the process of painting the control arms. These could fit in my oven so I could powdercoat them, but once again I'll probably end up updating to later suspension at some point so I'll just do it quick for now and stick with paint.

ImageIMG_20160424_213020 by Vex Art, on Flickr

Have some leads on some other needed 20v parts and pretty much everything I need for a late dash swap (and still keep chocolate brown)...I'll update when I get the logistics figured out on those. I still need to finish pulling the old dash and wiring.
I did get the seats pulled and found $5 under them!

Image2016-04-25_10-49-32 by Vex Art, on Flickr

Re: Alex's '83 UrQ Project

Posted: Tue Apr 26, 2016 2:17 pm
by 90quattrocoupe
alxdgr8 wrote:I did get the seats pulled and found $5 under them!


Always a plus.

Re: Alex's '83 UrQ Project

Posted: Tue Apr 26, 2016 9:57 pm
by Dan McBoost
Save all the rust, flatten it and stick it and the $5 in a frame:D

Re: Alex's '83 UrQ Project

Posted: Tue Apr 26, 2016 10:28 pm
by alxdgr8
Dan McBoost wrote:Save all the rust, flatten it and stick it and the $5 in a frame:D

Good idea!

Sent from my Nexus 6P using Tapatalk

Re: Alex's '83 UrQ Project

Posted: Wed Apr 27, 2016 12:25 pm
by heartlessnomad12
I just had beers with my buddy you got the Ducati from, he was wondering if you ever got that thing running.

Re: Alex's '83 UrQ Project

Posted: Wed Apr 27, 2016 8:51 pm
by alxdgr8
heartlessnomad12 wrote:I just had beers with my buddy you got the Ducati from, he was wondering if you ever got that thing running.


Sadly no, I had to part it....still have the engine since nobody wants to buy it. Maybe someday I'll throw that in a vintage bike or something. Title for that bike and the replacement frame I bought were stolen in a home robbery (and neither title was in my name yet) so I could never put it together legally (at least not without finding another frame with title, which I gave up looking for). So yeah, no monster :( I did buy an ST4 last year though so I have a Duc fix.

Re: Alex's '83 UrQ Project

Posted: Thu Apr 28, 2016 12:10 pm
by heartlessnomad12
Wow, terribly bad luck but im sure you will find a good use for that motor when you have some time to think about what all you could do with it.